Introduction:
Welcome to the world of digital art! If you have recently purchased a drawing tablet, you are about to embark on an exciting journey of creativity and self-expression. Drawing tablets, also known as graphics tablets or pen tablets, have become essential tools for artists, designers, and hobbyists alike. They allow you to sketch, paint, and illustrate directly on a digital canvas, providing a seamless and intuitive experience.
In this article, we will guide you through the process of setting up your drawing tablet, from choosing the right tablet to installing the necessary software and adjusting the settings. Whether you are a beginner or an experienced artist transitioning to digital art, this guide will help you get started and make the most out of your drawing tablet.
Before we dive into the technical steps, it’s important to mention that every drawing tablet is unique and may have its own setup process. However, the general steps and principles discussed here should apply to most tablets on the market.
So, without further ado, let’s get started on this exciting journey towards unleashing your artistic potential with your new drawing tablet!
Choosing the Right Drawing Tablet:
When it comes to selecting a drawing tablet, there are a few key factors to consider. The tablet you choose will greatly impact your overall experience and the quality of your artwork. Here are some important aspects to keep in mind:
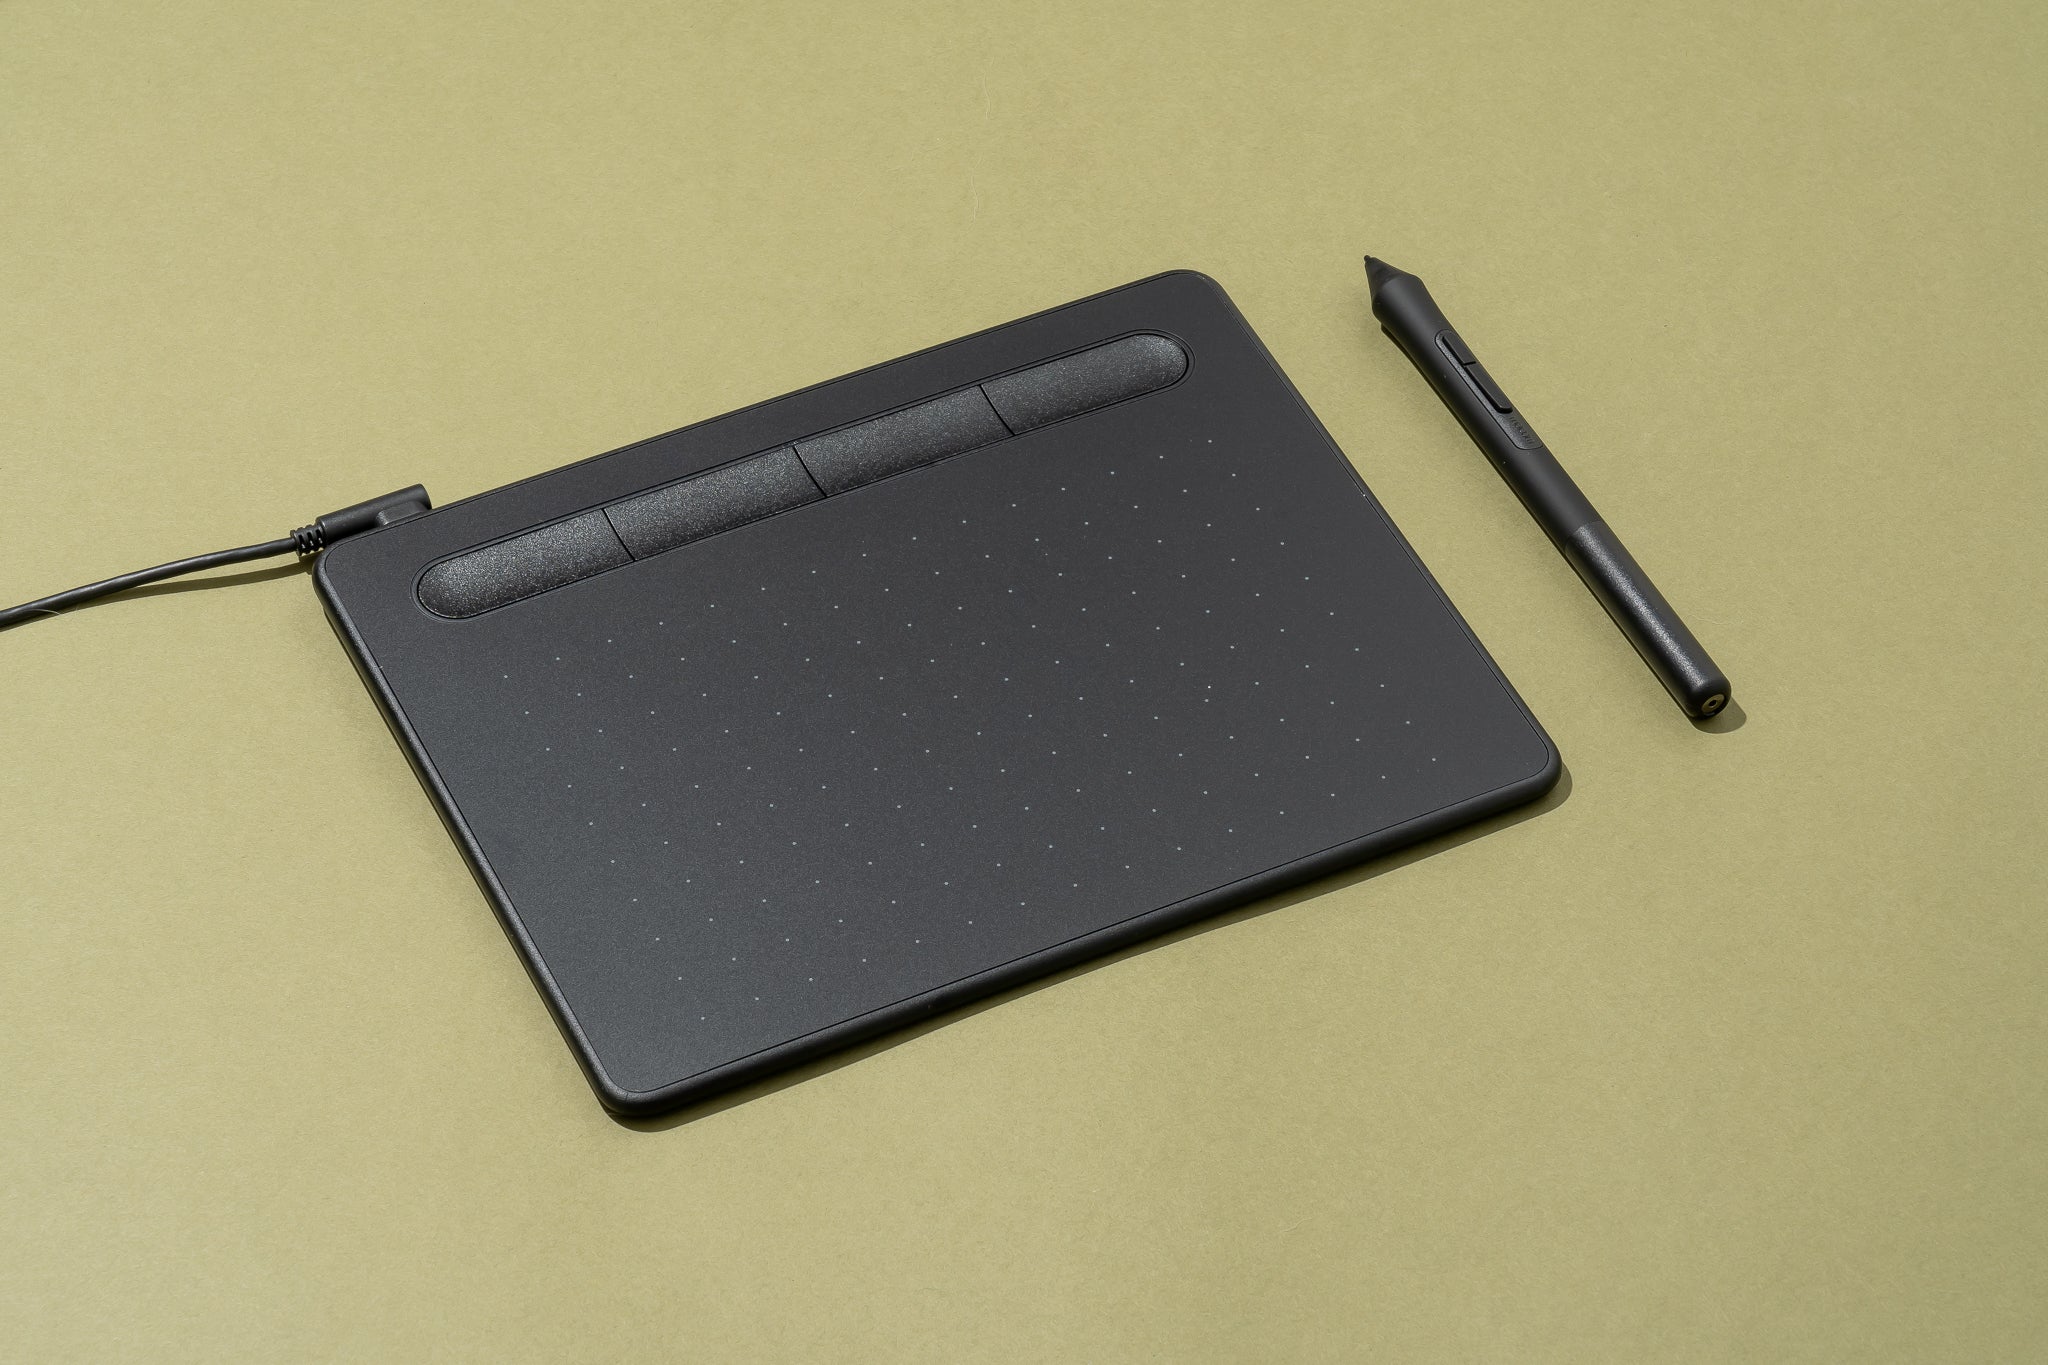
- Size: Drawing tablets come in various sizes, typically measured in inches. Larger tablets offer more drawing space and may be ideal for professional artists who require precision and detail. Smaller tablets are portable and convenient for on-the-go artists.
- Pressure Sensitivity: This refers to the tablet’s ability to detect the pressure applied by your pen. Higher pressure sensitivity allows for more accurate and nuanced control over brush strokes, giving your artwork a more organic and natural feel.
- Resolution: The resolution of a drawing tablet is measured in lines per inch (LPI) or dots per inch (DPI). Higher resolutions result in smoother lines and sharper details. Consider opting for a tablet with a higher resolution for better precision and clarity.
- Connectivity: Some drawing tablets connect to your computer via USB cables, while others offer wireless options. Determine which connectivity option fits your workflow and preferences.
- Compatibility: Ensure that the drawing tablet you choose is compatible with your operating system and preferred drawing software. Most tablets are compatible with popular software like Photoshop, Illustrator, and Corel Painter, but it’s always good to double-check.
- Budget: Set a budget and explore the options within that range. While it’s tempting to opt for the most expensive tablet, there are plenty of budget-friendly options available that can deliver excellent performance.
Take the time to research different models, read reviews, and consider your specific needs and preferences as an artist. Remember, the right drawing tablet is a personal choice that suits your style, workflow, and artistic aspirations.
Installing the Necessary Software:
Once you have chosen and acquired your drawing tablet, the next step is to install the necessary software to ensure its proper functionality. Here’s a step-by-step guide to help you get started:
- Check the Box: Start by checking the package that came with your drawing tablet. Most tablets include a CD or a USB drive containing the necessary drivers and software. Locate this and keep it handy for the installation process.
- Connect the Tablet: Connect your drawing tablet to your computer using the included USB cable or any other connectivity method provided by your tablet. Ensure a stable connection to avoid any installation issues.
- Visit the Manufacturer’s Website: If your tablet does not come with a physical installation disk, visit the manufacturer’s website. Look for the “Support” or “Downloads” section, locate the drivers and software for your specific tablet model, and download them to your computer.
- Run the Installation: Once you have the drivers or software downloaded, locate the file and run the installation wizard. Follow the on-screen instructions, accepting the terms and conditions and selecting the desired installation options.
- Restart Your Computer: After the installation is complete, it’s usually recommended to restart your computer. This allows the system to properly recognize and configure the newly installed drivers or software.
It’s important to note that some drawing tablets are “plug-and-play,” meaning they don’t require any additional software installation. In such cases, your computer should automatically detect the tablet once it’s connected.
If you encounter any issues during the installation process, refer to the manufacturer’s documentation, online forums, or reach out to their customer support for assistance.
Installing the necessary software is a crucial step to enable full functionality and optimize the performance of your drawing tablet. Once everything is successfully installed, you’re ready to move on to the next step: connecting your drawing tablet to your computer.
Connecting Your Drawing Tablet to Your Computer:
Now that you have installed the necessary software for your drawing tablet, it’s time to connect it to your computer. Follow these steps to ensure a proper connection:
- Choose the Right Port: Identify the type of connection port on your drawing tablet. Most tablets use USB ports, so locate an available USB port on your computer that matches the tablet’s cable connector.
- Connect the Cable: Take the cable provided with your drawing tablet and insert one end into the tablet and the other end into the USB port on your computer. Ensure a secure connection, and make sure the cable is not tangled or strained.
- Check for Power: Some drawing tablets require an external power source, such as a wall adapter. If this is the case, connect the adapter to a power outlet and ensure that your tablet is receiving power.
- Wait for Recognition: Once your drawing tablet is connected, your computer should recognize it automatically. You may see a notification or hear a sound indicating that a new device has been detected.
- Confirm Device Connectivity: To ensure your computer recognizes the drawing tablet, go to your computer’s device manager. Look for the tablet under the “Human Interface Devices” or “Universal Serial Bus Controllers” section. If you see the tablet listed without any warning signs or errors, it is successfully connected.
If you encounter any issues with the connection, try using a different USB port, ensuring that the cable is not damaged, or restarting your computer. If problems persist, refer to the manufacturer’s troubleshooting guide or contact their customer support for assistance.
Successfully connecting your drawing tablet to your computer is an essential step to begin your digital art journey. With the tablet now recognized and connected, it’s time to adjust the settings to personalize your drawing experience.
Adjusting the Settings on Your Drawing Tablet:
Once your drawing tablet is connected to your computer, it’s important to adjust the settings to suit your preferences and optimize your drawing experience. Here are some key settings to consider:
- Pen Pressure Sensitivity: Most drawing tablet software allows you to adjust the pressure sensitivity settings of your pen. Experiment with different sensitivity levels to find the one that feels most comfortable and responsive to your drawing style.
- Shortcut Buttons: Many drawing tablets come with programmable shortcut buttons. Take advantage of these buttons by assigning frequently used functions such as brush size adjustment, eraser, or undo/redo commands. Customizing these shortcuts can help enhance your workflow and efficiency.
- Screen Mapping: Screen mapping refers to how the tablet’s drawing surface corresponds to your computer screen. You can calibrate the mapping to ensure proper alignment between the pen movement on the tablet and the cursor movement on the screen. Adjusting this setting helps avoid any offset or accuracy issues.
- Hand Orientation: If you are left-handed, you may need to adjust the hand orientation setting to match your dominant hand. This ensures a more comfortable drawing experience and prevents any confusion between pen movements and screen actions.
- Pressure Curve: Some drawing tablets allow you to customize the pressure curve, which determines how sensitive the tablet is to different levels of pressure. Experiment with different curve settings to find a response that suits your drawing style and stroke dynamics.
- Drawing Area: Depending on your tablet model, you may have the option to adjust the active drawing area. Resizing the active area allows you to focus on specific portions of the tablet or adapt to different screen resolutions.
Access these settings through the software provided with your tablet or within your computer’s system settings. Consult the user manual or online tutorials for detailed instructions on accessing and modifying these settings specific to your tablet model.
Remember, the goal of adjusting the settings is to optimize the tablet’s response to your individual preferences and drawing style. Take some time to experiment with different settings and find the configuration that feels most comfortable and natural for you.
With the settings customized to your liking, you are now ready to move on to calibrating your drawing tablet for precise and accurate input.
Calibrating Your Drawing Tablet:
Calibrating your drawing tablet is an important step to ensure accurate and precise pen input. By calibrating, you align the position of the pen on the tablet with the corresponding position on your computer screen. Here’s how to calibrate your drawing tablet:
- Open the Calibration Tool: Locate the calibration tool provided with your drawing tablet software. It is usually found in the settings or preferences section.
- Follow the Instructions: The calibration tool will guide you through a series of steps to align the pen input with the screen display. Pay attention to the instructions and follow them carefully.
- Make Precision Strokes: During the calibration process, you will be asked to make precise strokes on specific points on the tablet. Follow the on-screen prompts and try to be as accurate as possible to ensure proper calibration.
- Test the Calibration: Once the calibration is complete, test it by drawing or making strokes on the tablet. Check if the cursor movement on the screen accurately corresponds to your pen movements on the tablet. If any misalignment or inconsistency is detected, consider recalibrating.
- Repeat if Necessary: If you are not satisfied with the calibration results, you can repeat the process until you achieve the desired accuracy. Calibration may vary depending on factors such as screen resolution, tablet size, and personal preference.
Remember, proper calibration is key to ensure that your drawing tablet accurately translates your pen movements to the computer screen. It helps maintain precision and avoids any offset or lag between your pen and cursor movements.
If you encounter any issues during the calibration process or need further assistance, consult your tablet’s user manual or reach out to the manufacturer’s customer support.
With your drawing tablet successfully calibrated, you are now ready to put it to the test and start creating digital art. Let’s move on to the next section and learn how to test your drawing tablet.
Testing Your Drawing Tablet:
After setting up and calibrating your drawing tablet, it’s essential to test it to ensure that all aspects are functioning correctly. Testing your tablet will help you become familiar with its features and identify any potential issues. Here’s how you can test your drawing tablet:
- Open Your Preferred Drawing Software: Launch your preferred drawing software, such as Adobe Photoshop, Corel Painter, or any other program compatible with your tablet. Make sure the software recognizes your tablet and its pressure sensitivity.
- Try Different Brush Sizes and Opacity: Use the brush tool in your drawing software and vary the brush sizes. Observe if the tablet accurately responds to changes in pressure, resulting in thicker or thinner strokes. Also, test the opacity settings to see if the tablet correctly adjusts the transparency of your brush strokes.
- Experiment with Pen Tilt: If your drawing tablet supports pen tilt sensitivity, experiment with different pen angles to see if the software accurately detects and responds to the tilt. This feature allows you to achieve more dynamic and expressive brush strokes.
- Test Shortcut Buttons: If your tablet has programmable shortcut buttons, test them to ensure they perform the intended functions. Assign different commands to each button and see if they execute correctly.
- Check for Lag or Latency: Draw with quick, fluid motions to test for any delay or lag in the tablet’s response. Ideally, the cursor on your screen should closely follow your pen movements without any noticeable delay.
- Test Hand Rejection: If your drawing tablet supports hand rejection, rest your hand on the tablet’s surface while drawing and see if it ignores your hand contact and only registers the pen input. This feature prevents accidental marks caused by palm or finger contact while drawing.
While testing your drawing tablet, pay attention to any unexpected behavior or issues such as cursor misalignment, pressure sensitivity problems, or unresponsive shortcut buttons. If you encounter any problems, consult the user manual or visit the manufacturer’s support page for troubleshooting tips.
By thoroughly testing your drawing tablet, you can ensure that it is functioning correctly and that you are ready to unleash your creativity in the digital realm. With the testing phase complete, it’s time to move on to the next section and explore some useful tips for getting started with your drawing tablet.
Tips for Getting Started with Your Drawing Tablet:
Now that you have set up, installed, calibrated, and tested your drawing tablet, it’s time to dive into the world of digital art. Here are some helpful tips to get you started and make the most out of your drawing tablet:
- Practice: Like any new tool or skill, getting comfortable with your drawing tablet takes practice. Set aside dedicated time to explore its features and experiment with different techniques. The more you practice, the more proficient you’ll become.
- Experiment with Brushes and Tools: Take advantage of the variety of brushes and tools available in your drawing software. Test different brush types, textures, and settings to discover your favorites and create unique effects in your artwork.
- Watch Tutorials: There is a wealth of online tutorials and resources available that can help you learn new techniques and master digital art. Watch tutorials, join online art communities, and participate in workshops to expand your skills and knowledge.
- Customize Your Workspace: Adapt your drawing software’s workspace to your liking. Arrange toolbars, palettes, and panels in a way that is intuitive and comfortable for you. Remember, customization is key to streamline your workflow and make the most of your drawing tablet.
- Utilize Layers: Take advantage of layers in your drawing software. Layers allow you to work on different elements of your artwork separately, making adjustments and edits easier. Experiment with layer blending modes and opacity for more depth and visual appeal.
- Take Breaks: Drawing on a tablet for extended periods can be physically demanding. Remember to take regular breaks to rest your hand, stretch, and relax your eyes. This will help prevent strain and maintain your creativity and focus.
- Seek Inspiration: Explore different artists, styles, and genres to find inspiration for your own artwork. Follow art communities, visit galleries, or browse online art platforms to discover new ideas and perspectives.
- Have Fun and Experiment: Above all, enjoy the process of digital art creation! Use your drawing tablet to explore new styles, techniques, and ideas. Don’t be afraid to push your boundaries and try something different. Remember, digital art offers endless possibilities.
Embrace the learning curve of digital art with your drawing tablet, and remember that improvement comes with time and practice. Be patient with yourself and allow yourself the freedom to explore and express your creativity.
With these tips in mind, you are well-equipped to embark on your artistic journey with your drawing tablet. Embrace the digital medium and let your imagination soar!
Conclusion:
Congratulations on setting up your drawing tablet and entering the exciting world of digital art! We have covered the essential steps to get started, from choosing the right tablet to installing the necessary software, connecting it to your computer, adjusting the settings, calibrating, testing, and providing tips to help you make the most out of your drawing tablet.
Remember that becoming proficient with your drawing tablet requires practice, patience, and experimentation. Take the time to familiarize yourself with its features, explore the vast array of digital art tools and techniques, and find your unique style. Be open to learning from tutorials, seeking inspiration from other artists, and engaging with online art communities.
As you embark on your artistic journey, embrace the endless possibilities and freedom that digital art offers. Let your imagination guide you and use your drawing tablet as a powerful tool to bring your ideas to life. Whether you are an aspiring artist or a seasoned professional, the digital realm provides a dynamic and versatile platform to hone your skills and unleash your creativity.
Remember to enjoy the process, have fun, and embrace the learning curve. Trust in your abilities and keep pushing yourself to explore new horizons. With time and practice, you will discover new techniques, refine your skills, and create stunning digital artworks.
So, go ahead, express yourself, and create awe-inspiring digital masterpieces with your drawing tablet. Your artistic journey awaits!