Introduction
A shared mailbox is a powerful tool that allows multiple users to access and manage a single mailbox. It is commonly used in businesses and organizations to streamline communication and collaboration. With a shared mailbox, team members can send and receive emails from a single email address, making it easy to coordinate tasks, share information, and maintain a unified front.
Having a shared mailbox offers several benefits that can greatly improve the efficiency of your team. Whether you’re working on a project, handling customer inquiries, or managing a department, a shared mailbox can provide a centralized platform for communication, ensuring that everyone stays on the same page.
If you are considering implementing a shared mailbox or are tasked with setting one up for your team, this article will guide you through the process. We will explore the benefits of using a shared mailbox, provide step-by-step instructions on how to set it up, and explain different options for accessing and sending emails from the shared mailbox.
By the end of this article, you will have a clear understanding of how to leverage the power of a shared mailbox to streamline your team’s email communication, enhance collaboration, and improve overall productivity.
What is a shared mailbox?
A shared mailbox is an email account that multiple users can access and manage. It is designed to facilitate communication and collaboration within a team or a department. Unlike a regular mailbox associated with an individual user, a shared mailbox is not tied to a specific person, but rather to a specific group or function.
When an email is sent to a shared mailbox, it can be accessed by all the authorized users who have been granted permission to access that mailbox. This allows team members to view, respond to, and manage emails collectively, improving the efficiency and effectiveness of communication.
Shared mailboxes are commonly used in organizations or departments that handle a large volume of inbound emails, such as customer support teams, sales teams, or project management teams. By centralizing the email communication, shared mailboxes help ensure that important messages are not missed and that the workload is evenly distributed among team members.
Shared mailboxes can have their own email address, enabling external parties, such as clients or customers, to send emails directly to the shared mailbox instead of individual team members. This helps maintain a professional and consistent image for the organization or department.
In addition to email access, shared mailboxes often come with other collaborative features, such as shared calendars, contacts, and tasks. These features enable team members to coordinate their activities, schedule meetings, and share important contacts, further enhancing teamwork and productivity.
It’s important to note that shared mailboxes are different from distribution groups or mailing lists. While distribution groups only allow members to receive emails, shared mailboxes provide the ability to send and receive emails from a common address, making them a more versatile option for teams working collaboratively.
Overall, shared mailboxes are a valuable tool for teams or departments that need to manage and coordinate their email communication efficiently. With their ability to streamline workflows and promote collaboration, shared mailboxes can significantly enhance team productivity and customer responsiveness.
Benefits of using a shared mailbox
Using a shared mailbox in your organization can bring numerous benefits to your team’s email communication and overall productivity. Here are some key advantages of utilizing a shared mailbox:
- Streamlined communication: With a shared mailbox, team members can easily collaborate and stay updated on important emails. By having a central mailbox where all relevant messages are stored, there is less chance of crucial information slipping through the cracks.
- Improved team collaboration: A shared mailbox allows team members to work together seamlessly by sharing emails, assigning tasks, and leaving comments. This promotes effective collaboration and ensures that everyone is on the same page. It also reduces the need for forwarding or cc’ing emails, which can quickly clutter individual inboxes.
- Enhanced customer service: For customer support or client-facing teams, a shared mailbox provides a unified point of contact. This enables team members to respond to customer inquiries promptly and efficiently, ensuring a high level of customer service and satisfaction.
- Efficient workload distribution: With a shared mailbox, work can be evenly distributed among team members. Emails can be assigned or delegated, allowing for a fair distribution of tasks and ensuring that no emails go unanswered.
- Consistent team communication: By using a shared mailbox, team members can maintain a consistent and professional image when communicating with clients or customers. Responses from the shared mailbox will bear the team’s name or designated email address, creating a unified front.
- Access from anywhere: Shared mailboxes can be accessed from various devices and platforms, such as desktop email clients, webmail, or mobile devices. This flexibility enables team members to access and respond to emails even when they are on the go.
- Secure and controlled access: Shared mailboxes can be configured with specific access permissions, ensuring that only authorized team members can view and manage the emails. This provides an extra layer of security and control over sensitive information.
In summary, utilizing a shared mailbox can revolutionize your team’s email communication by streamlining workflows, enhancing collaboration, and improving customer service. The benefits of using a shared mailbox extend beyond efficiency and convenience, making it a valuable tool for any organization or department that values effective teamwork and seamless communication.
How to set up a shared mailbox
Setting up a shared mailbox for your team requires a few steps to ensure it is properly configured and accessible to the authorized users. Follow these guidelines to set up a shared mailbox:
- Check email service compatibility: Confirm that your email service provider supports shared mailboxes. Popular email services like Microsoft Exchange and Google Workspace offer shared mailbox functionality. If you’re not sure, reach out to your IT department or email service provider for assistance.
- Gain administrative access: To create a shared mailbox, you will need administrative access to the email service. If you don’t have administrative privileges, contact your IT department or the designated person responsible for managing email accounts in your organization.
- Create the shared mailbox: Once you have administrative access, log in to your email service’s administration panel. Locate the option to create a new mailbox or account and choose the shared mailbox type. Provide a name for the shared mailbox that is descriptive and easily identifiable by your team.
- Assign permissions: After creating the shared mailbox, you’ll need to assign permissions to the individuals who will use it. Determine who needs access to the shared mailbox and grant them appropriate permissions, such as read-only or full access. This can usually be done through the administration panel or by using email management tools provided by your email service.
- Configure email forwarding (optional): If you want emails sent to the shared mailbox to be automatically forwarded to individual team members, set up email forwarding rules. This ensures that everyone stays updated and receives relevant emails even when they are not actively checking the shared mailbox.
- Communicate access details: Once the shared mailbox is set up and permissions are assigned, inform your team members about its existence and provide instructions on how to access it. Share the email address associated with the shared mailbox and any login credentials or access instructions as required.
Following these steps will ensure that your shared mailbox is successfully set up and ready for your team to use. It’s important to regularly review and update permissions as team members change roles or responsibilities to maintain an organized and secure email environment.
Accessing a shared mailbox
Once a shared mailbox is set up, team members need to know how to access it efficiently. There are different methods to access a shared mailbox, depending on the email service and the email client being used. Here are a few common ways to access a shared mailbox:
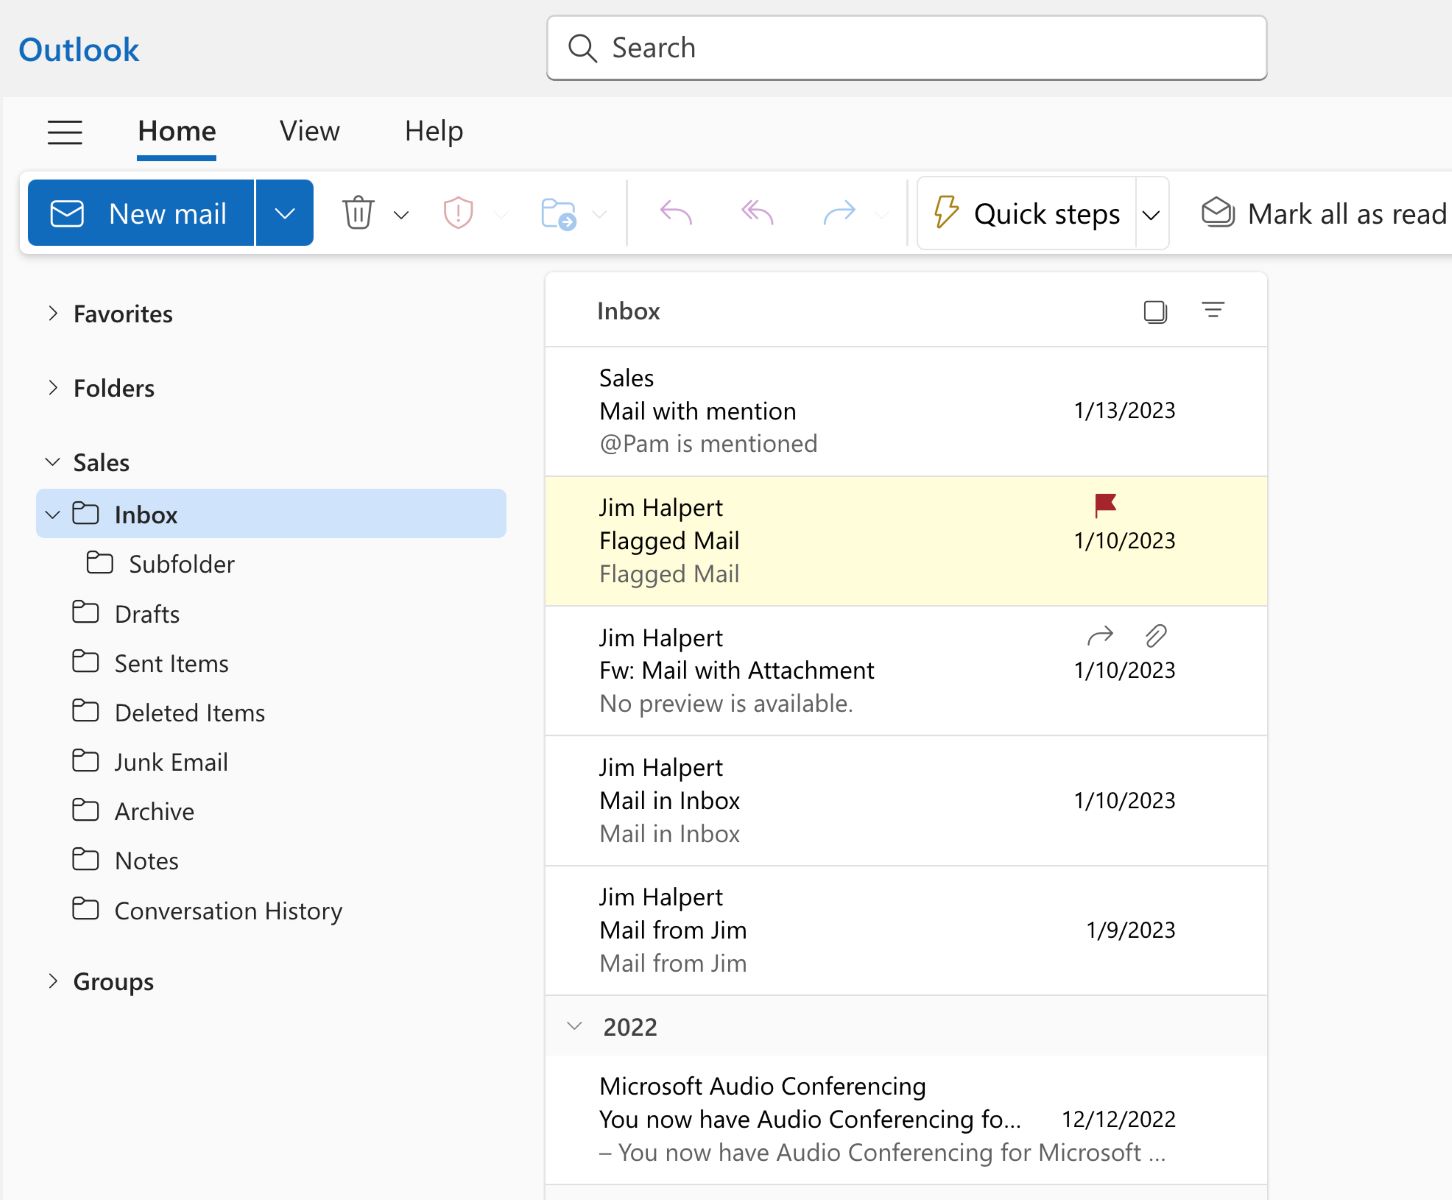
- Using Outlook: If your team uses Microsoft Outlook as the email client, accessing a shared mailbox is straightforward. Users with the appropriate permissions can add the shared mailbox to their Outlook profile by going to the Account settings > Email tab and clicking on “Add a new account”. Follow the prompts and enter the email address and password associated with the shared mailbox. The shared mailbox will then appear as a separate mailbox in the Outlook interface, allowing users to access its emails, folders, and other features.
- Using webmail: Many email services provide a web-based interface for accessing emails. To access a shared mailbox using webmail, team members need to log in to the email service provider’s webmail portal and enter the credentials of the shared mailbox. They will then have access to the shared mailbox’s inbox, sent items, and other folders. Webmail access provides the benefit of being accessible from any device with an internet connection and a web browser.
- Using email clients: Apart from Outlook, other email clients like Mozilla Thunderbird, Apple Mail, and others may also support accessing shared mailboxes. Refer to the email client’s documentation or contact your IT department for guidance on how to configure and access a shared mailbox in those specific email clients.
- Mobile access: Many email services offer mobile apps that allow users to access shared mailboxes on their smartphones or tablets. Install the relevant app, enter the shared mailbox credentials, and configure the settings as required. This enables team members to access and manage emails from the shared mailbox on the go.
Remember to communicate the instructions for accessing the shared mailbox to your team members and provide any additional information or guidelines specific to your organization’s setup. Regularly communicate any changes or updates to ensure everyone is up to date and can access the shared mailbox without any issues.
Sending email from a shared mailbox
Once you have access to a shared mailbox, you can send emails on behalf of the shared mailbox email address instead of your personal email address. This allows for a consistent and professional communication experience. Here are three common options for sending emails from a shared mailbox:
- Using Outlook: In Microsoft Outlook, composing and sending an email from a shared mailbox is straightforward. Simply select the shared mailbox in the “From” field when composing a new email. You may need to expand the “From” field to see the shared mailbox name or click on the “From” dropdown menu to select it. The email will then be sent from the shared mailbox, and responses will be directed to the shared mailbox as well.
- Using webmail: When accessing the shared mailbox through webmail, such as Gmail or Outlook on the web, you can compose and send emails directly from the shared mailbox. Look for options like “New Message,” “Compose,” or a similar button to open the email composition window. Ensure that the shared mailbox is selected in the “From” field before sending the email.
- Using email clients: If you are using an email client other than Outlook or webmail, the process of sending emails from a shared mailbox may vary. In most email clients, you can add the shared mailbox as a separate account or configure the “From” field to include the shared mailbox email address. Refer to the email client’s documentation or reach out to your IT department for specific guidance on sending emails from a shared mailbox in your chosen email client.
It’s important to note that sent emails from a shared mailbox are saved in the sent items folder of the shared mailbox, not the individual sender’s sent items folder. This allows for better tracking and organization of sent emails within the shared mailbox environment. Additionally, responses to emails sent from a shared mailbox will be redirected to the shared mailbox’s inbox, allowing multiple team members to stay updated on ongoing conversations.
By leveraging these options, you can effectively send emails from a shared mailbox, ensuring that the communication is centralized and representative of the shared mailbox’s identity. This makes it easier for team members to collaborate, maintain consistency, and provide a seamless experience for recipients.
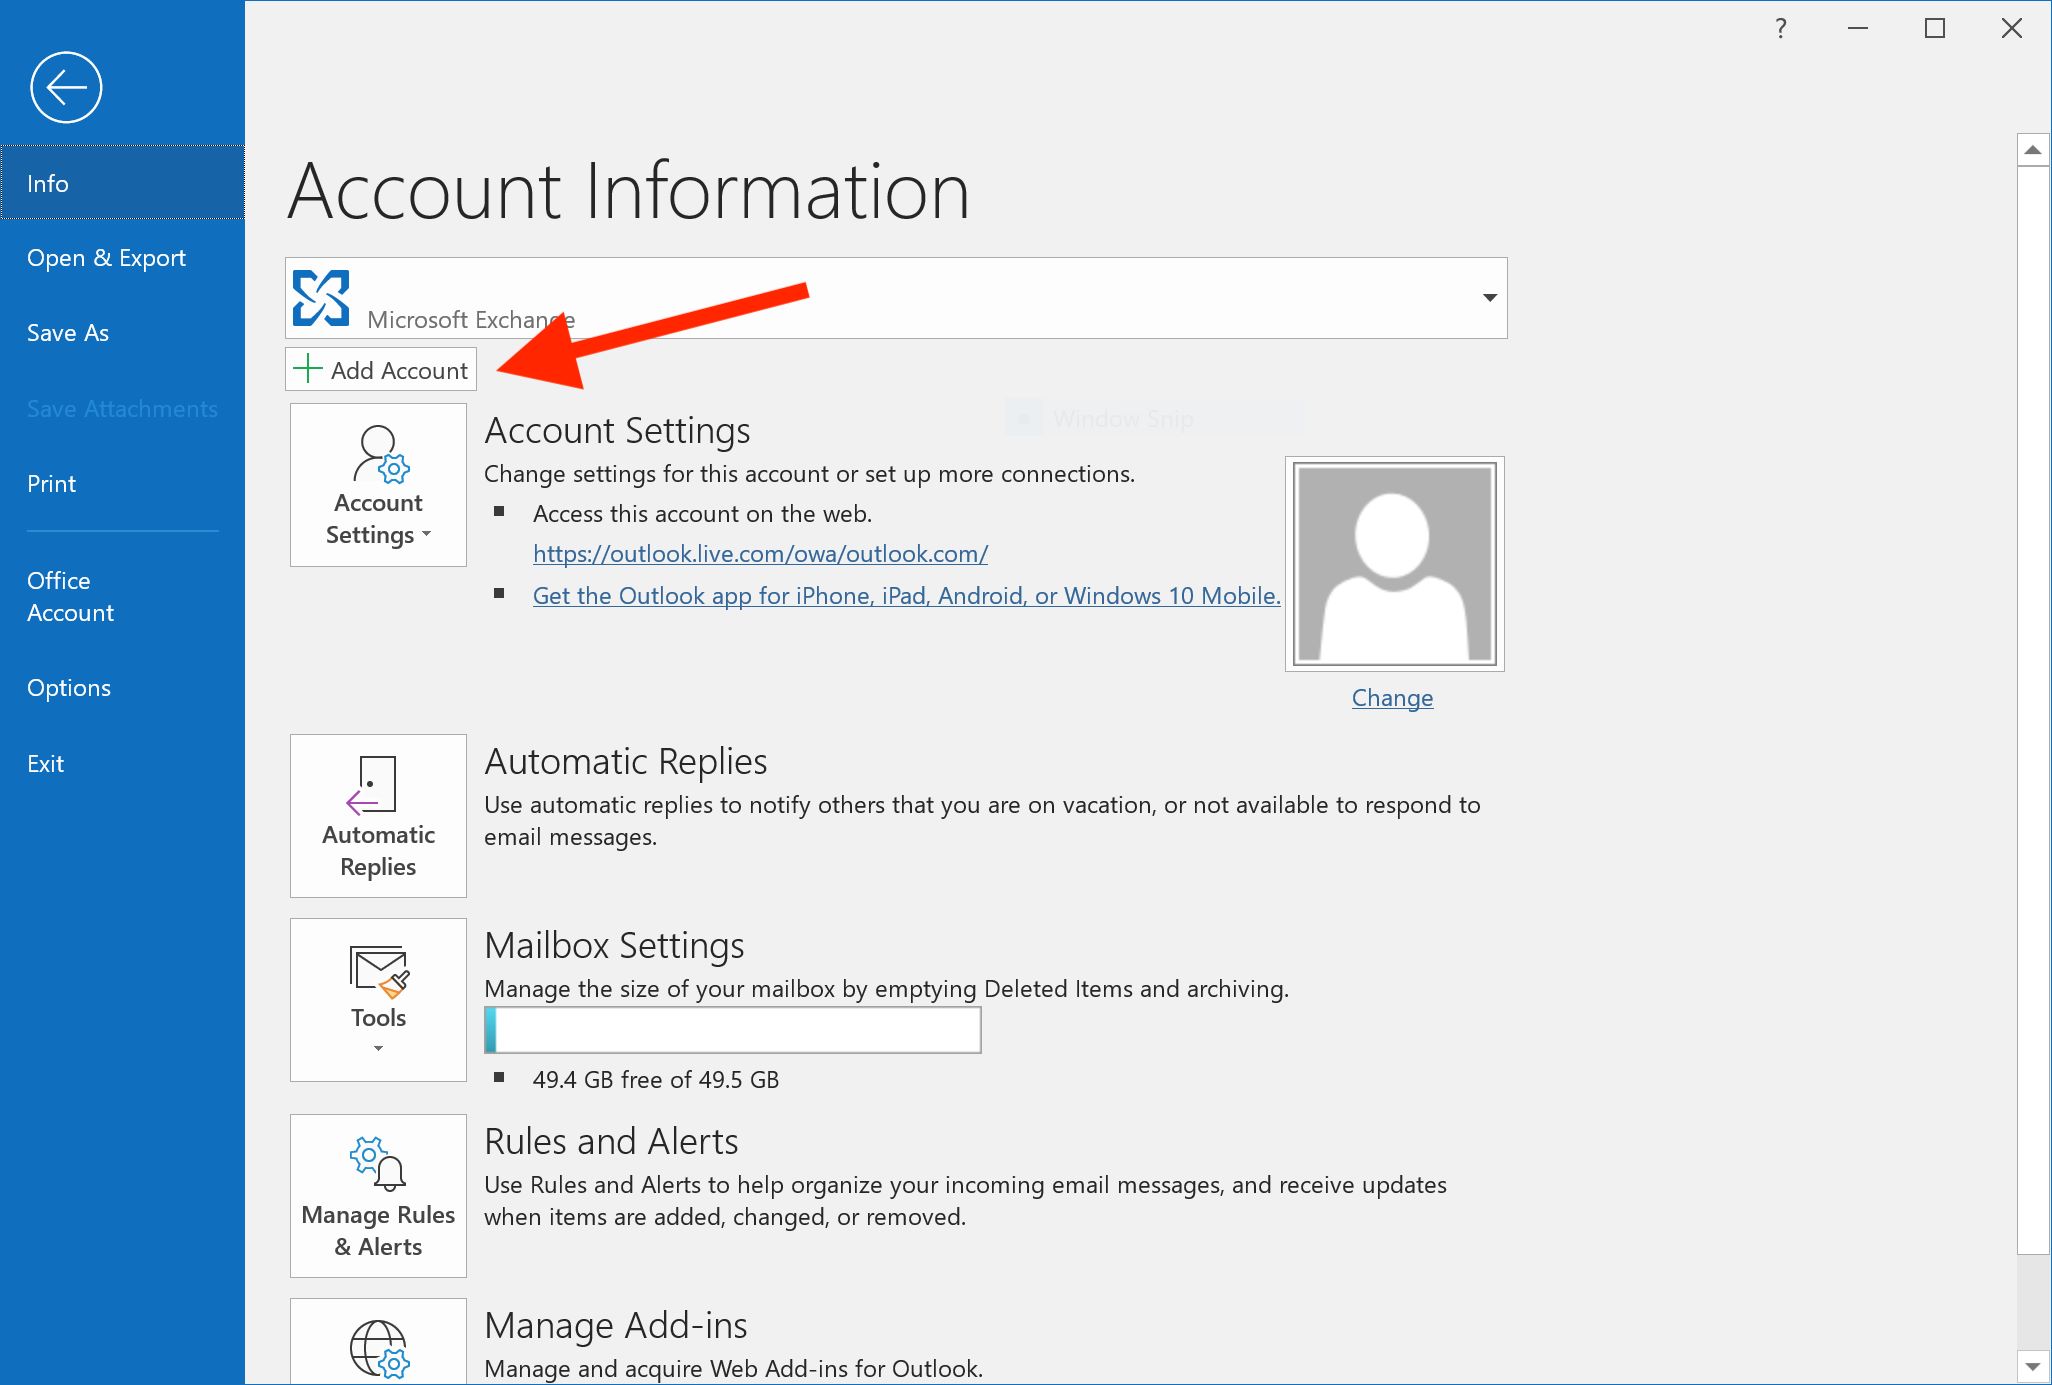
Option 1: Using Outlook
Microsoft Outlook is a popular email client used by many organizations, and it offers a convenient way to access and send emails from a shared mailbox. Here’s how you can use Outlook to send emails from a shared mailbox:
- Open Microsoft Outlook on your computer and ensure that you are logged in with the account that has access to the shared mailbox.
- Click on the “New Email” button to compose a new email.
- In the email composition window, you will see a “From” field. Click on the “From” dropdown arrow to expand the options.
- A list of available email accounts and aliases will appear. Look for the name or email address associated with the shared mailbox and select it.
- Compose your email as you normally would, filling in the recipient(s), subject, and email content.
- Click on the “Send” button to send the email from the shared mailbox.
By following these steps, you will be able to send emails from the shared mailbox within Microsoft Outlook. The recipient(s) will see that the email is sent from the shared mailbox email address, maintaining a professional and consistent communication experience.
When you send an email from a shared mailbox using Outlook, the sent email will be stored in the sent items folder of the shared mailbox, ensuring that all team members can easily access and review sent emails.
It’s important to note that the exact steps may vary slightly depending on the version of Outlook you are using. If you encounter any difficulties, refer to Microsoft’s documentation or consult your IT department for specific instructions on sending emails from a shared mailbox using Outlook.
Using Outlook to send emails from a shared mailbox offers a seamless and integrated experience, especially if your organization already utilizes Microsoft’s email infrastructure. It allows team members to utilize the familiar Outlook interface while ensuring that the shared mailbox maintains a professional presence in all outgoing communications.
Option 2: Using webmail
If you access your email through a web-based email client, such as Gmail or Outlook on the web, you can easily send emails from a shared mailbox using the webmail interface. Here’s how you can do it:
- Open your preferred web browser and navigate to the webmail login page for your email service provider (e.g., Gmail, Outlook, etc.).
- Enter the login credentials for the account that has access to the shared mailbox.
- Once logged in, you will be taken to your inbox or mailbox view. Look for a button or option that says “Compose” or “New Message” to start composing a new email.
- In the email composition window, you should see a “From” field. Click on the field to expand the options.
- A dropdown menu will appear with a list of available email addresses associated with your account. Look for the name or email address associated with the shared mailbox and select it.
- Compose your email, including the recipient(s), subject, and email content.
- Click on the “Send” button to send the email from the shared mailbox.
By utilizing webmail, you can send emails from the shared mailbox without the need for a separate email client or software installation. Webmail also offers the advantage of being accessible from any device with an internet connection, making it a convenient option for on-the-go access.
When you send an email from a shared mailbox using webmail, the sent email will be stored in the sent items folder of the shared mailbox. This allows all authorized team members to review and track sent emails within the shared mailbox environment.
It’s important to note that the exact steps and interface may vary depending on the email service provider you are using. If you encounter any difficulties, refer to the documentation provided by your email service provider or contact their support team for assistance in sending emails from a shared mailbox through webmail.
Using webmail to send emails from a shared mailbox offers a simple and accessible method for team members to collaborate and communicate effectively. It eliminates the need for additional software installations and allows for seamless access across various devices and platforms.
Option 3: Using email clients
Aside from Outlook and webmail, there are various email clients available that support accessing shared mailboxes. This option provides flexibility for users who prefer alternative email client software. Here’s how you can send emails from a shared mailbox using email clients:
- Launch your preferred email client software (e.g., Thunderbird, Apple Mail, etc.) on your computer.
- Depending on the email client, locate the settings or preferences section. This is usually accessible through the menu or toolbar.
- In the settings or preferences section, find the accounts or mailbox settings. Look for an option to add a new email account.
- Choose the type of email account you want to add. Select the appropriate option depending on your email service provider (e.g., IMAP, Exchange, etc.).
- Enter the required information, such as the shared mailbox email address, username, password, and any other settings required by your email service provider. Follow the prompts and instructions provided by your email client.
- After adding the shared mailbox account to your email client, you should see it listed along with your other email accounts in the client’s interface.
- Create a new email within the email client, and in the “From” field, select the shared mailbox email address.
- Compose your email, including the recipient(s), subject, and email content.
- Click on the “Send” button to send the email from the shared mailbox.
It’s important to note that the exact steps and options may vary depending on the email client software you are using. Refer to the documentation or support resources provided by the email client or consult your IT department for specific instructions relevant to your chosen email client.
Using email clients to send emails from a shared mailbox allows users to manage their emails within a familiar and preferred interface. It offers flexibility and customization options to suit individual preferences and productivity needs.
When you send an email from a shared mailbox using an email client, the sent email will be stored in the sent items folder of the shared mailbox, ensuring that all authorized team members can access and review sent emails. This helps maintain a centralized and organized communication environment.
By leveraging email client software, team members can access and send emails from a shared mailbox while utilizing the features and functionalities provided by their preferred email client. This option caters to individual preferences and ensures a seamless and integrated experience within the email client environment.
Troubleshooting common issues
While setting up and using a shared mailbox can greatly improve collaboration and communication within a team, it is not uncommon to encounter a few issues along the way. Here are some common issues that may occur when working with a shared mailbox and some troubleshooting tips to resolve them:
- Access issues: If a team member is unable to access the shared mailbox, ensure that they have been granted the appropriate permissions. Confirm that they are using the correct login credentials and that their email client or webmail settings are configured correctly.
- Email delivery problems: If emails sent to the shared mailbox are not being received, check spam or junk folders to ensure they are not being filtered incorrectly. Verify that the email address associated with the shared mailbox is correctly entered and functioning properly.
- Missing emails: If emails appear to be missing from the shared mailbox, check the various folders, including inbox, sent items, drafts, and deleted items. Emails may have been accidentally moved or deleted. Double-check email rules or filters that may have redirected emails to separate folders.
- Synchronization issues: In some cases, emails sent from a shared mailbox may not synchronize correctly across various devices or email clients. Check for updates to email client software and ensure that the shared mailbox account settings are correct and up to date.
- Permissions and security concerns: If permissions need to be modified or revoked for team members accessing the shared mailbox, make sure to adjust them accordingly. Regularly review account access and security settings to ensure that only authorized individuals have appropriate access to the shared mailbox.
- Technical glitches: Occasionally, shared mailbox issues may be due to technical glitches or outages with the email service provider. Check for any reported service disruptions or consult with your IT department for assistance in resolving technical issues.
If you encounter any persistent issues or are unsure how to resolve a particular problem with the shared mailbox, it is recommended to reach out to your IT department or email service provider’s support team for assistance. They can provide targeted troubleshooting advice and guide you through the necessary steps to resolve the issue.
Regularly monitoring and addressing common issues that arise when working with a shared mailbox will help ensure optimal functionality and a smooth communication experience for all team members.
Conclusion
Implementing a shared mailbox can greatly enhance team communication and collaboration by providing a centralized platform for managing email correspondence. With the ability to send and receive emails from a shared email address, team members can work together more efficiently, distribute workloads effectively, and provide consistent and timely responses to clients and customers.
In this article, we’ve explored the concept of a shared mailbox and discussed its benefits for organizations and teams. We’ve provided step-by-step instructions on how to set up a shared mailbox, highlighting the importance of administrative access and permissions management.
We’ve also outlined different methods for accessing and sending emails from a shared mailbox, including using popular email clients like Outlook, utilizing webmail interfaces, and configuring email clients to access shared mailboxes. Understanding these options allows team members to choose the most suitable method based on their preferences and needs.
Additionally, we’ve mentioned some common issues that may arise when working with shared mailboxes and provided troubleshooting tips to overcome these challenges. By addressing these issues proactively, teams can ensure a smooth and uninterrupted workflow with the shared mailbox.
In conclusion, a shared mailbox is a valuable tool for enhancing team collaboration, streamlining communication, and improving overall productivity. By implementing best practices and utilizing the various options available for accessing and sending emails from a shared mailbox, organizations can create a more efficient and effective email communication environment.