Introduction
When it comes to troubleshooting or upgrading your PC, knowing the specifications of your computer is crucial. The specifications, or specs, provide valuable information about your hardware and software so that you can make informed decisions. From the processor speed to the amount of RAM, understanding your PC specs can help you determine compatibility with software and hardware requirements.
There are several methods you can use to find the specs of your PC, ranging from built-in system settings to third-party software. In this article, we will explore various ways to discover your PC specs, allowing you to gather the necessary information for maintenance and future upgrades.
Whether you are a tech enthusiast, a gamer, or just curious about your computer, this guide will walk you through different methods to see your PC specs, providing you with the knowledge you need to make informed decisions about your system’s capabilities. So, let’s dive into the different methods and find out the specs of your PC!
Method 1: Using System Settings
One of the easiest ways to view your PC specs is by accessing the system settings on your computer. This method is available on both Windows and Mac systems and provides a comprehensive overview of the hardware and software configuration.
On Windows, you can access the system settings by following these steps:
- Click on the Start button or press the Windows key on your keyboard.
- Type “Settings” and click on the Settings app that appears in the search results.
- In the Settings window, click on the “System” option.
- From the left-side menu, select the “About” option.
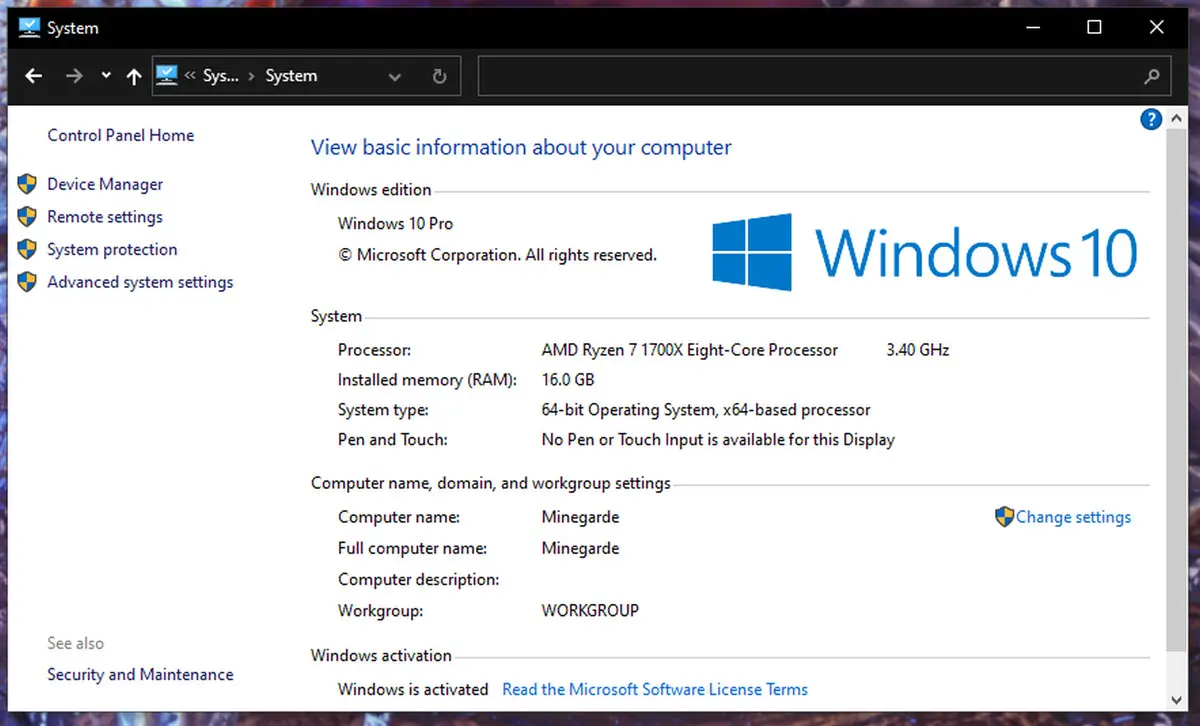
- You will see the basic specifications of your computer, including the processor, installed memory (RAM), and device name.
- For more detailed information, click on the “Device specifications” link or scroll down to see additional details such as the system type, pen and touch input, and Windows specifications.
On a Mac, you can find the system settings by following these steps:
- Click on the Apple menu in the top-left corner of the screen.
- Select the “About This Mac” option.
- A window will appear showing an overview of your Mac, including the model name, processor, memory, and macOS version.
- For more detailed information, click on the “More Info…” button. This will open the System Information window, where you can explore the specifications of your Mac in more detail.
Using the system settings is a convenient way to quickly access and view your PC specs without the need for any additional software. However, if you require more detailed information or would like to explore alternative methods, continue reading the following sections.
Method 2: Using Command Prompt
If you prefer a command-line approach, using the Command Prompt on Windows can provide you with detailed information about your PC specs. This method allows you to access a wide range of system information and is especially helpful for tech-savvy users or system administrators.
Here’s how to use Command Prompt to find your PC specs:
- Open the Command Prompt by pressing the Windows key and typing “Command Prompt” in the search bar. Click on the Command Prompt app that appears in the search results.
- Once the Command Prompt window opens, type “systeminfo” (without quotes) and press Enter.
- Wait for a few moments as the command retrieves and displays detailed system information.
- You will see a list of specifications, including the operating system version, BIOS version, processor details, installed memory (RAM), and more.
- To quickly find specific information, you can use the “systeminfo” command with additional parameters. For example, to display only the processor information, type “systeminfo | findstr /i “Processor”” (without quotes) and press Enter.
The Command Prompt method provides a wealth of information about your PC specs, giving you a deeper understanding of your system’s hardware and software components. It’s an ideal method for those comfortable with the command-line interface and allows for more advanced exploration of system details.
Now that we’ve covered the Command Prompt method, let’s move on to another approach – using the Task Manager to view your PC specs.
Method 3: Using Task Manager
The Task Manager, a built-in utility in Windows, is not only useful for monitoring running processes and performance, but it can also provide valuable information about your PC specs. This method is particularly helpful if you want to quickly access essential specifications without relying on external tools or commands.
Follow these steps to use Task Manager to find your PC specs:
- Right-click on the taskbar at the bottom of your screen and select “Task Manager” from the context menu. Alternatively, you can press “Ctrl + Shift + Esc” on your keyboard to open Task Manager directly.
- When the Task Manager window appears, click on “More details” if you see the simplified view.
- In the Task Manager, click on the “Performance” tab at the top.
- You will see an overview of your system’s performance, including CPU, memory, disk, and network usage.
- To view detailed specifications, click on the “CPU” or “Memory” sections to expand them.
- Under the expanded section, you will find specific information about your processor, installed memory (RAM), and other relevant details.
The Task Manager method provides a quick and convenient way to access your PC specs, especially when you need to monitor system performance or troubleshoot issues. However, keep in mind that it may not provide as comprehensive information as other methods we will explore.
Now that we’ve covered using Task Manager, let’s move on to another popular tool – Speccy – for viewing your PC specs.
Method 4: Using Speccy
If you’re looking for a dedicated software tool to gather detailed information about your PC specs, Speccy is a popular choice. Developed by Piriform, the same company behind CCleaner, Speccy provides a comprehensive overview of your system’s hardware and software configuration in an easy-to-understand interface.
Follow these steps to use Speccy to find your PC specs:
- Download and install Speccy from the official website (https://www.ccleaner.com/speccy) if you haven’t already.
- Once Speccy is installed, open the program. You will see an organized dashboard displaying various categories of information.
- Explore the different sections to view specific details about your PC specs, including CPU, motherboard, RAM, storage devices, graphics card, and more.
- Click on each category to expand and view more detailed information. For example, under the “Operating System” category, you will find information about the installed operating system, service pack version, and system uptime.
- Speccy also provides real-time temperature monitoring for your computer’s components, allowing you to keep an eye on your system’s temperature levels.
Speccy offers a user-friendly interface and provides a comprehensive overview of your PC’s specs. It’s a great option for both novice and advanced users who want detailed information and temperature monitoring in one place.
Now that we’ve covered the Speccy method, let’s move on to another tool – Belarc Advisor – which offers a different approach to viewing your PC specs.
Method 5: Using Belarc Advisor
If you are looking for a comprehensive and detailed analysis of your PC specs, Belarc Advisor is a powerful tool to consider. This free software scans your computer and generates a detailed report containing information about your hardware, software, and system configuration.
Here’s how to use Belarc Advisor to find your PC specs:
- Begin by downloading Belarc Advisor from the official website (https://www.belarc.com/products_belarc_advisor) and install it on your computer.
- Launch Belarc Advisor after installation. The program will perform a thorough scan of your system.
- After the scan is complete, Belarc Advisor will open a web page containing a detailed report of your PC specs.
- The report includes information about the operating system, processor, memory (RAM), storage devices, software licenses, network configuration, and more.
- Scroll through the report to explore the various sections and view specific details about each component of your system.
Belarc Advisor provides a comprehensive and detailed analysis of your PC specs, including software licenses and other valuable information. This makes it a useful tool for tracking software installations and ensuring compliance with licensing agreements.
Now that we’ve covered using Belarc Advisor, let’s move on to another popular tool – CPU-Z – for viewing your PC specs.
Method 6: Using CPU-Z
If you are specifically interested in detailed information about your CPU, motherboard, memory, and other hardware components, CPU-Z is a reliable and popular choice. This freeware utility provides in-depth analysis of your computer’s hardware and presents it in a straightforward and easy-to-understand interface.
Here’s how to use CPU-Z to find your PC specs:
- Download and install CPU-Z from the official website (https://www.cpuid.com/softwares/cpu-z.html) if you haven’t done so already.
- Run CPU-Z after installation. The program will immediately start gathering information about your system’s hardware.
- You will be presented with several tabs, each focusing on specific aspects of your computer’s specs, such as the CPU, motherboard, memory, graphics, and more.
- Click on each tab to view detailed information about the corresponding hardware component. For example, under the “CPU” tab, you can find details about your processor, including the model, architecture, clock speeds, and cache sizes.
- CPU-Z also provides real-time monitoring of the CPU’s core frequency, voltage, and temperature, allowing you to keep an eye on the performance and temperature of your processor.
CPU-Z is renowned for its accuracy and reliability in providing detailed information about your PC specs, particularly the CPU and related components. It is often favored by computer enthusiasts and overclockers for its advanced monitoring and benchmarking capabilities.
Now that we’ve covered using CPU-Z, let’s move on to another method – using the DirectX Diagnostic Tool – to find your PC specs.
Method 7: Using DirectX Diagnostic Tool
The DirectX Diagnostic Tool is a built-in utility in Windows that not only helps diagnose issues related to DirectX but also provides detailed information about your PC’s hardware and software specifications. This method is especially useful if you’re interested in knowing more about your graphics card and DirectX-related information.
To use the DirectX Diagnostic Tool to find your PC specs, follow these steps:
- Press the Windows key and type “dxdiag” in the search bar. Click on the “dxdiag.exe” program that appears in the search results.
- Once the DirectX Diagnostic Tool window opens, it will start collecting information about your system’s hardware and software configuration. This may take a few moments.
- On the “System” tab, you will find information about your operating system, processor, memory, and other system details.
- Switch to the “Display” tab to view details about your graphics card, including the manufacturer, model, driver details, and display resolution.
- The “Sound” tab provides information about your audio devices and drivers, while other tabs like “Input” and “Network” offer relevant specifications related to those components.
- Explore the different tabs to access specific details related to various hardware and software components of your PC.
The DirectX Diagnostic Tool allows you to quickly access important information about your PC specs, especially graphics card-related details, which may be useful for gaming or graphics-intensive tasks.
By now, we have explored multiple methods to find your PC specs, ranging from built-in system settings to dedicated software tools. Choose the method that suits your needs and preferences to gain a comprehensive understanding of your computer’s hardware and software configuration.
Conclusion
Knowing the specifications of your PC is essential for troubleshooting, upgrading, or simply satisfying your curiosity about your computer. In this article, we have explored several methods to view your PC specs, ranging from built-in system settings to dedicated software tools.
The first method involved accessing the system settings on your computer, which provides a quick and easy way to find basic information about your hardware and software configuration, regardless of whether you are using Windows or Mac.
For those who prefer a command-line approach, using the Command Prompt on Windows allows you to retrieve detailed system information using the “systeminfo” command.
Task Manager, another built-in utility in Windows, offers a convenient way to view your PC specs, especially if you want to monitor system performance or find quick information about your CPU and memory usage.
If you require a dedicated software tool, Speccy is a popular choice as it offers a comprehensive overview of your PC’s hardware and software configuration, along with real-time temperature monitoring.
Belarc Advisor, on the other hand, provides a detailed analysis of your PC specs, including software licenses, making it useful for tracking software installations and maintaining compliance.
CPU-Z stands out for its in-depth analysis of your CPU, motherboard, memory, and other hardware components, making it a go-to choice for advanced users and overclockers.
Lastly, the DirectX Diagnostic Tool is a handy utility on Windows that not only helps diagnose DirectX-related issues but also provides information about your PC’s hardware and software specifications, with a focus on graphics card-related details.
By using any of these methods, you can gain valuable insights into your PC specs and make informed decisions about compatibility, upgrades, and troubleshooting. Whether you’re a tech enthusiast, a gamer, or simply interested in knowing more about your computer, having a clear understanding of your PC specs is an essential step in maximizing your computing experience.


![Is The Razer Pro Type Ultra A Gamechanger? [REVIEW]](https://robots.net/wp-content/uploads/2022/06/razer-pro-type-ultra-featured-2-300x175.jpg)