Why is it important to check if your graphics card is working?
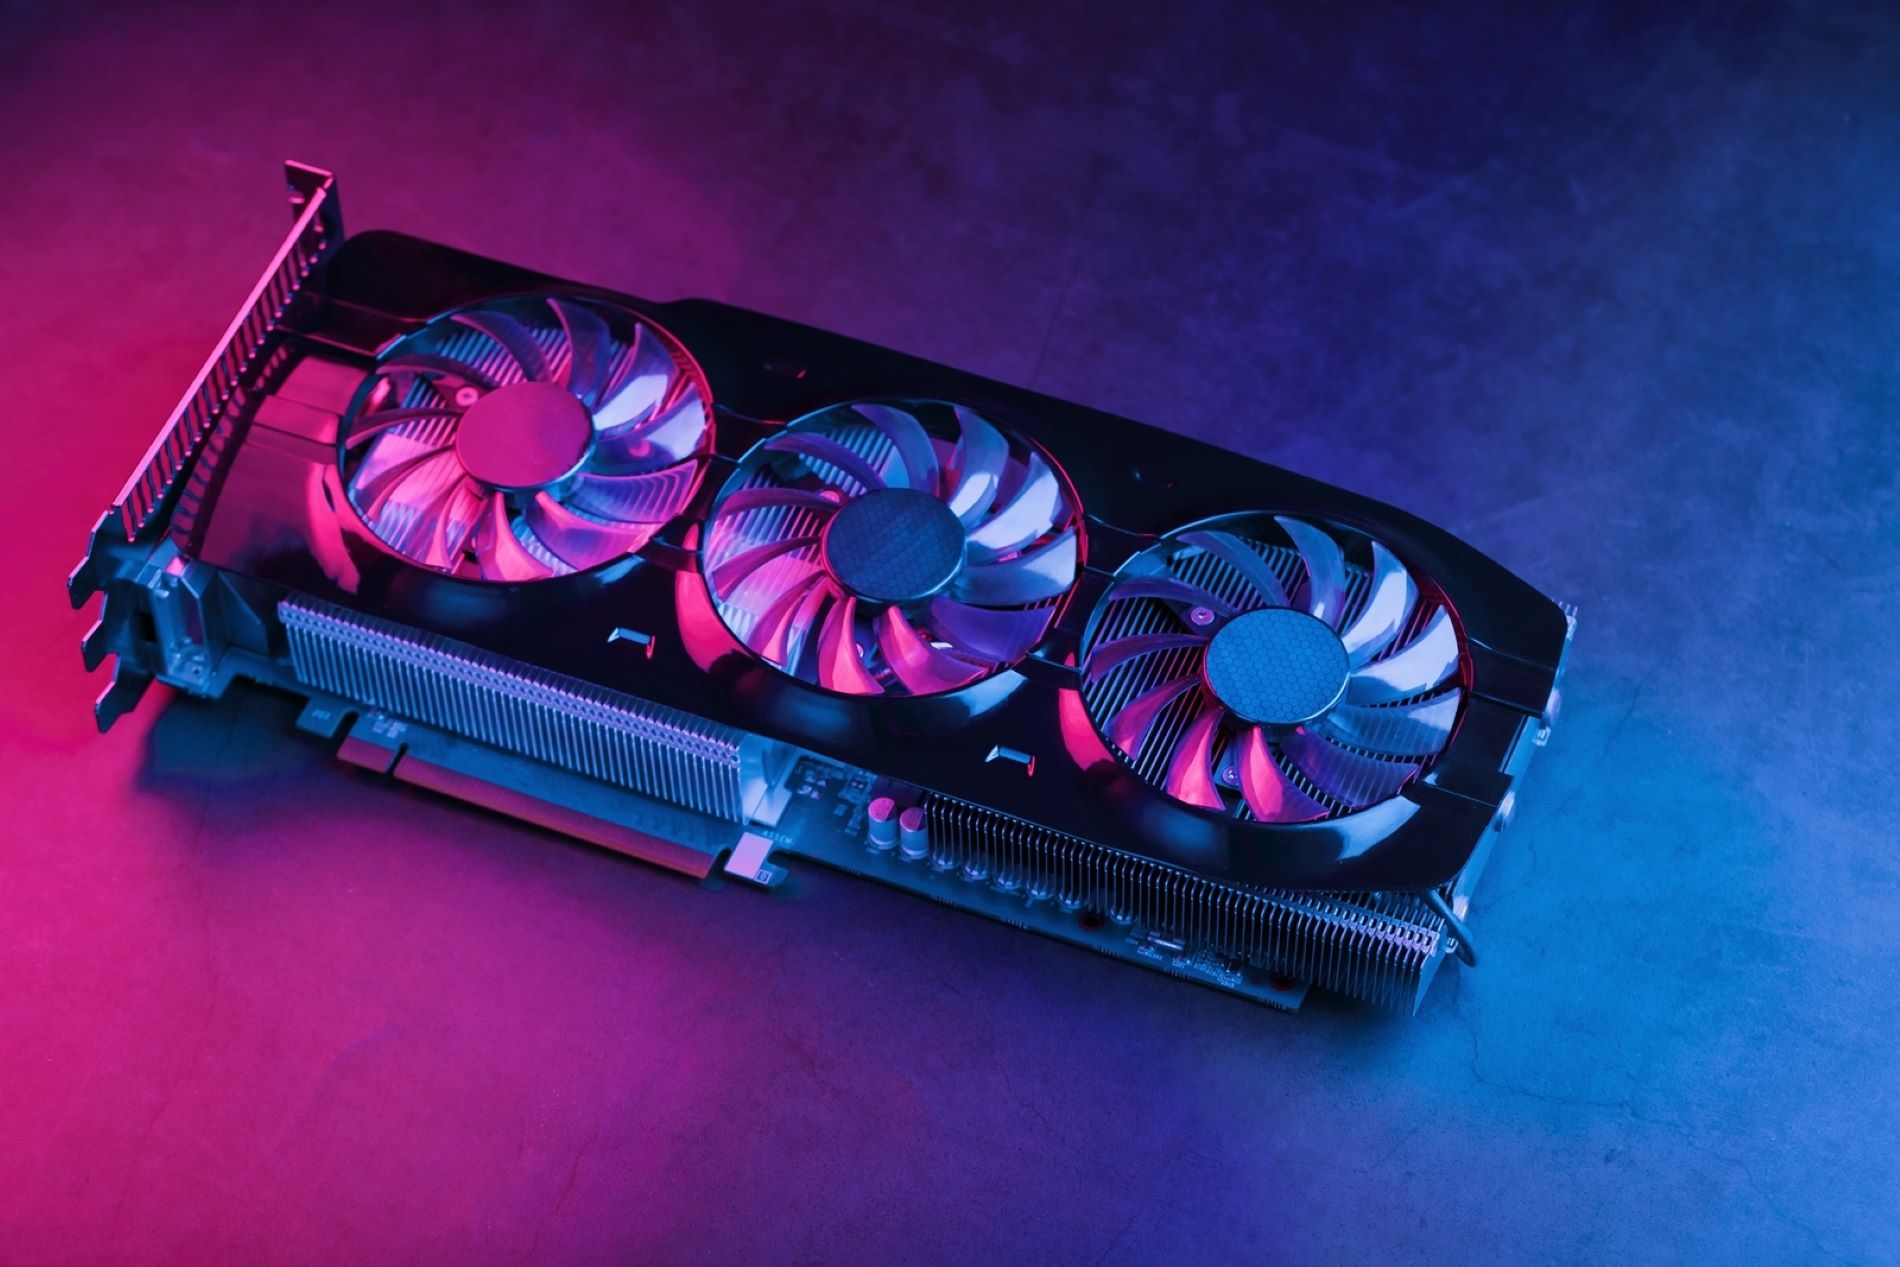
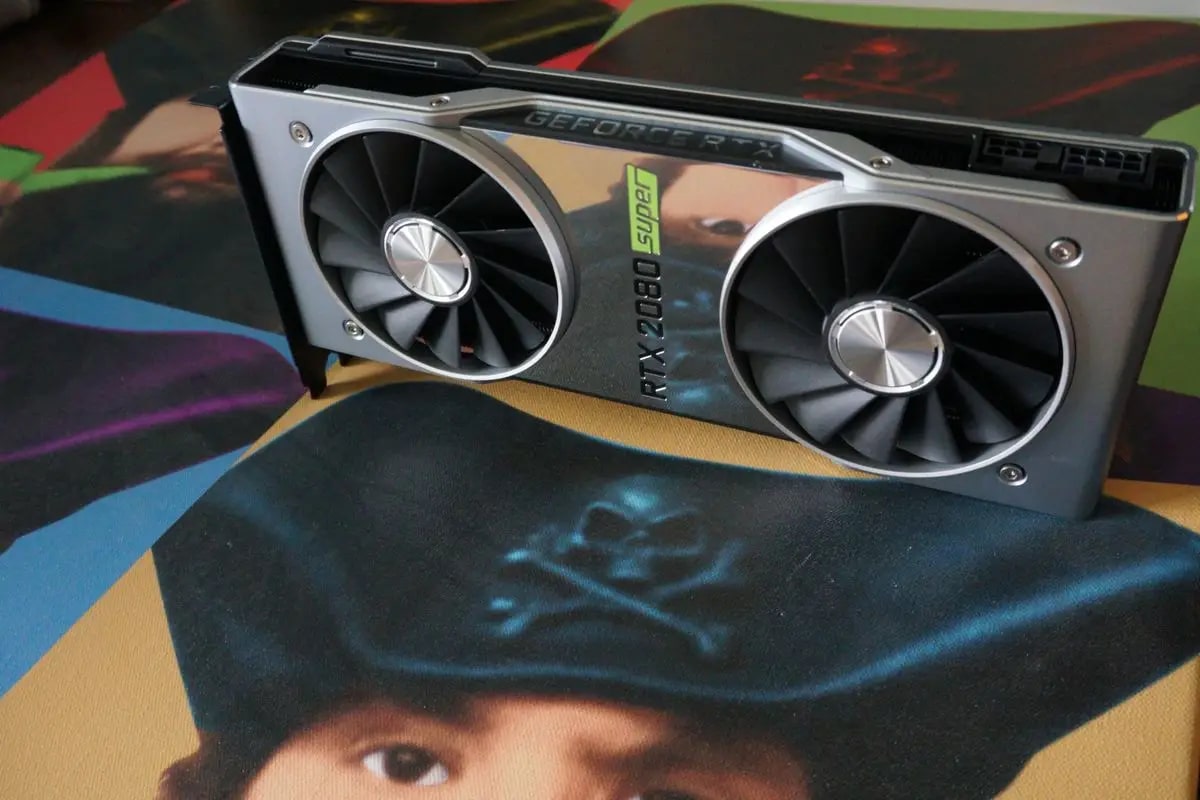
Your graphics card plays a crucial role in your computer’s performance, particularly when it comes to handling graphics-intensive tasks such as gaming, video editing, and 3D rendering. It is responsible for rendering images, videos, and animations on your screen, ensuring smooth and visually appealing graphics.
Regularly checking if your graphics card is working properly is essential for several reasons:
- Optimal Performance: A faulty or malfunctioning graphics card can significantly impact your computer’s performance. It may cause lag, stuttering, or freezing while running graphic-intensive applications, leading to a frustrating user experience. By ensuring your graphics card is functioning correctly, you can enjoy smoother gameplay, faster video editing, and seamless multitasking.
- Hardware Safety: Overheating is one of the common issues that graphics cards can face. Continuous usage under high temperatures can gradually degrade the components, leading to potential hardware failures. Regularly checking your graphics card’s temperature and addressing any cooling issues can extend its lifespan and prevent costly hardware damages.
- Compatibility: Graphics cards are designed to work with specific hardware and software configurations. Checking if your graphics card is functioning properly ensures that it is compatible with your system and can handle the demanding requirements of modern applications and games. It allows you to identify any compatibility issues early on and make necessary adjustments or upgrades.
- Software Updates: Graphics card manufacturers often release driver updates to improve performance, add new features, and fix bugs or compatibility issues. Regularly checking if your graphics card drivers are up to date ensures that you are benefiting from the latest enhancements and improvements. Outdated drivers can lead to performance issues, visual glitches, or compatibility problems with new software releases.
- Troubleshooting: When encountering graphics-related issues such as artifacting, visual abnormalities, or display errors, it is crucial to determine if the graphics card is at fault. By systematically checking if your graphics card is working properly, you can rule out or identify it as the source of the problem, making troubleshooting and resolving the issue more efficient.
Given the significant role of graphics cards in modern computer systems, regularly checking if your graphics card is functioning correctly should be a part of your routine maintenance. It ensures optimal performance, hardware safety, compatibility, and allows for quick troubleshooting if any issues arise. By doing so, you can ensure a smooth and enjoyable experience with graphics-intensive tasks on your computer.
Checking the physical connections
One of the first steps to take when checking if your graphics card is working properly is to ensure that all the physical connections are secure and properly connected. A loose or incorrectly connected cable can result in no display or poor graphics performance.
Here are the key physical connections to check:
- Power Connections: Ensure that the power connectors from your power supply are securely connected to the graphics card. Some high-end graphics cards require additional power connectors, so make sure they are properly plugged in. Loose power connections can cause the graphics card to not function or perform optimally.
- Display Cable: Check that the display cable, whether it’s HDMI, DisplayPort, or DVI, is firmly attached to both the graphics card and the monitor. A loose or damaged cable can result in a blank screen or a distorted display. Consider trying a different cable or testing the cable on another system to rule out any cable-related issues.
- PCIe Slot Connection: Ensure that the graphics card is securely inserted into the PCIe slot on the motherboard. Sometimes, due to vibrations or movement, the card might become slightly dislodged, causing poor contact and resulting in display issues. Gently removing and reseating the graphics card can help establish a proper connection.
- Dust and Debris: Over time, dust and debris can accumulate on the connectors, affecting the signal transmission between the graphics card and the rest of the system. Use compressed air or a soft brush to clean the PCIe slot and connectors, ensuring a clean and reliable connection.
By checking and ensuring the proper physical connections of your graphics card, you can eliminate potential hardware problems that may cause display issues or poor performance. Taking just a few minutes to verify these connections can save you a lot of troubleshooting time and effort.
Updating graphics card drivers
Updating your graphics card drivers is an important step in ensuring optimal performance and compatibility with the latest software and games. Graphics card manufacturers regularly release driver updates to improve stability, fix bugs, and enhance overall performance. By keeping your drivers up to date, you can maximize the potential of your graphics card and avoid potential issues.
Here are the steps to update your graphics card drivers:
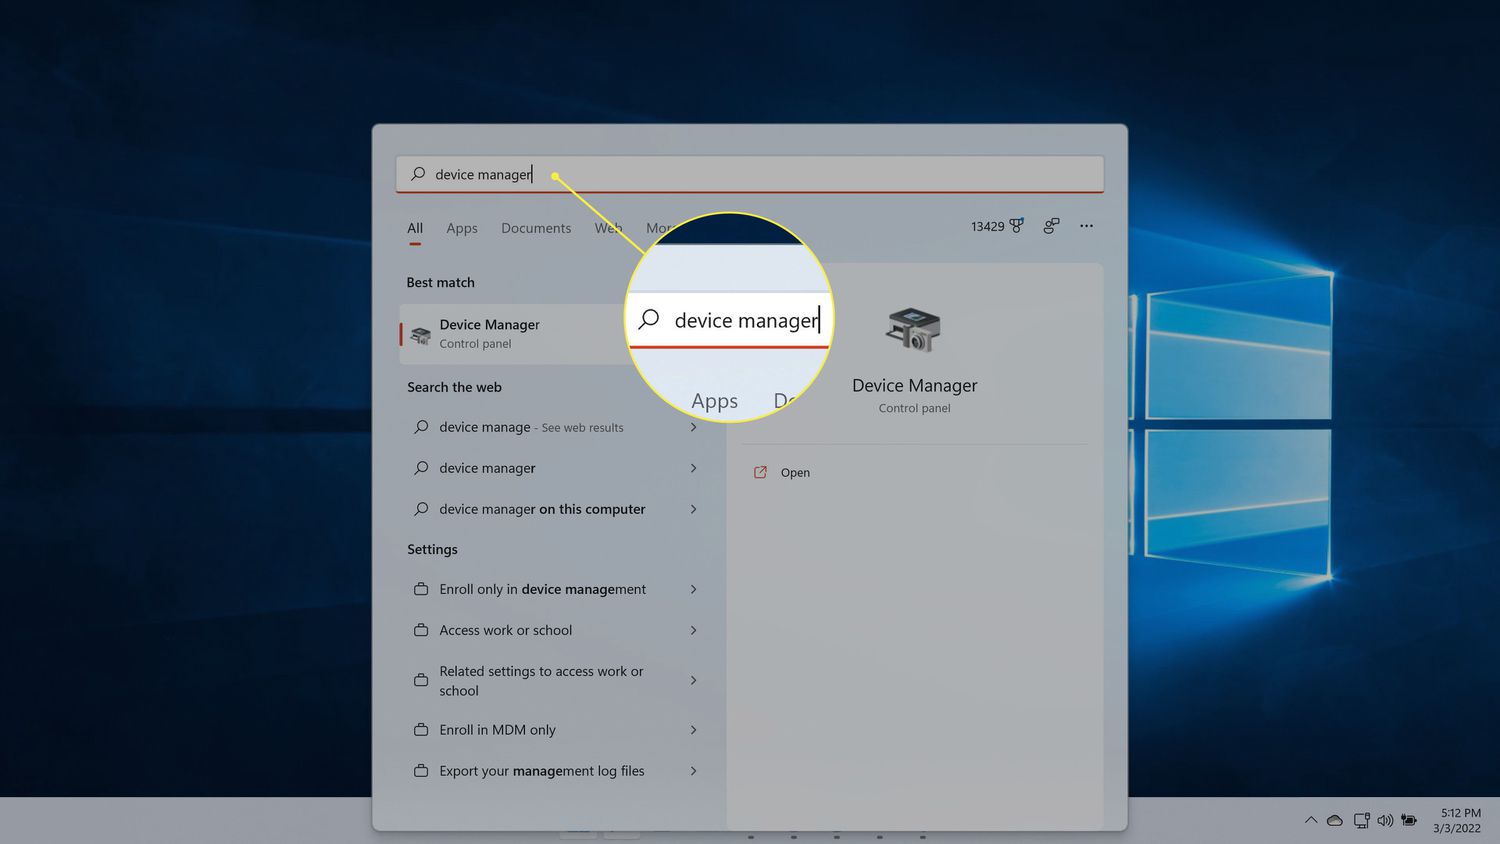
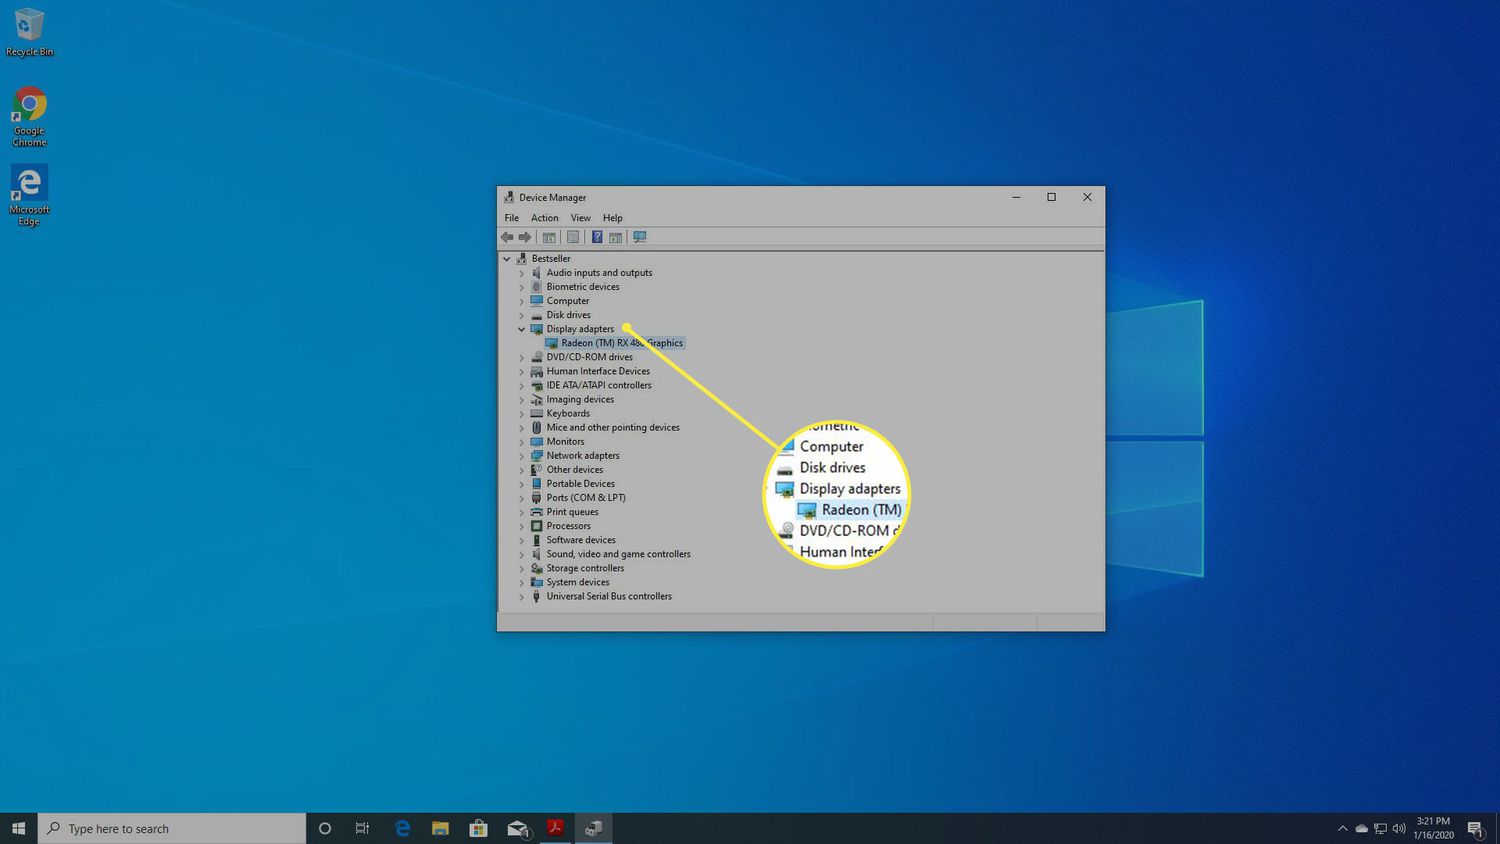
- Identify your graphics card model: Before updating your drivers, it’s important to know the exact model of your graphics card. You can find this information in the Device Manager on Windows or the System Information utility on macOS. Make note of the manufacturer (NVIDIA, AMD, Intel) and the specific model number.
- Visit the manufacturer’s website: Once you have identified your graphics card model, visit the manufacturer’s official website. Most manufacturers provide driver downloads on their support or driver download section. Look for the appropriate driver download for your specific card and operating system.
- Download the latest driver: Download the latest driver for your graphics card from the manufacturer’s website. Make sure to choose the driver that matches your operating system version. It’s recommended to download the full driver package rather than an express or minimal installation to ensure all necessary components are installed.
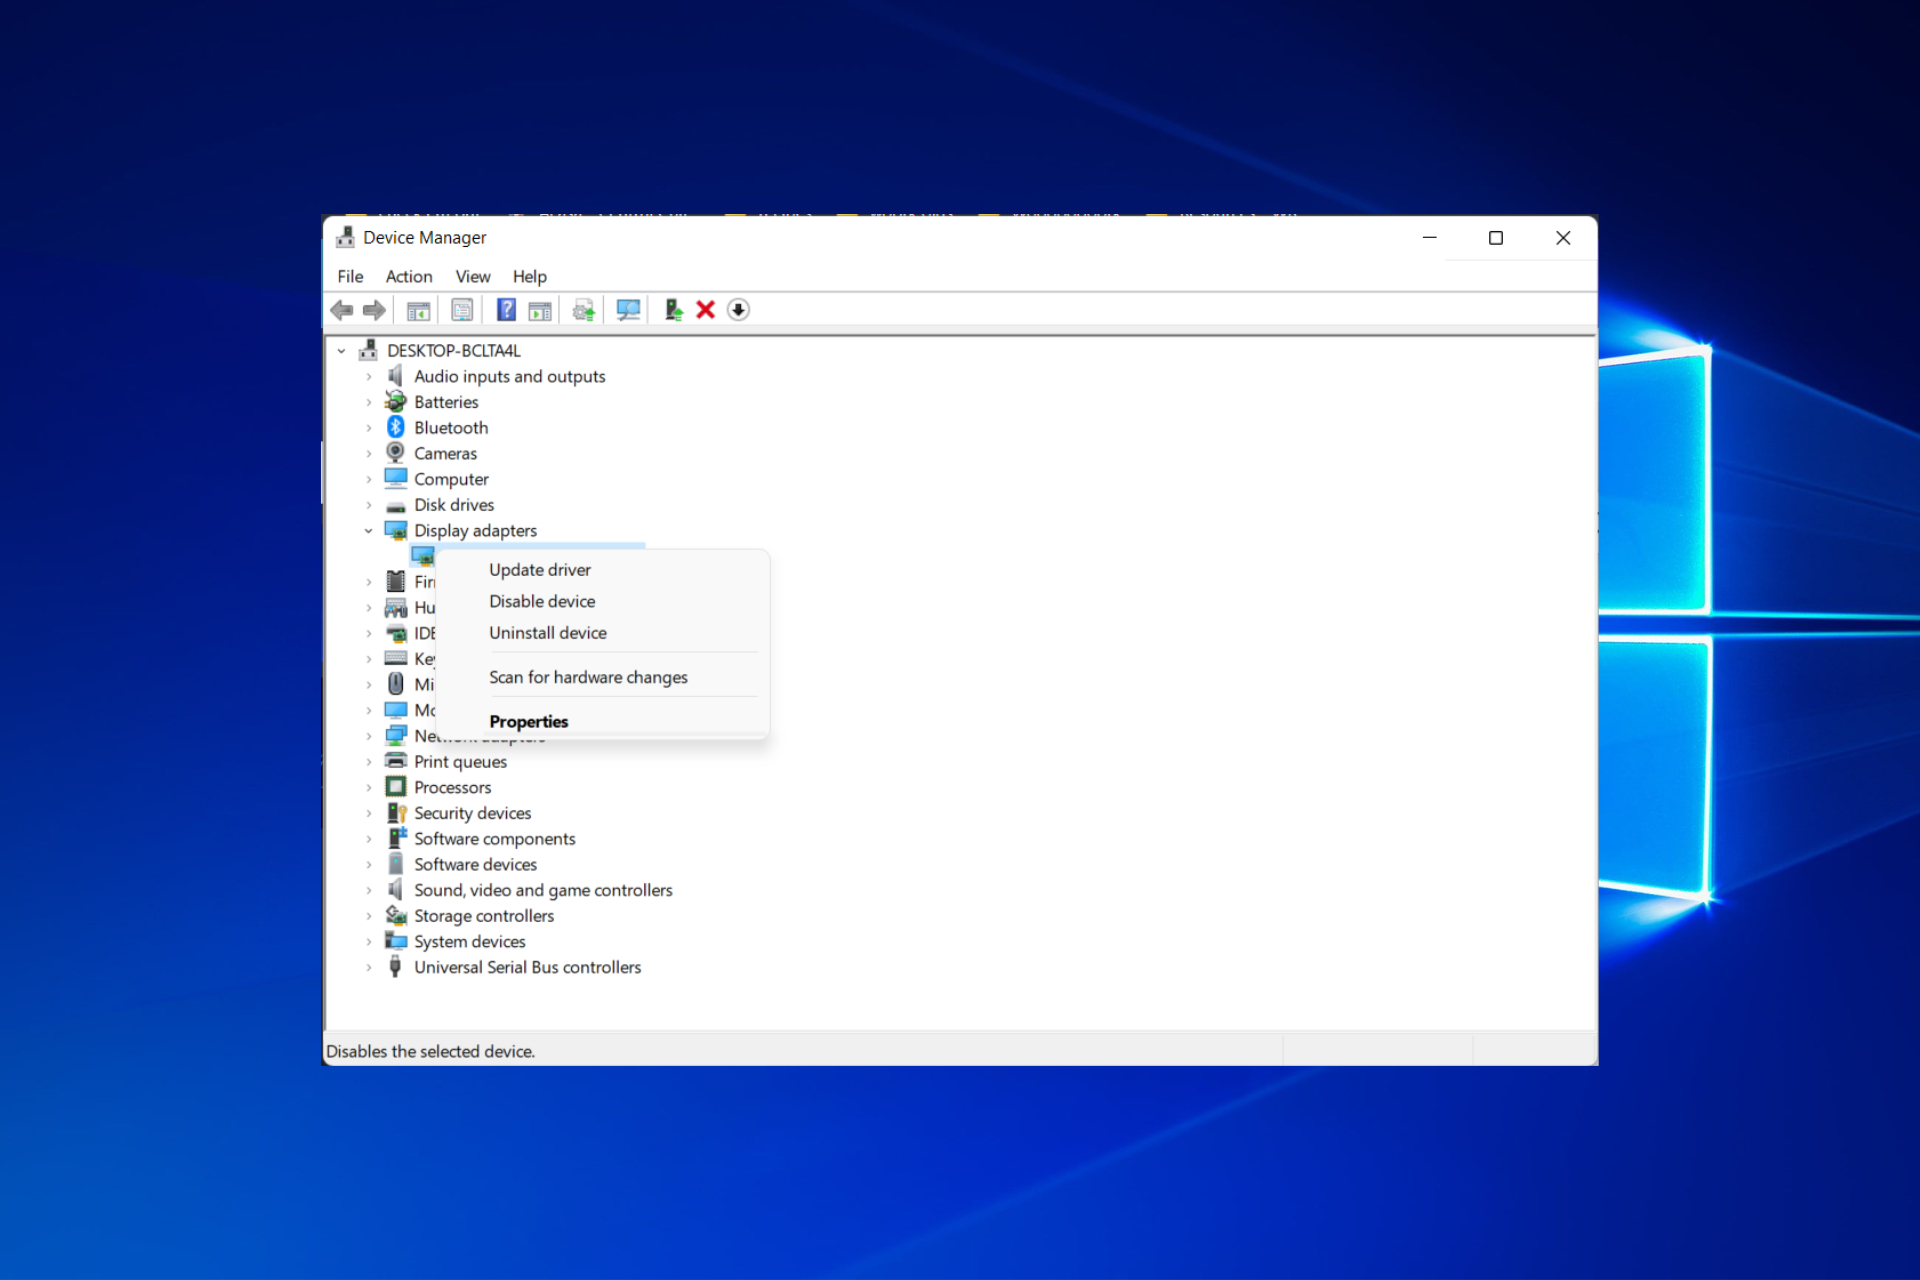
- Uninstall existing drivers: Before installing the new driver, it’s advisable to uninstall the existing graphics card drivers. You can do this by going to the Device Manager, right-clicking on your graphics card, and selecting “Uninstall device.” Restart your computer after the uninstallation process is complete.
- Install the new driver: Once your system has restarted, locate the downloaded driver file and run the installation process. Follow the on-screen prompts to complete the installation. Restart your computer again to ensure the new driver is fully integrated into your system.
Regularly updating your graphics card drivers ensures that you benefit from performance improvements, bug fixes, and enhanced compatibility with the latest software and games. It also helps to eliminate potential issues that may arise due to outdated or incompatible drivers. By dedicating a few minutes to this routine maintenance task, you can optimize your graphics card’s performance and ensure a smoother and more enjoyable computing experience.
Running diagnostic tests
Running diagnostic tests on your graphics card can help identify any underlying issues or abnormalities that might be affecting its performance. These tests can provide valuable insights into the overall health and functionality of your graphics card. Here are some commonly used diagnostic tools and tests:
- Manufacturer’s Diagnostic Tools: Many graphics card manufacturers provide their own diagnostic tools, such as NVIDIA’s GeForce Experience or AMD’s Radeon Software. These tools often include built-in diagnostic features that can test your graphics card’s performance, monitor temperatures, and detect any potential errors or issues. Check the manufacturer’s website or support documentation for the appropriate diagnostic tool for your graphics card.
- Benchmarking Software: Benchmarking software like 3DMark or Heaven Benchmark can assess the performance capabilities of your graphics card by running a series of tests and providing a score. These tests stress your graphics card by simulating realistic gaming or rendering scenarios, allowing you to compare your card’s performance with others of the same model or gauge its performance over time.
- Monitoring Software: Utilizing monitoring software such as GPU-Z or MSI Afterburner can provide real-time data about your graphics card’s temperature, clock speeds, memory usage, and fan speeds. Monitoring these vital statistics can help identify any anomalies or potential overheating issues that might affect performance.
- Stress Testing: Stress testing your graphics card involves running demanding graphics-intensive applications or games for an extended period to evaluate its stability and performance under heavy loads. Tools like FurMark can stress test your GPU by rendering intense 3D graphics, allowing you to observe how your card handles prolonged usage and ensures it doesn’t overheat or crash.
By running diagnostic tests on your graphics card, you can gain valuable insights into its performance, stability, and any potential issues. Regularly conducting these tests can help identify and address problems early on, improving the longevity and functionality of your graphics card. If any abnormalities or errors are detected during the tests, you can seek appropriate solutions such as adjusting settings, updating drivers, or contacting technical support for further assistance.
Monitoring GPU temperature
Monitoring the temperature of your graphics processing unit (GPU) is crucial for ensuring its optimal performance and longevity. Overheating can lead to performance degradation, stability issues, and even hardware failure. By keeping an eye on the GPU temperature, you can take necessary precautions to prevent overheating and maintain your graphics card’s health.
Here are some methods and tools to monitor your GPU temperature:
- Manufacturer’s Software: Graphics card manufacturers often provide monitoring software that allows you to check the temperature of your GPU. For example, NVIDIA offers the GeForce Experience and AMD provides the Radeon Software. These software tools display real-time GPU temperature and allow you to customize fan speeds and cooling profiles.
- Third-Party Monitoring Software: There are numerous third-party applications available that can monitor GPU temperature. Programs such as GPU-Z, MSI Afterburner, and HWMonitor provide detailed temperature readings along with other important system information. These tools often offer customizable alerts and logging features to help you track changes in temperature over time.
- On-Screen Display (OSD) Overlays: Some monitoring software, including MSI Afterburner, allow you to display GPU temperature as an on-screen overlay while playing games or running demanding applications. This on-screen display is particularly helpful in gauging the real-time temperature impact of your graphics card during heavy usage.
- Hardware Monitoring: Certain graphics cards come equipped with built-in temperature sensors. These sensors enable you to monitor the GPU temperature directly from the BIOS or UEFI settings of your computer. Consult your graphics card’s documentation or the manufacturer’s website to determine if your card supports hardware temperature monitoring.
Regularly monitoring your GPU temperature can help you catch any overheating issues before they cause damage to your graphics card or impact its performance. It’s important to keep the GPU temperature within safe limits, generally between 60 to 85 degrees Celsius (140 to 185 degrees Fahrenheit), depending on the specific graphics card model.
To prevent overheating and maintain a cool GPU temperature, consider the following preventive measures:
- Clean Dust and Ensure Proper Airflow: Dust buildup can restrict airflow and increase temperatures inside your computer case. Regularly clean the dust from your computer’s fans, heat sinks, and GPU to ensure optimal cooling.
- Improve Case Cooling: Installing additional case fans or upgrading your CPU cooler can improve overall airflow in your computer, effectively reducing GPU temperatures. Proper cable management can also help optimize airflow throughout the case.
- Avoid Overclocking: Overclocking your GPU can increase its temperature significantly. If you are concerned about high temperatures, consider avoiding or reducing overclocking settings.
- Maintain a Cool Environment: Ensure that your computer is in a well-ventilated area and not exposed to excessive heat sources. Avoid placing your PC near radiators, heating vents, or direct sunlight.
By actively monitoring your GPU temperature and implementing these preventive measures, you can maintain optimal performance, stability, and longevity for your graphics card.
Checking for artifacts or visual abnormalities
When checking if your graphics card is working properly, it’s important to pay attention to any visual abnormalities or artifacts that may appear on your screen. Artifacts are anomalies in the display, such as pixelation, flickering, color distortion, or random graphical glitches. These issues can indicate problems with your graphics card or driver.
Here are some steps to check for artifacts or visual abnormalities:
- Observe during Boot-Up: Pay attention to the initial boot-up sequence of your computer. Look for any unusual patterns, lines, or distortions that may appear during the BIOS or operating system loading screens. Monitor the screen closely as it transitions from a blank screen to displaying the manufacturer’s logo, desktop wallpaper, or login screen.
- Check Different Applications: Open different applications and observe their graphic displays. Test graphics-intensive applications like games, 3D modeling software, or video editors. Look for any unusual graphical glitches, texture flickering, or sudden frame rate drops that may occur while using these applications.
- Run Full-Screen Tests: Use full-screen test patterns, such as the ones available in certain benchmarking software or online, to see if any artifacts or abnormalities appear. These fullscreen tests provide a consistent and controlled environment to check for visual issues.
- Switch Display Cables or Monitors: A faulty display cable or monitor can sometimes be the cause of visual abnormalities. Try using a different display cable or connecting your system to a different monitor to rule out any issues with your current setup.
- Inspect Graphics Card Connection: Make sure your graphics card is properly seated in the PCIe slot on your motherboard. Ensure there are no loose connections or physical damage to the graphics card itself, as these can also contribute to visual abnormalities.
If you notice any artifacts or visual abnormalities during these checks, consider taking the following steps to troubleshoot the issue:
- Update Graphics Card Drivers: Outdated or incompatible drivers can sometimes cause visual glitches. Ensure that you have the latest drivers installed for your graphics card by visiting the manufacturer’s website.
- Adjust Graphics Settings: In some cases, changing graphics settings within applications or games can resolve visual abnormalities. Try adjusting the resolution, anti-aliasing settings, or texture quality to see if the issue persists.
- Check for Overheating: Overheating can also lead to graphical abnormalities. Monitor your GPU temperature and make sure it’s within safe limits. If necessary, improve your cooling system or clean any dust that may be obstructing airflow in your computer case.
- Seek Technical Support: If the artifacts or visual abnormalities persist despite these steps, it may be necessary to contact technical support, either from the graphics card manufacturer or from a qualified technician. They can provide further guidance and assistance in diagnosing and resolving the issue.
By actively checking for artifacts or visual abnormalities, you can detect any potential issues with your graphics card early on and take the necessary steps to address them. Ensuring a glitch-free and visually pleasing experience while using your computer.
Testing GPU performance with benchmark software
Testing the performance of your graphics processing unit (GPU) using benchmark software provides a reliable way to assess its capabilities and compare it to other hardware setups. Benchmark tests simulate real-world scenarios and measure the GPU’s performance in rendering graphics, processing complex calculations, and handling demanding tasks. Conducting these tests helps you understand the power and performance of your GPU and identify areas for potential improvement.
Here’s how you can test your GPU performance using benchmark software:
- Choose a Benchmark Software: There are several popular benchmarking tools available, such as 3DMark, Heaven Benchmark, Cinebench, or Unigine Superposition. Choose a benchmarking software that aligns with your needs and offers tests suitable for your intended use cases, whether it’s gaming, video editing, or 3D rendering.
- Run Benchmark Tests: Once you have selected the benchmark software, install and run the tests. Each benchmark tool offers specific tests to stress different aspects of your GPU’s performance, including graphics rendering, shader performance, or physics simulations. Follow the instructions provided by the software to initiate and complete the tests.
- Monitor Performance Metrics: During the benchmark tests, pay attention to the performance metrics displayed by the software. These metrics include frame rates, average and minimum FPS (frames per second), GPU temperature, and CPU usage. They provide valuable insights into your GPU’s performance and any potential bottlenecks or issues.
- Compare Results: Once the benchmark tests are completed, compare your GPU’s performance results with other similar system configurations or benchmarks available online. This allows you to gauge your GPU’s performance relative to others and identify areas where it excels or falls behind. It’s essential to compare results with hardware configurations similar to yours for accurate comparisons.
- Identify Areas for Improvement: Analyze the benchmark results to identify any potential areas for improvement. For example, if your GPU consistently underperforms in certain benchmarks, it could indicate driver issues, hardware limitations, or inadequate cooling. Understanding these areas can help you make informed decisions on optimizing your GPU’s performance.
Testing your GPU performance with benchmark software provides valuable insights into its capabilities and helps you make informed decisions when optimizing your system. Remember that benchmarks are intended to simulate real-world scenarios and stress your GPU. However, they may not always represent the exact performance you will experience in every application or game. Therefore, it’s essential to consider benchmark results alongside other factors, such as compatibility, driver support, and actual usage scenarios.
Regularly testing your GPU’s performance allows you to stay informed about your system’s capabilities, make informed hardware upgrade decisions, and ensure you are getting the best possible performance out of your graphics card.
Troubleshooting common graphics card issues
Graphics card issues can cause various problems, ranging from display abnormalities to crashes and poor performance. Troubleshooting these issues can help you identify the underlying cause and find appropriate solutions to rectify them. Here are some common graphics card issues and troubleshooting steps:
- No Display or Blank Screen: If your monitor remains blank or displays “no signal” when connected to your graphics card, ensure that the card is correctly seated in the PCIe slot. Check the power connections and monitor cable connections. If the issue persists, test the monitor or try a different cable to rule out any hardware issues.
- Driver Crashes or Display Driver Stopped Responding: Frequent driver crashes or the “display driver stopped responding” error could indicate a problem with the GPU drivers. Update your graphics card drivers to the latest version from the manufacturer’s website. Consider performing a clean installation of the drivers to ensure all remnants of previous installations are removed.
- Overheating and Fan Issues: Overheating can cause performance issues and damage your graphics card. Check that the fans on the graphics card are spinning properly and not obstructed by dust or debris. Clean the fan and heat sink from any accumulated dust to ensure optimal cooling. If necessary, adjust fan settings or consider additional cooling options, such as aftermarket GPU coolers or case fans.
- Artifacts or Visual Abnormalities: Artifacts, flickering, or graphical glitches can indicate problems with the graphics card. Update your graphics card drivers to the latest version, as outdated or incompatible drivers can cause visual abnormalities. Check the physical connections between the monitor and graphics card cables and ensure they are secure. If the issue persists, it may indicate a faulty graphics card that requires replacement or repair.
- Low GPU Performance: If you notice a significant decrease in GPU performance, ensure that your graphics card is not running in a power-saving mode. Adjust the power settings in the graphics card control panel to maximize performance. Monitor the GPU temperature to ensure it’s not overheating or throttling due to excessive heat. Consider updating drivers and adjusting in-game graphics settings to improve performance.
- Incompatibility or System Crashes: Incompatibilities between graphics card drivers and other software or hardware components can lead to system crashes. Ensure that your operating system and applications are up to date. Update your graphics card drivers and check for compatibility issues with other hardware or software. Consider performing a clean boot to troubleshoot conflicts caused by third-party applications.
If you encounter persistent graphics card issues that cannot be resolved through troubleshooting, it may be necessary to contact technical support from the graphics card manufacturer or seek assistance from a qualified technician. They can provide further guidance and help resolve any hardware-related issues.
By following these troubleshooting steps, you can diagnose and resolve common graphics card issues, ensuring optimal performance, stability, and longevity for your graphics card.