My apologies for the confusion. Here’s the introduction section for the article:
Introduction
Being able to take screenshots on your Dell gaming laptop can be incredibly useful in various situations. Whether you want to capture a memorable gaming moment, save important information from a website, or share your screen with someone for troubleshooting, knowing how to take a screenshot is essential.
In this article, we will explore different methods to capture screenshots on your Dell gaming laptop. We will cover the built-in Windows Snipping Tool as well as handy keyboard shortcuts that can streamline the process. Additionally, we will delve into capturing the entire screen, specific windows, and even a portion of the screen.
By learning these techniques, you will be equipped with the tools to effortlessly capture and save screenshots, enhancing your productivity and improving your overall experience with your Dell gaming laptop.
So, whether you are a gaming enthusiast, a professional, or a casual user, stay with us as we guide you through the process of taking screenshots on your Dell gaming laptop.
Using the Windows Snipping Tool
One of the most convenient built-in tools for taking screenshots on your Dell gaming laptop is the Windows Snipping Tool. The Snipping Tool allows you to capture screenshots of any shape or size and annotate them if necessary. Here’s how to use it:
1. Open the Snipping Tool: You can find the Snipping Tool by typing “Snipping Tool” in the search bar or locating it in the “Accessories” folder in the Windows Start menu.
2. Choose the snip type: Once the Snipping Tool window is open, click on “New” to initiate the screenshot process. Select from the available snip types: Free-form Snip, Rectangular Snip, Window Snip, or Full-screen Snip.
3. Capture the screenshot: After selecting the desired snip type, your screen will freeze, allowing you to select the area you want to capture. Click and drag the cursor to define the capture area. Release the mouse button to capture the screenshot.
4. Annotate and save the screenshot: Once the screenshot is captured, the Snipping Tool window will open with the captured image. You can use the provided tools, such as a pen or highlighter, to annotate the screenshot if needed. To save the screenshot, go to “File” and select “Save As…” Choose a location on your Dell gaming laptop and give the file a name.
5. Access the saved screenshots: To locate the saved screenshots, open the chosen destination folder in Windows File Explorer. Your screenshots will be saved as image files (usually in PNG format) and can be easily accessed or shared.
Using the Windows Snipping Tool is a straightforward method for capturing screenshots on your Dell gaming laptop. The tool offers flexibility in capturing different areas of your screen and allows you to make annotations before saving the screenshots for future use.
Now that you know how to utilize the Windows Snipping Tool, let’s explore other methods that allow you to take screenshots on your Dell gaming laptop.
Using Keyboard Shortcuts
Keyboard shortcuts provide a quick and efficient way to capture screenshots on your Dell gaming laptop without the need to open any additional applications. Here are some commonly used keyboard shortcuts for taking screenshots:
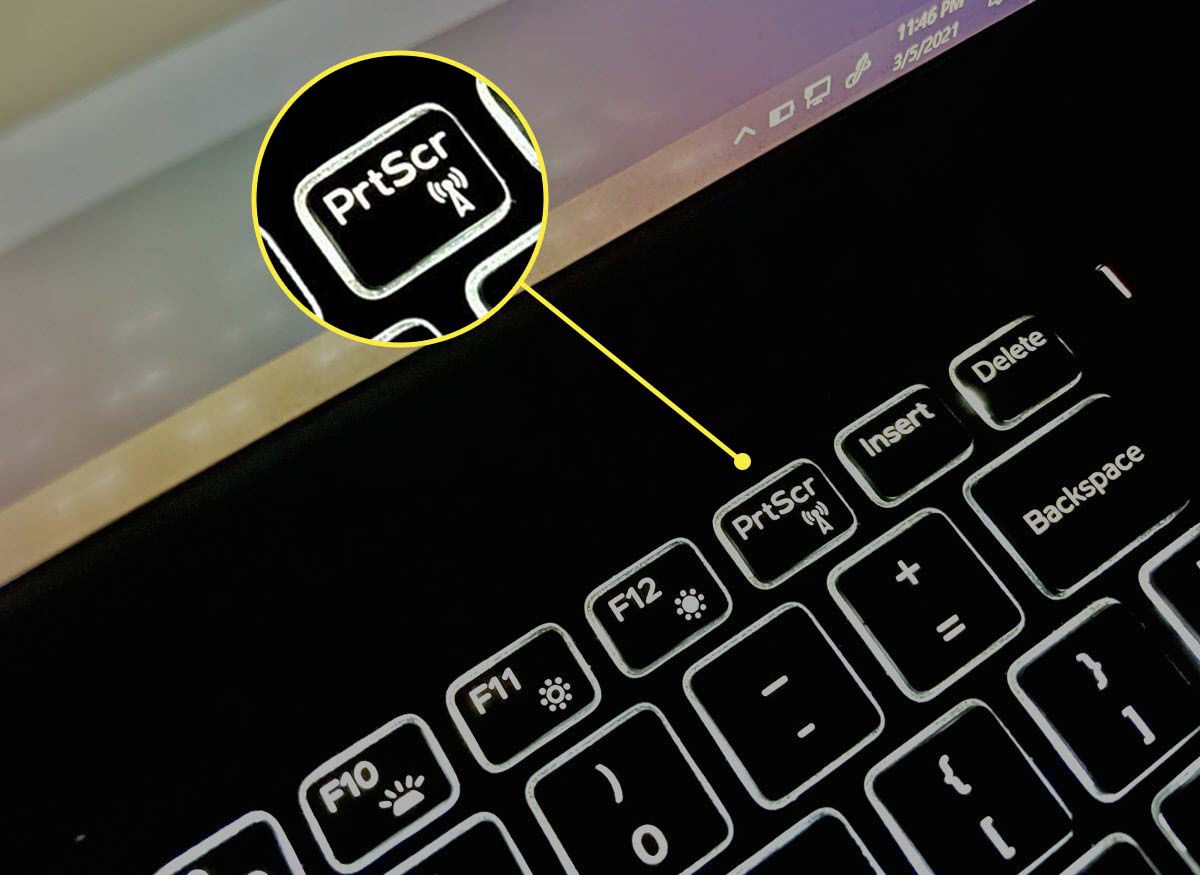
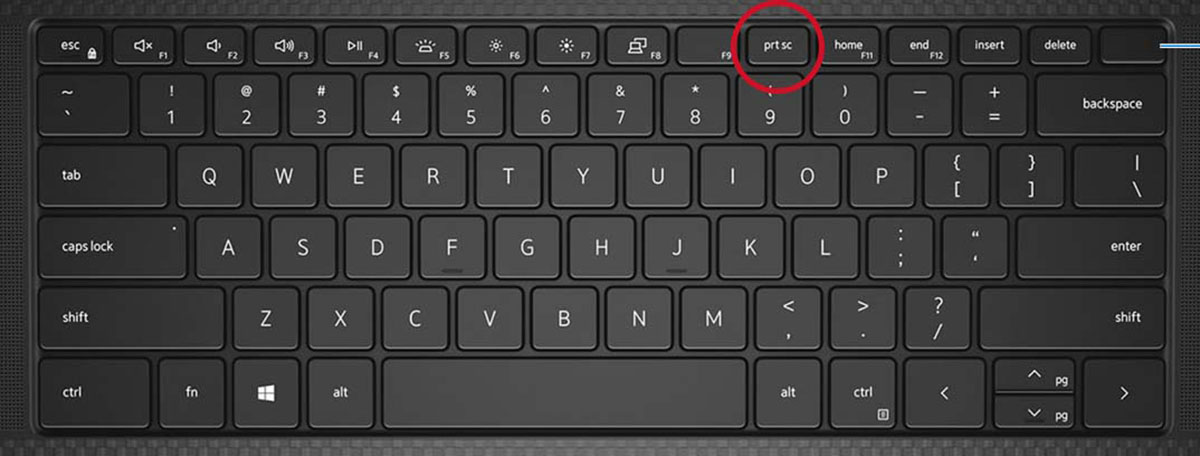
1. Print Screen (PrtScn) Key: Pressing the Print Screen key on your keyboard captures the entire screen. To use this method, simply locate the PrtScn key, usually located in the top row of your keyboard, press it, and the screenshot will be saved to your clipboard.
2. Alt + Print Screen: If you only want to capture the active window or application, you can use the Alt + Print Screen keyboard shortcut. Pressing these keys simultaneously captures the currently active window and saves it to the clipboard.
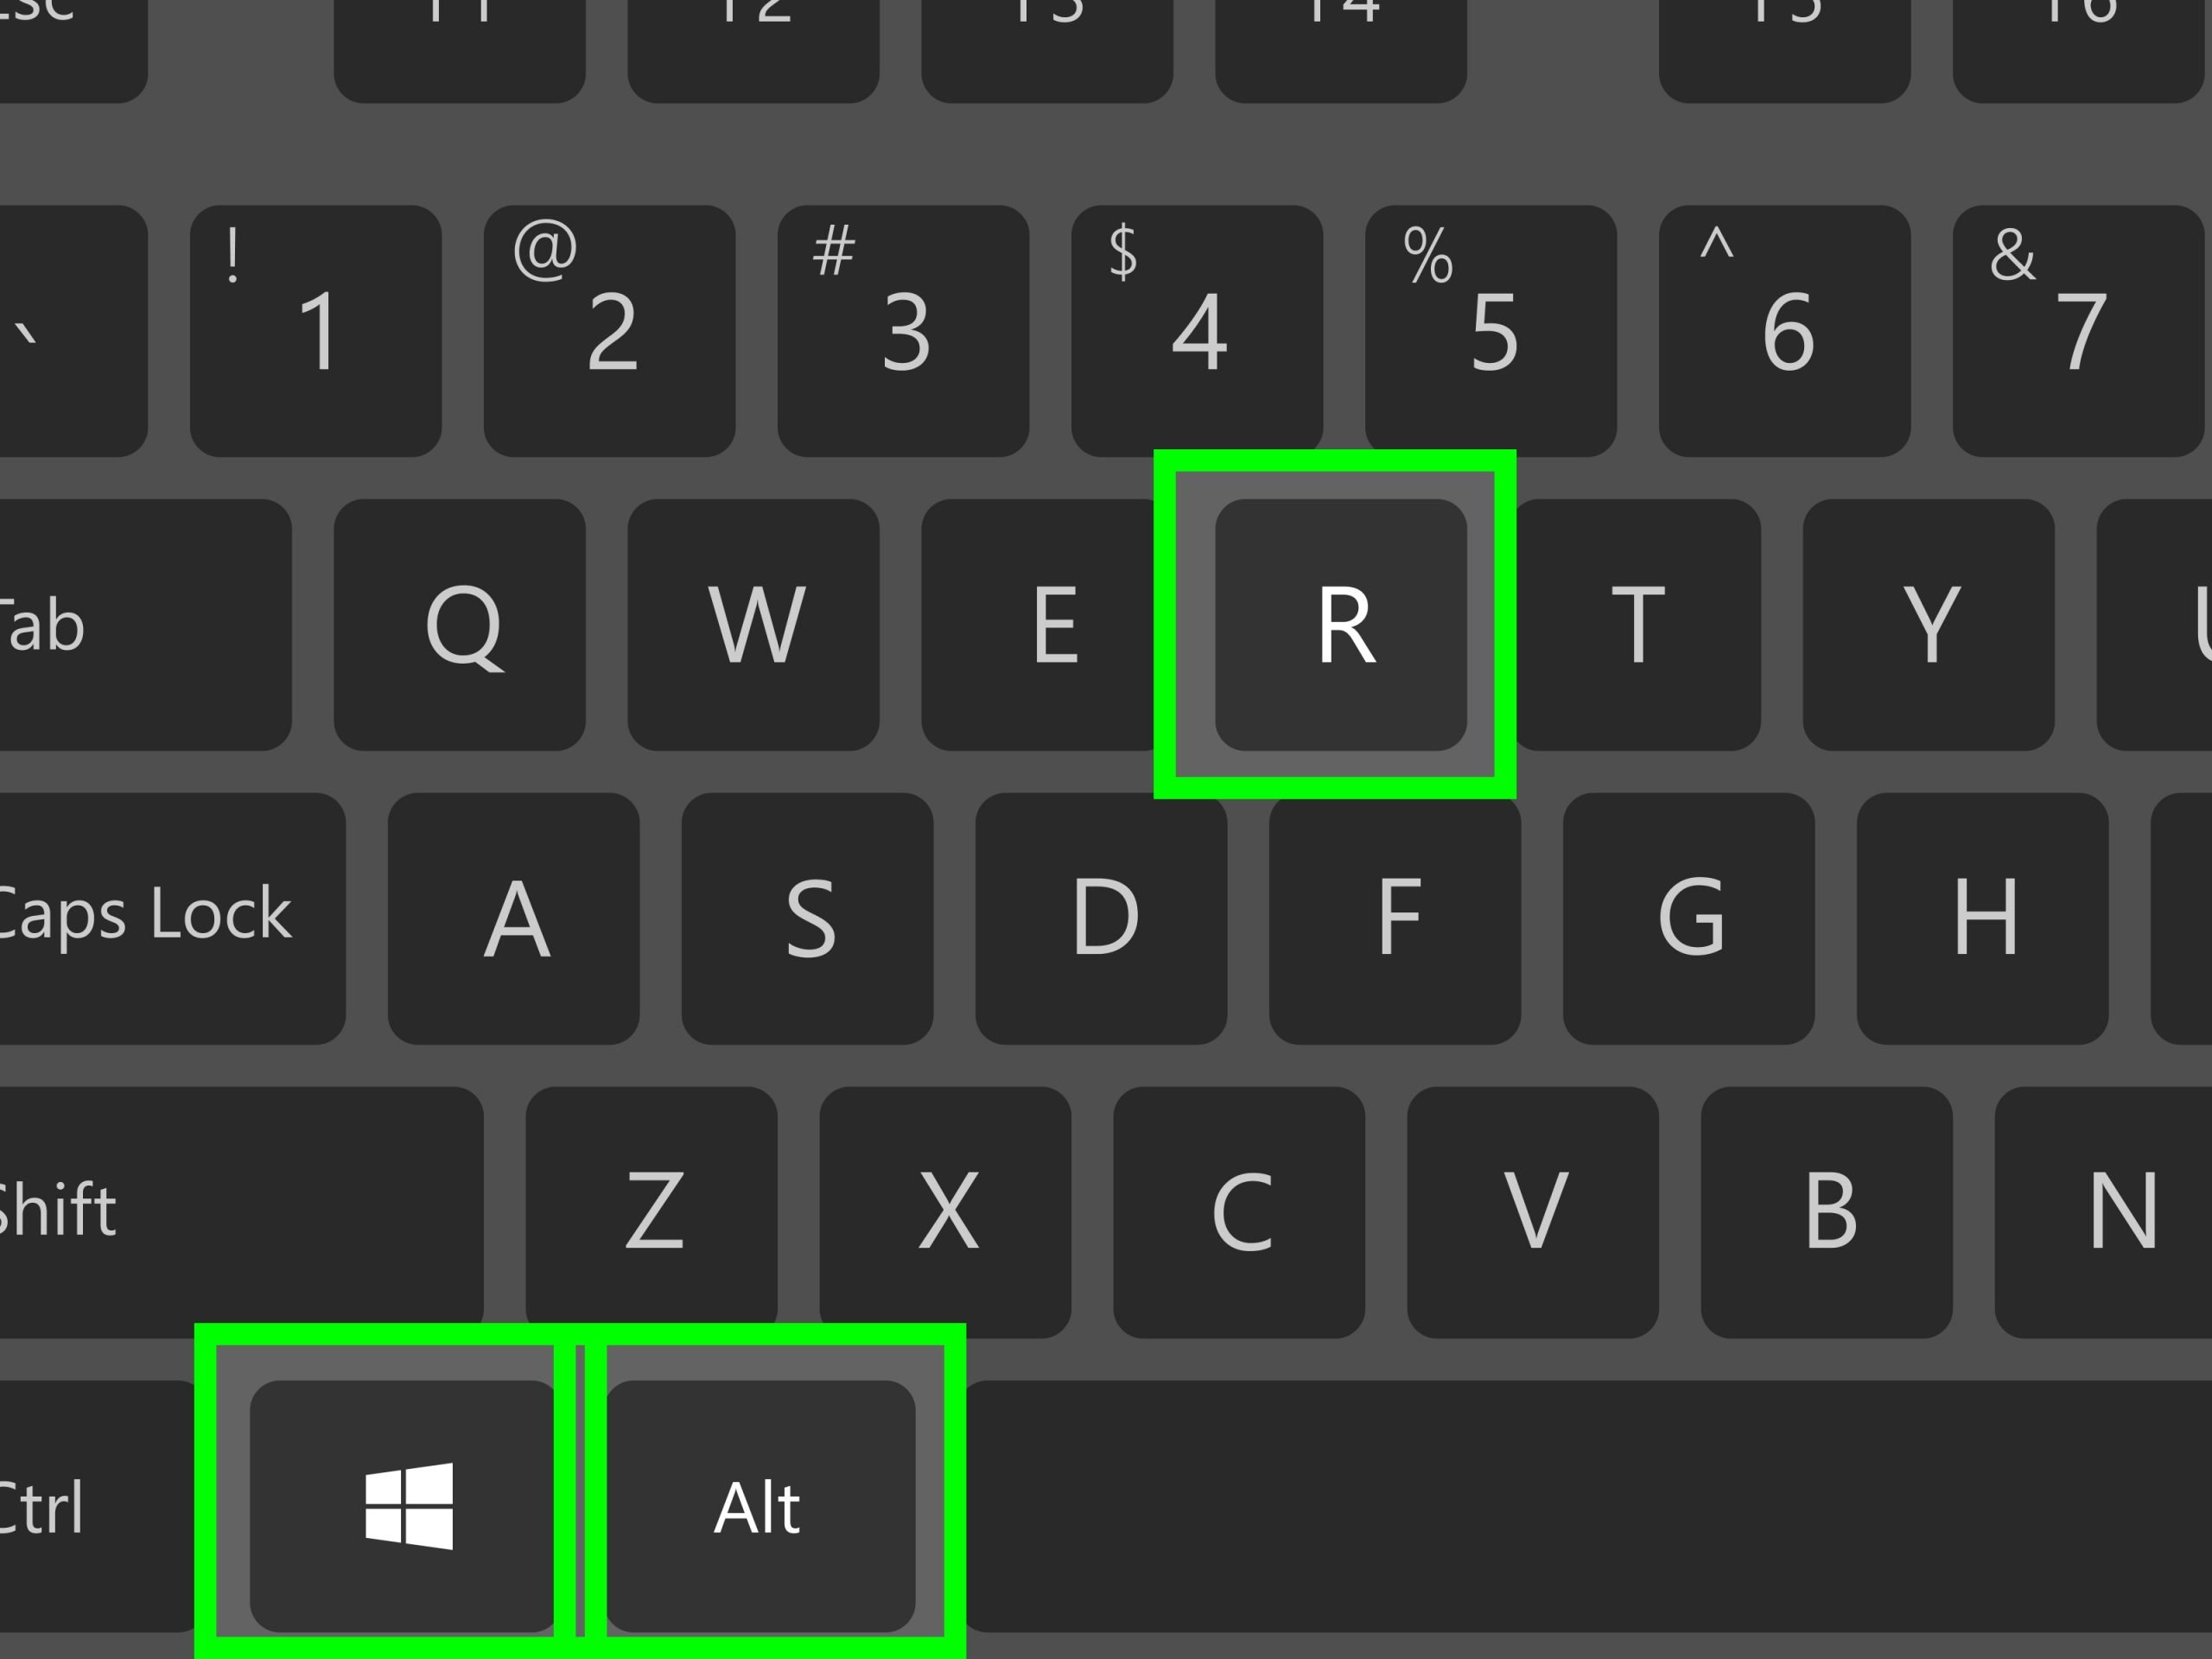
3. Windows Key + Shift + S: This keyboard shortcut is specific to Windows 10 and allows you to capture a portion of the screen using the Snip & Sketch tool. By pressing Windows Key + Shift + S, your screen will dim, and you can click and drag to select the area you want to capture. The captured screenshot will be saved to the clipboard and can be accessed using image editing or pasting tools.
4. Windows Key + PrtScn: This shortcut is also specific to Windows 10 and captures the entire screen, similar to the Print Screen key. However, unlike the Print Screen key, the Windows Key + PrtScn combination automatically saves the screenshot to your designated “Screenshots” folder within the Pictures directory.
Using keyboard shortcuts can significantly speed up the process of capturing screenshots on your Dell gaming laptop. Whether you need to capture the entire screen, an active window, or a specific area, these shortcuts provide a convenient and efficient way to save screenshots for later use or sharing.
Now that you are familiar with using keyboard shortcuts, let’s move on to explore different techniques for capturing specific areas of the screen.
Capturing the Whole Screen
If you want to capture the entire screen of your Dell gaming laptop, there are a few simple methods you can use. Here are three methods to capture the whole screen:
1. Print Screen (PrtScn) Key: Pressing the Print Screen key on your keyboard captures the entire screen and saves it to the clipboard. After capturing the screenshot, you can use image editing software or a word processing program to paste and save the screenshot.
2. Windows Key + PrtScn: This keyboard shortcut is specific to Windows and captures the whole screen, similar to the Print Screen key. However, unlike the Print Screen key, the Windows Key + PrtScn combination automatically saves the screenshot to the designated “Screenshots” folder within the Pictures directory.
3. Snipping Tool: If you prefer using the Snipping Tool, you can choose the “Full-screen Snip” option to capture the entire screen. Open the Snipping Tool, click on “New,” and then select “Full-screen Snip.” The screenshot will be captured, and you can annotate or save it using the available tools within the Snipping Tool.
By using these methods, you can easily capture the whole screen of your Dell gaming laptop. Depending on your preference and the tools available on your laptop, you can choose the method that works best for you in different situations.
Now that you know how to capture the entire screen, let’s move on to the next section, which covers capturing a specific window on your Dell gaming laptop.
Capturing a Specific Window
If you want to capture a specific window on your Dell gaming laptop, there are several methods you can use. Capturing a specific window is useful when you only need to capture the contents of a specific program or application. Here are three methods to capture a specific window:
1. Alt + Print Screen: This keyboard shortcut allows you to capture the currently active window. Pressing the Alt + Print Screen keys simultaneously captures the contents of the window and saves it to the clipboard. You can then paste the screenshot into an image editing program or a word processing document to save it.
2. Snipping Tool: The Snipping Tool provides another straightforward method to capture a specific window. Open the Snipping Tool, click on “New,” and then select “Window Snip.” Your screen will freeze, and you can click on the desired window to capture its contents. You can annotate or save the screenshot using the available tools within the Snipping Tool.
3. Snip & Sketch: If you’re using Windows 10, you can utilize the Snip & Sketch tool to capture a specific window. Press the Windows key + Shift + S to activate the tool. Your screen will dim, and you will be able to click and drag to select the desired window. The captured screenshot will be saved to the clipboard and can be accessed using image editing or pasting tools.
By using these methods, you can easily capture a specific window on your Dell gaming laptop. Whether you prefer keyboard shortcuts or dedicated tools like the Snipping Tool or Snip & Sketch, these options provide flexibility and convenience for capturing specific windows.
Now that you know how to capture a specific window, let’s move on to the next section, where we’ll explore how to capture a portion of the screen on your Dell gaming laptop.
Capturing a Portion of the Screen
If you want to capture a specific portion of the screen on your Dell gaming laptop, there are several methods you can use. Capturing a portion of the screen is valuable when you need to focus on a specific area or element. Here are three methods to capture a portion of the screen:
1. Snipping Tool: The Snipping Tool offers a simple and effective way to capture a portion of the screen. Open the Snipping Tool, click on “New,” and then select “Rectangular Snip” or “Free-form Snip.” For a rectangular snip, click and drag the cursor to define the capture area. For a free-form snip, draw a shape around the desired area. The captured screenshot will be displayed within the Snipping Tool, and you can annotate or save it using the available tools.
2. Snip & Sketch: If you’re using Windows 10, the Snip & Sketch tool provides another option to capture a portion of the screen. Press the Windows key + Shift + S to activate the tool. Your screen will dim, and you can click and drag to select the desired area. The captured screenshot will be saved to the clipboard and can be accessed using image editing or pasting tools.
3. Third-Party Screen Capture Software: There are numerous third-party screen capture software options available that offer additional features and customization options. These programs allow you to capture specific areas of the screen, annotate screenshots, and even record screen activity. Some popular options include Snagit, Greenshot, and Lightshot, among others.
By utilizing these methods, you can easily capture a portion of the screen on your Dell gaming laptop. Whether you prefer the built-in Snipping Tool or Snip & Sketch tool, or opt for third-party software, the ability to capture specific portions of the screen provides flexibility and precision in your screenshots.
Now that you know how to capture a portion of the screen, let’s move on to the next section, where we’ll cover saving and opening the screenshots on your Dell gaming laptop.
Saving and Opening the Screenshot
Once you have captured a screenshot on your Dell gaming laptop, it’s essential to know how to save and open it for future use. Saving and opening screenshots can be done easily using various methods. Here’s how you can save and open your screenshots:
1. Saving the Screenshot:
- Using the Snipping Tool: If you used the Snipping Tool to capture your screenshot, you can save it by clicking on “File” and selecting “Save As…”. Choose a location on your Dell gaming laptop where you want to save the screenshot and give it a meaningful file name.
- Using Keyboard Shortcuts: When using keyboard shortcuts like Print Screen (PrtScn) or Windows Key + PrtScn, the screenshots are automatically saved to your clipboard. To save them as an image file, open an image editing program, such as Paint or Photoshop, and press “Ctrl + V” to paste the screenshot. Then, go to “File” and select “Save As…” to choose a location and save the screenshot with a desired name.
- Using Third-Party Software: If you used third-party screen capture software, the process of saving will vary depending on the program. Generally, these tools offer options to save the captured screenshots. Check the software’s interface or documentation for instructions on how to save the screenshots effectively.
2. Opening the Screenshot:
- Using Image Viewer: Once the screenshot is saved, you can open it using the default image viewer on your Dell gaming laptop. Double-click on the saved screenshot file, and it will open in the default image viewer program. From there, you can view and edit the screenshot as needed.
- Using Image Editing Software: If you want to make further edits or enhancements to the screenshot, you can open it in an image editing software, such as Adobe Photoshop or GIMP. Open the desired software, go to “File,” select “Open,” and browse for the saved screenshot file.
By following these steps, you can easily save and open your screenshots on your Dell gaming laptop. Whether you prefer using the built-in tools like the Snipping Tool or utilizing third-party software, saving and opening screenshots enables you to access and edit them for various purposes.
Now that you know how to save and open screenshots, let’s conclude our exploration of capturing screenshots on your Dell gaming laptop.
Conclusion
Capturing screenshots on your Dell gaming laptop is a valuable skill that can enhance your productivity and improve your overall user experience. Whether you need to capture a memorable gaming moment, save important information, or share your screen with others, knowing how to take screenshots is essential.
In this article, we explored various methods to capture screenshots on your Dell gaming laptop. We discussed the use of the Windows Snipping Tool, which allows you to capture screenshots of any shape or size and annotate them if necessary. We also covered the convenience of using keyboard shortcuts to quickly capture screenshots without the need for additional applications.
We went over capturing the whole screen to capture everything displayed on your Dell gaming laptop, as well as capturing specific windows or portions of the screen for more focused screenshots. Additionally, we discussed how to save and open the screenshots for future use or editing.
By familiarizing yourself with these techniques, you now have the ability to effortlessly capture and save screenshots on your Dell gaming laptop. Whether you are a gamer, professional, or casual user, incorporating screenshots into your workflow can greatly enhance your productivity and communication.
Remember to regularly practice these methods and explore additional features provided by third-party screen capture software to find the approach that works best for your specific needs and preferences.
Now, armed with the knowledge of capturing screenshots on your Dell gaming laptop, go ahead and start capturing those special moments, preserving important information, and easily sharing your screen with others. Unlock the full potential of your Dell gaming laptop and elevate your digital experience with the power of screenshots.