Introduction
Do you receive important emails that you want to keep for safekeeping? Are you worried about the limited storage space in your email client? Saving emails to an external hard drive is an effective solution to preserve important messages and free up space in your inbox. Whether you want to archive personal correspondence, store important business communications, or simply declutter your email, this guide will walk you through the process step by step.
With the increasing reliance on digital communication, individuals and businesses alike need to find reliable methods to back up and store their emails. By saving emails to an external hard drive, you can create a secure backup and easily access your messages whenever needed. This method not only ensures the long-term preservation of important information, but it also provides a convenient way to organize your email archives.
In this guide, we will explain how to save emails to an external hard drive using commonly used email clients such as Microsoft Outlook, Thunderbird, and Apple Mail. Although the steps may vary slightly depending on the email client you use, the overall process remains similar across platforms.
It’s important to note that before proceeding with saving emails to an external hard drive, it is recommended to organize your emails into specific folders or categories. This will make it easier to select and export the emails you want to save, saving you time and effort.
By following the steps outlined in this guide, you can safely and effectively save your emails to an external hard drive without worrying about losing important information. So let’s get started and learn how to preserve your emails for the future!
Step 1: Connect the External Hard Drive to Your Computer
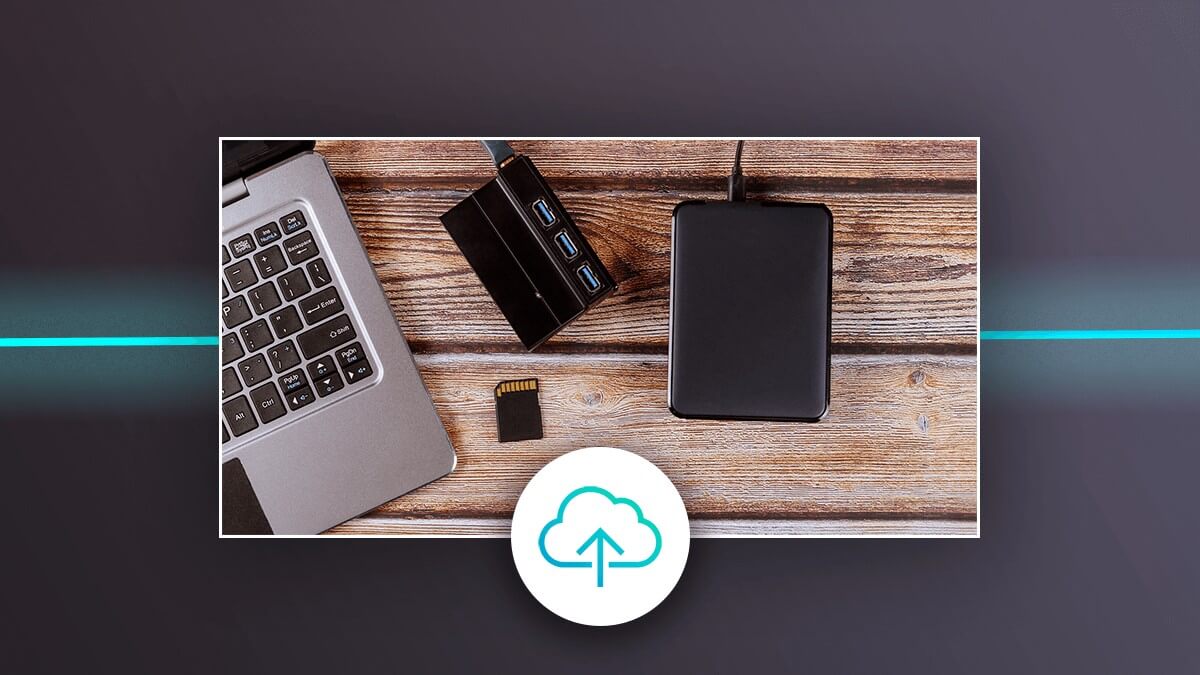
To begin saving your emails to an external hard drive, the first step is to connect the hard drive to your computer. This will allow you to transfer the emails from your email client to the external storage device.
Start by locating an available USB port on your computer. Most external hard drives utilize a USB connection, making it easy to plug in and use. Once you have identified the USB port, gently insert the USB cable into the port. Make sure the connection is secure and the cable is properly inserted.
Next, connect the other end of the USB cable to the external hard drive. Most external hard drives have a clearly marked port for the USB connection. Insert the cable into the appropriate port, ensuring a secure fit.
After connecting the external hard drive to your computer, give it a few seconds to be recognized by your operating system. Your computer should display a notification confirming that the device has been connected successfully. Depending on your operating system, you may also see the external hard drive appear as a new storage device in your file explorer.
It’s worth noting that some external hard drives require additional power sources. If your device has a separate power adapter, make sure to plug it into a power outlet to provide the necessary power. Refer to the manufacturer’s instructions for specific details on powering your external hard drive.
Once you have successfully connected the external hard drive to your computer, you are ready to move on to the next step and begin saving your emails. Remember to handle the external hard drive with care and avoid disconnecting it while the data transfer is in progress to prevent any potential data loss.
Step 2: Open Your Email Client
After connecting the external hard drive to your computer, the next step is to open your email client. Whether you use Microsoft Outlook, Thunderbird, Apple Mail, or any other email client, the process of saving emails to an external hard drive is similar.
Locate the email client icon on your desktop or in your system tray and double-click to open it. If you don’t have the email client installed, you can download and install it from the respective website or app store.
Once the email client is open, you will be prompted to provide your login credentials. Enter your email address and password to access your inbox and other email folders.
Once you are logged in, you will see your inbox, along with other folders such as Sent, Drafts, and Trash. Depending on your email client, the layout and organization of these folders may vary.
Take a moment to familiarize yourself with the email client’s interface and navigation options. Explore the various tabs, menus, and buttons to understand how to access different features and options.
It’s important to note that some email clients have different versions or editions, such as Microsoft Outlook 2010, 2013, or 2016. The steps to save emails may slightly vary between these versions. However, the general process remains the same.
Now that your email client is open and you are ready to proceed, let’s move on to the next step to export the emails as a .PST file and save them to your external hard drive.
Step 3: Export Emails as .PST File
Exporting your emails as a .PST file is a common method to save and transfer email data. A .PST file is a personal storage file that contains your emails, folders, and other data from your email client. This file can be easily imported back into the email client when needed.
The process of exporting emails as a .PST file may vary depending on the email client you are using. Here are the general steps to follow:
- Open your email client and navigate to the “File” or “Menu” tab, where you will usually find the option to manage or export your email data.
- Look for an option similar to “Export” or “Export Emails” and click on it. In some cases, you may need to go to the “Settings” or “Preferences” section to find the export options.
- Choose the option to export as a .PST file. This may be explicitly mentioned or you may need to choose a file format that supports email archiving and select the .PST option.
- Next, you will be prompted to select the specific emails or folders you want to export. You can choose to export individual folders or the entire mailbox, depending on your requirements.
- Review the export options and settings. Make sure to double-check any additional preferences such as including subfolders or preserving the folder structure.
- Choose the destination folder for the exported .PST file. This is where you will save the file on your external hard drive.
- Click on the “Export” or “Start” button to begin the export process. Depending on the size of your mailbox and the number of emails being exported, this process may take some time.
- Once the export is complete, you will receive a notification confirming the success of the operation. The .PST file containing your emails will be saved to the specified destination folder on your external hard drive.
It’s important to note that the options and steps may differ slightly based on your email client. If you are unsure about any specific step or option, refer to the official documentation or support resources provided by the email client developer.
Now that you have successfully exported your emails as a .PST file, let’s proceed to the next step to select the emails you want to save.
Step 4: Select the Emails You Want to Save
Now that you have exported your emails as a .PST file, the next step is to select the specific emails you want to save to your external hard drive. This allows you to filter out any unnecessary or irrelevant emails and only retain the ones that are important to you.
Here are the general steps to follow in most email clients:
- Open the .PST file that you exported in the previous step. This can usually be done by going to the “File” or “Menu” tab and choosing the option to open or import a file. Look for the .PST file you saved on your external hard drive and select it.
- Once the .PST file is opened, you will see the imported emails and folders in a separate section or in a separate window within your email client. This allows you to view and manage the emails independently from your main mailbox.
- Take some time to navigate through the imported emails and folders. You can expand or collapse folders to view the emails contained within.
- Select the emails you want to save to your external hard drive. You can do this by using keyboard shortcuts, selecting multiple emails at once by holding down the Ctrl or Shift key, or selecting them individually.
- If you want to save entire folders, you can select the folder and choose the option to save or export it as a separate file. This can be useful if you want to maintain the folder structure and organization in your exported emails.
- After selecting the emails or folders you want to save, go to the “File” or “Menu” tab and look for the option to save or export the selected items.
- Choose the location on your external hard drive where you want to save the selected emails. This will be the folder where you will store the emails for future retrieval.
- Click on the “Save” or “Export” button to initiate the process. Depending on the number of selected emails and their size, the saving process may take some time.
- Once the saving process is complete, you will receive a confirmation message indicating the success of the operation. The selected emails will now be saved to the specified location on your external hard drive.
Remember to organize your emails into logical folders or categories before exporting and saving them. This will make it easier for you to select and save specific groups of emails, making the process more efficient.
Now that you have selected and saved the emails you want, let’s move on to the next step to choose the destination folder in your external hard drive.
Step 5: Choose the Destination Folder in the External Hard Drive
Once you have selected the specific emails you want to save, the next step is to choose the destination folder on your external hard drive where you will store these emails. This will ensure that your saved emails are organized and easily accessible for future reference.
Follow these steps to choose the destination folder:
- Open your file explorer or finder on your computer. This can usually be done by clicking on the appropriate icon in your taskbar or dock.
- Navigate to your external hard drive by selecting it from the list of available storage devices. It is typically labeled with the drive letter (e.g., E: or F:).
- Create a new folder on your external hard drive for organizing your saved emails. Right-click anywhere in the external hard drive window and select “New Folder” from the context menu. Give the folder a descriptive name that represents the content of the emails you are saving.
- Double-click on the newly created folder to open it.
- Now, return to your email client and complete the saving process as described in the previous steps. When prompted to choose the destination folder, navigate to the folder you just created on your external hard drive.
- Select the folder and click on the “Save” or “Export” button to initiate the saving process. The selected emails will now be saved to the specified folder on your external hard drive.
It’s important to choose a destination folder that you can easily remember and locate in the future. Consider using a clear and descriptive naming convention for your folders to make it easier to find specific emails when needed.
In addition, you may want to create subfolders within your main destination folder to further organize your saved emails. This can be helpful if you have multiple categories or projects that you want to separate.
By choosing the right destination folder in your external hard drive, you ensure that your saved emails are stored in a logical and easily accessible location. Now that you have selected the folder, let’s move on to the next step and start the export process.
Step 6: Start the Export Process
Now that you have chosen the destination folder for your saved emails on your external hard drive, it’s time to initiate the export process. This step will transfer the selected emails from your email client to the designated folder in the external hard drive.
Follow these steps to start the export process:
- Return to your email client and make sure you have the selected emails or folders ready for export as discussed in the previous steps.
- Double-check that your external hard drive is connected to your computer and recognized by your operating system.
- Navigate to the “File” or “Menu” tab in your email client and look for the option to save, export, or transfer your emails. This option may be labeled differently depending on the email client you are using.
- Click on the appropriate option to start the export process. A dialog box or wizard will appear, guiding you through the necessary steps.
- Review the export settings and preferences. Make sure the destination folder on your external hard drive is correctly selected.
- Confirm or adjust any additional options such as file format or file naming conventions.
- Click on the “Export” or “Start” button to initiate the export process. The email client will begin transferring the selected emails to the specified destination folder on your external hard drive.
- Depending on the number and size of the emails being exported, the process may take some time. Be patient and avoid interrupting the export process to ensure successful completion.
- Once the export process is finished, you will receive a notification or confirmation message from your email client, indicating the completion of the export. You can now close the export window or dialog box.
Double-check the designated folder on your external hard drive to ensure that the exported emails have been successfully transferred. Verify that the folder contains the expected emails and that they are intact and accessible. This will give you peace of mind knowing that your emails are stored safely on your external hard drive.
Congratulations! You have completed the export process and successfully saved your emails to an external hard drive. Now you can easily access and retrieve your important emails whenever you need them.
Step 7: Verify the Exported Emails
After completing the export process and saving your emails to the external hard drive, it is crucial to verify that the exported emails are intact and accessible. This step ensures that your important emails have been successfully transferred and are ready to be retrieved whenever needed.
Follow these steps to verify the exported emails:
- Navigate to the destination folder on your external hard drive where you saved the exported emails.
- Open the folder and review the contents. You should see the exported emails in the format specified during the export process (such as .PST or other supported formats).
- Double-click on one of the exported emails to open it and ensure that the message, attachments, and any other relevant content are displayed correctly.
- Verify the folder structure and organization of the exported emails. If you had created subfolders within your main destination folder, check that the emails are properly organized in the respective subfolders.
- Take a moment to browse through a few more emails to ensure that all the exported emails are intact and accessible.
- If you had exported specific folders, make sure that their contents match your expectations.
- If any issues or errors are encountered during the verification process, double-check the export settings and repeat the previous steps. It is important to ensure the accuracy and completeness of your saved emails.
Verification is an essential step to confirm the success of the export process and to provide peace of mind knowing that your important emails are securely stored on your external hard drive. By taking the time to verify the exported emails, you can avoid any future surprises or difficulties in retrieving the saved data.
Congratulations! You have successfully exported and verified your emails on your external hard drive. Now you can confidently rely on the backup you have created, knowing that your valuable email data is preserved and easily accessible whenever you need it.
Conclusion
Saving emails to an external hard drive is a reliable and effective method to preserve important messages, free up inbox space, and create a secure backup of your email data. By following the steps outlined in this guide, you can successfully transfer and store your emails on an external hard drive, ensuring their long-term accessibility and protection.
Throughout this process, we discussed the importance of connecting the external hard drive to your computer and opening your email client. We explored how to export emails as a .PST file, select the specific emails you want to save, and choose the destination folder on your external hard drive. Additionally, we provided guidance on how to initiate the export process and verify the exported emails to ensure their accuracy and completeness.
Remember to handle your external hard drive with care and avoid disconnecting it during the data transfer process to prevent any potential data loss. Regularly backup your emails to maintain an up-to-date and reliable archive. It is also helpful to organize your emails into specific folders or categories before exporting them, as this makes the selection and saving process more efficient.
By saving your emails to an external hard drive, you can easily access and retrieve your important messages, even if you encounter issues with your email client or internet connectivity. Storing your emails on an external device also frees up storage space in your email client, ensuring its optimal performance and preventing any potential mailbox size limitations.
As technology continues to advance, it is increasingly important to have a reliable method to preserve and store digital data. Saving emails to an external hard drive offers a practical and secure solution for both personal and professional email management.
We hope that this guide has provided valuable insights and guidance on how to save emails to an external hard drive. By following these steps, you can ensure the safekeeping of your important emails and enjoy the benefits of an organized and efficient email archive.
Take the necessary steps today to safeguard your email data by saving it to an external hard drive. With this backup in place, you can have peace of mind knowing that your valuable messages will be preserved for future reference and retrieval.


