Introduction
Welcome to this practical guide on how to copy all Outlook emails to an external hard drive. Whether you’re looking to create a backup of your important emails or simply want to free up space on your computer, copying your Outlook emails to an external hard drive is a smart decision.
Outlook stores your emails, contacts, calendars, and other data in a file called a Personal Storage Table (PST) file. By exporting this file and transferring it to an external hard drive, you can have a secure and portable backup of your emails that can be easily accessed whenever needed.
Backing up your Outlook emails to an external hard drive also provides peace of mind in case of computer crashes or accidental deletion of emails. You can rest assured knowing that all your important communications are safely stored on a separate device.
In this step-by-step guide, we will walk you through the process of copying all your Outlook emails to an external hard drive. Whether you’re using Outlook on Windows or Mac, the steps outlined in this guide are applicable to both platforms.
By the end of this guide, you will have a complete backup of your Outlook emails on your external hard drive, ensuring the safety and accessibility of your important data. Let’s get started!
Step 1: Create a Folder on the External Hard Drive
The first step in copying your Outlook emails to an external hard drive is to create a folder on the external drive where you will store the backup files. This folder will act as the destination for the exported PST file.
Here’s how you can create a folder on your external hard drive:
- Connect your external hard drive to your computer using the appropriate cable or adapter.
- Once connected, open the File Explorer (Windows) or Finder (Mac) on your computer.
- Navigate to your external hard drive. It is usually labeled with a specific name or letter.
- Right-click (Windows) or Control-click (Mac) on an empty space in the external hard drive window.
- From the context menu, select “New Folder” or “Create New Folder.”
- Give the folder a descriptive name, such as “Outlook Backup” or “Email Backup.”
Once you have created the folder on your external hard drive, you are ready to proceed to the next step of exporting your Outlook emails.
Remember, it’s important to choose a folder name that is easy to identify and reflects its purpose as an Outlook email backup location. This will help you locate the folder quickly in case you need to restore your emails or access them from another device.
Now that you have created the folder on your external hard drive, you are one step closer to ensuring the safety and accessibility of your Outlook emails. In the next step, we will export your Outlook emails as a PST file, ready to be copied to the external hard drive.
Step 2: Export Outlook Emails as a PST File
In this step, we will guide you through the process of exporting your Outlook emails as a PST (Personal Storage Table) file. The PST file contains all your emails, contacts, calendars, and other data, and it will be the file that you will copy to your external hard drive.
Here’s how you can export your Outlook emails as a PST file:
- Open Outlook on your computer.
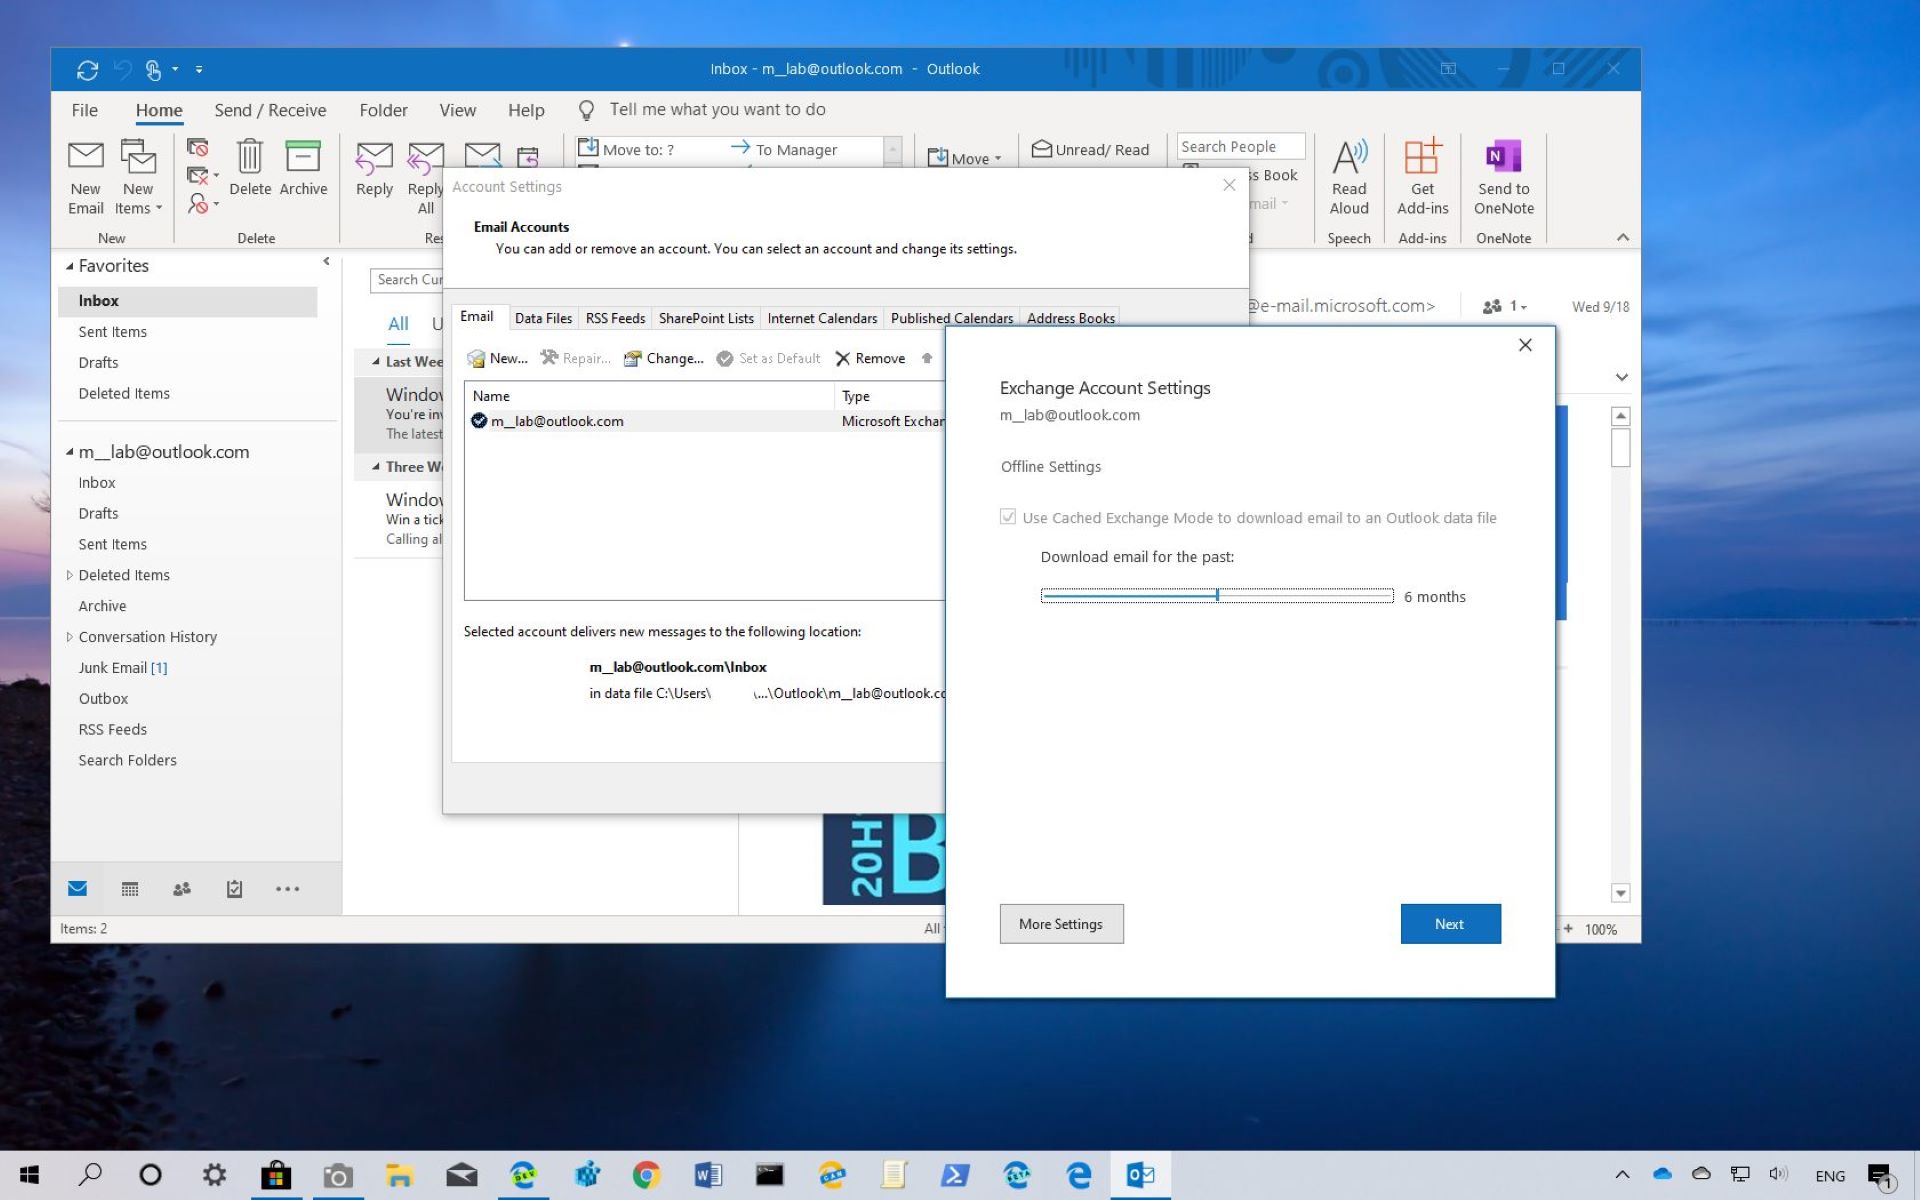
- Click on the “File” tab at the top-left corner of the Outlook window.
- In the File menu, select “Open & Export” or “Open” (depending on your Outlook version).
- Choose “Import/Export” from the options.
- In the Import and Export Wizard window, select “Export to a file” and click “Next”.
- Select “Outlook Data File (.pst)” as the file type and click “Next”.
- Select the folder you want to export. If you want to export all your emails, select the top-level folder like “Inbox” or your email account name.
- Choose a location to save the PST file. Click on the “Browse” button and navigate to the folder you created on your external hard drive in Step 1.
- Give the PST file a name and click “Finish” to begin the export process.
Outlook will start exporting your selected emails and other data to the specified location on your computer. The time it takes to complete the export process depends on the size of your mailbox and the speed of your computer.
Once the export is finished, you will have a PST file containing all your Outlook emails and data. This file is now ready to be copied to your external hard drive. In the next step, we will guide you on how to locate and copy the PST file to your external hard drive.
By following these instructions, you are taking proactive steps to safeguard your Outlook emails and ensure their accessibility in case of any unforeseen events. Let’s move on to the next step!
Step 3: Locate and Copy the PST File to the External Hard Drive
In this step, we will explain how to locate and copy the PST (Personal Storage Table) file, which contains all your Outlook emails, to the external hard drive you connected earlier. By completing this step, you will ensure that your Outlook email backup is securely stored on a separate device.
Here’s how to locate and copy the PST file to the external hard drive:
- Open the File Explorer (Windows) or Finder (Mac) on your computer.
- Navigate to the location where Outlook stores its data files. The default location is typically in a folder named “Documents” or “Outlook Files.”
- Look for the PST file that you exported in Step 2. The file name will be the one you specified during the export process.
- Right-click (Windows) or Control-click (Mac) on the PST file.
- Select “Copy” from the context menu that appears.
- Now, go back to the File Explorer or Finder and locate the external hard drive.
- Open the folder you created on the external hard drive in Step 1.
- Right-click (Windows) or Control-click (Mac) on the folder and select “Paste” to copy the PST file to the external hard drive.
The copying process may take some time, depending on the size of the PST file and the speed of your computer and external hard drive. Once the copy is complete, you will have successfully transferred your Outlook emails to the external hard drive.
It is important to note that the PST file contains all your Outlook data, not just emails. This includes contacts, calendars, and other items. By copying the PST file to the external hard drive, you are ensuring the safety and accessibility of all your Outlook data in one centralized location.
In the final step, we will guide you on how to verify the copy process to ensure that your Outlook emails are successfully backed up on the external hard drive. Let’s move on!
Step 4: Verify the Copy Process
After copying the PST (Personal Storage Table) file to your external hard drive, it is important to verify that the copy process was successful. Verifying the copy process gives you the assurance that your Outlook emails are securely backed up and ready to be accessed whenever you need them.
Here’s how you can verify the copy process:
- Open the File Explorer (Windows) or Finder (Mac) on your computer.
- Navigate to the folder on your external hard drive where you copied the PST file in Step 3.
- Locate the PST file and verify that it has the same name and file size as the original file in your Outlook data folder.
- Double-click on the PST file to open it in Outlook. If Outlook recognizes the file and allows you to access your emails and other data, it means the copy process was successful.
- Browse through your Outlook folders, check your emails, contacts, calendars, and other data to ensure everything is intact.
If you can access and view your emails and data without any issues, you can be confident that the copy process from the Outlook data folder to the external hard drive was successful. Your Outlook emails are now safely stored on the external hard drive.
It is recommended to periodically repeat the verification process to ensure the ongoing integrity of your Outlook email backup. Regularly checking the PST file on the external hard drive helps you identify any potential issues and take appropriate measures, such as creating a new backup or resolving any file corruption.
By successfully verifying the copy process, you have completed the final step in the process of copying your Outlook emails to an external hard drive. You now have the peace of mind knowing that your important emails are securely backed up and easily accessible.
Congratulations! You have successfully copied all your Outlook emails to an external hard drive. By following these steps, you have taken proactive measures to protect and preserve your valuable email communications. In the event of any data loss or system failure, you can rely on your backup to restore your emails and continue your productivity seamlessly.
Remember to keep your external hard drive in a safe place and consider creating regular backups to ensure the most up-to-date copies of your Outlook emails are always available. Happy emailing!
Conclusion
Copying your Outlook emails to an external hard drive is a wise decision to safeguard your valuable communication and ensure easy accessibility. By following the steps outlined in this guide, you have successfully created a backup of your Outlook emails and stored them on a separate device.
We started by creating a folder on the external hard drive, providing a dedicated location for your Outlook email backup. Then, we walked you through the process of exporting your Outlook emails as a PST file, which contains all your data. Once the PST file was exported, we guided you on how to locate and copy it to the external hard drive.
Verifying the copy process was the final step, allowing you to ensure the integrity and accessibility of your Outlook emails on the external hard drive. By following these steps, you have taken proactive measures to protect your communications and can have peace of mind knowing your emails are safely stored in a separate location.
Remember to periodically verify the backup on the external hard drive and consider creating regular backups to maintain the most up-to-date copy of your Outlook emails. Backup practices ensure that you can easily recover your data in the event of any unforeseen circumstances.
With your Outlook emails safely backed up on an external hard drive, you can confidently manage your email communications without the fear of losing important information. Whether you need to restore emails after a computer crash or access them from another device, your backup on the external hard drive will have you covered.
Thank you for following this guide on how to copy all Outlook emails to an external hard drive. We hope this information has been valuable to you, allowing you to protect your important communications and enhance your overall data management practices.
Happy email backup and safekeeping!