Introduction
Downloading files from Dropbox to your computer is a relatively straightforward process. However, if you want to save those files directly to an external hard drive, there are a few additional steps involved. In this article, we will guide you through the process of downloading files from Dropbox to an external hard drive, ensuring that your important data is safely stored outside of your computer’s internal storage.
Using an external hard drive for storing your files has several advantages. It provides additional storage space, allows for easy transport of large amounts of data, and serves as a backup solution in case your computer’s internal storage fails. By downloading files from Dropbox directly to your external hard drive, you can conveniently access them whenever necessary without taking up space on your computer’s hard drive.
Whether you need to transfer important work documents, personal photos and videos, or any other type of file, this guide will walk you through the process step-by-step. All you need is a computer, an external hard drive, and an active Dropbox account.
Before we begin, ensure that your computer is connected to the internet and that your external hard drive is properly connected and recognized by your computer. Having these prerequisites in place will allow for a smooth and efficient download process.
Now, let’s dive into the step-by-step instructions for downloading files from Dropbox to your external hard drive.
Step 1: Connect your external hard drive to your computer
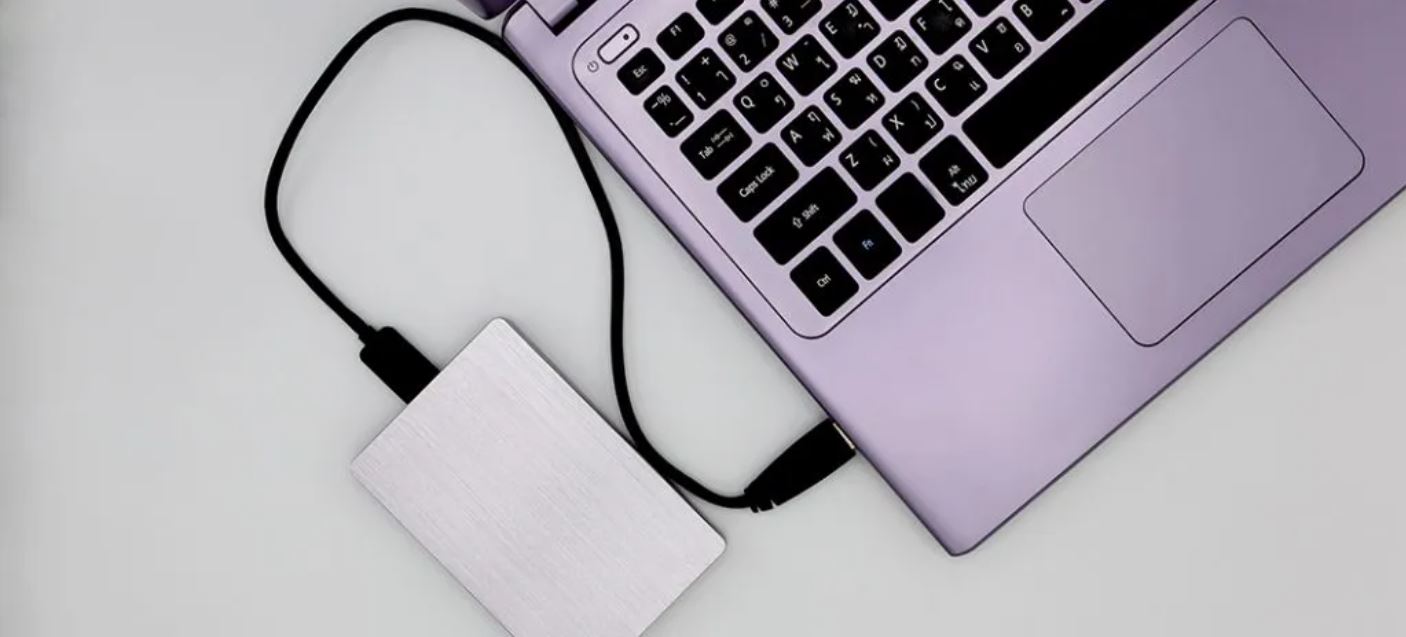
The first step in downloading files from Dropbox to your external hard drive is to ensure that the hard drive is properly connected to your computer. Connect one end of the USB cable provided with your external hard drive to the appropriate port on your computer and the other end to the external hard drive itself. Make sure the connection is secure.
If your external hard drive requires a power source, connect it to a power outlet using the provided power cable. Once connected, turn on the external hard drive and wait for your computer to recognize it. Typically, you will hear a confirmation sound or see a notification indicating that the external hard drive has been successfully connected.
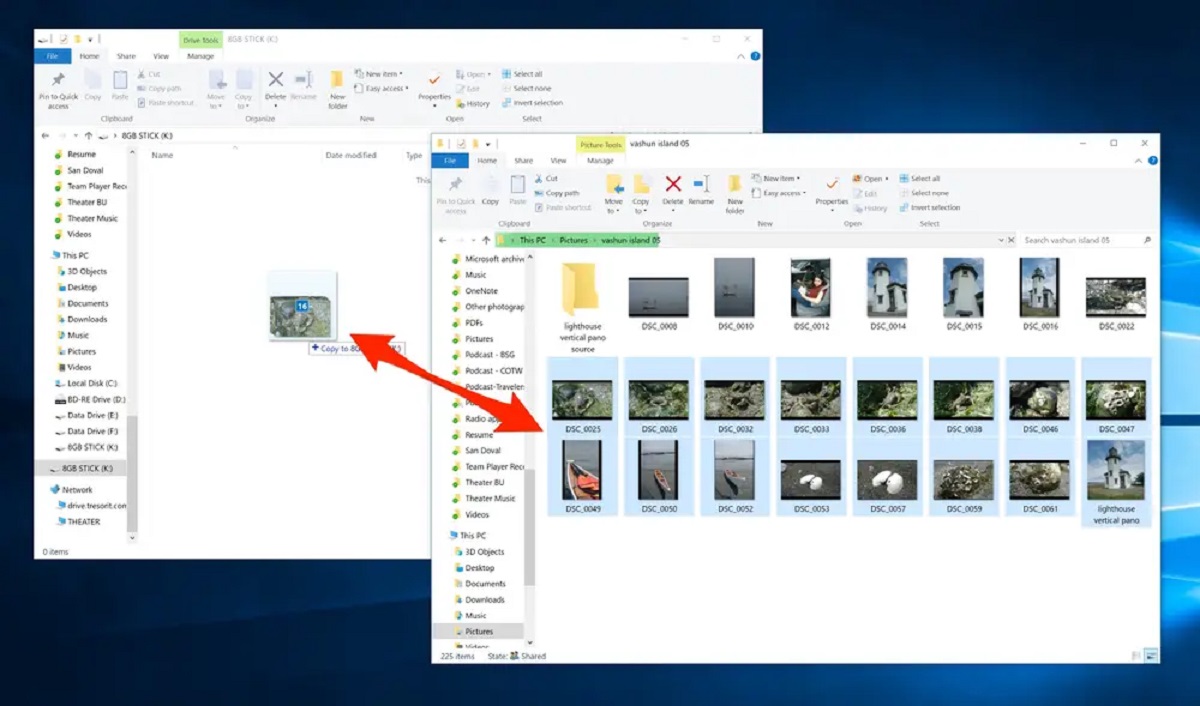
It is important to note that different computers and operating systems may have variations in the recognition process. In most cases, you will find the external hard drive listed as a new device in the “File Explorer” on Windows or on the desktop on macOS. Take a moment to familiarize yourself with the location where your computer recognizes the external hard drive.
Once you have successfully connected your external hard drive and your computer recognizes it, you are ready to proceed to the next step.
Step 2: Sign in to your Dropbox account
Before you can start downloading files from Dropbox to your external hard drive, you need to sign in to your Dropbox account. Open your preferred web browser and navigate to the Dropbox website (www.dropbox.com).
If you already have a Dropbox account, enter your email address and password in the designated fields. Click on the “Sign in” button to access your account. If you don’t have a Dropbox account, you will need to create one by clicking on the “Sign up for free” button and following the prompts to create an account.
Once signed in, you will be taken to your Dropbox dashboard. Here, you can view all the files and folders stored in your Dropbox account. Take a moment to ensure that you have the necessary permissions to access and download the files you need.
In addition to the web version of Dropbox, you can also sign in using the Dropbox desktop application. If you have the application installed on your computer, simply open it and sign in using your email address and password. The desktop application provides a seamless experience and allows for easier file management.
With your Dropbox account signed in and accessible, you are now ready to move on to the next step: selecting the files or folders you want to download.
Step 3: Select the files or folders you want to download
Once you have successfully signed in to your Dropbox account, it’s time to select the specific files or folders you want to download to your external hard drive. Dropbox provides a user-friendly interface that allows you to easily navigate and locate your desired files.
To begin, browse through the files and folders in your Dropbox account. You can use the search bar at the top of the page to quickly find specific files or folders by name. Alternatively, you can manually navigate through your folders by clicking on the folders and subfolders displayed on the screen.
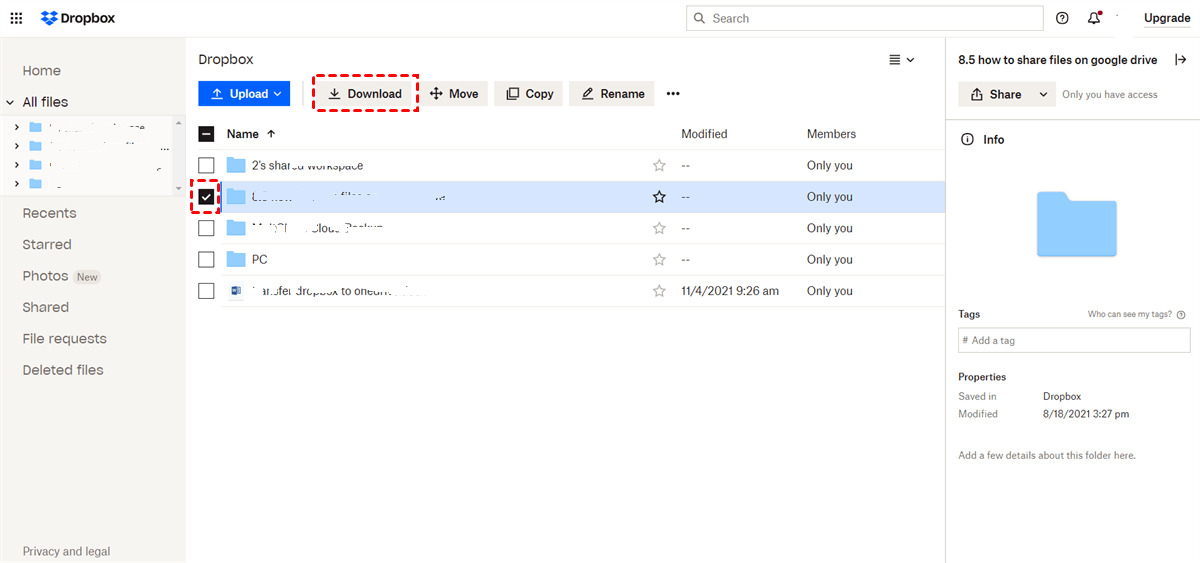
When you come across a file or folder that you want to download to your external hard drive, simply click on the checkbox next to it. This will mark the file or folder for download. If you want to select multiple files or folders, you can hold down the Ctrl (Windows) or Command (Mac) key while clicking on each item.
If you have a large number of files and folders to download, you can save time by selecting an entire folder. By selecting a folder, all the files and subfolders within that folder will be automatically included in the download.
Once you have finished selecting the files or folders you want to download, proceed to the next step: choosing the external hard drive as your download destination.
Step 4: Choose the external hard drive as your download destination
After selecting the files or folders you want to download from Dropbox, it’s time to choose the external hard drive as the destination for your downloads. This ensures that the files are saved directly to your external storage rather than your computer’s internal storage.
To choose the external hard drive as your download destination, you will need to specify the folder or location on the external hard drive where you want the files to be saved. Here’s how to do it:
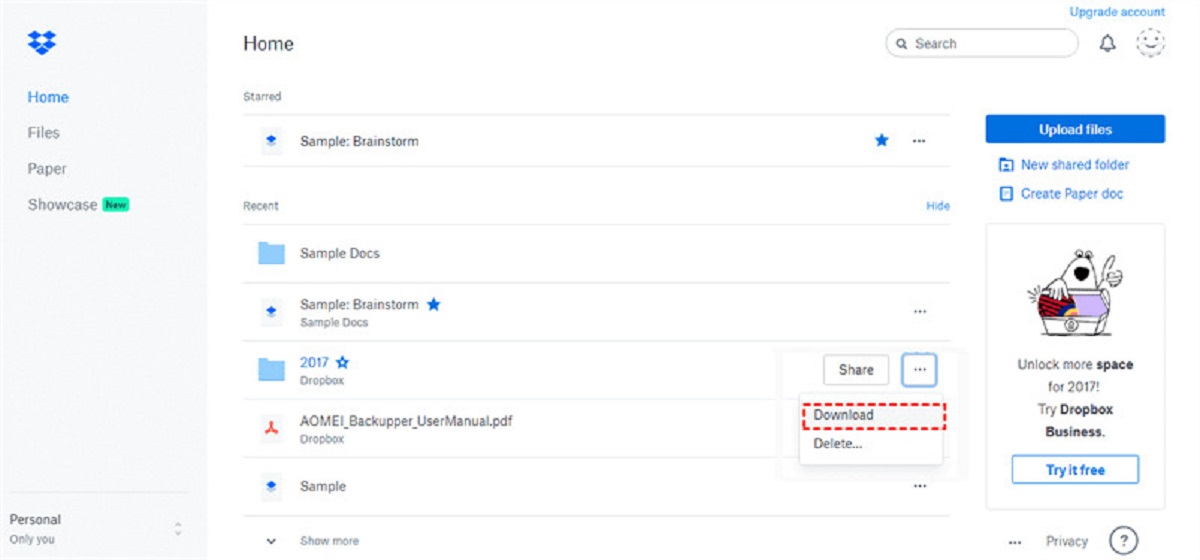
- On the Dropbox website, click on the “Download” button or right-click on the selected files or folders and choose the “Download” option.
- A dialog box will appear asking you to select the location to save the downloaded files. Browse through your computer’s directory and locate the external hard drive.
- Click on the external hard drive to select it as the destination for your downloads. You may need to navigate to the specific folder on the external hard drive where you want to save the files.
- Once you have selected the external hard drive and specified the desired download location, click on the “Choose” or “Save” button to confirm your selection.
By choosing the external hard drive as your download destination, Dropbox will automatically save the selected files or folders to the specified location on your external storage. It’s important to ensure that you have enough available space on your external hard drive to accommodate the downloaded files.
With the download destination set, you are now ready to initiate the download process. Proceed to the next step to start downloading the files from Dropbox to your external hard drive.
Step 5: Start the download process
Once you have chosen the external hard drive as the download destination for your files from Dropbox, it’s time to initiate the download process. This will begin transferring the selected files or folders from your Dropbox account to your external hard drive.
To start the download process, follow these steps:
- On the Dropbox website, click on the “Download” button or right-click on the selected files or folders and choose the “Download” option.
- A progress bar or indicator will appear on your screen, showing the status of the download. The time it takes to complete the download will depend on various factors, such as the size of the files and your internet connection speed.
- During the download process, it’s advised to avoid interrupting or closing the browser tab or window. Doing so may halt or disrupt the download, requiring you to start the process over.
Alternatively, if you prefer to use the Dropbox desktop application, you can initiate the download process from there. Simply navigate to the files or folders you want to download, right-click on them, and choose the “Download” option. The Dropbox application will handle the download and transfer the files to the specified location on your external hard drive.
As the download progresses, you can monitor the status of the transfer to get an estimate of how much time is remaining. Once the download is complete, you will be notified or the progress indicator will reach 100%.
With the download process underway, all you need to do now is wait for it to finish. Once completed, you will have successfully transferred the selected files or folders from Dropbox to your external hard drive.
Step 6: Wait for the download to complete
After starting the download process of your files from Dropbox to your external hard drive, you will need to be patient and wait for the transfer to complete. The length of time it takes for the download to finish will depend on several factors, including the size of the files, your internet connection speed, and the performance of your computer.
During the download process, it is important to refrain from interrupting or closing the browser tab or window. Doing so may halt or disrupt the download, requiring you to restart the process from the beginning.
To ensure a smooth and uninterrupted download, consider the following tips:
- Make sure that your computer is connected to a stable and reliable internet connection. A slow or intermittent connection may result in delays or incomplete file transfers.
- Avoid running other bandwidth-intensive activities, such as streaming videos or downloading large files, while the Dropbox download is in progress. This will help maintain sufficient bandwidth for the download process.
- Keep an eye on the progress indicator or status bar provided by Dropbox. This will give you an estimate of how much time is remaining for the download to complete.
While waiting for the download to finish, you can continue with other tasks on your computer or take a break. It is essential to exercise patience and allow the process to run its course.
Once the download is complete, you will be notified or the progress indicator will reach 100%. At this point, you can proceed to the final step—safely disconnecting your external hard drive.
Step 7: Safely disconnect your external hard drive
After the download process from Dropbox to your external hard drive is complete, it is important to properly disconnect your external hard drive from your computer to avoid any data loss or damage to your files.
Follow these steps to safely disconnect your external hard drive:
- In the taskbar (Windows) or menu bar (Mac), look for the USB icon or the external hard drive icon.
- Click on the icon to display a list of connected devices.
- Locate your external hard drive in the list and click on it.
- A context menu will appear with options related to your external hard drive.
- Choose the option to safely eject or safely remove your external hard drive. This option may be called “Eject,” “Safely Remove,” or something similar.
- Wait for the notification that it is safe to disconnect the external hard drive, or until the icon representing your external hard drive disappears from the list of connected devices.
- Once you have received confirmation that it is safe to do so, physically unplug the USB cable or power cable connecting the external hard drive to your computer.
It is important to follow these steps to ensure that all file transfers and write operations to the external hard drive are completed and that no data is lost or corrupted.
By safely disconnecting your external hard drive, you minimize the risk of data loss and help prolong the life of the device. Additionally, it allows you to safely transport or store your external hard drive and use it on other computers or devices as needed.
With your external hard drive now safely disconnected from your computer, you have successfully completed the process of downloading files from Dropbox to your external hard drive.
Congratulations! You can now enjoy accessing and utilizing your files directly from your external hard drive with ease and convenience.
Conclusion
Downloading files from Dropbox to an external hard drive provides a convenient and efficient way to store and access your important data. By following the step-by-step instructions outlined in this guide, you can easily transfer files from your Dropbox account directly to your external hard drive.
Remember, the process involves connecting your external hard drive to your computer, signing in to your Dropbox account, selecting the files or folders you want to download, choosing the external hard drive as your download destination, starting the download process, waiting for the download to complete, and finally, safely disconnecting your external hard drive.
Using an external hard drive for storing your files offers several advantages, including additional storage space, portability, and data backup. With your files securely stored on your external hard drive, you can free up space on your computer’s internal storage and easily access your files whenever needed.
Whether you need to transfer work documents, personal photos and videos, or any other type of file, downloading from Dropbox to an external hard drive ensures that your data remains organized and accessible in a separate storage solution.
So, go ahead and give it a try! Follow the steps outlined in this guide and take advantage of the benefits that come with downloading files from Dropbox to your external hard drive.
With this knowledge and the right tools at your disposal, you can confidently manage your files and enjoy the flexibility and convenience that an external hard drive provides.