Introduction
Welcome to the world of iMessage on your Mac! If you’re familiar with iMessage on your iPhone or iPad, you’ll be delighted to know that you can also enjoy the convenience of messaging from your Mac computer. With iMessage, you can easily connect with friends, family, and colleagues using Apple’s own messaging platform.
Whether you’re new to iMessage or just looking for some tips on how to return in iMessage on your Mac, you’ve come to the right place. In this article, we will walk you through the process of enabling iMessage on your Mac, accessing your messages, composing and sending messages, and of course, returning to messages you’ve received.
Returning in iMessage simply refers to replying or responding to a message you’ve received. It’s an important feature that allows for meaningful conversations and keeps the communication flowing. Whether you want to reply to a simple “hello” or engage in a full-blown conversation, we’ll cover the various methods you can use to return in iMessage on your Mac.
So, if you’re ready to dive into the world of iMessage and learn how to effectively return in your conversations, let’s get started!
Enabling iMessage on Your Mac
Before you can start enjoying the benefits of iMessage on your Mac, you need to ensure that iMessage is enabled. Here’s how you can enable iMessage on your Mac:
- Launch the Messages app on your Mac. You can easily find it in your Applications folder or by searching for “Messages” in Spotlight.
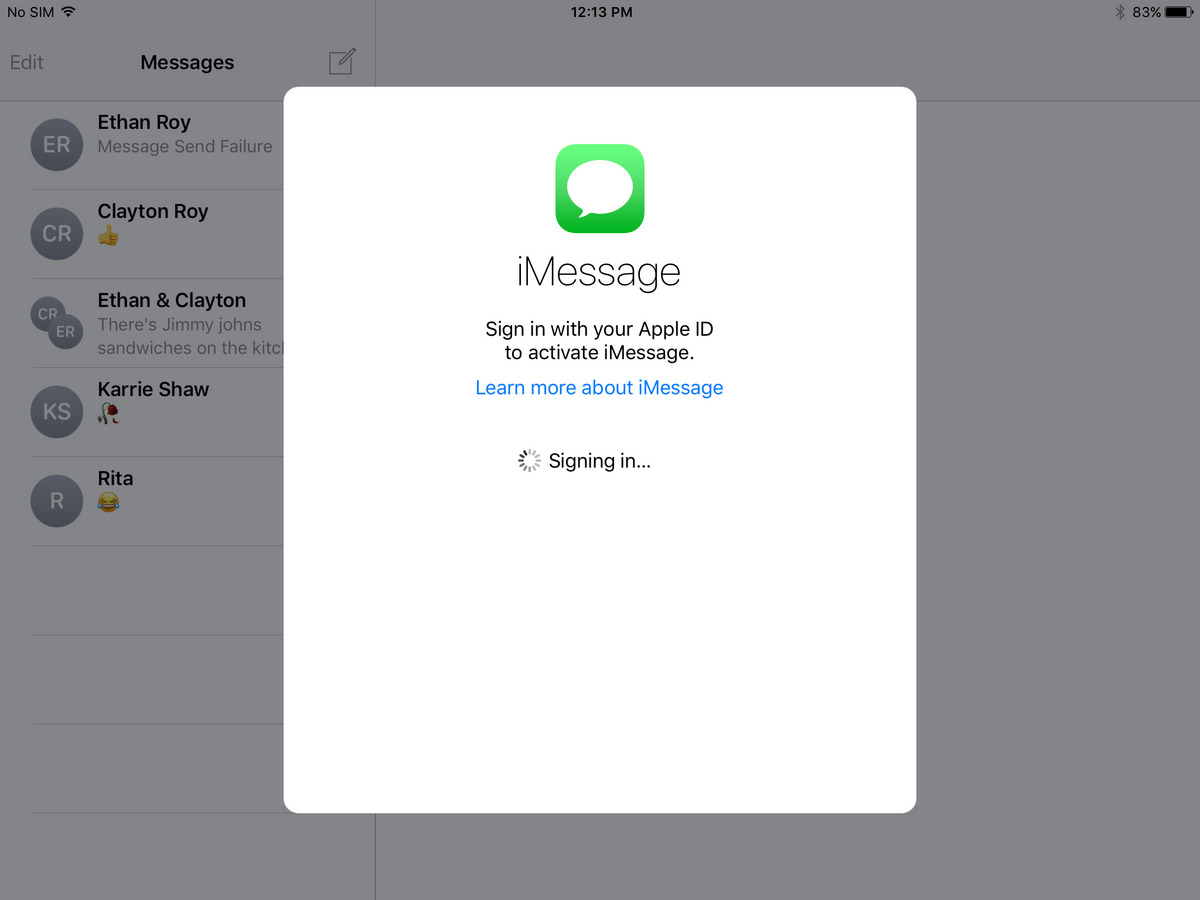
- If you’re launching Messages for the first time, you’ll be prompted to sign in with your Apple ID. Enter your Apple ID and password, then click “Sign In.”
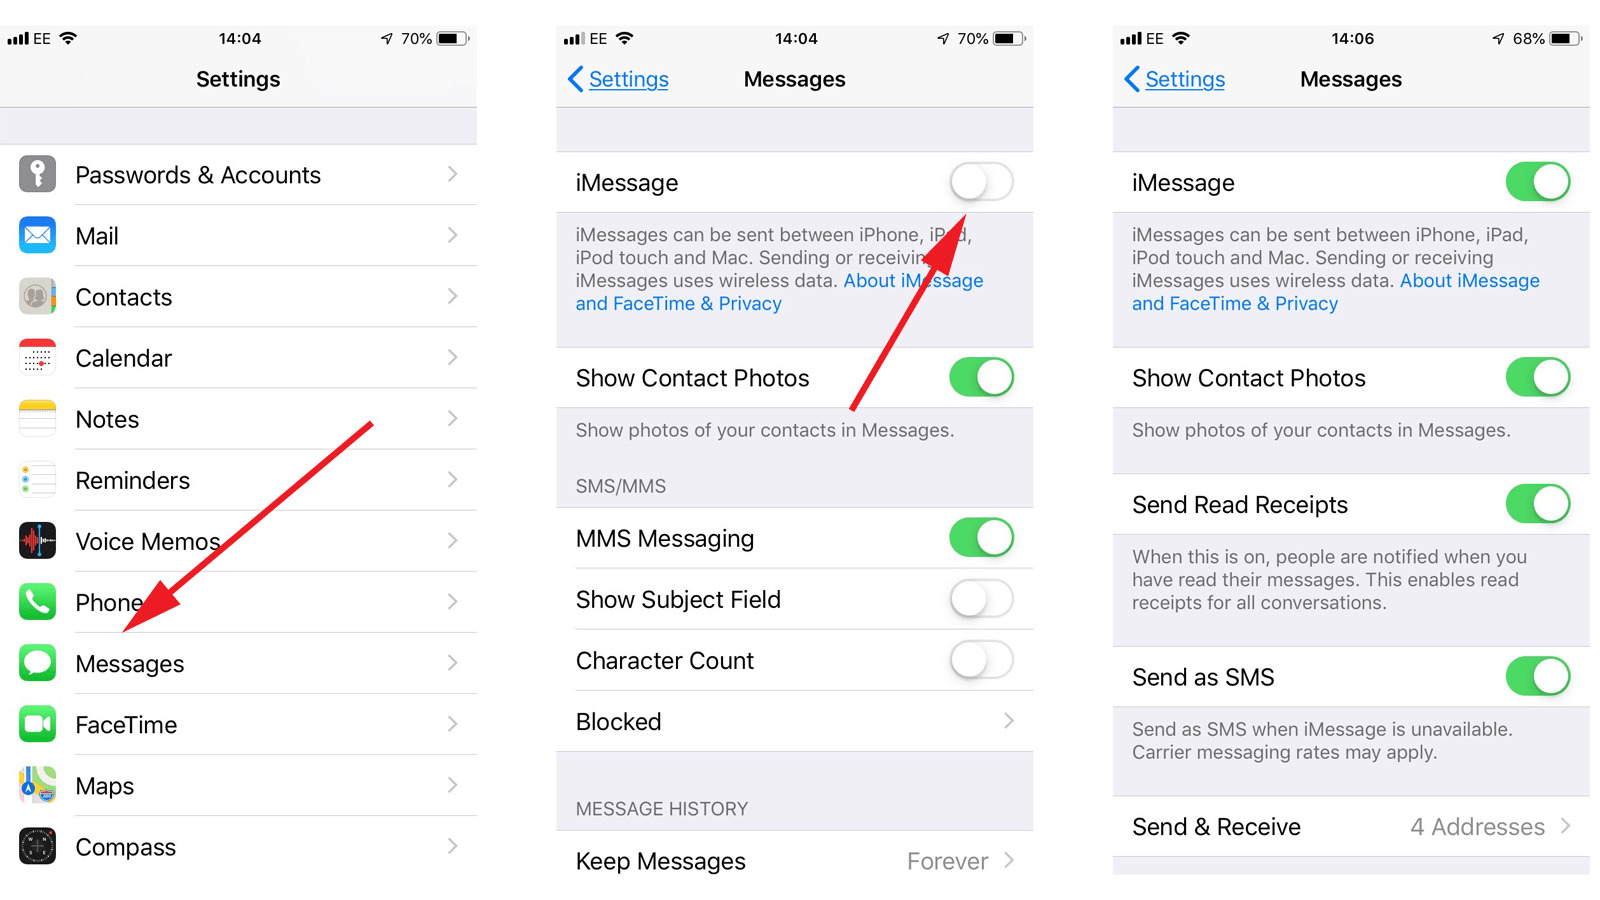
- If you’re already signed in with your Apple ID but iMessage is not activated, go to the menu bar and click on “Messages,” then select “Preferences.
- In the Preferences window, click on the “Accounts” tab. You’ll see your Apple ID listed on the left side.
- Ensure that the “Enable this account” checkbox is checked. If it’s not, click on the checkbox to enable iMessage for your Apple ID.
- You may also want to check the “Enable Messages in iCloud” checkbox, which will allow you to sync your iMessage conversations across all your Apple devices.
- Once you have enabled iMessage and made any desired settings changes, close the Preferences window.
That’s it! You have successfully enabled iMessage on your Mac. Now, let’s move on to accessing iMessage on your Mac and getting started with your conversations.
Accessing iMessage on Your Mac
Now that you have iMessage enabled on your Mac, let’s look at how you can access it and start using this convenient messaging platform.
To access iMessage on your Mac:
- Click on the “Messages” icon in your Dock or open it from the Applications folder.
- If you have set it up to open automatically when you start your Mac, the Messages app will already be open.
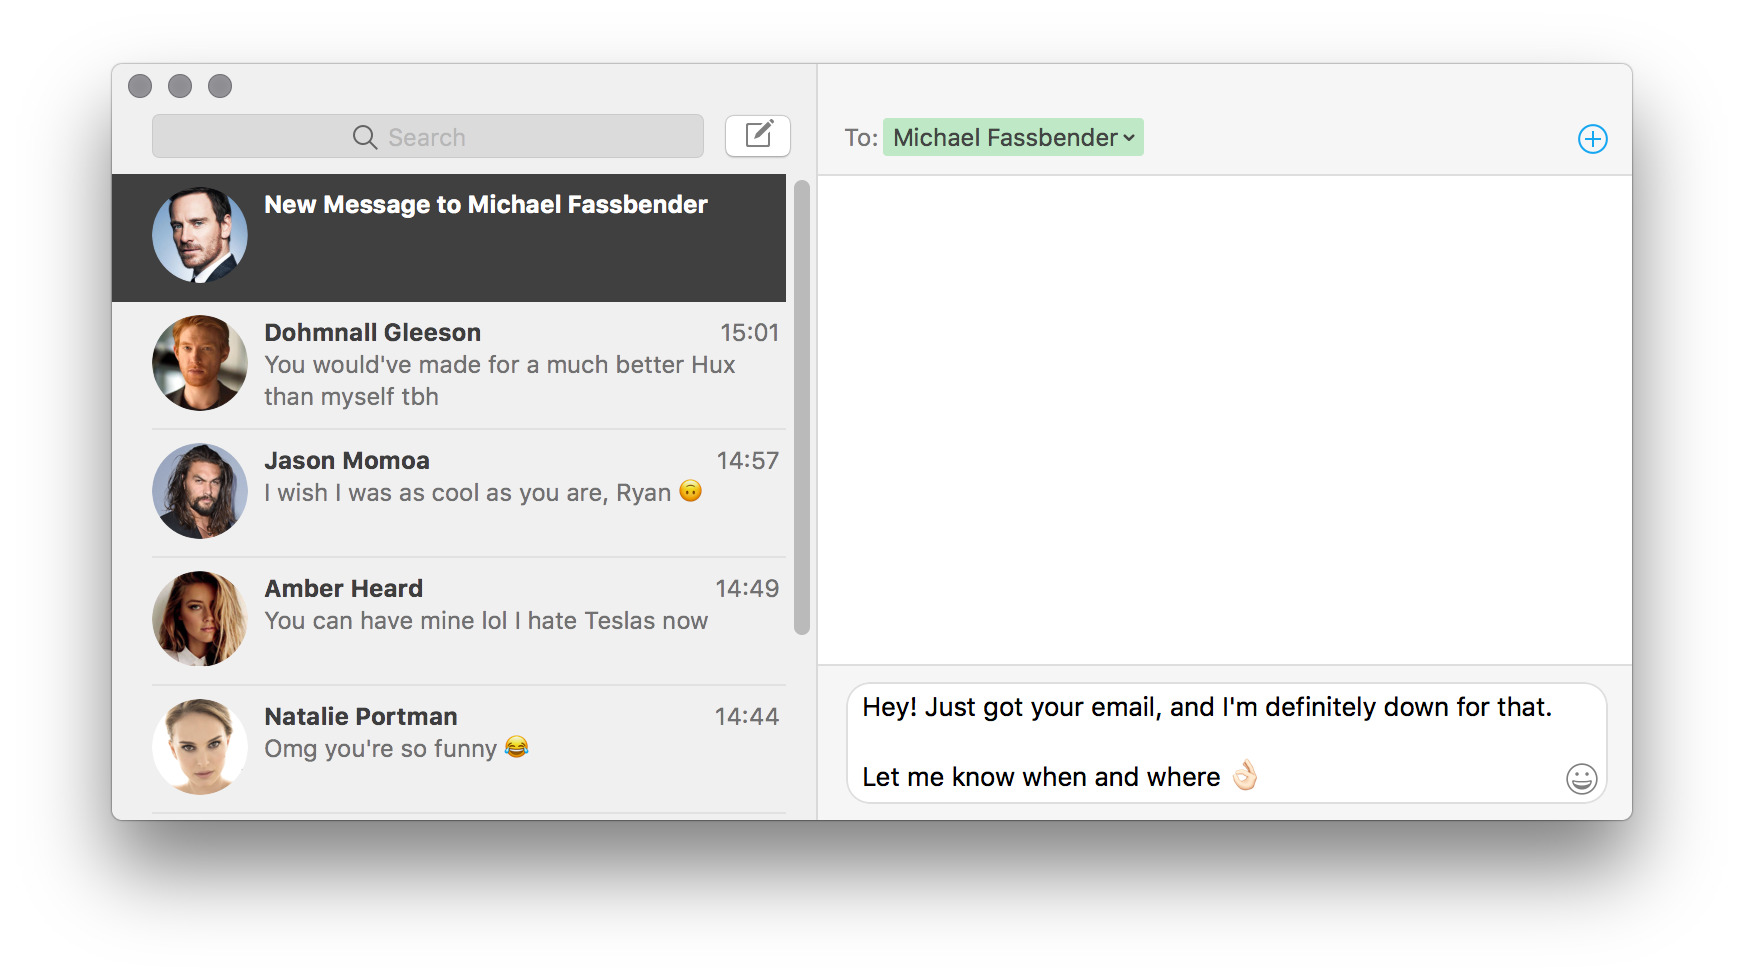
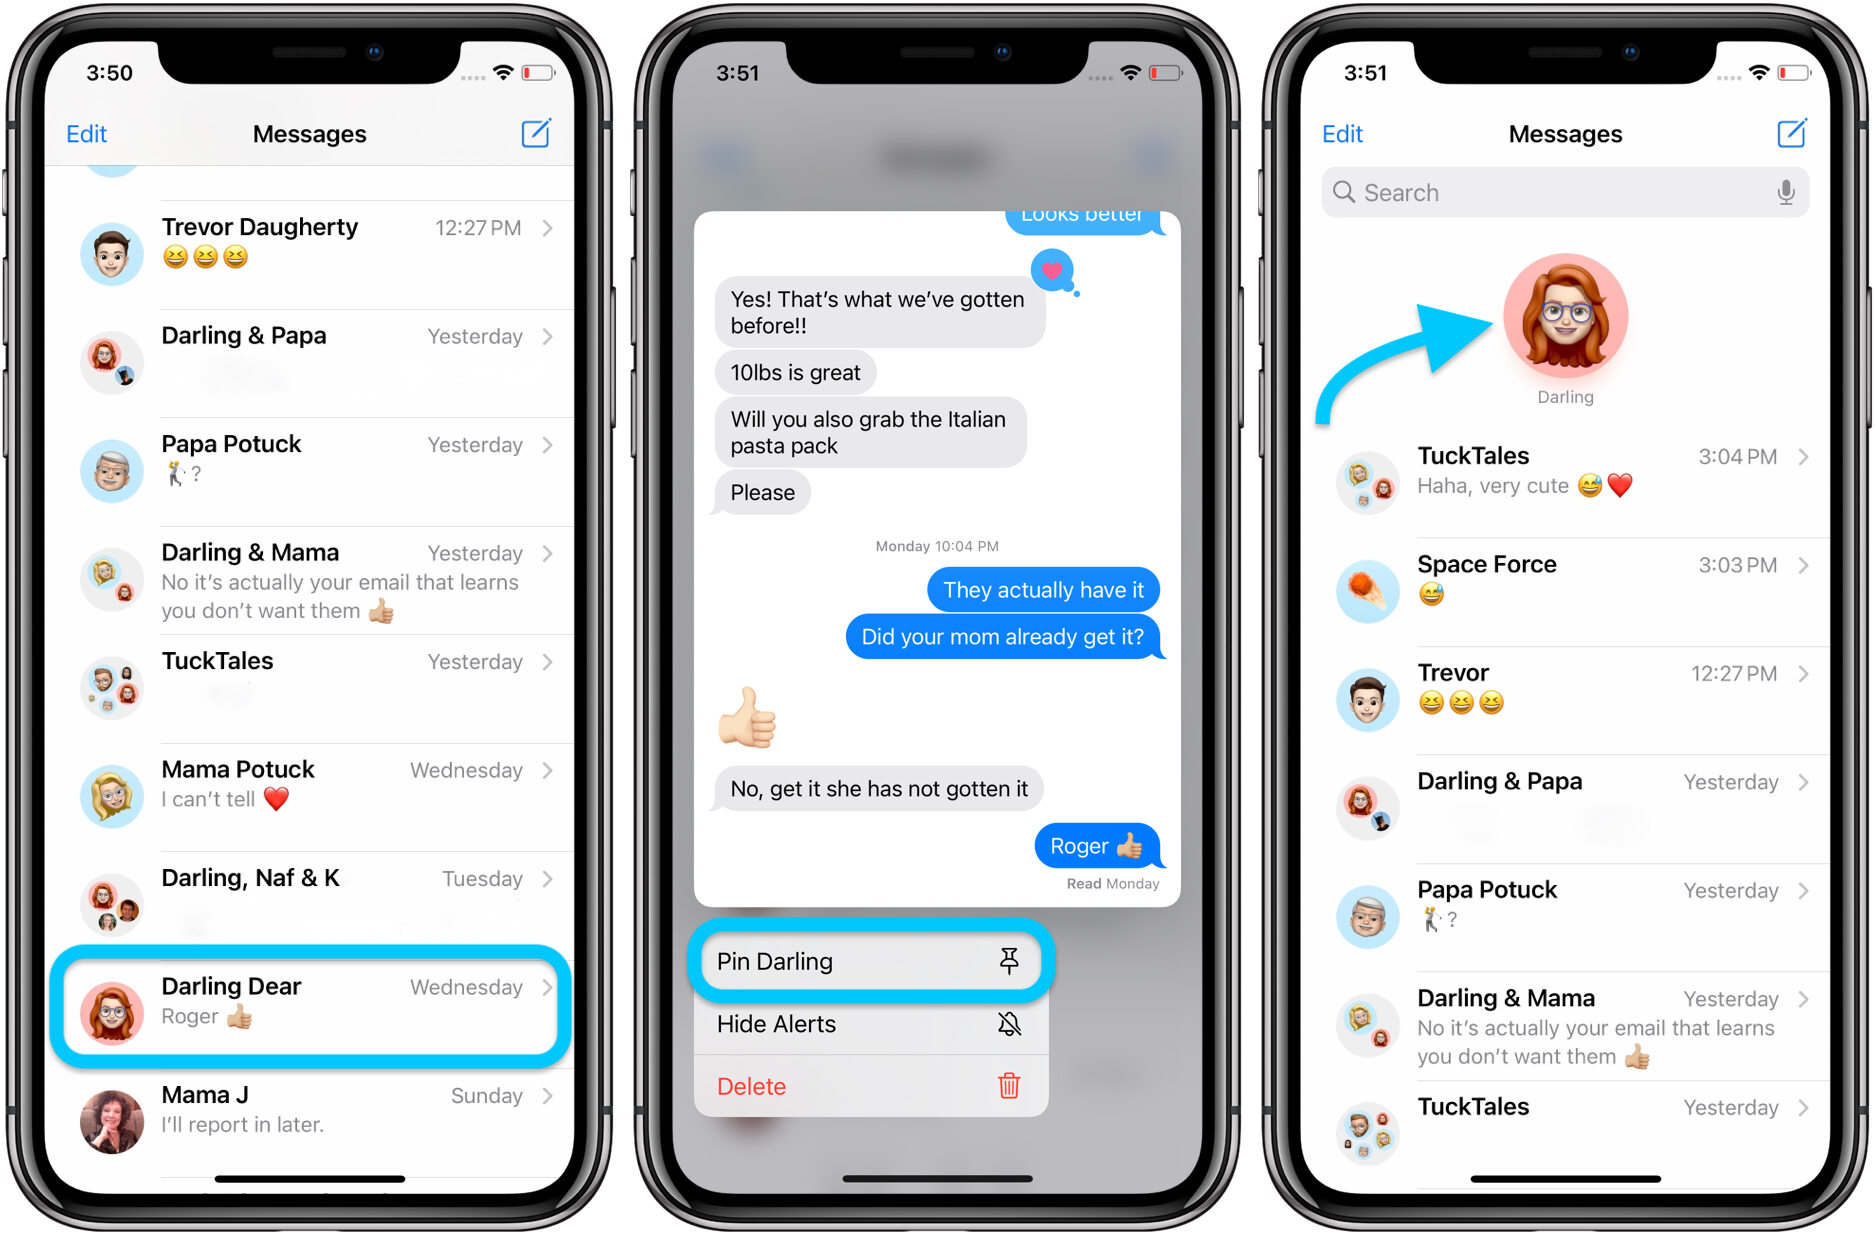
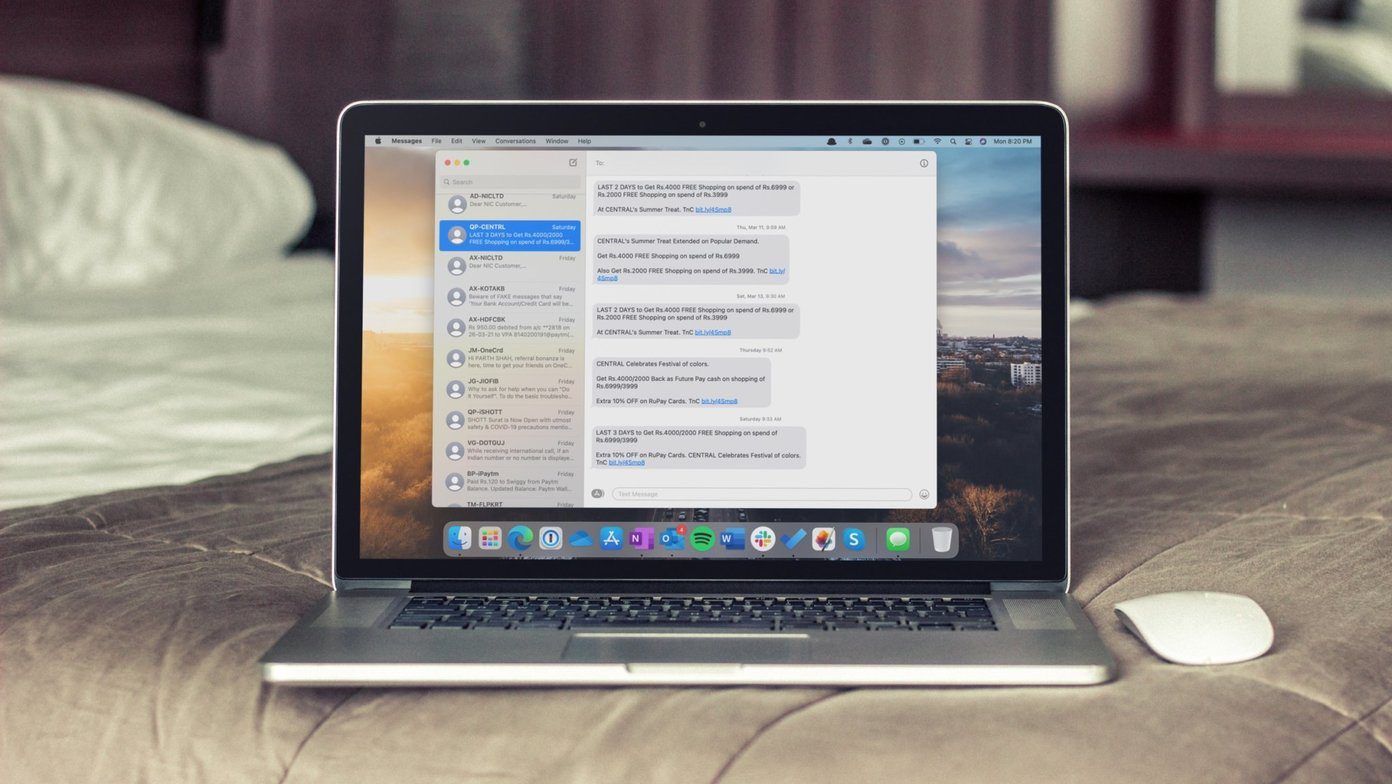
- Once the Messages app is open, you will see a list of your conversations on the left side of the window.
- If you have previously used iMessage on other devices such as your iPhone or iPad, you will notice that all your conversations are synced and visible on your Mac.
- To open a conversation, simply click on the name or phone number of the contact you want to message.
- The conversation window will appear on the right side, displaying your previous messages with that contact.
- You can also search for a specific contact or conversation by using the search field at the top of the Messages app window.
- Now that you have accessed iMessage on your Mac, you’re ready to start composing and sending messages.
With easy access to iMessage on your Mac, you can seamlessly transition between your Apple devices and continue your conversations without missing a beat. It’s a convenient way to stay connected with friends, family, and colleagues.
In the next section, we will explore how to compose and send messages in iMessage on your Mac. Stay tuned!
Writing and Sending a Message
Now that you have accessed iMessage on your Mac, it’s time to learn how to compose and send messages. Writing and sending a message in iMessage is simple and straightforward. Here are the steps:
- Open the conversation in which you want to send a message. You can either click on an existing conversation on the left side of the Messages app window or start a new conversation by clicking on the “New Message” button in the upper-left corner.
- In the message input field at the bottom of the conversation window, type your message.
- You can format your text by using the formatting options available in the toolbar above the message input field. For example, you can make your text bold or italic, change the font, or add emojis.
- If you want to send an attachment, such as a photo or a document, you can click on the paperclip icon in the toolbar to attach a file.
- Once you have composed your message, you can either press the “Return” key on your keyboard or click on the send button (paper airplane icon) to send the message.
- Your message will then be sent to the recipient, and it will appear in the conversation window.
That’s it! You have successfully written and sent a message in iMessage on your Mac. Repeat these steps for each message you want to send to continue the conversation with your chosen contact.
Now that you know how to write and send messages, let’s move on to the next section to learn about returning a message in iMessage on your Mac.
Returning a Message in iMessage
Returning a message in iMessage refers to replying or responding to a message you’ve received. It’s an essential part of the conversation that keeps the communication going. Here’s how you can return a message in iMessage on your Mac:
- Open the conversation containing the message you want to respond to by clicking on it in the Messages app window.
- In the conversation window, you’ll see the message you want to reply to.
- Click on the message to select it and bring up the reply field.
- Type your response in the reply field. You can use the same formatting options available when composing a new message, such as bold or italic text, emojis, and attachments.
- Once you have composed your response, press the “Return” key on your keyboard or click on the send button (paper airplane icon) to send the message.
- Your reply will be sent, and it will appear in the conversation, below the message you responded to.
That’s it! You have successfully returned a message in iMessage on your Mac. Now you can engage in meaningful conversations by replying to messages from your contacts.
Keep in mind that returning a message is not limited to just text. You can also respond with images, documents, or even voice recordings, depending on the capabilities of your Mac and the options available in iMessage.
In the next section, we will explore handy keyboard shortcuts you can use to quickly return in iMessage on your Mac. Stay tuned!
Using Keyboard Shortcuts to Return in iMessage
If you want to streamline your iMessage workflow and respond to messages even faster, you can take advantage of the handy keyboard shortcuts available in iMessage on your Mac. These shortcuts allow you to quickly return to messages without reaching for your mouse. Here are some useful keyboard shortcuts to help you return in iMessage:
- Reply to a Message: Select the message you want to reply to and press the “Command + R” keys on your keyboard. This will bring up the reply field, allowing you to type and send your response.
- Send a Quick Reply: While the message you want to reply to is selected, press the “Control + Return” keys on your keyboard to quickly send a short, generic reply such as “OK” or “Thanks.”
- Next Conversation: To move to the next conversation, press the “Control + Tab” keys on your keyboard. This is handy when you have multiple conversations open and want to navigate between them quickly.
- Previous Conversation: Similarly, you can move to the previous conversation by pressing the “Control + Shift + Tab” keys on your keyboard.
- Go to the Message Input Field: To jump directly to the message input field, press the “Command + Option + I” keys on your keyboard. This allows you to start typing your response without using your mouse.
These keyboard shortcuts can significantly speed up your messaging experience in iMessage on your Mac. By utilizing these shortcuts, you can efficiently navigate conversations, reply to messages, and stay engaged in your communication.
Now that you know how to use keyboard shortcuts, let’s move on to the next section, where you’ll learn how to customize the return key behavior in iMessage on your Mac.
Customizing the Return Key Behavior
If you prefer a different behavior for the return key when using iMessage on your Mac, you have the option to customize it. By default, pressing the return key in iMessage sends the message. However, you can change this behavior to perform different actions. Here’s how you can customize the return key behavior in iMessage:
- Open the Messages app on your Mac.
- Click on “Messages” in the menu bar at the top of the screen.
- Select “Preferences” from the drop-down menu to open the Preferences window.
- Go to the “General” tab in the Preferences window.
- You will see an option called “Return key.” Click on the drop-down menu next to it.
- Choose the behavior you prefer for the return key. The available options include:
- Send message: This is the default behavior where pressing the return key sends the message.
- Add new line: With this option selected, pressing the return key inserts a new line in the message, allowing you to add multiple lines of text before sending.
- Once you have selected your preferred return key behavior, close the Preferences window.
That’s it! You have successfully customized the return key behavior in iMessage on your Mac. Feel free to choose the option that aligns with your messaging style and preference.
By customizing the return key behavior, you can make your messaging experience even more personalized and tailored to your needs.
Now that you’ve learned about customizing the return key behavior, it’s time to wrap up our guide to returning in iMessage on your Mac. Keep using these techniques to stay engaged in your conversations and make the most out of the iMessage platform.
Conclusion
Congratulations! You’ve now mastered the art of returning in iMessage on your Mac. By enabling iMessage, accessing your messages, composing and sending messages, and returning to messages with ease, you can have seamless and meaningful conversations with your contacts. Remember to take advantage of the keyboard shortcuts and customize the return key behavior to enhance your messaging productivity.
iMessage on your Mac offers a convenient and efficient way to stay connected and communicate with your friends, family, and colleagues. Whether you’re using your Mac for work or personal purposes, iMessage keeps you connected across all your Apple devices.
So, go ahead and enjoy the power of iMessage on your Mac. Stay connected, reply promptly, and make the most out of your conversations. Whether it’s a quick response or a more in-depth conversation, iMessage on your Mac has got you covered.
We hope this guide has been helpful in assisting you with returning in iMessage on your Mac. Now, it’s time to put your newfound knowledge into practice and start engaging in meaningful conversations through iMessage.
Happy messaging!