Introduction
Welcome to this guide on how to reset your Panimage Media Tablet. Whether you’re experiencing software issues, performance lag, or simply want to start fresh, resetting your tablet can help resolve many common problems. By following the steps outlined in this article, you’ll be able to reset your Panimage Media Tablet to its factory settings, ensuring a clean slate for your device.
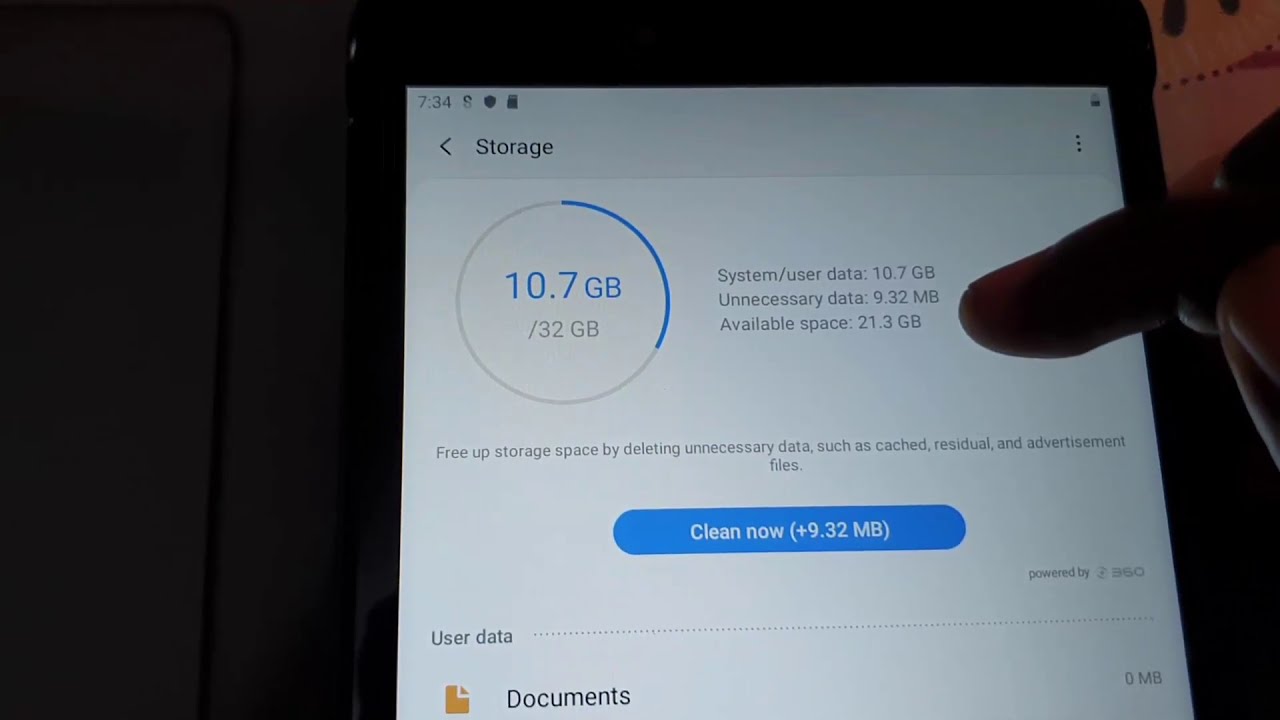
A factory reset is a process that erases all data and settings on your tablet, returning it to its original state when you first purchased it. This means that all apps, files, and personal preferences will be removed, so it’s essential to back up any important data before proceeding with the reset. It’s also worth noting that a factory reset is irreversible, and once completed, you won’t be able to recover any deleted data.
Before diving into the reset process, it’s important to ensure you have a stable internet connection and that your tablet is charged or connected to a power source. Additionally, make sure you have the necessary login credentials handy for any accounts associated with your tablet, as you may need to re-enter them after the reset.
Resetting your Panimage Media Tablet can provide a fresh start and improve device performance by eliminating clutter and optimizing system resources. It can also help resolve software issues, such as freezing or crashing apps. So, if you’re ready to take the plunge and reset your tablet, let’s dive into the step-by-step process.
Step 1: Backup your data
Before proceeding with a factory reset of your Panimage Media Tablet, it’s crucial to back up any important data that you don’t want to lose. This includes photos, videos, documents, contacts, and any other files that are stored on your tablet.
There are several methods you can use to back up your data, depending on your preferences and available resources:
- Cloud storage: One of the easiest ways to back up your data is by utilizing cloud storage services such as Google Drive, Dropbox, or iCloud. These services allow you to upload and store your files securely in the cloud, accessible from any device with an internet connection. Simply sign up for an account, install the corresponding app on your Panimage Media Tablet, and follow the instructions to sync and backup your data.
- External storage: If you prefer having a physical copy of your data, you can back it up to an external storage device such as a USB drive or an external hard drive. Connect the device to your tablet using the appropriate cables or adapters, and transfer the files you want to back up.
- Transfer to a computer: Another option is to connect your Panimage Media Tablet to a computer using a USB cable and transfer your files directly. Once connected, your tablet will appear as a removable storage device on your computer. Simply copy and paste or drag and drop the files you want to back up onto your computer’s hard drive or any external storage devices connected to it.
Regardless of the method you choose, make sure you double-check that all your important data has been successfully backed up before proceeding with the factory reset. It’s essential to have a copy of everything you want to keep to avoid any potential loss during the reset process.
With your data safely backed up, you’re now ready to move on to the next step: locating the reset button on your Panimage Media Tablet.
Step 2: Locate the reset button
Once you have backed up your data, it’s time to locate the reset button on your Panimage Media Tablet. The reset button is a small, recessed button typically located on the side or the back of the device. Its exact placement may vary depending on the model of your tablet.
To find the reset button, carefully inspect the edges and corners of your tablet. Look for a tiny hole or a small button labeled “Reset” or “Factory Reset.” In some cases, the reset button may be hidden under a removable cover or behind a small pinhole that requires a paperclip or a similar tool to access.
It’s important to note that not all tablets have a physical reset button. Some devices may require you to access the reset option through the tablet’s menu or settings. If you cannot find a physical reset button on your Panimage Media Tablet, refer to the user manual or visit the manufacturer’s website for specific instructions on how to perform a factory reset.
Once you have located the reset button on your tablet, take a mental note of its position. You will need this information for the next step in the reset process. With the reset button identified, let’s move on to step 3: powering off the tablet.
Step 3: Power off the tablet
After locating the reset button on your Panimage Media Tablet, it’s time to power off the device before proceeding with the reset process. Turning off the tablet ensures that the reset operation can be performed smoothly without any interruptions.
To power off your tablet, press and hold the power button. The power button is usually located on the side or the top of the device. Hold the button until a menu appears on the screen, providing options such as “Power off,” “Restart,” or “Shut down.”
Select the “Power off” option from the menu and confirm your choice if prompted. This will initiate the shutdown process, and your tablet will gradually power down. Depending on the model of your Panimage Media Tablet, the screen may display a spinning icon or a progress bar indicating that the shutdown process is in progress.
It’s important to wait until the tablet has completely powered off before proceeding to the next step. This ensures that all system processes are terminated, allowing for a clean reset of your device. Typical shutdown times may vary, but it usually takes a few seconds to a minute for the tablet to turn off completely.
Once your tablet has powered off, you’re now ready to move on to step 4: pressing and holding the reset button.
Step 4: Press and hold the reset button
With your Panimage Media Tablet powered off, it’s time to initiate the reset process by pressing and holding the reset button. This button is typically a small, recessed button located on the side or the back of the device, as mentioned in the previous step.
Using a paperclip or a similar tool, gently press and hold the reset button. Make sure to apply steady pressure to the button and hold it down for a continuous duration. Depending on the tablet model, you may need to use a bit of force or hold the button for a specific amount of time.
While holding the reset button, do not release it until instructed to do so in the next step. This step is crucial as it triggers the reset process and initiates the restoration of your Panimage Media Tablet to its factory settings.
It’s worth noting that the reset button is designed to be small and recessed to prevent accidental resets. This ensures that you don’t accidentally trigger a reset and lose your data. So, make sure you locate the button accurately and press it intentionally to commence the reset process.
Now that you are holding down the reset button, let’s proceed to the next step: releasing the reset button.
Step 5: Release the reset button
After holding down the reset button on your Panimage Media Tablet, it’s time to release it. This step is essential as it allows the tablet to start the reset process and restore its factory settings.
When releasing the reset button, make sure to do it gently and avoid any sudden movements. Slowly release the pressure from the button, allowing it to come back to its original position. Depending on the tablet model, you may hear a click or feel a slight vibration as the button resets.
Once you have released the reset button, do not press it again or attempt to initiate another reset. The tablet will now begin the process of erasing all data and settings, returning it to its factory state. The duration of the reset process may vary depending on the tablet model and the amount of data stored on the device.
While the reset is in progress, it’s important to be patient and avoid any interruptions or interactions with the tablet. Let the device complete the reset process uninterrupted to ensure a successful restoration to factory settings.
Now that you have released the reset button, it’s time to move on to step 6: waiting for the device to reset.
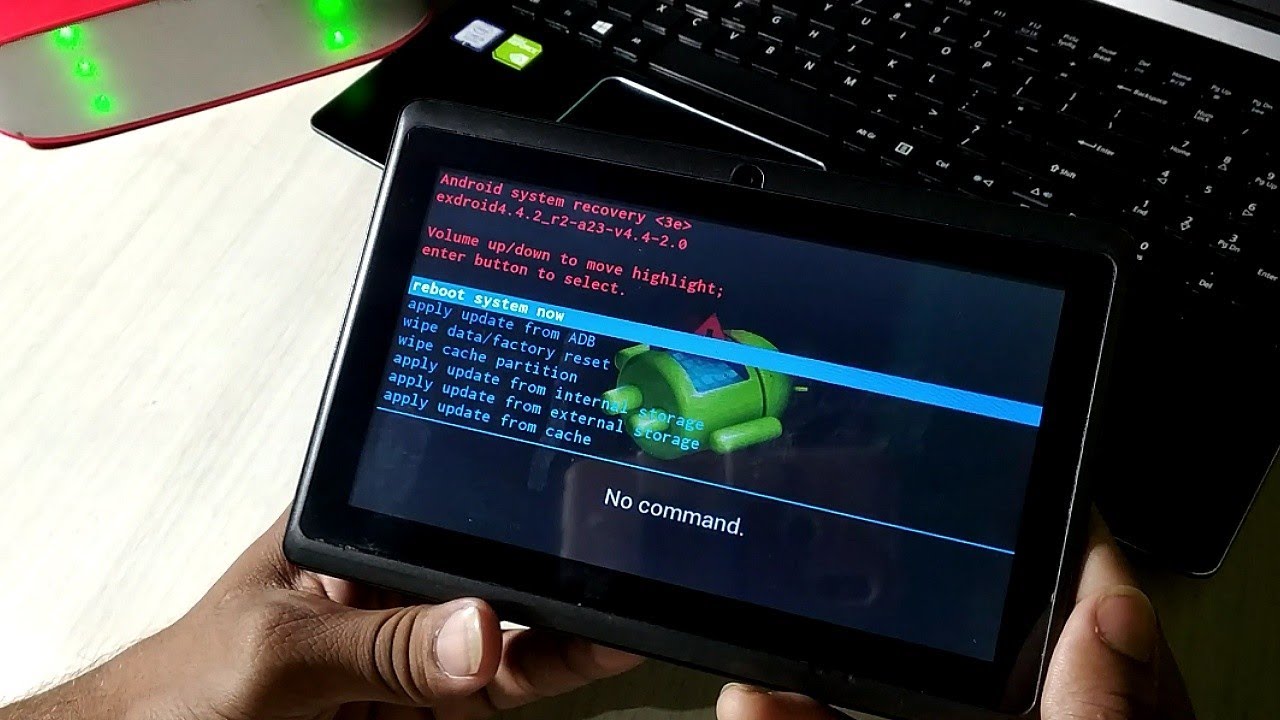
Step 6: Wait for the device to reset
After releasing the reset button on your Panimage Media Tablet, the device will now begin the process of resetting itself to its factory settings. This step requires some patience as the tablet erases all data and settings and reinstalls the original software.
The duration of the reset process may vary depending on the tablet model and the amount of data stored on the device. In some cases, the reset process may take a few minutes, while in others, it can take up to an hour. It’s important to let the tablet complete the reset process without interruption to ensure a successful restoration.
During the reset process, the tablet may display various screens or progress indicators. This can include a loading symbol, a progress bar, or messages indicating the status of the reset. It’s normal for the tablet’s screen to turn on and off or display different images during this time.
It’s crucial not to interfere with the tablet’s reset process by pressing any buttons or attempting to power it off. Doing so may interrupt the reset and could potentially lead to incomplete restoration or other undesired consequences.
While waiting for the device to reset, take this opportunity to prepare for the next step, which involves rebooting the tablet. Ensure that your tablet is connected to a power source or has enough battery charge to complete the reboot process smoothly.
Now that you have initiated the reset process, let’s move on to step 7: rebooting the tablet.
Step 7: Reboot the tablet
After the reset process is complete, it’s time to reboot your Panimage Media Tablet. Rebooting the tablet allows the newly restored factory settings to take effect and ensures a fresh start for your device.
To reboot your tablet, simply press and hold the power button until the device powers on. Depending on your tablet model, you may need to hold the button for a few seconds or until you see the manufacturer’s logo appear on the screen.
Once the tablet powers on, you will be prompted to go through the initial setup process, similar to when you first purchased the device. This includes selecting your language, connecting to a Wi-Fi network, and logging in with your Google or Apple ID, if applicable.
During the setup process, carefully follow the on-screen instructions and provide the necessary information to personalize your tablet according to your preferences. If prompted to restore your data from a previous backup, you can choose to do so from the cloud storage or external storage device where you backed up your data.
It’s important to note that after the reset, any apps or files that were not backed up will no longer be present on your tablet. You will need to reinstall your favorite apps and restore any files from the backup you created earlier.
After completing the setup process and restoring your data, take a moment to explore your newly reset Panimage Media Tablet. Notice the improved performance and stability, as well as the absence of any previous issues that may have prompted the reset.
Congratulations! You have successfully rebooted your Panimage Media Tablet, and it’s now ready to be used with its factory settings restored. Enjoy a fresh start with your device!
Step 8: Restore your data
After rebooting your Panimage Media Tablet and completing the initial setup, it’s time to restore your data from the backup you created earlier. This will allow you to regain access to all your important files, contacts, and other data that you had previously backed up.
If you used cloud storage to back up your data, such as Google Drive or iCloud, you’ll have the option to restore your data during the setup process. Simply follow the on-screen prompts and sign in to your cloud storage account when prompted. Select the backup that you want to restore from, and the tablet will begin syncing and downloading your data back to the device.
If you used an external storage device, such as a USB drive or external hard drive, you’ll need to connect that device to your Panimage Media Tablet. Open the file manager or file explorer app on your tablet and locate the backup file on the external storage device. Copy the files and paste them into the appropriate folders on your tablet.
If you transferred your data to a computer, connect your tablet to the computer using a USB cable. Open the file manager on your computer and locate the folder where you saved your backup files. Copy the files and transfer them to the appropriate folders on your tablet.
Once the restoration process is complete, you’ll have access to all your files, photos, videos, contacts, and other data on your Panimage Media Tablet, just as they were before the reset. Take some time to verify that all your files are successfully restored and accessible.
If you encounter any issues or missing data during the restoration process, double-check that you followed the correct steps for backing up and restoring your data. In some cases, certain file formats or incompatible data may not be restored. If the problem persists, you may need to consult the user manual or contact the manufacturer for further assistance.
With your data successfully restored, you can now enjoy using your Panimage Media Tablet with a fresh start and the peace of mind that your important files are safely back on the device.
Now that you have completed the data restoration process, your Panimage Media Tablet is fully set up and ready to be used. Enjoy your device and make the most out of its features and capabilities!
Conclusion
Resetting your Panimage Media Tablet can be a beneficial solution for resolving software issues, improving performance, and starting fresh with a clean device. Through the step-by-step guide provided in this article, you have learned how to reset your tablet to its factory settings.
Remember, before initiating the reset process, it is crucial to back up your data to ensure that you do not lose any important files or information. Utilize cloud storage services, external storage devices, or computer transfers to create a backup of your data.
Locating the reset button on your tablet is the next step, as this button initiates the restoration process. Take your time to find the reset button, and if necessary, consult the user manual or manufacturer’s website for guidance.
Powering off the tablet ensures a smooth reset process without any interruptions. Press and hold the power button until a menu appears, and select the “Power off” option.
After powering off the tablet, press and hold the reset button to initiate the restoration. Maintain pressure on the button until instructed to release it, allowing the device to reset to its factory settings.
Once you have released the reset button, patiently wait for the tablet to complete the reset process. Avoid interrupting the process and let the device fully restore its settings to ensure a successful outcome.
When the reset process is complete, reboot the tablet to activate the newly restored factory settings. Follow the on-screen setup instructions and restore your data from the backup you created earlier.
With your data successfully restored, you can now enjoy a fresh start with your Panimage Media Tablet. Take the opportunity to explore the improved performance and stability of your device.
Resetting your tablet is a powerful tool that allows you to troubleshoot issues and optimize your device’s performance. However, it is important to note that a factory reset is irreversible and should be done with caution.
By following the steps outlined in this guide, you have gained the knowledge and confidence to reset your Panimage Media Tablet effectively. Enjoy your device with its restored factory settings and make the most out of its features and capabilities.