Introduction
Resetting your wifi router can be a simple yet effective solution to various connectivity issues. Whether you’re experiencing slow internet speeds, dropped connections, or forgotten passwords, a reset can often help restore your router to its default settings and resolve these problems. In this article, we will guide you through the process of resetting your wifi router, so you can enjoy a seamless and uninterrupted internet experience.
Wifi routers have become an essential part of our daily lives, connecting our devices to the vast world of the internet. However, just like any other electronic device, routers can encounter glitches, software bugs, or conflicts that may hinder their performance. When all troubleshooting attempts fail, resetting your router can be a troubleshooting step worth considering.
Resetting your router essentially clears out all the customized settings and configurations, bringing it back to its factory default state. This means that any changes you made to the router’s settings, such as wifi network name (SSID), password, or port forwarding rules, will be erased. While this may seem inconvenient, it can be beneficial in situations where you are unable to access the router’s settings due to forgotten passwords, or if you simply want to start afresh with a clean slate.
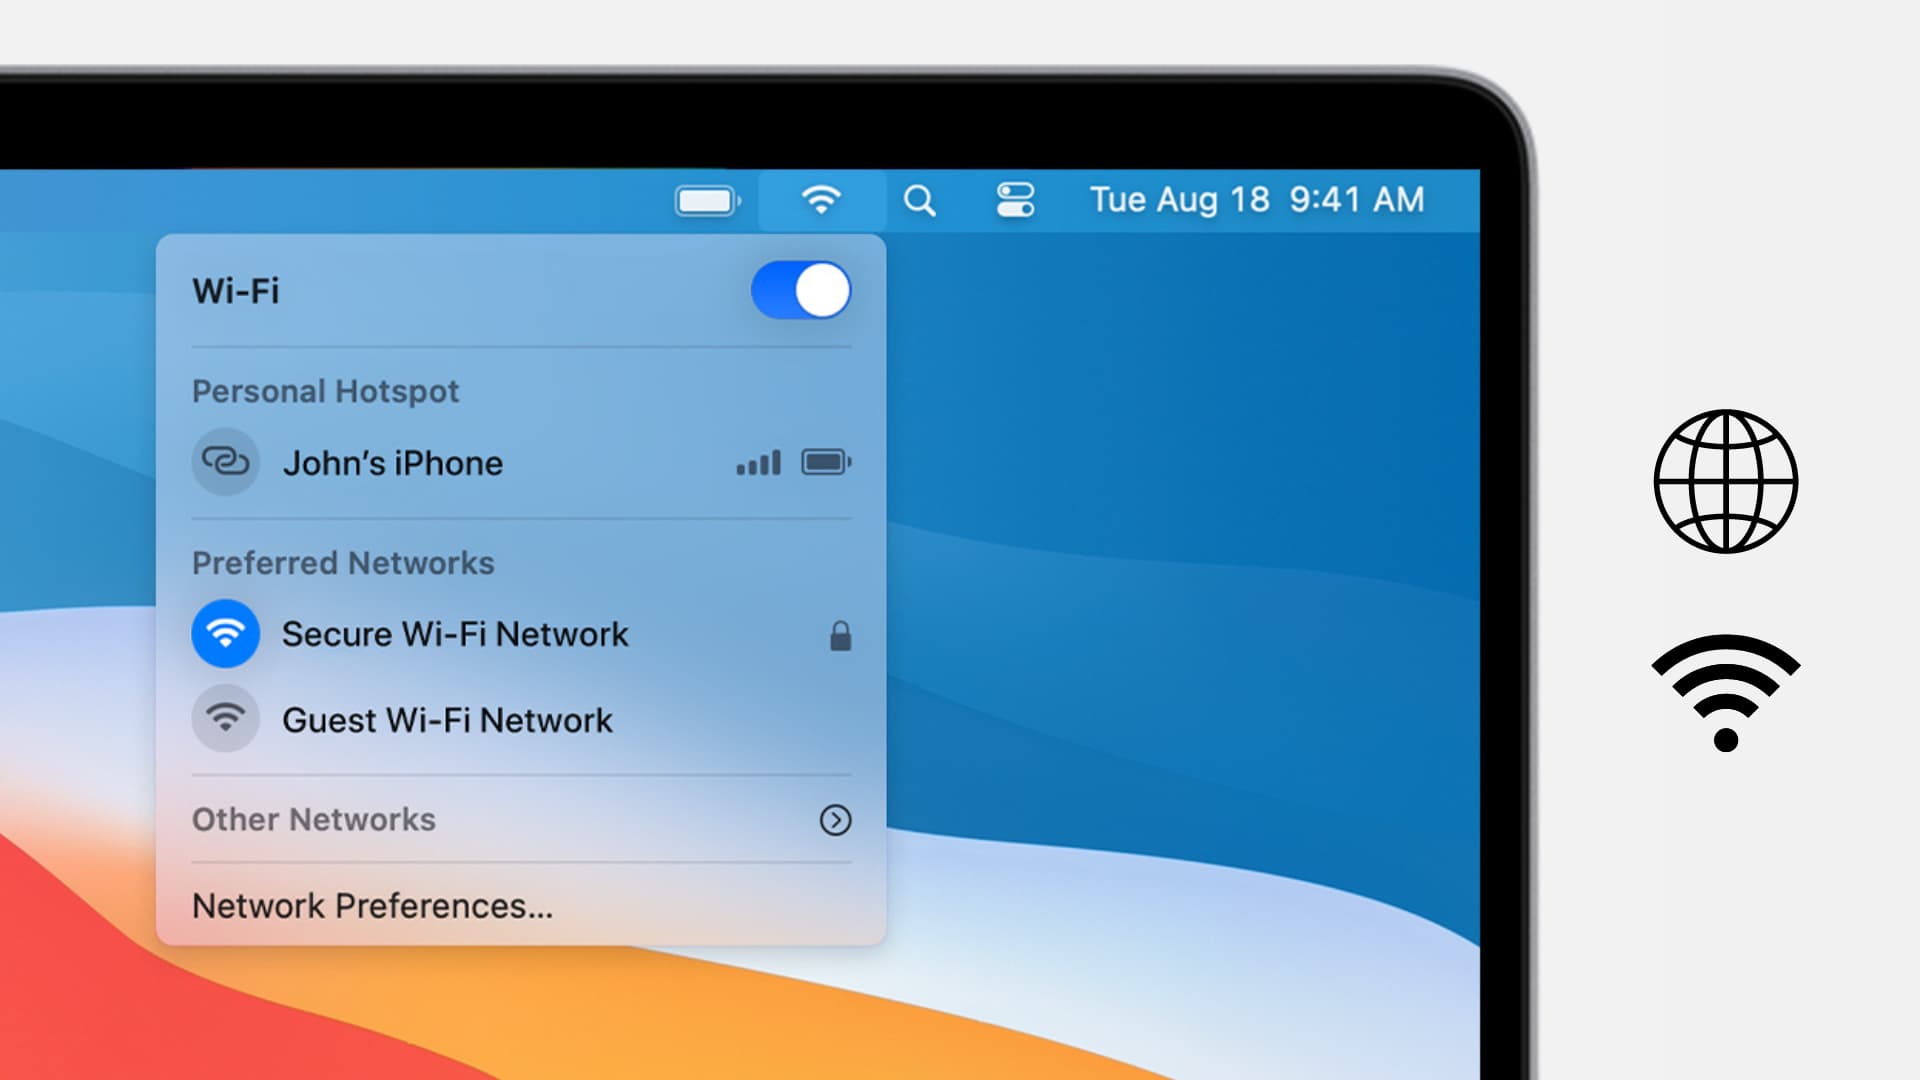
Why Reset Your Wifi Router?
There are several reasons why you might consider resetting your wifi router. Let’s explore some of the common scenarios where a reset can be beneficial:
- Recurring Connectivity Issues: If you’re experiencing frequent connection drops, slow speeds, or intermittent network issues, resetting your wifi router can help eliminate these problems. It allows the router to clear out any temporary glitches or conflicts that may be affecting its performance.
- Forgotten Passwords: If you’ve forgotten your wifi network password, performing a reset will restore the default login credentials. This allows you to access the router’s settings and set up a new password without the need for external tools or software.
- Network Security Concerns: In some cases, you may suspect unauthorized access to your wifi network or have concerns about its security. Resetting the router not only clears any potential unauthorized settings but also removes any connected devices, ensuring a fresh start for a more secure network.
- Router Troubleshooting: Resetting the router is often one of the initial troubleshooting steps recommended by technical support. It helps isolate issues related to configuration errors, firmware bugs, or software conflicts, allowing for a clean slate to troubleshoot further.
- Performance Optimization: Over time, routers can accumulate unnecessary data and settings that can impact their performance. By resetting the router, you can start with a clean configuration, potentially improving its overall speed and stability.
It is important to note that while resetting your wifi router can resolve many common issues, it is not a guaranteed solution for all problems. If you are unsure about performing a reset or if your issues persist after resetting, it is recommended to seek assistance from your internet service provider or router manufacturer’s support team for further guidance.
How to Reset a Wifi Router
Resetting a wifi router is a relatively simple process that involves restoring the router to its default factory settings. There are two common methods to perform a reset: a soft reset and a hard reset. Let’s look at each method in detail:
Option 1: Soft Reset
A soft reset is the preferred method to use if you can still access the router’s settings. This method allows you to reset the router without losing any customized configurations you have made. To perform a soft reset, follow these steps:
- Access the router’s administration panel by entering the router’s IP address into your web browser. The IP address is often printed on the router label or can be found in the user manual.
- Login to the router’s settings using the administrator credentials. If you have not changed the default login details, check the router documentation for the default username and password.
- Navigate to the “System” or “Maintenance” section of the router’s settings, where you will find the option to reset the router.
- Select the “Reset” or “Restore Factory Settings” option and confirm your decision.
- Wait for the router to complete the reset process. This may take a few minutes, and the router may reboot during this time.
- Once the reset process is complete, you can access the router’s settings with the default login credentials or reconfigure the router as needed.
Option 2: Hard Reset
A hard reset should be considered when you cannot access the router’s settings or if you encounter more severe issues. This method will completely reset the router to its default settings, removing all configurations you have made. To perform a hard reset, follow these steps:
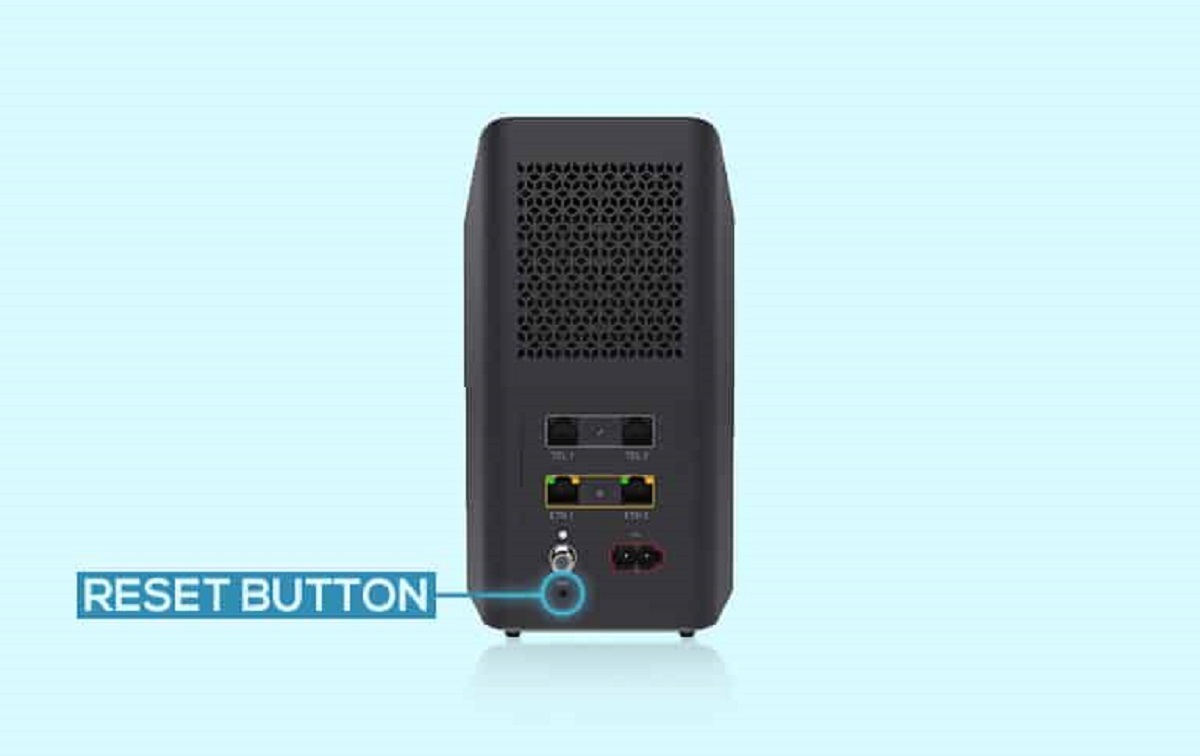
- Locate the reset button on the back or bottom of your router.
- With the router powered on, use a paperclip or a small pin to press and hold the reset button.
- Continue holding the reset button for about 10-15 seconds, or until the router’s lights start flashing. This indicates that the reset process has started.
- Release the reset button and wait for the router to complete the reset process. The lights on the router will typically stop flashing once the process is finished.
- Once the router has reset, power it off and wait for a few seconds. Then, power it back on.
- Follow the setup instructions provided by your router’s manufacturer to configure the router’s settings and establish a new wifi network.
It’s important to note that after performing a hard reset, you will need to reconfigure your wifi network settings, including the network name (SSID) and password, along with any other customized settings you had previously set up.
Option 1: Soft Reset
A soft reset is the preferred method to use if you can still access the router’s settings. This method allows you to reset the router without losing any customized configurations you have made. To perform a soft reset, follow these steps:
- Access the router’s administration panel by entering the router’s IP address into your web browser. The IP address is often printed on the router label or can be found in the user manual.
- Login to the router’s settings using the administrator credentials. If you have not changed the default login details, check the router documentation for the default username and password.
- Navigate to the “System” or “Maintenance” section of the router’s settings, where you will find the option to reset the router.
- Select the “Reset” or “Restore Factory Settings” option and confirm your decision.
- Wait for the router to complete the reset process. This may take a few minutes, and the router may reboot during this time.
- Once the reset process is complete, you can access the router’s settings with the default login credentials or reconfigure the router as needed.
Performing a soft reset allows you to reset the router while retaining any customized configurations you have made. This is especially useful if you have set up specific port forwarding rules, DNS settings, or firewall configurations that you do not want to lose. By accessing the router’s administration panel and selecting the “Reset” or “Restore Factory Settings” option, you initiate the reset process.
It’s important to note that the exact location of the reset option may vary depending on your router model and firmware version. If you’re unsure where to find it, refer to your router’s user manual or visit the manufacturer’s website for guidance. Additionally, it’s recommended to create a backup of your router’s settings before performing a soft reset, especially if you have made extensive customizations that you want to restore later.
Once the reset process is initiated, the router will reboot and restore the factory default settings. This may take a few minutes to complete. After the reset, you can access the router’s settings using the default login credentials or reconfigure the necessary settings according to your preferences.
Keep in mind that performing a soft reset does not affect the wifi network name (SSID) or password, so you don’t need to reconnect your wireless devices or update the wifi information. However, if you encounter any connectivity issues after the reset, it’s recommended to double-check your network settings and ensure that your devices are connected to the correct wifi network.
Option 2: Hard Reset
A hard reset should be considered when you cannot access the router’s settings or if you encounter more severe issues. This method will completely reset the router to its default settings, removing all configurations you have made. To perform a hard reset, follow these steps:
- Locate the reset button on the back or bottom of your router.
- With the router powered on, use a paperclip or a small pin to press and hold the reset button.
- Continue holding the reset button for about 10-15 seconds, or until the router’s lights start flashing. This indicates that the reset process has started.
- Release the reset button and wait for the router to complete the reset process. The lights on the router will typically stop flashing once the process is finished.
- Once the router has reset, power it off and wait for a few seconds. Then, power it back on.
- Follow the setup instructions provided by your router’s manufacturer to configure the router’s settings and establish a new wifi network.
Performing a hard reset is a more drastic measure and should be used when other troubleshooting methods have failed. It completely erases all settings, configurations, and customized changes you have made to the router. By locating the reset button on the router, usually a small hole labeled “Reset,” you can initiate the reset process.
To perform the hard reset, you need to press and hold the reset button for about 10-15 seconds. This duration may vary depending on the router model, so it’s a good idea to consult your router’s user manual for specific instructions. As you continue to hold the reset button, the router’s lights may start flashing, indicating that the reset process has begun.
Once you release the reset button, the router will complete the reset process. During this time, the lights on the router may continue to flash or eventually stop flashing, depending on the manufacturer’s specifications. It’s important to power off the router for a few seconds after the reset and then power it back on to ensure a fresh start.
After the reset, your router will return to its factory default settings, including the default login credentials, wifi network name (SSID), and password. You will need to follow the setup instructions provided by your router’s manufacturer to configure the necessary settings and establish a new wifi network. These instructions can typically be found in the router’s user manual or on the manufacturer’s website.
Remember that performing a hard reset will remove all previously customized configurations, so it’s essential to make note of any specific settings or configurations you want to restore after the reset. Additionally, keep in mind that a hard reset can also disconnect any connected devices, so you may need to reconnect your devices to the newly established wifi network.
Step 1: Locate the Reset Button
Before you can reset your wifi router, the first step is to locate the reset button. The reset button is typically found on the back or bottom of the router and is usually labeled “Reset” or represented by a small circular hole. Locating the reset button may vary depending on your router model, so it’s important to refer to your router’s user manual or visit the manufacturer’s website for specific instructions.
To locate the reset button, follow these general guidelines:
- Examine the exterior of your router: Look for any labeled buttons or small holes on the back or bottom of the device. The label “Reset” or an icon resembling a circular arrow pointing clockwise or counterclockwise is often associated with the reset button.
- If you see a labeled button: The reset button will be clearly marked with the word “Reset” or a corresponding symbol. It may be a recessed button that requires a paperclip or pin to access, or it may be a protruding button that can be pressed directly.
- If you see a small hole: Some routers have a reset button located inside a small hole. This design protects the button from accidental presses. To access the reset button, use a paperclip or a small pin and insert it into the hole. Apply gentle pressure to engage the button.
It is important to note that different router models may have different reset button locations and designs. If you are having difficulty locating the reset button, it is recommended to consult your router’s user manual or visit the manufacturer’s website for specific instructions and illustrations pertaining to your device.
Once you have located the reset button, you are ready to proceed with the next steps to reset your wifi router. It’s important to ensure that you have a clear understanding of the reset process and its effects, as performing a reset will restore the router to its default factory settings and remove any customized configurations or settings you have made.
Remember that a reset button is a valuable tool for troubleshooting connectivity issues and restoring your router’s functionality. However, it should be used as a last resort after exhausting other troubleshooting steps or seeking assistance from your internet service provider or router manufacturer’s support team.
Step 2: Press and Hold the Reset Button
Once you have located the reset button on your wifi router, the next step is to press and hold the button. Pressing and holding the reset button is an essential part of the reset process, as it initiates the restoration of your router to its default factory settings. Follow these steps to press and hold the reset button correctly:
- Ensure that your router is powered on and connected to a power source.
- Locate the reset button, which is usually a small hole or labeled button on the back or bottom of the router.
- Use a paperclip, a small pin, or a similar tool that can fit into the reset button. Insert it into the hole or press it against the button.
- Apply steady and firm pressure to press and hold the reset button. The duration required may vary depending on your router model, but it is commonly around 10-15 seconds.
When pressing and holding the reset button, ensure that you maintain consistent pressure and do not release it prematurely. Some routers may have a small LED light near the reset button that indicates the reset process is underway. When the reset process is initiated, the router’s lights may start flashing or change color, indicating that the restoration has begun.
It’s crucial to keep in mind that the exact duration for pressing and holding the reset button may vary depending on your router model. If you are uncertain about the required duration, it is advisable to consult your router’s user manual or refer to the manufacturer’s website for specific instructions.
By pressing and holding the reset button, you are effectively triggering the router’s reset process. This process wipes out any customized settings or configurations you have made to the router, bringing it back to its default factory settings. It is a necessary step to resolve connectivity issues, but it’s important to remember that the reset is irreversible, and you will need to reconfigure your router’s settings after completing the reset process.
Once you have successfully pressed and held the reset button for the required duration, you can proceed to the next step in the reset process. Power off the router before continuing to the following steps to ensure a complete reset of the device.
Performing a reset may take a few minutes, and the router may reboot automatically during this time. Be patient and allow the router to complete the reset process before moving on to the next step. Following the correct procedure will help ensure a successful reset of your wifi router, allowing you to troubleshoot and resolve any connectivity issues you may be experiencing.
Step 3: Power Off and Power On the Router
After you have pressed and held the reset button on your wifi router, the next step is to power off the router and then power it back on. This step is crucial to complete the reset process and ensure that your router is ready for the next configuration steps. Follow these steps to power off and power on your router:
- With the reset process initiated, locate the power button or unplug the power cable from the router.
- Wait for a few seconds to ensure that the router fully shuts down.
- Once the router is powered off, either press the power button again or plug the power cable back into the router.
- Wait for a few moments to allow the router to boot up and initialize its system.
Powering off the router after performing a reset is essential because it ensures that all remaining data and temporary settings are cleared. This allows the router to start with a clean slate and fully implement the default factory settings. By powering off the router, you are effectively giving it a fresh start and preparing it for the subsequent setup and configuration steps.
The exact duration for keeping the router powered off may vary, but a few seconds of downtime is usually sufficient. This brief period also allows any residual power to dissipate before powering the router back on. Once you have powered on the router, it will go through a boot-up process, during which it re-establishes its firmware, software, and network connections.
Ensure that you do not disrupt the power supply to the router during the boot-up process. Interrupting the power supply at this critical stage can lead to further complications and may require iterating the reset process again. Be patient and allow the router to fully boot up, as this ensures a stable and functional system.
After the router has powered on and completed its boot-up process, you can proceed to the next steps in the setup process. This may involve accessing the router’s settings interface through a web browser, entering the default login credentials, and customizing the settings according to your preferences.
Keep in mind that powering off and on the router is a standard procedure after performing a reset. It allows the router to reset any temporary configurations, initialize all default settings, and prepare for the subsequent setup. By following these steps, you will ensure a smooth transition from the reset process to the configuration stage.
Step 4: Complete the Setup Process
Once you have successfully reset your wifi router and powered it back on, the next step is to complete the setup process. This involves accessing the router’s settings and configuring it according to your specific requirements. Follow these steps to complete the setup process:
- Ensure that your computer or mobile device is connected to the same network as the router, either through wired Ethernet or via wifi.
- Open a web browser and enter the default IP address of the router into the address bar. The default IP address can usually be found in the router’s user manual or on the manufacturer’s website.
- You will be prompted to enter the router’s login credentials. If you have not modified the default settings, consult the router’s user manual or documentation for the default username and password.
- After successfully logging in, you will have access to the router’s settings interface. From here, you can configure various aspects of your network, such as wifi network name (SSID), security settings, DHCP settings, port forwarding, and more.
- Refer to the router’s user manual or online documentation for specific instructions on customizing the settings to suit your needs. Configure the settings as desired, making sure to save any changes made.
- Once you have completed the setup and configuration process, it is recommended to test the internet connectivity and perform a speed test to ensure that the router is functioning properly.
During the setup process, it is important to ensure that you secure your wifi network by choosing a strong and unique password. This will help protect your network from unauthorized access. Additionally, you may want to consider enabling encryption protocols, such as WPA2, to further enhance the security of your network.
If you encounter any issues or have questions regarding specific settings, refer to the router’s user manual or contact the manufacturer’s support for further assistance. They will be able to provide guidance on how to configure the router to best suit your needs and address any specific requirements you may have.
Remember to save any changes made during the setup process. This ensures that the customized configurations are implemented and will persist even if the router is restarted or loses power temporarily.
Completing the setup process allows you to establish a fully functional and customized network configuration that meets your specific requirements. Enjoy your newly configured wifi router and experience a seamless and reliable internet connection.
Step 5: Set Up Your Wifi Network
After completing the initial setup process, the next step is to set up your wifi network. This involves configuring the network name (SSID) and password, which will allow your devices to connect wirelessly. Follow these steps to set up your wifi network:
- Access the router’s settings interface by entering the router’s IP address into a web browser on a connected device. If you are unsure of the IP address, consult your router’s user manual or manufacturer’s website.
- Login to the router’s settings using the administrator credentials you set during the initial setup process.
- Navigate to the wireless settings section, where you will find options to configure your wifi network.
- Choose a unique and easily identifiable name for your wifi network. This is the SSID and will be displayed when devices search for available networks.
- Select the appropriate security settings for your wifi network. It is highly recommended to choose the WPA2 security protocol, which offers the highest level of encryption and provides better protection against unauthorized access.
- Create a strong and unique password for your wifi network. A strong password typically consists of a combination of upper and lower-case letters, numbers, and special characters.
- Save the changes made to the wifi settings.
Setting up your wifi network involves customizing the network name and security settings to ensure both convenience and security. Choosing a unique and easily recognizable SSID makes it easier for your devices to identify and connect to the correct network. Additionally, enabling proper security protocols and creating a strong wifi password ensures that only authorized users can access your network.
It is important to note that the process of setting up your wifi network may vary depending on your router’s firmware and interface. Refer to your router’s user manual or manufacturer’s website for specific instructions on configuring the wireless settings.
Once you have configured the wifi network settings and saved the changes, your network will be ready for use. You can now connect your devices to the wifi network by selecting the network name (SSID) you created and entering the corresponding password. Remember to update the wifi credentials on all your devices to ensure seamless connectivity.
In the future, if you want to make changes to your wifi network settings, you can access the router’s settings interface and navigate to the wireless settings section to modify the SSID, password, or other relevant configurations.
By properly setting up your wifi network, you can enjoy a secure and reliable wireless connection for all your devices. It is recommended to periodically review and update your network’s security settings to ensure ongoing protection against emerging threats.
Troubleshooting Tips
Even after performing a reset and setting up your wifi network, you may still encounter connectivity issues or other problems. Here are some troubleshooting tips to help you diagnose and resolve common wifi router issues:
- Check the physical connections: Ensure that all cables connecting the router to the modem and power source are securely plugged in. Sometimes, loose or faulty connections can cause connectivity problems.
- Restart your devices: Power off and restart your devices, including computers, smartphones, and tablets. This can often resolve temporary glitches or conflicts and establish a fresh connection to the wifi network.
- Update firmware: Visit the router manufacturer’s website to check for any available firmware updates for your specific router model. Updating the firmware can address bugs, security vulnerabilities, and performance issues.
- Change wifi channel: If you experience interference from other nearby wifi networks, switch to a different wifi channel. Access the router’s settings and experiment with different channels to find the one with the least congestion.
- Disable conflicting devices: Certain electronic devices, like cordless phones or microwave ovens, can interfere with wifi signals. Move these devices away from your wifi router or disable them temporarily to see if it improves the connection.
- Reset network settings on devices: If you’re experiencing issues with only one or a few devices, try resetting the network settings on those devices. This can help clear out any misconfigurations or network-specific problems.
- Use different DNS servers: Changing your DNS (Domain Name System) servers can sometimes improve connectivity and speed. Try using public DNS servers like Google DNS or OpenDNS instead of your internet service provider’s default servers.
- Contact your internet service provider: If you’ve exhausted all troubleshooting steps and still experience persistent issues, it’s advisable to contact your internet service provider’s support team for further assistance. They can help diagnose any network-related problems or perform line tests if necessary.
Remember, troubleshooting wifi router issues can be a trial-and-error process. It may take some time to identify and resolve the root cause of the problem. If one troubleshooting method doesn’t work, proceed to the next until you find a solution that works for you.
If all else fails, professional assistance from your internet service provider or a certified technician may be required. They can conduct more advanced diagnostics and offer targeted solutions to address complex or persistent issues.
Conclusion
Resetting a wifi router can be a valuable troubleshooting step to resolve various connectivity issues. Whether you choose a soft reset or a hard reset, the process can help restore your router to its default factory settings, clearing any temporary glitches or configurations that may be causing problems. By following the steps outlined in this guide, you can successfully reset your wifi router and set up a new wifi network to enjoy a seamless and reliable internet connection.
Remember, before performing a reset, it’s essential to understand the consequences. Resetting your router will erase any customized settings or configurations you have made, including the wifi network name (SSID), password, and port forwarding rules. Be sure to document any important settings beforehand or create a backup to make the restoration process easier.
If you encounter any challenges during the reset process or need further assistance, consult your router’s user manual or contact the manufacturer’s support team. They can provide specific guidance based on your router model and help resolve any issues you may encounter.
By following the steps and implementing the troubleshooting tips outlined in this article, you can take control of your wifi router and optimize its performance. A properly functioning wifi network ensures that you can enjoy fast and reliable internet connectivity for all your devices.
Remember that troubleshooting wifi connectivity issues can be a trial-and-error process, and it may take some time to identify and resolve the underlying problems. Stay patient, be open to trying different solutions, and don’t hesitate to seek professional assistance when needed.
We hope this guide has helped you in resetting your wifi router and resolving any issues you were experiencing. Enjoy your renewed internet connection and the benefits of a properly functioning network!