Introduction
Electric skateboards are a popular mode of transportation and a thrilling way to embrace the freedom of cruising around town. However, like any other mode of transportation, the wheels of an electric skateboard may need replacing over time due to wear and tear. Whether you’re looking to upgrade your skateboard with a new set of wheels or replace the old ones to improve performance, knowing how to replace the wheels is an essential skill for any electric skateboard enthusiast.
In this guide, we will walk you through the step-by-step process of replacing the wheels on your electric skateboard. We will cover the necessary tools and materials, safety precautions, and detailed instructions to make the process smooth and hassle-free.
Before we dive into the process, it’s important to note that electric skateboards come in different designs and configurations. Therefore, the process of replacing the wheels might vary slightly depending on the make and model of your skateboard. It’s always a good idea to consult your skateboard’s user manual or contact the manufacturer for specific instructions or guidelines.
Now, let’s gather our tools and materials and get ready to elevate your electric skateboard experience by replacing those worn-out wheels!
Tools and Materials
Before diving into the wheel replacement process, make sure you have the following tools and materials ready:
- Skateboard tool: This is a multipurpose tool that includes a wrench for removing and tightening the nuts on your skateboard.
- Socket wrench: If your skateboard uses nuts that require a socket wrench, make sure you have the appropriate size socket wrench available.
- Replacement wheels: Purchase the appropriate replacement wheels for your electric skateboard. Make sure to check the measurements and specifications to ensure compatibility.
- Bearing press tool: This tool helps in removing and inserting bearings into the new wheels. Not all skateboards require this tool, but it can be handy if your skateboard does.
- Bearings: Check if your replacement wheels come with bearings or if you need to purchase them separately. Bearings help the wheels spin smoothly.
- Clean cloth: Use a clean cloth to wipe down any dirt or debris from the wheel and axle area.
These are the basic tools and materials you’ll need to replace the wheels on your electric skateboard. It’s always a good idea to check the user manual or contact the manufacturer for any specific tools or materials required for your particular skateboard model.
Now that we have all the necessary tools and materials, let’s move on to the next step: safety precautions.
Step 1: Safety Precautions
Before starting the wheel replacement process, it’s crucial to prioritize safety. By following these safety precautions, you can minimize the risk of accidents and perform the task with confidence:
- Find a safe and stable workspace: Choose a flat and well-lit area to work on your electric skateboard. Ensure the space is free from any obstacles or tripping hazards.
- Turn off your electric skateboard: Before attempting any maintenance or repairs, make sure the power switch of your electric skateboard is turned off. This will prevent any accidental movement or unexpected starts.
- Wear protective gear: Put on appropriate safety gear, including a helmet, knee and elbow pads, and wrist guards. These safety measures will protect you in case of any falls or accidents during the wheel replacement process.
- Secure the skateboard: Place the electric skateboard on a stable surface or use a skateboard stand to secure it in an upright position. This will provide stability and make the wheel replacement process easier.
- Handle tools with care: Be cautious while handling tools, especially sharp or heavy ones. Use them properly and avoid rushing or applying excessive force. Keep your hands and fingers away from moving parts.
- Maintain focus and concentration: Avoid distractions and stay focused on the task at hand. This will help you carry out each step correctly and minimize the chances of errors or accidents.
By following these safety precautions, you can ensure a safe and successful wheel replacement process for your electric skateboard. Now that we’ve covered the necessary safety measures, let’s move on to gathering all the required tools and materials in step 2.
Step 2: Gather all the Necessary Tools and Materials
Before diving into the wheel replacement process, it’s important to gather all the necessary tools and materials. Having everything prepared and within reach will make the process smoother and more efficient. Here are the tools and materials you’ll need:
- Skateboard tool: This multipurpose tool typically includes a socket wrench, Allen key, and screwdriver. It is essential for removing and tightening nuts on the skateboard.
- Replacement wheels: Purchase the appropriate replacement wheels for your electric skateboard. Ensure they are compatible with your skateboard’s specifications and measurements.
- Bearings: Check if your replacement wheels come with bearings or if you need to purchase them separately. Bearings help the wheels spin smoothly and improve overall performance.
- Bearing press tool: Depending on your skateboard, you may need a bearing press tool to remove and insert bearings into the new wheels. Not all skateboards require this tool, so check your specific skateboard model for guidance.
- Clean cloth: Use a clean cloth to wipe down any dirt or debris from the wheel and axle area before installing the new wheels.
Having these tools and materials ready will ensure that you can complete the wheel replacement process without interruptions and delays. It’s also a good idea to refer to your skateboard’s user manual or contact the manufacturer for any specific tools or materials required for your particular skateboard model.
Once you have gathered all the necessary tools and materials, you are ready to move on to the next step – removing the old wheels in Step 3.
Step 3: Remove the Old Wheels
Now that you have all the necessary tools and materials ready, it’s time to remove the old wheels from your electric skateboard. Follow these steps:
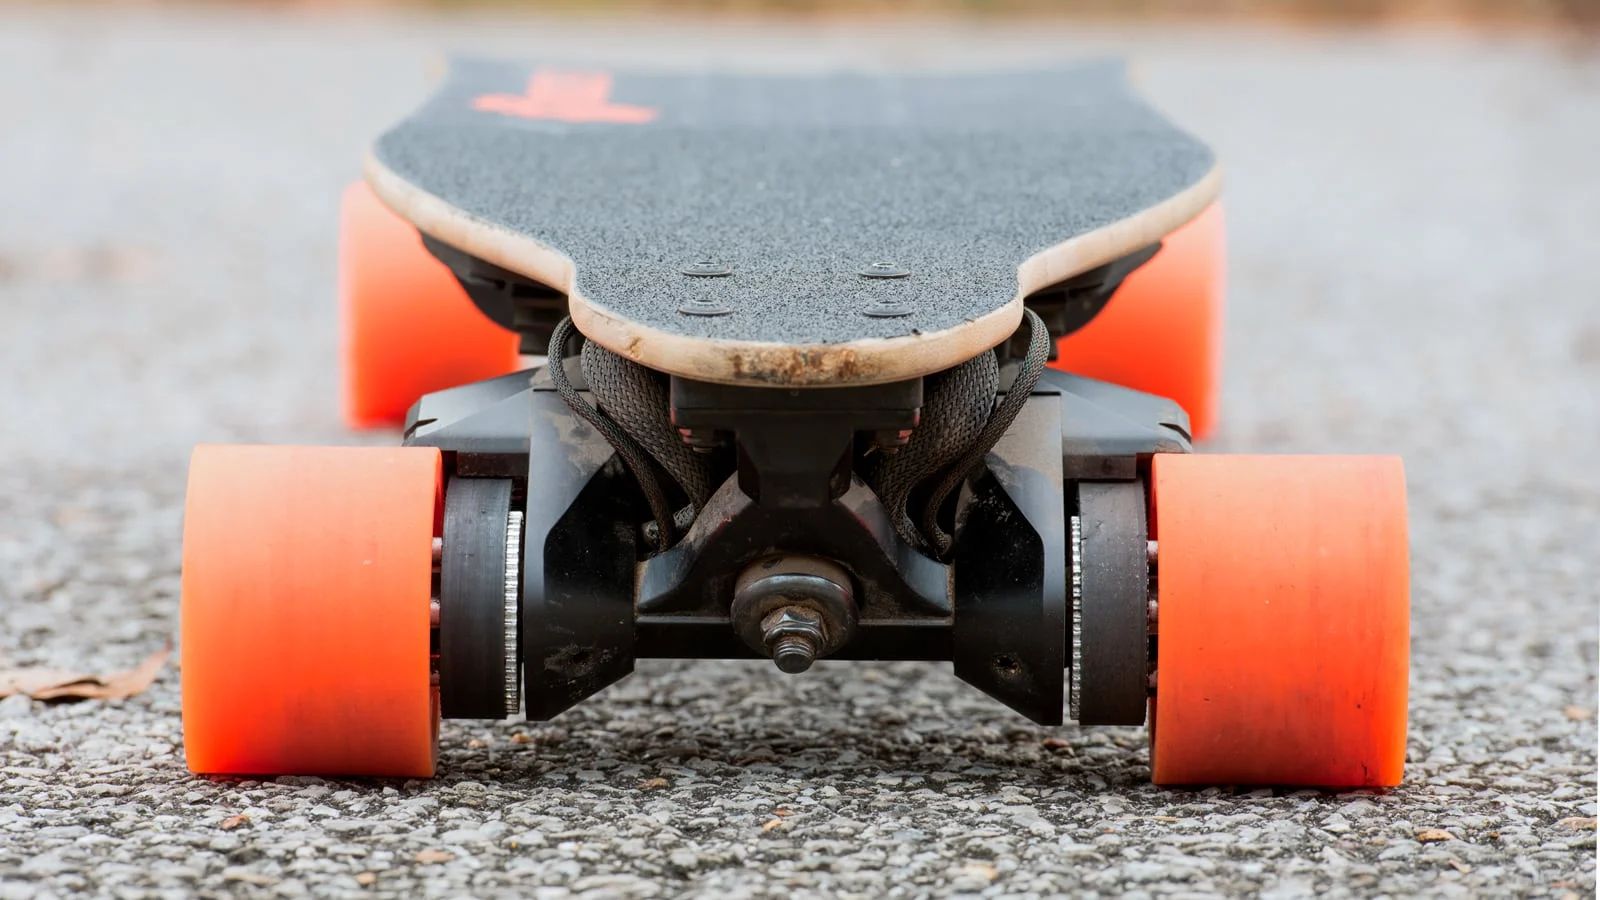
- Locate the nuts: Find the nuts that secure the wheels to the axles. They are typically located in the center of each wheel.
- Use the skateboard tool: Depending on the type of nuts on your skateboard, use the appropriate tool from your skateboard tool. It might be a socket wrench or an Allen key.
- Loosen the nuts: Place the tool on the nut and turn counterclockwise to loosen it. Repeat this process for all the nuts on each wheel.
- Remove the nuts: Once the nuts are sufficiently loosened, you can remove them from the axles. Set them aside in a safe place.
- Take off the old wheels: With the nuts removed, gently pull the old wheels off the axles. They should slide off easily, but you might need to give them a little wiggle or use your skateboard tool as leverage.
- Inspect the axles: Take a moment to inspect the axles for any dirt, debris, or wear. Use a clean cloth to wipe away any grime or buildup before proceeding.
By following these steps, you will successfully remove the old wheels from your electric skateboard. Remember to handle the wheels with care to avoid damaging the axles or other components of your skateboard. With the old wheels removed, it’s time to move on to Step 4: cleaning the wheel and axle area.
Step 4: Clean the Wheel and Axle Area
After removing the old wheels from your electric skateboard, it’s important to clean the wheel and axle area before installing the new wheels. This step ensures optimal performance and prevents any debris or dirt from interfering with the wheel movement. Follow these simple steps to clean the wheel and axle area:
- Use a clean cloth: Take a clean cloth and wipe down the axles to remove any dirt or debris. Make sure to clean both the outside and inside of the axle area.
- Inspect the bearings: While cleaning, take a moment to inspect the bearings for any signs of damage or excess dirt. If the bearings appear worn out or damaged, consider replacing them before installing the new wheels.
- Remove dirt and debris: Pay careful attention to the wheel area and remove any dirt, pebbles, or other debris trapped between the wheels and the axles. A toothpick or a small brush can help dislodge stubborn dirt.
- Ensure smooth rotation: Rotate the cleaned axles to check for smooth rotation. If you notice any resistance or grinding sounds, double-check for any remaining debris and clean again if necessary.
By cleaning the wheel and axle area, you ensure smooth and efficient performance of your new wheels. Additionally, a clean and well-maintained skateboard not only performs better but also extends the lifespan of various components. With the wheel and axle area now clean, it’s time to move on to Step 5: installing the new wheels.
Step 5: Install the New Wheels
With the old wheels removed and the wheel and axle area cleaned, it’s time to install the new wheels on your electric skateboard. Follow these steps to complete the installation:
- Check the new wheels: Before installing, ensure that the new wheels are the correct size and compatible with your skateboard’s specifications. Confirm if they come with their own bearings or if you need to use the existing ones.
- Insert the bearings: If your new wheels require bearings, use a bearing press tool or gently push the bearings into the center of each wheel. Ensure they are securely in place.
- Align the wheels: Place the new wheels onto the axles, making sure they are aligned properly. The side with the bearing should face inward, towards the center of the skateboard.
- Secure the wheels: Once the wheels are in place, take the nuts that were removed earlier and thread them onto the axles. Use your skateboard tool or socket wrench to tighten them snugly but not overly tight, as this can impair wheel rotation.
- Test the wheels: Give each wheel a gentle spin to ensure they rotate smoothly and without any wobbling or resistance. If there are any issues, double-check the alignment and tightness of the nuts.
By following these steps, you will successfully install the new wheels onto your electric skateboard. It’s important to double-check the alignment and tightness of the nuts, as improper installation can affect the performance and stability of your skateboard. Once the new wheels are securely in place, you’re ready to move on to the next step: tightening the nuts securely.
Step 6: Tighten the Nuts Securely
Now that you have installed the new wheels on your electric skateboard, it’s important to tighten the nuts securely to ensure optimal performance and safety. Follow these steps to tighten the nuts:
- Use your skateboard tool: Grab your skateboard tool and locate the nuts on each wheel. The nuts should be threaded onto the axles.
- Tighten the nuts: Place your skateboard tool onto the nuts and turn them clockwise to tighten. Make sure to tighten each nut evenly to ensure balanced tightness.
- Avoid overtightening: While it’s important to secure the nuts, avoid overtightening them. This can lead to difficulty in wheel rotation and potential damage to the bearings or axles.
- Check the tightness: Once you have tightened all the nuts, give each wheel a gentle spin to ensure they rotate freely and without any wobbling. If you notice any issues, adjust the tightness of the nuts accordingly.
Remember to strike a balance between securing the nuts and allowing for smooth wheel rotation. Over-tightening can lead to unnecessary friction and decreased performance, while under-tightening can cause the wheels to wobble or become loose during rides. By following these steps, you can ensure that the nuts are securely tightened to provide a stable and reliable ride on your electric skateboard.
With the nuts tightly secured, it’s time for the final step: testing the skateboard before hitting the road. Proceed to Step 7 to ensure everything is in proper working order.
Step 7: Test the Skateboard
After replacing the wheels and securely tightening the nuts on your electric skateboard, it’s essential to test it before heading out for a ride. Follow these steps to ensure everything is in proper working order:
- Find a safe test area: Choose a flat and open area away from traffic or obstacles to test your skateboard.
- Mount your skateboard: Place one foot on the skateboard while using the other foot to push yourself forward slightly.
- Test the wheels: Pay attention to how smoothly the wheels roll and if there are any unusual noises or vibrations. The wheels should rotate freely without any wobbling.
- Check the stability: Ride the skateboard cautiously, making sure that it feels stable and there are no issues with the new wheels or nuts.
- Test braking and turning: Test the braking system, ensuring it functions properly and stops the skateboard safely. Also, perform some gentle turns to assess the maneuverability and responsiveness of the skateboard.
- Listen for any unusual sounds: Pay attention to any unfamiliar noises, such as grinding or scraping sounds, which could indicate a problem with the wheel installation.
By testing your skateboard after wheel replacement, you can identify and address any potential issues before taking it for a longer ride. If you notice any abnormal behavior or have concerns about the performance, it’s important to investigate further or consult a professional if needed.
With the skateboard successfully tested and functioning as expected, you can now enjoy a smooth and exciting ride on your electric skateboard with the new wheels securely in place.
Conclusion
Replacing the wheels on your electric skateboard is a straightforward process that can greatly enhance your riding experience. By following the steps outlined in this guide, you can successfully replace your skateboard’s wheels and ensure optimal performance. From taking safety precautions to gathering the necessary tools and materials, removing the old wheels, cleaning the wheel and axle area, installing the new wheels, tightening the nuts securely, and testing the skateboard, each step plays a vital role in the overall process.
Remember to consult your skateboard’s user manual or contact the manufacturer for any specific instructions or guidelines that may apply to your particular skateboard model. This will ensure that you follow the correct process for your specific skateboard.
By maintaining your electric skateboard and regularly inspecting and replacing worn-out wheels, you can prolong the lifespan of your skateboard and enjoy a smoother, safer, and more enjoyable ride. Whether you’re upgrading your current wheels or replacing them for better performance, the process can be completed with basic tools and minimal technical know-how.
Now that you have completed the wheel replacement process, it’s time to hit the road and experience the joy of cruising on your newly improved electric skateboard.


