Introduction
Welcome to our guide on how to replace a PSU fan. The Power Supply Unit (PSU) is a vital component of any computer system, responsible for supplying power to all the other components. Over time, the fan within the PSU may become faulty or start to malfunction, leading to overheating and potential damage to your computer.
If you notice loud noises, overheating, or the computer shutting down unexpectedly, it could be a sign that your PSU fan needs to be replaced. In this guide, we will walk you through the step-by-step process of replacing the faulty fan, ensuring that your computer stays cool and operates smoothly.
Before we begin, it’s important to note that opening and working inside a power supply unit can be dangerous. Make sure to take the necessary precautions, such as wearing anti-static wristbands and disconnecting the power supply from the mains. If you are not comfortable working with electronics or unsure about any step, it’s always best to seek professional assistance.
In the following sections, we will explain the tools and materials you’ll need for the repair, as well as guide you through each step, from disconnecting the power and removing the PSU to choosing the right replacement fan and installing it correctly. By the end of this guide, you’ll have the knowledge and confidence to replace the PSU fan yourself, saving you time and money.
So, let’s get started with the tools and materials you’ll need for this repair!
Tools and Materials Needed
Before you embark on replacing the PSU fan, it’s important to gather all the necessary tools and materials. Here’s a list of what you’ll need:
- Screwdriver set: Make sure to have a variety of screwdrivers, including both Phillips-head and flat-head screwdrivers, as different components may require different types.
- Replacement PSU fan: Measure the dimensions of your existing fan and ensure that the replacement fan matches those specifications. You can find replacement fans at your local computer hardware store or order online.
- Anti-static wristband: This will help discharge any static electricity from your body, preventing damage to sensitive electronic components.
- Thermal paste: It’s a good idea to have some thermal paste on hand to apply between the fan and the heat sink to ensure proper heat transfer.
- Clean cloth or compressed air: You’ll need a clean cloth or compressed air to remove any dust or debris from the PSU and other components.
- Electrical tape: This will be used to secure any loose cables and prevent them from interfering with the fan or other components.
- Optional: Isopropyl alcohol and cotton swabs. These can be used to clean off any thermal paste residue from the heat sink.
When gathering your tools and materials, ensure they are of good quality and appropriate for the task at hand. Using the right tools will make the process easier and help prevent any accidental damage to the components.
Now that you have everything you need, it’s time to move on to the next step: preparing for the repair. Let’s proceed to the next section, where we’ll guide you through the necessary preparations before replacing the PSU fan.
Step 1: Preparing for the Repair
Before diving into the PSU fan replacement process, it’s essential to take a few preparatory steps to ensure a smooth and safe repair. Follow these guidelines to get ready:
- Unplug your computer: To avoid any electrical mishaps, disconnect your computer from the power source. Unplug the power cord from the wall outlet and ensure no power is flowing to the system.
- Ground yourself: Static electricity can damage sensitive computer components. Prevent this by grounding yourself. You can use an anti-static wristband, which attaches to your wrist and discharges any static electricity built up in your body. Another option is touching a grounded metal object to discharge any static charge.
- Gather your tools and materials: As we discussed earlier, make sure you have all the necessary tools and materials readily available on your work surface. This will save you time during the repair process.
- Choose a suitable work area: Find a clean, well-lit, and spacious area to perform the repair. Ideally, use a non-static surface like a wooden table or an anti-static mat.
- Prepare the computer: Before opening the PSU, shut down your computer and remove any connected peripherals, such as monitors, keyboards, and mice. It’s also a good idea to take a photo or make a note of the cable connections to facilitate reassembly later.
- Remove the side panel: Depending on your computer case, you may need to remove the side panel to access the PSU. Use the appropriate screws or latches to remove the panel carefully.
By taking the time to prepare adequately, you’ll ensure a safer and more efficient repair process. Once you’ve completed these steps, you’re ready to move on to the next section: disconnecting the power and removing the PSU.
Step 2: Disconnecting Power and Removing the PSU
Now that you’ve prepared for the repair, it’s time to disconnect the power and remove the PSU from your computer. Follow these steps carefully:
- Double-check power disconnection: Ensure that your computer is completely powered off and disconnected from the electrical outlet. Remember, safety is paramount during this process.
- Locate the PSU: Identify the PSU, typically located at the top or bottom of the computer case. It’s a rectangular metal box with cables connected to various components.
- Disconnect cables: Find the main power cable connected to the motherboard and gently unplug it. You may need to press a release tab or squeeze a latch to detach the cable securely. Additionally, disconnect any other power cables leading from the PSU to other components, such as hard drives and graphics cards.
- Unscrew PSU: With the cables disconnected, locate and remove the screws or bolts securing the PSU to the computer case. Keep track of these screws, as you’ll need them to secure the new fan later. Once the screws are removed, carefully slide the PSU out of the case.
- Handle with care: When removing the PSU, be cautious not to damage any other components or cables inside the case. Take your time and ensure a smooth removal process.
By meticulously following these steps, you’ll successfully disconnect the power and remove the PSU from your computer. Now, it’s time to move on to the next section: opening the PSU and accessing the fan.
Step 3: Opening the PSU
With the PSU removed from your computer, it’s time to open it up and gain access to the faulty fan. Follow these steps to safely open the PSU:
- Read the PSU manufacturer’s warning: Before proceeding, check the manufacturer’s documentation or website for any specific warnings or precautions related to opening the PSU. This step is crucial for your safety and to avoid damage to the unit.
- Locate the PSU screws: Examine the exterior of the PSU and identify the screws holding the casing together. These screws are typically located at the rear of the unit or along the edges. Use the appropriate screwdriver to remove them.
- Remove the PSU cover: Once the screws are removed, carefully separate the PSU cover from the main body. Be gentle to avoid damaging any internal components of the PSU.
- Take note of the internal layout: As you open the PSU, take a mental note or photograph the internal layout for reference during reassembly. This step will help ensure proper alignment and organization of components.
- Handle with caution: Inside the PSU, you’ll find various electronic components, including capacitors, resistors, and transformers. These components can store an electrical charge, even when the unit is disconnected from power. Avoid touching or tampering with these components unless you have experience and proper training in working with power supplies.
It’s important to note that opening the PSU may void any existing warranty. If your PSU is still under warranty, consider checking with the manufacturer or consulting a professional before proceeding with this step.
Once you have successfully opened the PSU and familiarized yourself with its internal components, you’re ready to move on to the next step: identifying the faulty fan.
Step 4: Identifying the Faulty Fan
Now that you have access to the interior of the PSU, your next task is to identify the faulty fan. Follow these steps to locate the fan that needs replacing:
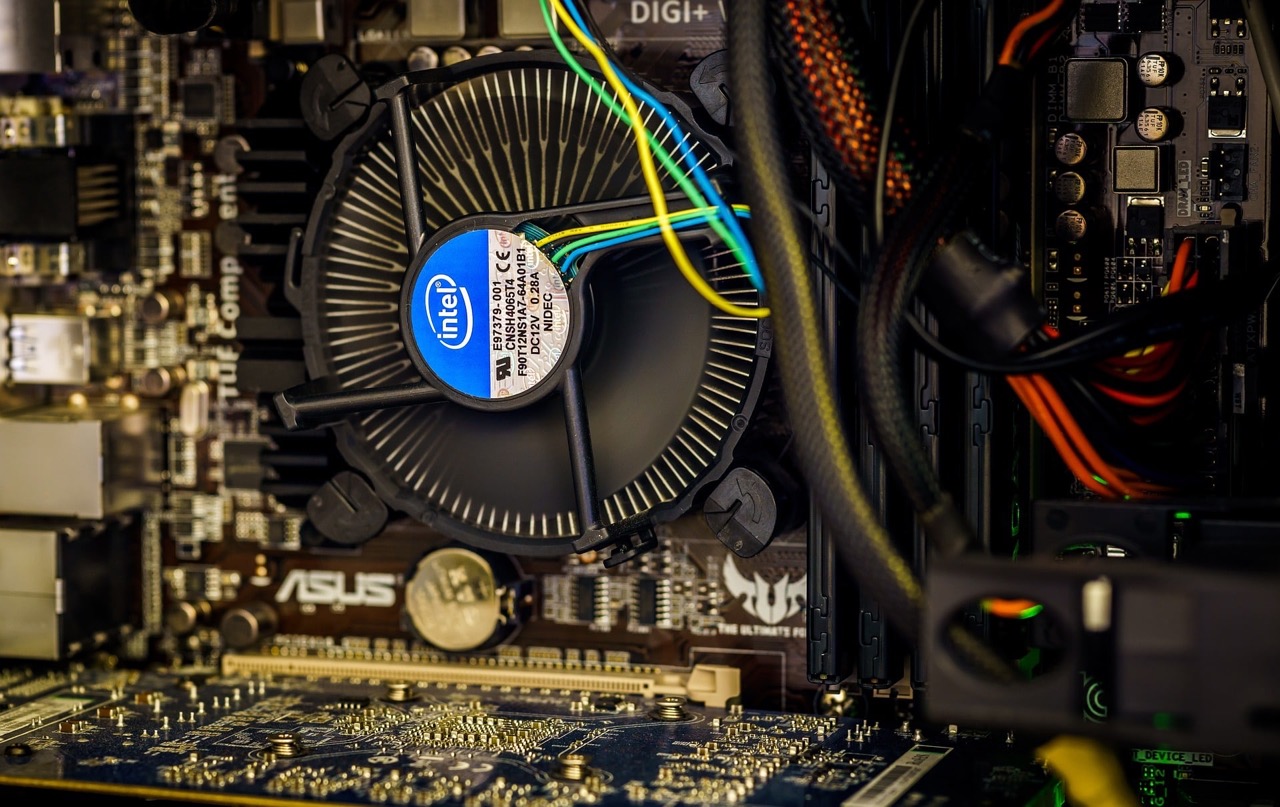
- Inspect the fan: Scan the interior of the PSU and locate the fan. The fan is usually positioned near the rear of the unit and is responsible for cooling the PSU components.
- Check for visible signs of damage: Look for any signs of damage or deterioration on the fan blades. This could include broken blades, excessive dust buildup, or a wobbly fan shaft. These signs are indicative of a faulty fan that needs to be replaced.
- Listen for unusual noises: Power on the PSU and listen for any strange noises coming from the fan. If you hear grinding, rattling, or loud noises, it’s a clear indication of a malfunctioning fan that requires replacement.
- Check for overheating: If your computer experiences frequent shutdowns or exhibits signs of overheating, the culprit may be a faulty fan. Touch and carefully feel the PSU casing to detect any excessive heat emanating from the fan area.
It’s important to note that the PSU contains high-voltage components, and working near them can be hazardous. Take necessary precautions, such as wearing rubber gloves and avoiding direct contact with any metal parts.
Once you have identified the faulty fan, it’s time to move on to the next step: removing the old fan. We’ll guide you through the process in the following section.
Step 5: Removing the Old Fan
With the faulty fan identified, it’s time to remove it from the PSU. Follow these steps carefully to safely remove the old fan:
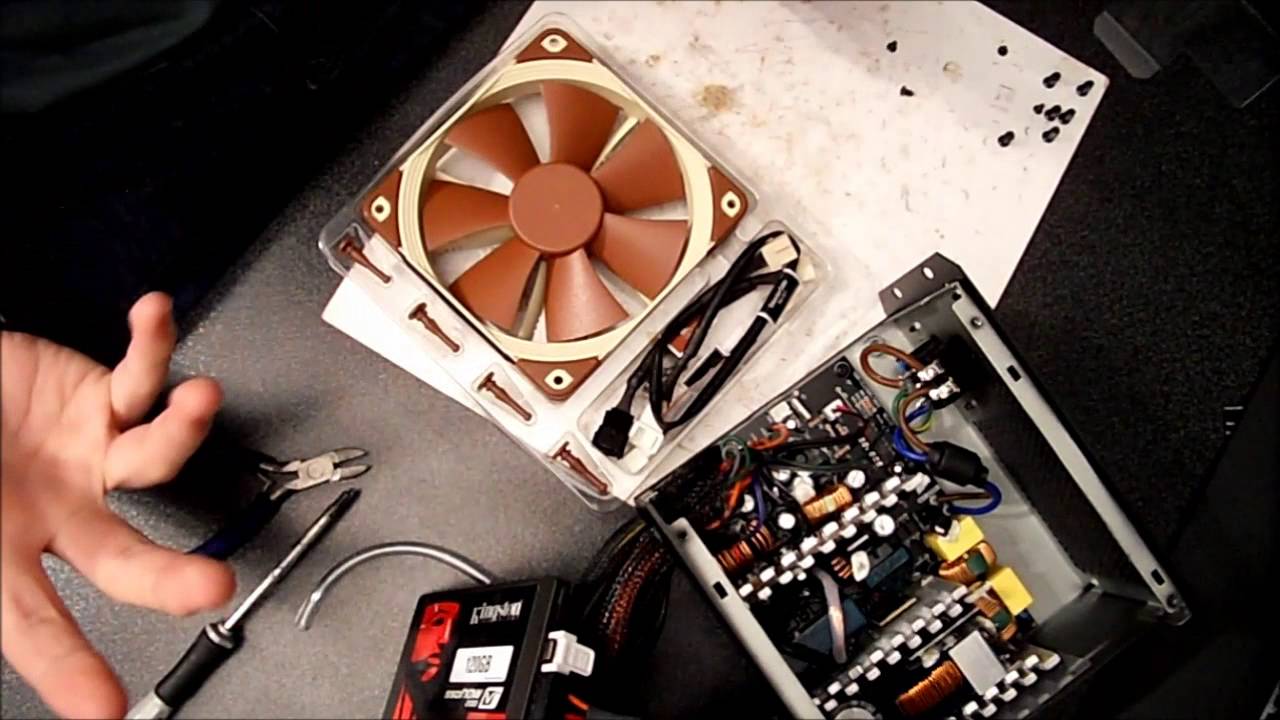
- Disconnect fan cables: Locate the cables connecting the fan to the PSU. Gently unplug these cables from their connectors, ensuring not to apply excessive force. If necessary, use a pair of tweezers or pliers to help with the disconnection.
- Remove mounting screws: Look for any screws holding the fan in place. Use the appropriate screwdriver to remove these screws, carefully lifting the old fan away from the PSU housing.
- Clean the fan area: Once the old fan is removed, take the opportunity to clean the surrounding area. Use a microfiber cloth or compressed air to remove any dust or debris that may have accumulated. This will provide a clean surface for the installation of the new fan.
- Dispose of the old fan responsibly: Since the old fan is likely damaged or no longer functional, it’s important to dispose of it properly. Check with your local recycling center or electronic waste disposal facility for guidance on how to dispose of electronic components.
During this process, be cautious of any sharp edges or exposed wires inside the PSU. Take your time and handle everything with care to avoid any accidental damage to yourself or the PSU components.
Now that the old fan has been successfully removed, it’s time to move on to the next step: choosing the right replacement fan. We’ll discuss this in the following section.
Step 6: Choosing the Replacement Fan
When replacing a faulty fan in your PSU, it’s important to select a suitable replacement that matches the specifications of the original fan. Follow these steps to choose the right replacement fan:
- Check the fan size: Measure the dimensions of the old fan, including the width, height, and thickness. This information is crucial for ensuring compatibility with the PSU and its mounting points.
- Determine the fan connector type: Examine the connector on the old fan, typically a 3-pin or 4-pin connector. Make sure the replacement fan has the same connector type, allowing for easy installation and compatibility with the PSU.
- Consider the airflow and noise level: Look for a replacement fan that offers sufficient airflow to keep your PSU and other components cool. Additionally, consider the noise level specified in decibels (dB). Opt for a fan that is quiet but still offers efficient cooling performance.
- Research reputable brands: Consider purchasing a replacement fan from a well-known and reputable brand. Research online reviews and recommendations to ensure the fan’s reliability, longevity, and performance.
- Price and warranty: Compare prices and check if the replacement fan comes with a warranty. While it’s crucial to stay within your budget, prioritizing quality and durability is equally important.
By following these steps, you’ll be able to choose a replacement fan that meets your specific requirements and is compatible with your PSU. Remember, selecting the right fan will ensure optimal cooling and prolong the lifespan of your computer’s components.
Once you have chosen the replacement fan, it’s time to move on to the next step: installing the new fan. We’ll guide you through the process in the following section.
Step 7: Installing the New Fan
Now that you have selected the right replacement fan for your PSU, it’s time to install it. Follow these steps carefully to ensure a successful installation:
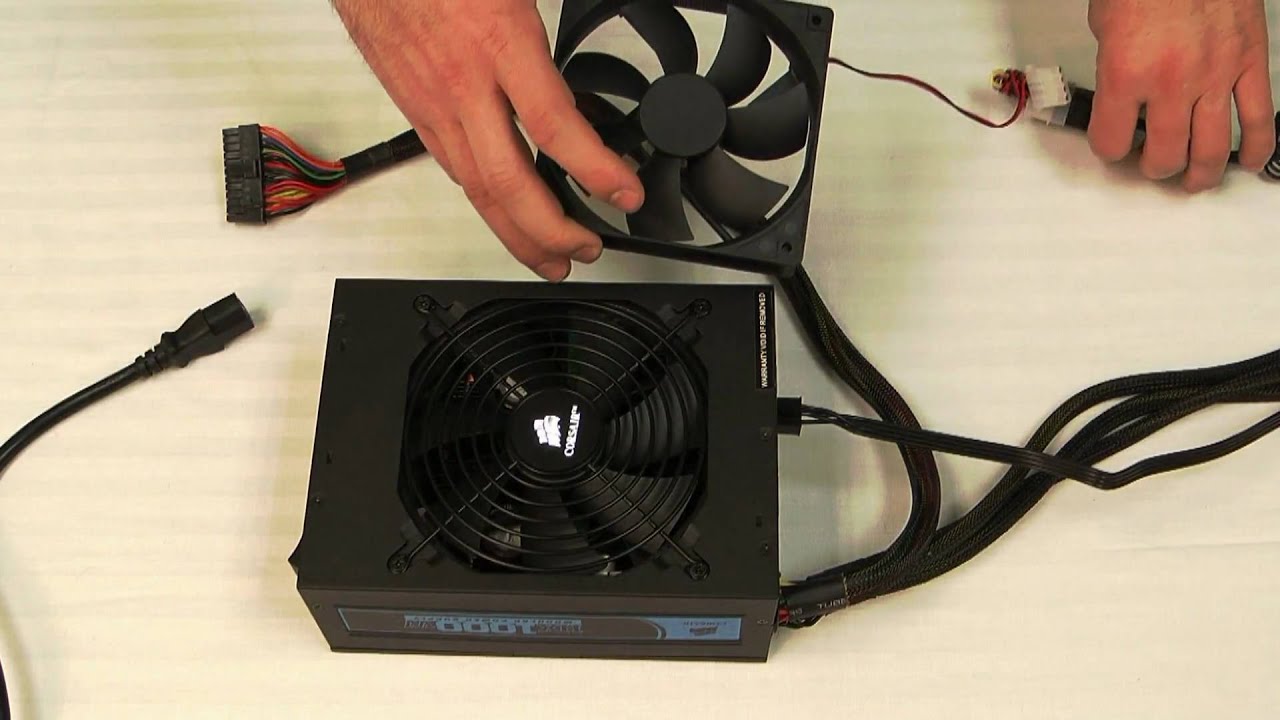
- Prepare the new fan: Unbox the new fan and ensure that it is free from any damage. Check that all necessary accessories, such as screws or mounting brackets, are included.
- Align the fan: Position the replacement fan in the same location as the old fan within the PSU. Make sure it aligns properly with the mounting points.
- Screw the fan into place: Using the screws or mounting brackets provided, secure the new fan to the PSU. Tighten the screws appropriately, but avoid over-tightening, as it may damage the fan or the PSU casing.
- Connect the fan cables: Attach the fan cables to their respective connectors on the PSU. Ensure a secure connection, aligning the pins correctly. Double-check that the fan cables are not obstructing any other components within the PSU.
- Organize the cables: Arrange the cables neatly, ensuring they don’t interfere with the fan or obstruct airflow. Use cable ties or zip ties to secure any loose cables and keep them tidy.
- Inspect the installation: Take a moment to visually inspect the new fan and surrounding area to ensure everything is properly installed and aligned. Ensure there are no loose screws, cables, or any other potential issues.
During the installation, be careful not to exert excessive force or damage any components inside the PSU. Take your time and ensure a secure and proper installation of the new fan.
Now that the new fan is installed, it’s time to move on to the next step: closing the PSU. We’ll guide you through the process in the following section.
Step 8: Closing the PSU
After successfully installing the new fan in your PSU, it’s time to close it up. Follow these steps to securely close the PSU:
- Position the PSU cover: Carefully place the PSU cover back onto the main body. Align the screw holes on the cover with the corresponding holes on the PSU to ensure a proper fit.
- Secure the cover: Insert and tighten the screws that hold the PSU cover in place. Start with one corner and work your way around, ensuring that all screws are adequately tightened, but avoid over-tightening to prevent damage to the casing.
- Check for any loose components: Give the PSU a gentle shake or pat to ensure that all internal components are secure. Listen for any rattling or loose components, and double-check that all cables are properly connected.
- Verify proper alignment: Take a moment to visually inspect the PSU and ensure that the cover is aligned correctly. It should be flush with the main body and sit evenly in the case.
By following these steps, you’ll ensure that the PSU is successfully closed, protecting the internal components and ensuring safe operation of your computer.
Now that the PSU is closed, it’s time to move on to the next step: reconnecting the PSU to your computer. We’ll guide you through this process in the following section.
Step 9: Reconnecting the PSU
Now that you’ve closed the PSU, it’s time to reconnect it to your computer. Follow these steps carefully to ensure a proper and secure reconnection:
- Locate the PSU mounting area: Identify the mounting area within your computer case where the PSU is intended to be placed. It is typically found at the top or bottom of the case, with screw holes for securing the PSU.
- Slide the PSU back into place: Gently slide the PSU back into its designated spot in the computer case, aligning it with the mounting holes.
- Screw the PSU into place: Use the screws or bolts that you removed earlier to secure the PSU to the case. Make sure to tighten each screw firmly, but avoid over-tightening to prevent damage.
- Reconnect the power cables: Connect the power cables to their corresponding connectors on the motherboard and other components, ensuring a secure and proper connection for each cable.
- Organize the cables: Arrange the power cables neatly, using cable ties or zip ties to keep them organized and prevent any interference with the new fan or other components.
- Double-check connections: Take a moment to inspect all the cable connections and ensure that they are properly seated and secure. Confirm that no cables are loose or obstructing any cooling components.
It’s crucial to double-check all connections and ensure they are properly seated to avoid any potential issues or component damage.
Now that the PSU is reconnected, it’s time to move on to the final step: testing the replacement fan. We’ll guide you through this process in the following section.
Step 10: Testing the Replacement Fan
Now that the replacement fan has been installed and the PSU is reconnected to your computer, it’s important to test the fan to ensure it is functioning properly. Follow these steps to test the replacement fan:
- Power on your computer: Plug in the power cord and turn on your computer. Allow it to boot up completely.
- Listen for the fan: Pay attention to any unusual noises coming from the PSU. If you hear any grinding, rattling, or loud noises, it could indicate an issue with the fan. The replacement fan should operate smoothly and quietly.
- Observe fan operation: Take a look at the fan blades to ensure they are spinning freely. Verify that the fan is moving air and providing proper cooling to the PSU and other internal components.
- Check for overheating: Monitor the temperature of your computer components, especially the CPU and GPU, using diagnostic software or monitoring tools. If the replacement fan is functioning correctly, it should help maintain a stable temperature and prevent overheating.
- Run stress tests (optional): If you want to be thorough, you can run stress tests on your computer to put a heavy load on the system and monitor the temperatures. This will help ensure that the replacement fan is capable of cooling the components effectively under demanding conditions.
During this testing phase, it’s essential to keep a close eye on the fan’s operation and the overall temperature of your computer. If you notice any issues or concerns, such as abnormal temperatures or fan failure, it’s recommended to seek further assistance or consult with a professional technician.
Congratulations! You have successfully replaced the faulty PSU fan and tested the replacement. By taking these steps, you have ensured the proper cooling of your PSU and other components, promoting the longevity and performance of your computer.
Conclusion
Replacing a faulty PSU fan is a crucial maintenance task to ensure optimal performance and longevity of your computer system. By following the step-by-step guide that we have provided, you now have the knowledge and confidence to replace the PSU fan yourself.
Throughout this guide, we discussed the importance of proper preparation, including gathering the necessary tools and materials. We walked you through the process of disconnecting power, removing the PSU, opening it up, identifying the faulty fan, and removing it carefully. We then guided you through the steps of choosing the right replacement fan, installing it securely, and closing the PSU properly. Finally, we highlighted the importance of testing the replacement fan to ensure its functionality.
Remember, when engaging in any hardware-related repairs, it is crucial to prioritize safety. Take necessary precautions, such as disconnecting power, grounding yourself, and handling components with care. If you are uncertain about any step or lack the experience, it’s always best to seek professional assistance.
By replacing the faulty PSU fan, you have taken a proactive step towards maintaining the health and performance of your computer system. The new fan will contribute to proper cooling, preventing overheating and potential damage to important components.
We hope that this guide has been helpful in guiding you through the process of replacing a PSU fan. With the knowledge and skills you have gained, you can now tackle this repair task confidently. Remember to regularly clean your computer and check for any signs of fan malfunction to ensure the optimal functioning and longevity of your system. Keep your computer cool and enjoy uninterrupted performance!