Introduction
Welcome to our guide on how to rename a file on a Chromebook. If you’re a Chromebook user, you may find yourself needing to change the name of a file for various reasons. Whether you want to make a file name more descriptive, correct a typo, or organize your files better, the renaming feature on Chromebook can help you achieve that.
A Chromebook is a versatile device that runs on Chrome OS, Google’s own operating system. While it may have some differences compared to traditional desktop systems, renaming a file on a Chromebook is a straightforward process that can be accomplished in just a few simple steps. Whether you’re a beginner or an experienced user, this guide will walk you through the process.
In this article, we will provide you with a step-by-step tutorial on how to rename a file on a Chromebook. We will cover everything from opening the Files app to confirming the file name change. So, let’s get started and learn how to rename files effortlessly on your Chromebook!
Step 1: Open the Files App
The first step to rename a file on a Chromebook is to open the Files app. The Files app is the default file manager on Chromebooks, where you can organize, view, and manage your files and folders.
To open the Files app, you can either click on the “Launcher” button located in the bottom-left corner of the screen and then click on the “Files” icon, or you can use the keyboard shortcut “Shift + Search + F”. This will launch the Files app and display your files and folders.
Once the Files app is open, you will see a list of your files and folders in the main window. The left sidebar displays different locations such as “Google Drive”, “Downloads”, and “Recent”, where your files are stored.
Now that you have successfully opened the Files app, you’re ready to proceed to the next step and locate the file you want to rename.
Step 2: Locate the File You Want to Rename
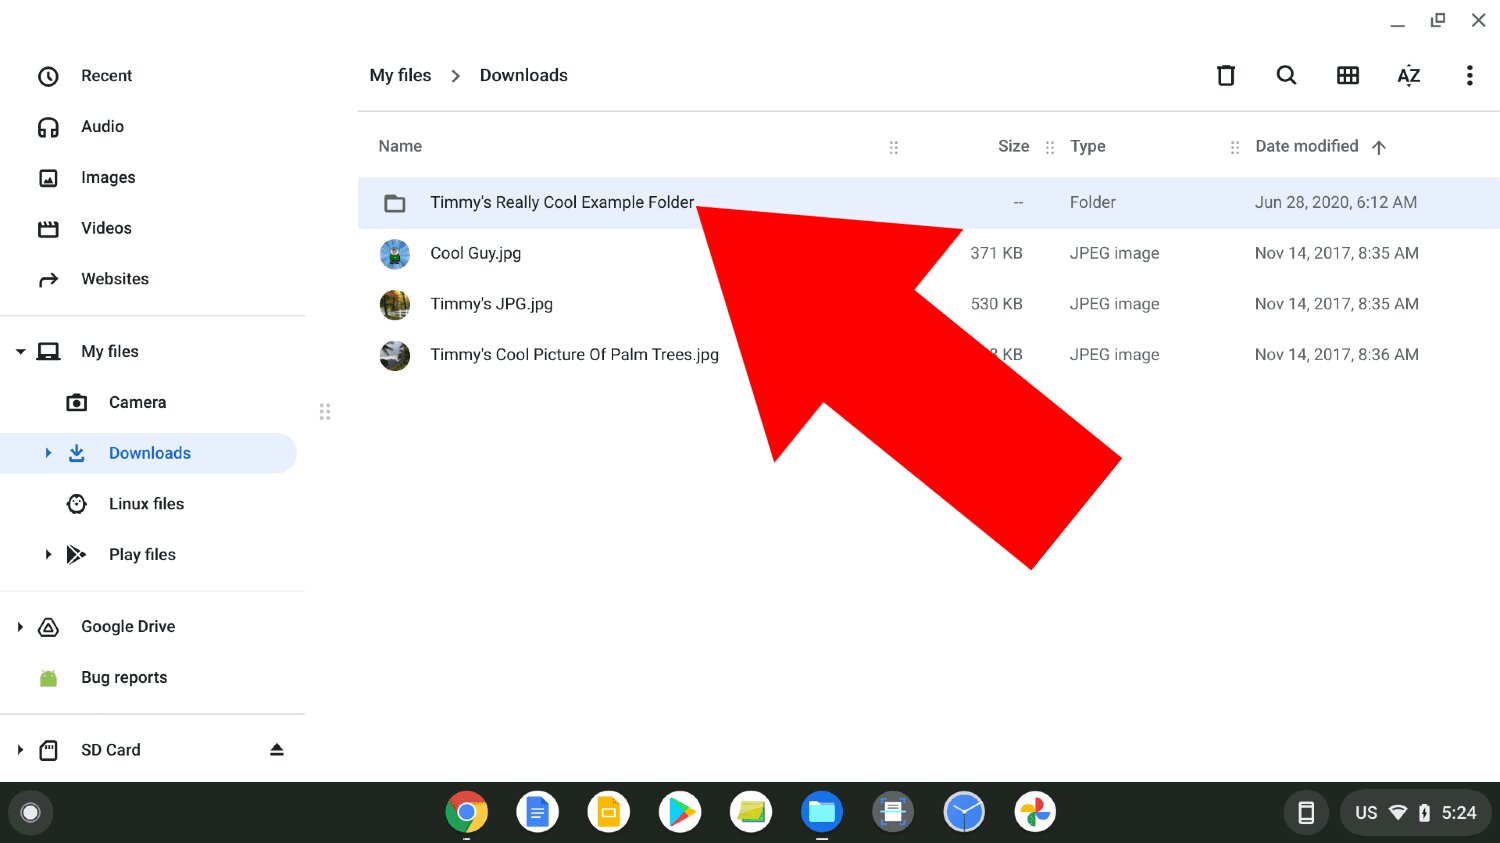
After opening the Files app on your Chromebook, you need to locate the file that you want to rename. The Files app organizes your files and folders in a user-friendly manner, making it easy to find the file you’re looking for.
In the main window of the Files app, you will see a list of your files and folders. You can navigate through different locations by clicking on the options in the left sidebar, such as “Google Drive”, “Downloads”, or “Recent”. Depending on where your file is stored, you may need to click on the appropriate location to find it.
If you know the specific folder where the file is located, you can simply click on that folder to view its contents. Alternatively, you can use the search bar at the top of the Files app to search for the file by name. Just type the name of the file in the search bar, and the app will display the matching results.
Once you have located the file you want to rename, you can proceed to the next step and learn how to rename it using the Files app on your Chromebook.
Step 3: Right-Click on the File
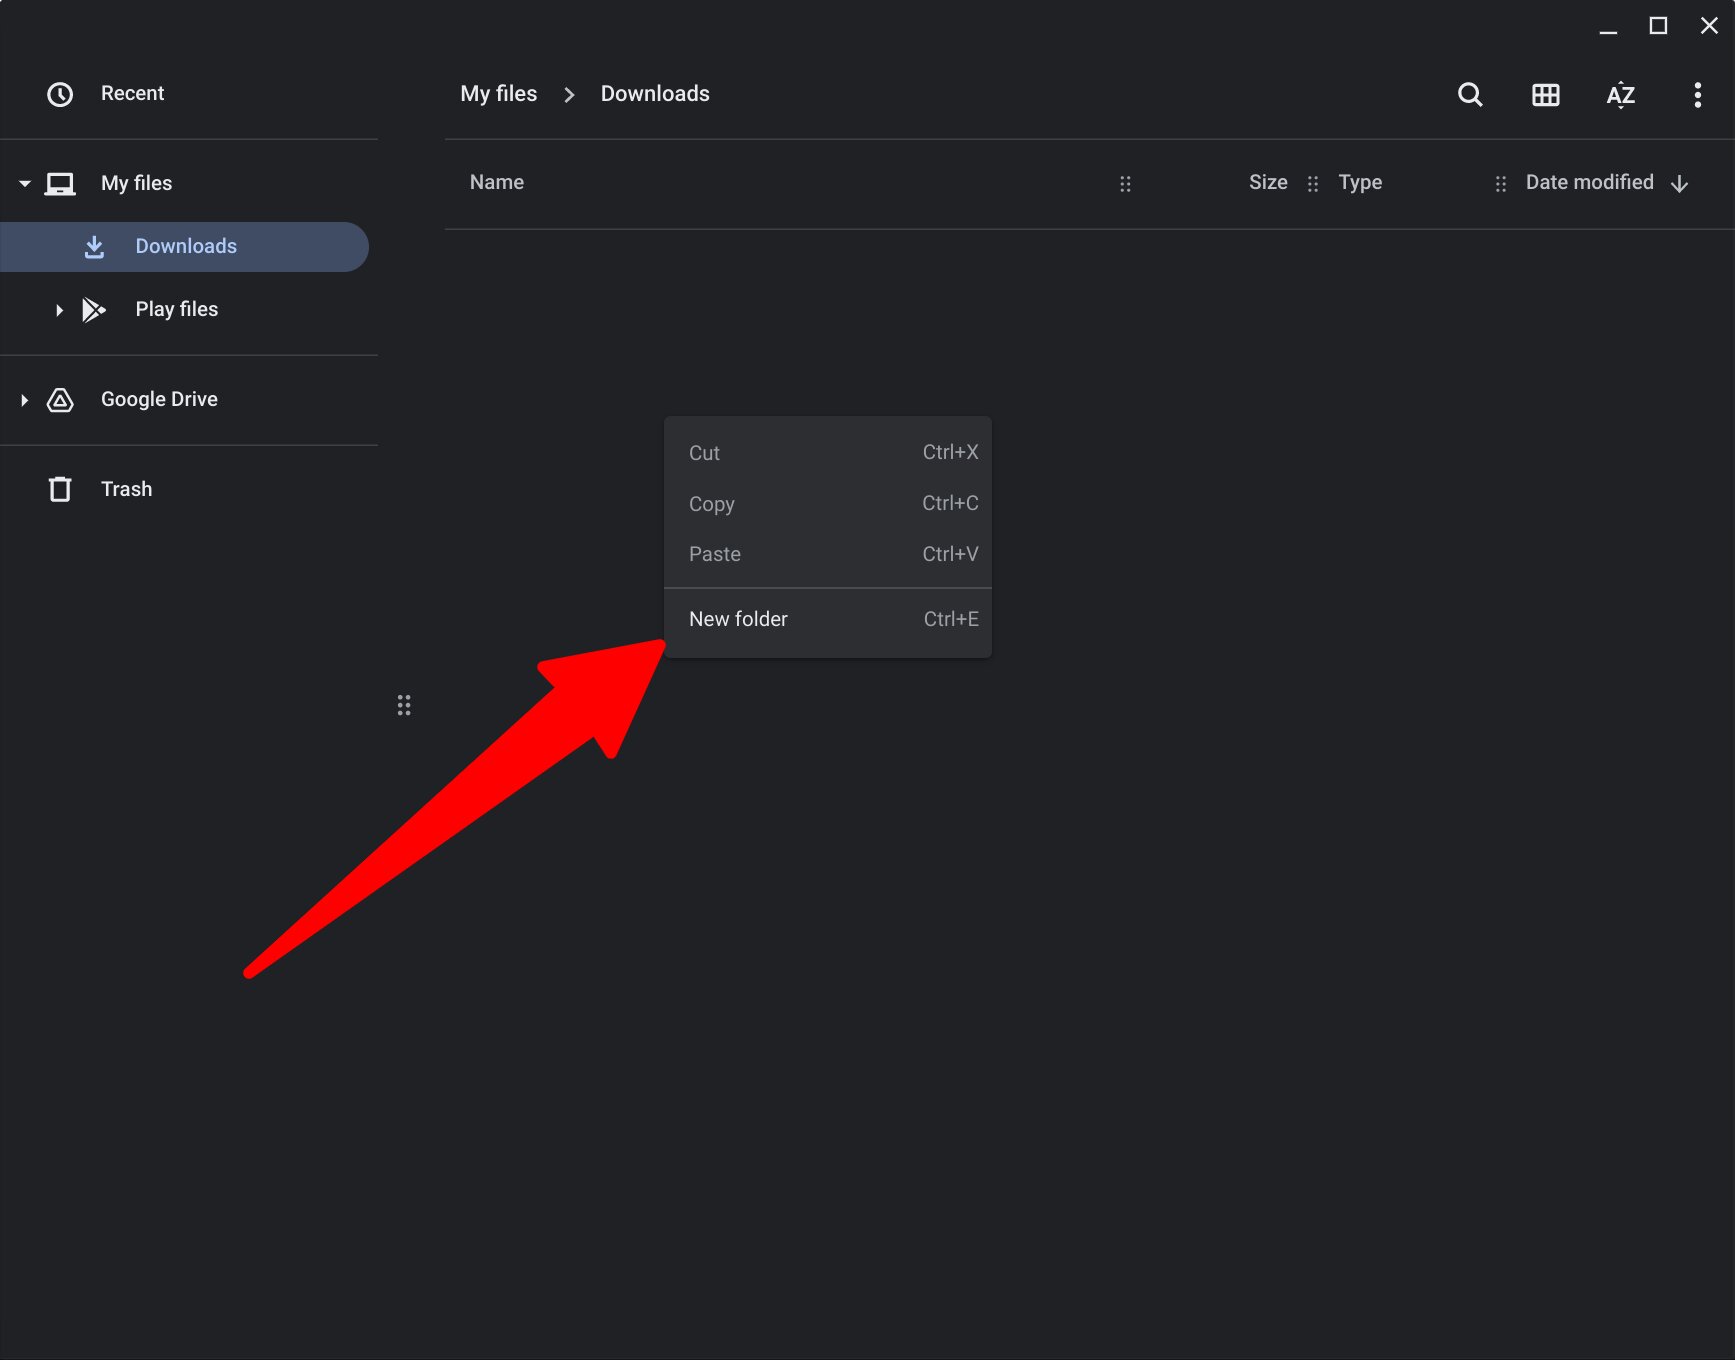
Now that you have found the file you want to rename in the Files app on your Chromebook, it’s time to initiate the renaming process. To do this, you need to right-click on the file with your mouse or trackpad. If you are using a touch screen, press and hold on the file until a context menu appears.
When you right-click on the file, a context menu will open up with several options to choose from. This menu provides various actions that you can perform on the file, such as copying, moving, deleting, and renaming.
If you’re not familiar with right-clicking on a Chromebook, it’s important to note that there are a few ways to perform this action. You can either use a two-finger tap on the trackpad, press the Alt key on your keyboard while clicking with one finger on the trackpad, or use a mouse with a right-click button.
After successfully right-clicking on the file, a context menu will appear on the screen, giving you access to different options. In the next step, we will focus on selecting the “Rename” option from the context menu to proceed with renaming the file.
Step 4: Select “Rename” from the Context Menu
After right-clicking on the file in the Files app on your Chromebook, a context menu will appear on the screen. This menu provides you with various options to choose from, including renaming the file.
To rename the file, you need to select the “Rename” option from the context menu. Move your cursor or use the arrow keys to highlight the “Rename” option, and then click on it or press the Enter key on your keyboard to proceed.
By selecting the “Rename” option, you are indicating that you want to change the current name of the file to something different. This action will open up a text field where you can edit the file name and customize it according to your preference.
If you accidentally click on an option other than “Rename,” don’t worry. Simply navigate back to the file, right-click on it again, and select the “Rename” option from the menu.
Once you have successfully selected the “Rename” option from the context menu, you can move on to the next step and edit the file name to give it a new identity.
Step 5: Edit the File Name
After selecting the “Rename” option from the context menu in the Files app on your Chromebook, a text field will appear, allowing you to edit the file name. This is where you can give the file a new name that better suits your needs.
The text field will initially contain the current name of the file, which you can modify or completely replace. To edit the file name, simply click or tap inside the text field to activate it and start typing.
You have the freedom to choose any desired name for the file, but it’s essential to keep a few things in mind. Firstly, ensure the new name accurately represents what the file contains. This helps you easily identify the file in the future.
Secondly, avoid using any special characters or symbols in the file name. Stick to letters, numbers, and spaces (although spaces are generally discouraged for file names to ensure compatibility across different platforms).
If you want to make multiple changes to the file name, you can use the backspace or delete keys on your keyboard to remove characters, or you can select and overwrite the entire name with the new one.
Lastly, pay attention to the file extension. The file extension identifies the file type and should not be changed unless you want to convert the file to a different format. For example, if you have a file named “document.pdf,” you can change the name to “meeting_notes.pdf” while preserving the “.pdf” extension.
Once you have finished editing the file name, you’re ready to save the changes and give the file its new identity. The next step will show you how to do that on your Chromebook.
Step 6: Press Enter to Save the New Name
After you have edited the file name in the text field, it’s time to save the changes and assign the file its new name. To do this, simply press the Enter key on your keyboard.
When you press Enter, the file name will be updated and saved with the new name you have provided. The text field will disappear, and you will see the updated file name displayed in the Files app.
It’s worth noting that pressing Enter also signifies that you have finished editing the file name. If you make any changes and want to cancel the renaming process without saving the new name, you can press the Esc key on your keyboard instead.
Once you have pressed Enter to save the new name, take a moment to review the updated file name in the Files app and ensure that it reflects the desired changes. If you are satisfied with the new name, you can move on to the next step to find confirmation of the successful renaming process.
Renaming files on a Chromebook is a quick and straightforward process, enabling you to efficiently manage and organize your files with customized names that suit your requirements. The final step will provide you with confirmation that the file has been successfully renamed.
Step 7: Confirmation Message
After successfully pressing Enter to save the new name for the file in the Files app on your Chromebook, you will receive a confirmation message that the file has been renamed. This serves as validation that the renaming process was completed.
The confirmation message typically appears briefly in a small notification or toast-like pop-up at the bottom of the screen. It may display a message such as “File name changed” or “Rename successful”. This message assures you that the file now has the updated name you provided.
It’s important to note that the specific appearance and wording of the confirmation message may vary depending on the version of Chrome OS you are using. However, regardless of the exact message, it serves as an indicator that the renaming process was successful.
Once you have received the confirmation message, you can navigate back to the location where the file is stored and verify that the updated name is displayed in the Files app. The new name will now be associated with the file, making it easier for you to identify and locate it in the future.
Congratulations! You have successfully renamed a file on your Chromebook. Repeat these steps whenever you need to modify the name of any file on your device.
Renaming files is a useful skill that allows you to organize and manage your files more efficiently. It helps establish a clear and logical file naming structure that suits your needs and makes it easier to search for specific files.
Now that you have learned how to rename a file on a Chromebook, you can fully utilize this feature and keep your files organized and easily accessible.
Conclusion
Renaming files on a Chromebook is a simple and essential skill that empowers you to organize your files in a way that best suits your needs. The step-by-step process outlined in this guide has hopefully provided you with a clear understanding of how to rename a file on your Chromebook.
By following the steps, you can easily open the Files app, locate the file you want to rename, right-click on it, select the “Rename” option, edit the file name, press Enter to save the changes, and receive a confirmation message that the renaming process was successful.
Renaming a file can help you maintain a well-organized file system, making it easier to find and manage your files. Whether you want to make file names more descriptive, correct typos, or establish a consistent naming convention, the renaming feature on your Chromebook provides you with that flexibility.
Remember to choose names that accurately represent the content of your files and avoid using special characters or symbols. Stick to letters, numbers, and spaces for maximum compatibility across different platforms.
So the next time you find yourself needing to rename a file on your Chromebook, feel confident in your ability to navigate the Files app and effortlessly give your files the names they deserve.
Start harnessing the power of file organization on your Chromebook through renaming, and enjoy the simplicity and efficiency it brings to your digital life.