Introduction
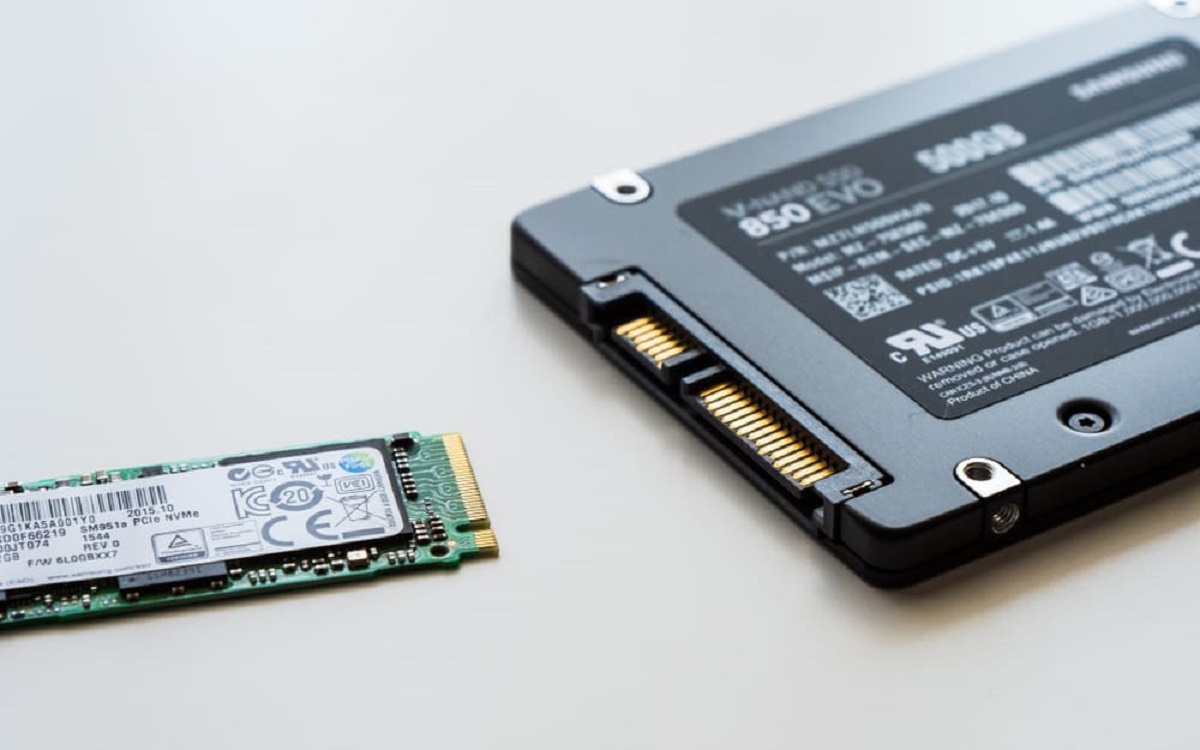
Welcome to the guide on how to remove a partition from your SSD (Solid State Drive). SSDs have become increasingly popular due to their fast performance and reliability. They offer users the flexibility to allocate different portions of the drive for various purposes, such as installing multiple operating systems or separating personal and work-related files. However, there may come a time when you no longer need a particular partition and want to reclaim the space.
Removing a partition from your SSD can be a straightforward process, depending on the operating system you’re using. In this guide, we will walk you through the steps for removing a partition in Windows using Disk Management, on a Mac using Disk Utility, and even explore the option of using third-party software.
Before we dive into the step-by-step methods, it’s important to note that when you remove a partition, all data stored on that partition will be permanently deleted. Therefore, it is crucial to back up any important files or data before proceeding with the partition removal process. It’s always better to be safe than sorry.
Now that we’ve covered the basics, let’s move on to the methods for removing a partition from your SSD. Whether you’re using Windows, Mac, or third-party software, we’re here to guide you through the process to help you reclaim that valuable space on your SSD.
Important Note Before Removing a Partition
Before you proceed with removing a partition from your SSD, there are a few important factors to consider. It’s crucial to be aware of the potential consequences and take the necessary precautions to avoid any data loss or complications during the process.
First and foremost, make sure that you have backed up any important data from the partition you intend to remove. This step is crucial because once a partition is deleted, all data stored within it will be permanently erased. Therefore, it’s essential to create a backup to ensure that you don’t lose any important files or documents.
Additionally, it’s important to note that removing a partition will also remove any operating system installed on it. If you have a dual-boot setup or have separate partitions for different operating systems, be aware that removing a partition will render the corresponding operating system inaccessible. Ensure that you either have a backup of the operating system or are confident in deleting it entirely.
It’s advisable to have a clear understanding of the purpose and use of the partition you’re planning to remove. Evaluate if you truly no longer need the partition and if deleting it won’t impact your workflow or personal data. It’s always a good idea to review your disk structure and partition allocation before making any decisions.
Lastly, depending on the method you choose for removing a partition, it’s important to have administrative privileges on your computer. Some methods may require elevated permissions to make changes to the drive structure. Ensure that you have the necessary permissions and access rights before proceeding.
By considering these important factors and taking the necessary precautions, you can avoid any potential data loss or complications that might arise from removing a partition from your SSD. Now that we’ve covered these important notes, let’s move on to the step-by-step methods for removing a partition on different operating systems.
Method 1: Using Disk Management (Windows)
If you’re using a Windows operating system, one of the easiest ways to remove a partition from your SSD is through the built-in Disk Management tool. Here’s a step-by-step guide on how to do it:
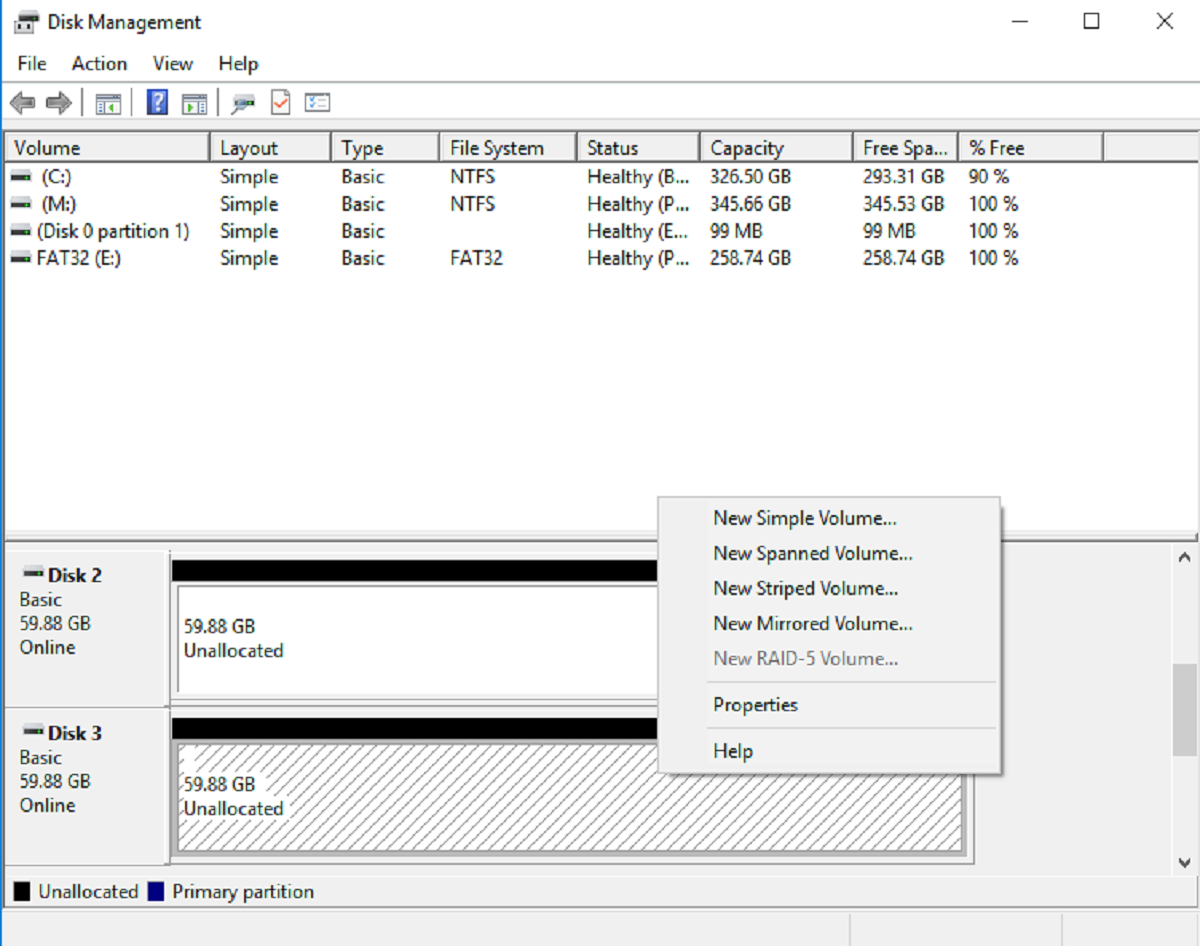
Step 1: Open Disk Management: Press the Windows key + X on your keyboard and select “Disk Management” from the menu that appears. Alternatively, you can right-click the Windows Start button, choose “Disk Management” from the context menu, and it will open the Disk Management tool.
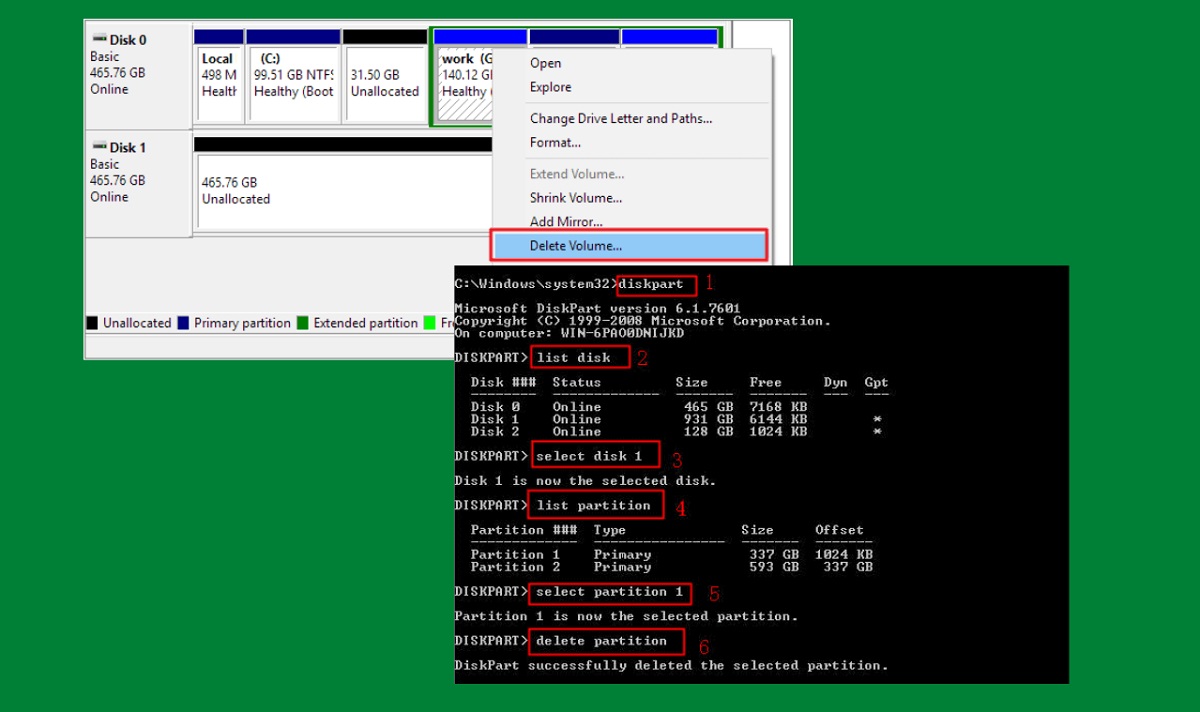
Step 2: Select the Partition to Remove: In the Disk Management window, you will see a list of all the drives and partitions connected to your computer. Locate the partition you want to remove and right-click on it. From the dropdown menu, select “Delete Volume.”
Step 3: Remove the Partition: A warning message will appear, informing you that all data on the partition will be deleted. Make sure you have backed up any important data from the partition. Then, click “Yes” to confirm the deletion. The partition will be removed, and the space will become unallocated.
That’s it! You have successfully removed a partition from your SSD using the Disk Management tool in Windows. Remember that the deleted partition will appear as unallocated space, which you can now allocate for other purposes if desired.
Please note that the steps may slightly vary depending on the version of Windows you are using. If you encounter any difficulties or are unsure about certain settings, it’s recommended to consult the Windows documentation or seek assistance from a technical expert.
Now that you’re familiar with the Disk Management method for removing partitions, let’s explore another approach using Disk Utility on a Mac.
Step 1: Open Disk Management
To begin the process of removing a partition using Disk Management in Windows, you’ll first need to open the Disk Management tool. Follow these steps:
1. Press the Windows key + X on your keyboard. This will open a menu with a variety of administrative tools.
2. From the menu, select “Disk Management.” This will launch the Disk Management tool, displaying a visual representation of your computer’s storage devices.
Alternatively, you can also access Disk Management by right-clicking on the Start button and selecting “Disk Management” from the context menu.
Once Disk Management is open, you’ll be able to see a list of all the connected drives and their corresponding partitions. The layout will provide you with an overview of the storage configuration on your computer.
It’s important to note that if your SSD doesn’t have any free space or unallocated partitions, you may need to create some by resizing existing partitions or deleting unnecessary ones before removing a partition. Be cautious while performing these actions, as they may result in data loss if not done properly.
By successfully opening Disk Management, you’re now ready to proceed to the next step: selecting the partition you wish to remove. Read on to learn how to do this in the following section.
Step 2: Select the Partition to Remove
After opening Disk Management, the next step in removing a partition from your SSD is selecting the specific partition that you want to remove. Follow these simple steps:
1. In the Disk Management window, you’ll see a graphical representation of your drives and partitions. Take a moment to identify the partition you wish to remove.
2. Right-click on the partition you want to remove. A context menu will appear with several options.
3. From the context menu, select “Delete Volume.” This option will initiate the process of removing the selected partition.
Please note that once you select “Delete Volume,” all data stored on the partition will be permanently erased. Ensure that you have backed up any important files or data before proceeding with this step.
Additionally, make sure you’re selecting the correct partition, as removing the wrong one can result in data loss. Take a moment to double-check the partition label or size to confirm it’s the correct one.
If there are any logical drives or extended partitions within the partition you want to remove, you’ll be prompted to delete those as well. Make sure to carefully review the information displayed before proceeding.
By successfully selecting the partition you want to remove, you’re one step closer to reclaiming valuable space on your SSD. The next and final step involves removing the selected partition, which will be covered in the next section.
Step 3: Remove the Partition
Once you have selected the partition you want to remove in Disk Management, the final step is to remove the partition. Follow these steps to complete the process:
1. After selecting the desired partition, a warning message will appear stating that all data on the partition will be permanently erased. It’s essential to ensure that you have backed up any important files or data from the partition before proceeding.
2. Read the warning message carefully to make sure you are deleting the correct partition. Once you are certain, click “Yes” to confirm the deletion.
3. Disk Management will then begin the process of removing the partition. This may take a few moments, depending on the size of the partition and the performance of your computer.
4. Once the partition is successfully removed, the space occupied by the partition will be displayed as unallocated. This unallocated space can now be utilized for other purposes, such as creating a new partition or extending an existing one.
It’s important to note that once a partition is deleted, the data stored within it cannot be recovered. Ensure that you have double-checked your backup and confirmation before proceeding with the removal process.
By successfully removing the partition, you have now reclaimed the space on your SSD for other storage needs. Feel free to explore how to allocate the unallocated space based on your requirements.
If you encounter any issues or complications during the partition removal process, it’s advisable to consult the Windows documentation or seek assistance from a technical expert for further guidance.
Now that you’ve learned how to remove a partition using the Disk Management tool in Windows, let’s move on to another method: using Disk Utility on a Mac.
Method 2: Using Disk Utility (Mac)
If you’re using a Mac computer, you can remove a partition from your SSD using the built-in Disk Utility. Here’s a step-by-step guide on how to do it:
Step 1: Open Disk Utility: To begin, go to the “Applications” folder and then open the “Utilities” folder. From there, double-click on “Disk Utility” to launch the application.
Step 2: Select the Partition to Remove: In the left sidebar of Disk Utility, you will see a list of storage devices including your SSD. Click on the SSD to select it.
Step 3: Remove the Partition: Once you have selected the SSD, you will see a series of tabs at the top of the Disk Utility window. Click on the “Partition” tab to view a visual representation of the partitions on the SSD.
Within the partition layout, click on the partition you wish to remove. It will become highlighted, indicating that it is selected.
To remove the selected partition, click on the minus (-) button located below the partition layout. This will initiate the process of removing the partition.
Note: Before removing the partition, ensure that you have backed up any important data from it, as the process will permanently erase all data stored within the partition.
Once you click the minus (-) button, a confirmation prompt will appear asking if you want to remove the partition. Review the information displayed to confirm that you have selected the correct partition, and then click “Remove” to proceed.
Disk Utility will now begin the process of removing the partition. Depending on the size of the partition and the performance of your Mac, this may take a few moments.
Once the partition removal process is complete, the selected partition will be deleted, and the space will be displayed as “Free Space” in the partition layout. You can now use this free space to create new partitions or resize existing ones according to your needs.
That’s it! You have successfully removed a partition from your SSD using Disk Utility on your Mac. If you have any further questions or encounter any difficulties during the process, it’s advisable to consult the Apple Support documentation or seek assistance from an Apple expert.
Now that you’re familiar with the Disk Utility method for removing partitions, let’s explore another option: using third-party software.
Step 1: Open Disk Utility
To begin the process of removing a partition using Disk Utility on your Mac, you need to open the Disk Utility application. Here’s how you can do it:
1. Navigate to the “Applications” folder on your Mac. You can find it by clicking on the Finder icon in the Dock and locating the “Applications” folder in the sidebar.
2. Within the “Applications” folder, open the “Utilities” folder. You can either scroll down or use the search feature to quickly find the “Utilities” folder.
3. Inside the “Utilities” folder, locate and double-click on the “Disk Utility” application to launch it.
After launching Disk Utility, the application will open and display a list of storage devices connected to your Mac, including your SSD. You’ll also see additional information about the available space and partitions on each device.
It’s important to note that Disk Utility is a powerful tool that allows you to manage various aspects of your storage devices. Take a moment to familiarize yourself with the interface and the options available in Disk Utility before proceeding with any partition removal process.
If your SSD doesn’t appear in the Disk Utility window, make sure it is properly connected to your Mac. You can also click on the “View” option in the menu bar and select “Show All Devices” to ensure that all connected devices are displayed in the sidebar.
By successfully opening Disk Utility, you’re now ready to proceed to the next step of selecting the partition you want to remove. Read on to learn how to do this in the following section.
Step 2: Select the Partition to Remove
After opening Disk Utility on your Mac, the next step in removing a partition from your SSD is selecting the specific partition that you want to remove. Here’s how you can do it:
1. In the Disk Utility window, you will see a sidebar on the left side displaying all the connected storage devices, including your SSD. Click on the SSD to select it.
2. Once you have selected the SSD, the main area of the Disk Utility window will display information about the selected device, including its capacity, manufacturer, and details about the partitions on the SSD.
3. To view the partitions on your SSD, click on the “Partition” tab at the top of the Disk Utility window. This tab provides a visual representation of the partitions present on the selected device.
4. Within the partition layout, you will see the partitions listed. Click on the partition you wish to remove. It will become highlighted, indicating that it is selected.
It’s important to ensure that you have selected the correct partition before proceeding with its removal. Take a moment to double-check the labels and sizes of the partitions to confirm that you’re removing the intended one.
If you have any concerns about removing the partition, you can also use the “Info” button located at the top of the Disk Utility window. This button provides additional details about the selected partition, such as its file system format and capacity, which can help you confirm your selection.
By successfully selecting the partition you want to remove in Disk Utility, you’re ready to proceed with the next step: removing the selected partition. This process will be covered in the upcoming section.
Step 3: Remove the Partition
Once you have selected the partition you want to remove in Disk Utility on your Mac, the next step is to actually remove the partition. Here’s how you can do it:
1. After selecting the desired partition, you will see various options and buttons at the top of the Disk Utility window. Click on the “minus” (-) button located towards the bottom left side of the window.
2. A confirmation dialog will appear, asking if you want to remove the selected partition. Review the information displayed on this dialog to ensure that you have chosen the correct partition for removal.
3. Once you have confirmed that you are removing the correct partition, click on the “Remove” button.
Please note that removing a partition will permanently erase all data stored within it. Make sure you have backed up any important files before proceeding with the removal process.
4. Disk Utility will now initiate the process of removing the partition. This process may take a few moments, depending on the size and complexity of the partition.
5. Once the partition removal process is complete, the selected partition will be removed from your SSD. The space previously occupied by the partition will now be displayed as “Free Space” within the disk layout.
With the partition successfully removed, you have now reclaimed the space on your SSD for other storage needs. You can allocate this free space to other partitions or resize existing ones as per your requirements.
If you encounter any difficulties or have any concerns during the partition removal process, it’s advisable to consult the official Apple documentation or seek assistance from an Apple expert for further guidance.
Now that you’ve learned how to remove a partition using Disk Utility on your Mac, let’s explore another method: using third-party software.
Method 3: Using Third-Party Software
If you prefer to use third-party software, there are several options available that can help you remove a partition from your SSD. These software tools often provide additional features and flexibility compared to the built-in disk management tools. Here’s a general outline of how you can use third-party software to remove a partition:
Step 1: Download and Install Third-Party Software: Start by researching and identifying a reliable third-party software tool that suits your requirements. Visit the software developer’s website and download the appropriate version for your operating system.
Step 2: Launch the Software and Select SSD: Once the software is installed, launch it on your computer. Navigate to the partition management section and select your SSD from the list of available drives.
Step 3: Remove the Partition: Next, locate the specific partition you want to remove from the SSD within the software’s interface. Depending on the software, you may have options such as right-clicking on the partition and selecting a “Delete” or “Remove” option. Review the software’s documentation or on-screen instructions for the precise steps.
Note: It’s crucial to carefully review the information before removing the partition. Ensure that you have selected the correct partition and are aware that all data stored within it will be permanently erased. Take the necessary precautions of backing up important files or data before proceeding.
Follow the Software’s Guidelines: Each third-party software tool may have its own interface and set of procedures for removing a partition. It’s vital to follow the software’s guidelines and prompts throughout the process to ensure successful removal.
By using third-party software, you may have additional options and features at your disposal that can enhance the partition removal process. These tools often provide advanced functionalities such as the ability to preview partition changes before applying them, optimizing partition layout, or even recovering deleted partitions if needed.
Make sure to choose a reputable third-party software tool from a trusted developer, as using unknown or unreliable software can pose risks to your data and system stability.
Now that you’re familiar with the option of using third-party software to remove a partition, it’s time to conclude this guide.
Step 1: Download and Install Third-Party Software
If you choose to use third-party software to remove a partition from your SSD, the first step is to download and install the appropriate software on your computer. Follow these steps to get started:
1. Research and Identify Reliable Software: Conduct thorough research to find a reputable third-party software that suits your needs. Look for software that is well-reviewed, widely used, and recommended by reputable sources. Make sure the software supports your operating system and has the features you require.
2. Visit the Developer’s Website: Once you have identified the software you want to use, visit the official website of the software developer. Most developers provide a download page or section on their website where you can access the software.
3. Download the Software: Locate the download link for the software on the developer’s website. Click on the appropriate download link to begin the download process. The file will typically be in a compressed format, such as a .zip or .dmg file.
4. Extract the Software: After the download is complete, locate the downloaded file on your computer and extract its contents if necessary. This step may involve double-clicking the downloaded file to extract its contents to a designated folder.
5. Install the Software: Once the software is extracted, locate the installation file within the extracted contents. Double-click on the installation file to begin the installation process. Follow the on-screen instructions provided by the software installer to complete the installation.
6. Launch the Software: After the installation is complete, you can typically find the newly installed software in your computer’s applications or programs list. Click on the software’s icon or shortcut to launch it.
It’s important to note that while third-party software can offer additional features and flexibility for managing partitions, it’s crucial to choose a reliable and trusted software tool. Research and read reviews to ensure that the software you choose is reputable and safe to use. Using unknown or unreliable software can pose risks to your data and computer system.
By successfully downloading and installing the third-party software, you’re now ready to proceed with using the software to remove the partition from your SSD. Each software may have its own set of procedures, which will be covered in the subsequent steps of this guide.
Now that you’ve completed the first step of downloading and installing the third-party software, let’s move on to the next step: launching the software and selecting your SSD.
Step 2: Launch the Software and Select SSD
Once you have downloaded and installed the third-party software on your computer, the next step in removing a partition from your SSD is to launch the software and select the SSD as the target device. Follow these steps to proceed:
1. Locate the installed software on your computer. This may be in your applications or programs list, or you may have created a desktop shortcut during the installation process. Double-click on the software’s icon or shortcut to launch it.
2. After launching the software, you will typically be greeted with a welcome screen or a main dashboard. Take a moment to familiarize yourself with the software’s interface and options.
3. Look for a section or module within the software that is specifically designed for partition management or disk management. The exact location and name of this section may vary depending on the software you’re using.
4. Within the partition management section, you should see a list of your connected storage devices. Locate and select the SSD that contains the partition you want to remove.
5. Depending on the software, you may be able to select the SSD by clicking on its corresponding name or drive letter in the software’s interface. The selection may be indicated by highlighting or marking the SSD in some way.
6. Double-check your selection to ensure that you have chosen the correct SSD. It’s important to be certain about the target device before proceeding with any partition removal operations.
By successfully launching the third-party software and selecting the SSD as the target device, you’re now ready to move on to the next step of removing the partition. Each software may have its own set of procedures and options for removing partitions, which will be covered in the subsequent steps.
Now that you have launched the software and selected the SSD, let’s proceed with the next step of removing the partition using the third-party software.
Step 3: Remove the Partition
After launching the third-party software and selecting the SSD as the target device, the next step in removing a partition is to actually remove it using the software. Here’s how you can proceed:
1. Locate the partition management or disk management section within the software’s interface. This section should provide options and features for managing partitions on your SSD.
2. Within the partition management section, you should be able to see a list of partitions on the selected SSD. Identify the specific partition you want to remove from the list.
3. Select the partition you wish to remove by clicking on it or using the designated selection option provided by the software. The selected partition should be highlighted or indicated in some way to confirm that it is chosen.
4. Look for an action or operation that allows you to remove the selected partition. This option may be labeled as “Delete,” “Remove,” or something similar. The exact terminology may vary depending on the software you’re using.
Note: It’s essential to carefully review the information and ensure that you have selected the correct partition for removal. Removing a partition will permanently delete all data stored within it. Make sure to have a backup of any important files or data before proceeding with this step.
5. Once you have confirmed the partition removal action, initiate the process by clicking on the designated button or option. The software will then proceed to remove the selected partition from your SSD.
6. Depending on the size and complexity of the partition, the removal process may take some time. The software will provide progress information or a completion notification when the process is finished.
By successfully removing the partition using the third-party software, you have now freed up space on your SSD for other purposes. The removed partition will no longer be visible in the partition list within the software’s interface.
If you encounter any difficulties or have questions during the partition removal process, reference the user documentation or help resources provided by the software developer. It’s important to follow the software’s guidelines and recommendations to ensure a successful partition removal.
Now that you have removed the partition using third-party software, you can proceed with utilizing the available free space or explore other options based on your needs.
Conclusion
Removing a partition from your SSD can be a straightforward process, offering you the flexibility to reclaim valuable space and optimize your storage configuration. In this guide, we explored three different methods for removing a partition: using Disk Management in Windows, Disk Utility on a Mac, and utilizing third-party software.
When using Disk Management or Disk Utility, it’s crucial to back up any important data before proceeding with the partition removal process. Carefully select the correct partition to avoid unintentional deletion of data and be aware that removing a partition will permanently erase all data stored within it.
If you choose to use third-party software, make sure to download and install a reputable and trusted tool from a reliable developer. These software options often provide additional features and flexibility for managing partitions, but it’s essential to exercise caution and follow the software’s guidelines.
Remember to familiarize yourself with the user documentation and seek assistance whenever needed, especially if you encounter any difficulties or uncertainties during the partition removal process. It’s always better to proceed with caution and make informed decisions to protect your data and ensure a smooth removal process.
By following the steps outlined in this guide, you can confidently remove partitions from your SSD and optimize your storage configuration according to your needs. Enjoy the additional space and improved organization that comes from removing unnecessary partitions from your SSD.
Thank you for reading this guide, and we hope it has provided you with valuable insights and guidance for removing partitions from your SSD. If you have any further questions or need additional assistance, feel free to consult the appropriate documentation or seek help from technical experts in the field.