Introduction
When using QuickBooks Online to manage your business finances, it’s essential to ensure that transactions are correctly classified. Inaccurate categorization can lead to incorrect financial reports, tax filing issues, and potential errors in your financial analysis. Fortunately, QuickBooks Online provides a straightforward process for reclassifying transactions, allowing you to easily correct any misclassifications.
In this article, we will guide you through the process of reclassifying transactions in QuickBooks Online. Whether you need to reclassify an expense, income, or any other type of transaction, QuickBooks Online provides a user-friendly interface that makes the task simple and efficient.
Reclassifying transactions is especially useful when you have mistakenly assigned an expense to the wrong category, assigned income to the wrong account, or if you need to allocate transactions to a different class. By following the step-by-step instructions provided in this article, you’ll be able to reclassify transactions effortlessly, ensuring accurate financial reporting and analysis.
So let’s dive in and explore how to reclassify transactions in QuickBooks Online.
Step 1: Open the Transactions Page
To begin reclassifying transactions in QuickBooks Online, you first need to navigate to the Transactions page. Here’s how:
- Log in to your QuickBooks Online account using your credentials.
- On the left-hand side menu, click on the “Accounting” tab. This will display a dropdown menu.
- From the dropdown menu, select “Chart of Accounts” to access your account list.
- Under the “Action” column, click on the account that contains the transaction you want to reclassify. This will open the account register.
- In the top-right corner of the account register, you’ll find a search bar. Click on it to activate the search feature.
- In the search bar, enter relevant keywords to find the specific transaction you want to reclassify. QuickBooks Online provides several search filters, such as date, type, or transaction amount, to help you refine your search.
- Once you’ve entered your search criteria, press the “Enter” key or click on the magnifying glass icon to initiate the search.
After following these steps, QuickBooks Online will generate a list of transactions that match your search criteria. Now you are ready to proceed to the next step; selecting the transaction you wish to reclassify.
Step 2: Select the Transaction to Reclassify
After opening the Transactions page and conducting a search for the specific transaction you want to reclassify, it’s time to select the transaction. Follow these steps:
- Review the search results displayed on the account register. QuickBooks Online will present a list of transactions that match your search criteria.
- Scan through the list to locate the transaction you wish to reclassify. You can use the transaction type, amount, or date to help you identify the correct transaction.
- Once you have found the transaction, click on it to select it. The selected transaction will be highlighted or marked in some way to indicate that it is currently active.
By following these steps, you will successfully select the transaction you want to reclassify in QuickBooks Online. With the transaction selected, you can now proceed to the next step, which involves editing the transaction details.
Step 3: Click on the “Edit” Button
Once you have selected the transaction you wish to reclassify, the next step is to click on the “Edit” button. This will enable you to modify the transaction details and make the necessary changes. Follow these instructions:
- With the transaction selected, locate and click on the “Edit” button. This button is usually represented by a pencil icon or labeled “Edit”. You will find it in the upper-right corner of the transaction details section.
- After clicking on the “Edit” button, QuickBooks Online will open the transaction in edit mode. This allows you to modify various aspects of the transaction, including account, class, description, and more.
- Take a moment to review the existing transaction details. This will help you ensure that the changes you make accurately reflect the necessary adjustments.
- Make the desired changes to the transaction. For example, if you need to change the account associated with the transaction, click on the account field and select the new account from the dropdown menu.
- If applicable, you can also modify other details such as the class, amount, tax category, and memo. Make sure to carefully review each field and update the information accordingly.
By following these steps and clicking on the “Edit” button, you gain the ability to modify the transaction details in QuickBooks Online. Next, we will cover how to choose the new account or class for the reclassified transaction.
Step 4: Choose the New Account or Class
After clicking on the “Edit” button and accessing the transaction in edit mode, you can now proceed to choose the new account or class for the reclassified transaction. Follow these steps:
- Review the transaction details and determine which account or class needs to be updated. This will depend on the specific changes you want to make.
- Locate the account or class field within the transaction form. This is where you can select the new account or class that you want to assign to the transaction.
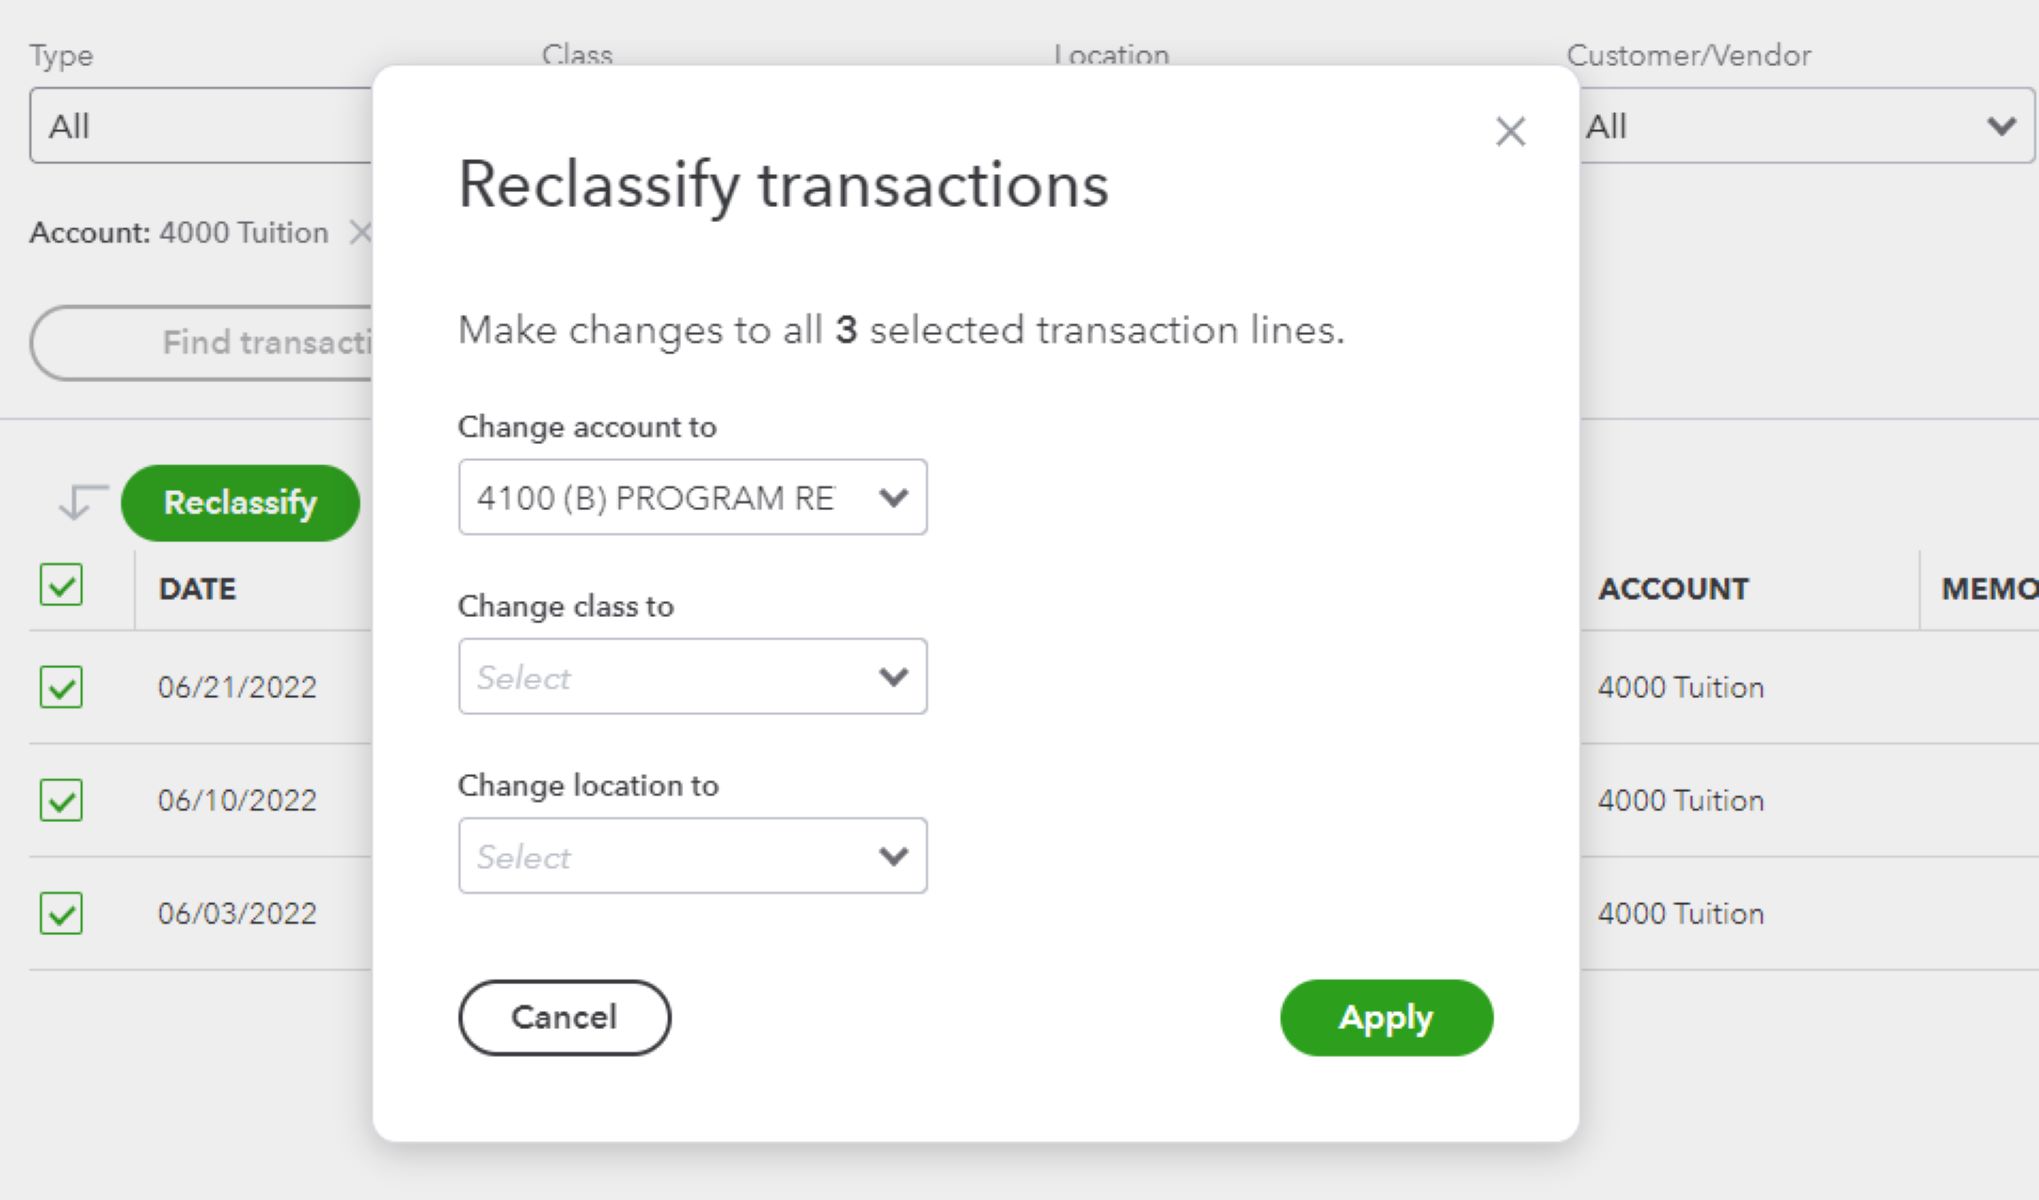
- If you are reclassifying the transaction to a new account, click on the account field and select the appropriate account from the dropdown menu. QuickBooks Online provides a list of accounts that you have set up previously.
- If you are reclassifying the transaction to a different class, click on the class field and choose the desired class from the available options. Classes allow you to categorize transactions based on different segments or departments within your business.
- Double-check that you have selected the correct account or class. Review the changes you have made and ensure they accurately reflect the reclassification you want to perform.
By following these steps and selecting the new account or class, you are almost finished with the process of reclassifying the transaction. The next step involves saving the changes you have made. Let’s proceed to the following section to learn how to save the reclassified transaction in QuickBooks Online.
Step 5: Save the Changes
Once you have chosen the new account or class for the reclassified transaction, it’s important to save the changes you have made. This will ensure that the transaction is updated correctly in QuickBooks Online. Follow these steps:
- After selecting the new account or class, review the rest of the transaction details to ensure everything is accurate. Check that the description, amount, and any other relevant information are correct.
- Once you are satisfied with the changes you have made, locate the “Save” or “Save and Close” button. This button is typically found at the bottom or top-right corner of the transaction form.
- Click on the “Save” or “Save and Close” button to save the reclassified transaction. QuickBooks Online will update the transaction with the new account or class you have selected.
- After saving the changes, you may be redirected back to the account register or transaction list. Take a moment to ensure that the reclassified transaction is now reflected accurately in the respective account or list.
By following these steps and saving the changes, you have successfully reclassified the transaction in QuickBooks Online. The next step is to verify the reclassified transaction to confirm that the changes have been applied correctly. Let’s move on to the final step in the process.
Step 6: Verify the Reclassified Transaction
After saving the changes and reclassifying the transaction in QuickBooks Online, it’s crucial to verify that the reclassification was successful. This step ensures that the transaction is correctly reflected in your financial records and reports. Follow these steps to verify the reclassified transaction:
- Return to the Transactions page or account register where you initially located the transaction.
- Use the search function or scroll through the list to find the reclassified transaction.
- Once you have located the transaction, ensure that the account or class has been updated according to your reclassification.
- Double-check other transaction details, such as the description, amount, and any other relevant information, to confirm that they accurately reflect the changes you made.
- If you have generated any financial reports that include the reclassified transaction, such as income statements or expense reports, review those reports to verify that the transaction is now correctly categorized.
By following these steps and verifying the reclassified transaction, you can ensure that the changes made in QuickBooks Online have been applied correctly. If everything appears accurate and the transaction is reflected as expected, congratulations! You have successfully reclassified the transaction.
However, if you notice any discrepancies or if the reclassification did not take effect as intended, you may need to repeat the previous steps to make the necessary adjustments. It’s important to ensure that your financial records are accurate and reflect the correct account or class assignments for each transaction.
With the verification process complete, you can now confidently rely on the reclassified transaction data for accurate financial reporting and analysis in QuickBooks Online.
Conclusion
Reclassifying transactions in QuickBooks Online is an essential task to maintain accurate financial records and reports for your business. By following the step-by-step instructions outlined in this article, you can easily navigate through the process and ensure that transactions are correctly categorized.
We began by opening the Transactions page and selecting the specific transaction that needs to be reclassified. Then, we clicked on the “Edit” button to access the transaction in edit mode and made the necessary changes to the account or class. After selecting the new account or class, we emphasized the significance of saving the changes to ensure the updated information is applied correctly.
Lastly, we highlighted the importance of verifying the reclassified transaction by reviewing the account register, transaction details, and financial reports. This step allows you to ensure that the reclassification has been successful and that your financial records accurately reflect the changes made.
By following these steps and taking the time to reclassify transactions as needed, you can trust that your financial data in QuickBooks Online is reliable and up-to-date. Accurate categorization of transactions ensures more accurate reporting, easier tax preparation, and improved financial analysis.
Remember, the ability to reclassify transactions is a powerful tool within QuickBooks Online that empowers you to maintain accurate financial records and make informed business decisions. Utilize this feature whenever necessary to ensure that your financial reporting is accurate and reflective of your business operations.
Now that you are equipped with the knowledge of how to reclassify transactions in QuickBooks Online, you can confidently manage your financials and maintain accurate records for your business.


