Introduction
Welcome to the world of Apple Watch! This innovative wearable device combines style, convenience, and cutting-edge technology, allowing you to stay connected and track your fitness goals on the go. But before you can start enjoying all the features of your Apple Watch, you need to pair it with your iPhone.
Pairing your Apple Watch with your iPhone is a simple and straightforward process that ensures seamless integration between the two devices. By following a few easy steps, you’ll have your Apple Watch up and running in no time.
In this article, we will guide you through the process of pairing your Apple Watch with your iPhone. Whether you’re a tech-savvy enthusiast or new to Apple products, our step-by-step instructions will help you get started. So, grab your iPhone and let’s dive in!
Note: Before you begin, make sure your iPhone is running the latest version of iOS. Keeping your software up to date is essential to ensure compatibility and avoid any potential issues during the pairing process.
Step 1: Update Your iPhone
The first step in pairing your Apple Watch with your iPhone is to make sure that your iPhone is running the latest version of iOS. Regular software updates not only introduce new features, but also include important bug fixes and security improvements.
To update your iPhone, follow these simple steps:
- Open the Settings app on your iPhone.
- Scroll down and tap on “General.”
- Select “Software Update.”
- If an update is available, you will see a message indicating so. Tap on “Download and Install.”
- Enter your passcode, if prompted, and agree to the Terms and Conditions.
- Wait for the update to download and install. This may take a few minutes, depending on your internet connection and the size of the update.
- Once the update is complete, your iPhone will restart.
After your iPhone has been updated to the latest version of iOS, you’re ready to move on to the next step: setting up your Apple Watch.
Note: It’s important to have your iPhone connected to Wi-Fi and have sufficient battery life during the update process. If you’re experiencing any issues with the update, make sure you have a stable internet connection and try again.
Step 2: Set Up Your Apple Watch
Now that your iPhone is updated, it’s time to set up your Apple Watch. The setup process is simple and only takes a few minutes to complete.
Follow these steps to set up your Apple Watch:
- Press and hold the side button on your Apple Watch until the Apple logo appears.
- Select your language preference by swiping up or down on the screen.
- Tap on your desired region or country, and then tap “Set Region.”
- Place your iPhone near your Apple Watch to start the pairing process.
- When you see the prompt on your iPhone, tap “Continue.”
- Hold your iPhone over the animated pattern displayed on your Apple Watch screen.
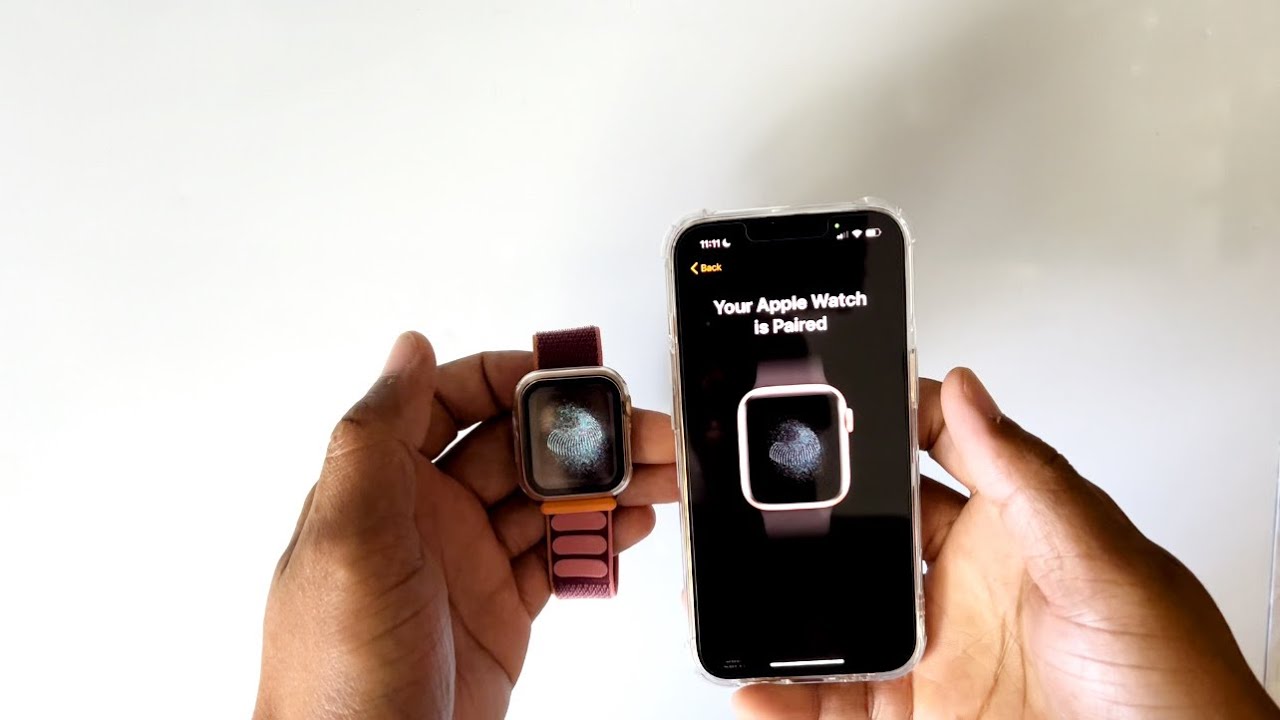
- Once your iPhone recognizes the Apple Watch, you will receive a notification indicating that your devices are paired. Tap “Set Up as New Apple Watch” to proceed with the setup.
- Follow the on-screen instructions to configure your Apple Watch’s preferences, such as selecting a wrist preference and setting up features like Apple Pay and Siri.
- Once you’ve completed the setup process, you’ll be ready to start using your Apple Watch!
Setting up your Apple Watch is an exciting step towards unlocking its full potential. By carefully following these steps, you’ll ensure a smooth and successful setup process.
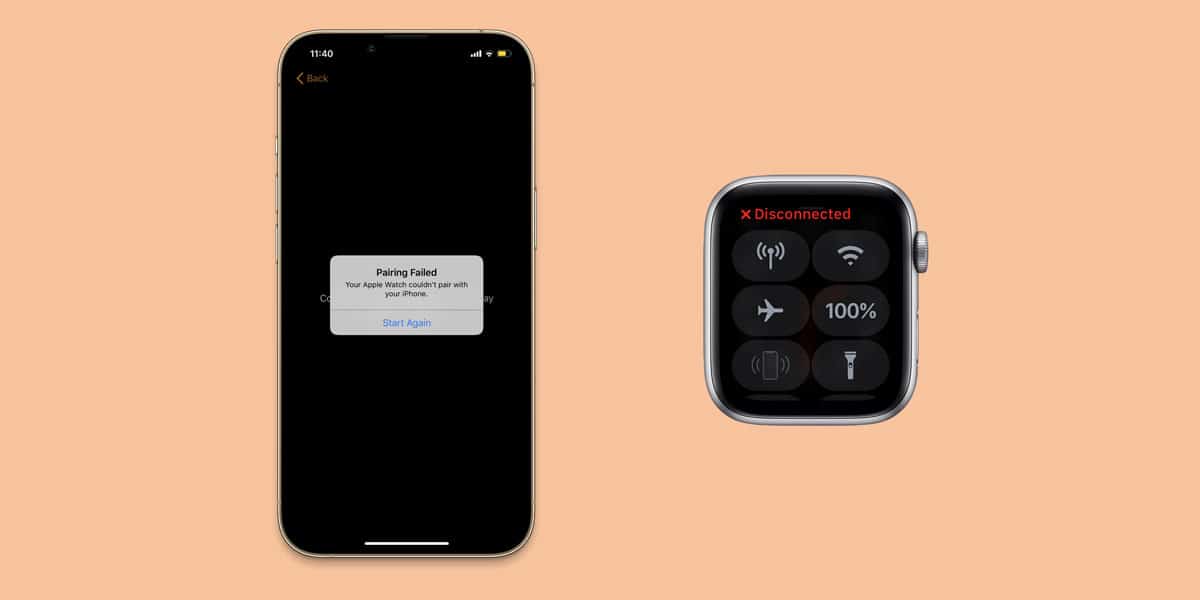
Note: If you encounter any issues during the setup process, make sure your iPhone and Apple Watch are sufficiently charged and within close proximity. Restarting both devices can often resolve any connectivity problems.
Step 3: Bring Your iPhone and Apple Watch Close Together
In order to successfully pair your Apple Watch with your iPhone, it’s important to ensure that they are in close proximity to each other. This proximity allows the devices to establish a secure connection and transfer the necessary data during the pairing process.
Here’s what you need to do:
- Make sure both your iPhone and Apple Watch are powered on and have sufficient battery life.
- Keep your iPhone and Apple Watch within a few inches of each other.
- Ensure that Bluetooth is enabled on your iPhone. You can do this by opening the Settings app, selecting “Bluetooth,” and making sure the toggle switch is in the on position.
- Check that your Apple Watch is in pairing mode. If it’s a new Apple Watch, simply turning it on should automatically put it in pairing mode. However, if you’re re-pairing an existing Apple Watch, you may need to follow a few additional steps. Go to the Settings app on your Apple Watch, tap “General,” and select “Reset.” Then choose “Erase All Content and Settings” to reset your Apple Watch and set it up as a new device.
Ensuring that your iPhone and Apple Watch are in close proximity and both devices are ready for pairing will greatly facilitate the next steps in the process.
Note: If your Apple Watch and iPhone are having trouble establishing a connection, try moving to a location with a stronger Bluetooth signal or restarting both devices. Sometimes a simple restart can resolve any temporary connectivity issues.
Step 4: Open the Apple Watch App on Your iPhone
Once you’ve ensured that your iPhone and Apple Watch are in close proximity, it’s time to open the Apple Watch app on your iPhone. This app is the gateway to managing your Apple Watch’s settings, applications, and more.
Follow these steps to open the Apple Watch app on your iPhone:
- Locate the Apple Watch app on your iPhone’s home screen. It’s represented by a green icon with an image of an Apple Watch.
- Tap on the Apple Watch app to open it.
Once the Apple Watch app is open, you’ll have access to a variety of settings and features that allow you to customize your Apple Watch experience. From here, you can manage notifications, install apps, adjust the watch face, and much more.
Note: It’s important to have a stable internet connection during this step. If you’re experiencing connectivity issues, make sure you’re connected to Wi-Fi or have a reliable cellular data connection.
The Apple Watch app on your iPhone serves as a centralized hub for managing and customizing your Apple Watch. Take some time to explore the app and familiarize yourself with its capabilities before proceeding to the next step.
Step 5: Tap “Start Pairing” on Your iPhone and Apple Watch
With the Apple Watch app open on your iPhone, it’s time to initiate the pairing process by tapping “Start Pairing.” This step will prompt both your iPhone and Apple Watch to begin searching for each other and establish a connection.
Here’s what you need to do:
- On your iPhone, tap “Start Pairing” within the Apple Watch app. The app will prompt you to align your iPhone with the center of the Apple Watch’s screen. Follow the instructions provided.
- Simultaneously, on your Apple Watch, you will see the “Start Pairing” message. Tap on it to initiate the pairing process.
By tapping “Start Pairing” on both your iPhone and Apple Watch, you’re allowing the devices to communicate and synchronize their settings. This step is crucial in establishing a seamless connection between the two devices.
Note: If you experience any difficulty initiating the pairing process, ensure that your iPhone and Apple Watch are still in close proximity and that Bluetooth is enabled on your iPhone. You may also want to try restarting both devices to resolve any temporary issues.
Once you’ve successfully tapped “Start Pairing” on both your iPhone and Apple Watch, you’re one step closer to enjoying the full functionality of your Apple Watch!
Step 6: Position Your iPhone Over the Animation on Your Watch
After tapping “Start Pairing” on your iPhone and Apple Watch, it’s time to position your iPhone over the animation displayed on your Apple Watch. This step allows your iPhone and Apple Watch to establish a secure connection and transfer the necessary data.
Follow these steps to position your iPhone correctly:
- Hold your iPhone steadily, ensuring that the camera is facing the Apple Watch.
- Align your iPhone’s viewfinder with the animation displayed on your Apple Watch.
- Keep your iPhone steady and centered over the animation.
- Wait for your iPhone to recognize the pairing animation on your Apple Watch. This may take a few seconds.
Properly positioning your iPhone over the animation ensures that the devices can communicate effectively and complete the pairing process. It’s important to be patient during this step and avoid moving the iPhone too quickly or abruptly.
Note: If your iPhone is having trouble recognizing the pairing animation on your Apple Watch, make sure there is adequate lighting in the room. Additionally, ensure that the camera lens on your iPhone is clean and free from any obstructions that may hinder its view.
Once your iPhone successfully recognizes the pairing animation on your Apple Watch, you’re well on your way to completing the pairing process and enjoying the full functionality of your Apple Watch!
Step 7: Wait for the Pairing Process to Complete
After positioning your iPhone over the animation on your Apple Watch, it’s time to patiently wait for the pairing process to complete. During this step, your iPhone and Apple Watch will exchange information, sync settings, and establish a secure connection.
Here’s what you need to do:
- Keep your iPhone steady and positioned over the animation on your Apple Watch.
- Allow the devices to communicate and transfer data. The length of time for the pairing process to complete may vary, but it typically takes just a few minutes.
- Be patient and attentive to any prompts or instructions that may appear on your iPhone or Apple Watch screens.
While waiting for the pairing process to complete, it’s important not to disrupt the connection between your iPhone and Apple Watch. Avoid moving your iPhone or interrupting the synchronization process, as this may cause pairing errors or delays.
Note: If the pairing process takes longer than expected, ensure that both your iPhone and Apple Watch have sufficient battery life. Additionally, make sure that your iPhone is within a reasonable distance from your Apple Watch to maintain a strong Bluetooth connection.
Once the pairing process is successfully completed, you’ll receive a notification and be ready to proceed to the next steps in setting up your Apple Watch. Congratulations on successfully establishing a connection between your iPhone and Apple Watch!
Step 8: Set Up Apple Pay and Siri
Now that your Apple Watch is paired with your iPhone, it’s time to customize your device even further by setting up Apple Pay and Siri. These features enhance the convenience and functionality of your Apple Watch, allowing you to make payments and interact with your device using voice commands.
Follow these steps to set up Apple Pay and Siri on your Apple Watch:
- Open the Apple Watch app on your iPhone.
- Tap on the “My Watch” tab at the bottom of the screen.
- Scroll down and select “Wallet & Apple Pay.”
- Follow the prompts to add your cards to Apple Pay on your Apple Watch, enabling you to make secure and convenient payments directly from your wrist.
- To set up Siri, go back to the “My Watch” tab in the Apple Watch app.
- Scroll down and select “Siri.”
- Toggle on “Hey Siri” to activate Siri using your voice command.
With Apple Pay set up, you can make purchases at supported merchants by simply tapping your Apple Watch on the payment terminal. Siri, on the other hand, allows you to perform various tasks and get information without needing to touch your Apple Watch.
Note: Make sure that your Apple Watch is connected to Wi-Fi or paired with your iPhone for Siri to work seamlessly. Also, ensure that your iPhone is running the latest version of iOS to fully utilize Siri’s capabilities.
By setting up Apple Pay and Siri on your Apple Watch, you’ve taken another step towards maximizing the functionality and convenience of your device. Now you’re ready to enjoy even more features and explore the numerous possibilities that your Apple Watch has to offer!
Step 9: Choose Your Wrist Preference
Choosing your wrist preference is an important step in setting up your Apple Watch. This selection ensures that notifications, haptic feedback, and other features are optimized for your preferred wrist placement. Whether you’re left-handed or right-handed, the Apple Watch can be customized to accommodate your needs.
Follow these steps to choose your wrist preference:
- On your Apple Watch, navigate to the home screen by pressing the Digital Crown.
- Tap on the “Settings” app.
- Scroll down and select “General” from the options.
- Tap on “Orientation.”
- Select your preferred wrist option: “Left” or “Right.”
By choosing your wrist preference, your Apple Watch will adjust the display orientation and optimize features such as the Digital Crown and side button for your convenience.
Note: If you want to switch your wrist preference at a later time, you can easily modify this setting in the Apple Watch app on your iPhone. Just open the app, go to “My Watch,” select “General,” and then tap on “Orientation.”
By selecting your preferred wrist orientation, you’re personalizing your Apple Watch experience and ensuring maximum comfort and usability. Enjoy a device that is tailored to your needs!
Step 10: Customize Your Apple Watch Settings
Now that you’ve completed the initial setup process for your Apple Watch, it’s time to delve into the various customization options available. Customizing your Apple Watch allows you to tailor the device to your preferences and make it uniquely yours.
Here are some ways you can customize your Apple Watch settings:
- Access the “Settings” app on your Apple Watch’s home screen.
- Explore the different categories available, such as “Brightness & Text Size,” “Sounds & Haptics,” “App Layout,” “Watch Face,” and more.
- Adjust the brightness and text size to your liking.
- Choose from a variety of watch faces and customize the complications displayed on them.
- Set your preferred sound and haptic alerts.
- Organize the app layout on your Apple Watch by rearranging, adding, or removing apps.
- Explore additional customization options available within each category and make adjustments as desired.
Through customization, you can personalize your Apple Watch to suit your style, needs, and preferences. Whether it’s changing the watch face to match your outfit or adjusting the haptic feedback for notifications, these settings allow you to tailor the device to your liking.
Note: You can also customize your Apple Watch settings using the companion Apple Watch app on your iPhone. This app offers more comprehensive options and a larger interface, making it easier to navigate and customize your device.
By taking the time to customize your Apple Watch settings, you’ll create a personalized experience that aligns with your unique preferences. Enjoy exploring the options and making your Apple Watch truly yours!
Conclusion
Congratulations on successfully pairing your Apple Watch with your iPhone! By following the step-by-step instructions outlined in this guide, you’ve embarked on a journey to unlock the full potential of your Apple Watch.
The pairing process ensures a seamless integration between your iPhone and Apple Watch, allowing you to receive notifications, track your fitness goals, make secure payments, and enjoy a range of other convenient features right from your wrist.
Remember to keep your iPhone and Apple Watch updated to the latest software versions to ensure compatibility and access to the latest features and improvements. Additionally, don’t forget to explore the various customization options available to tailor your Apple Watch to your preferences, from choosing the wrist orientation to customizing the watch face and settings.
Enjoy the world of possibilities that your Apple Watch brings! Stay connected, active, and in control of your daily life while sporting this stylish and functional wearable device.
Whether you’re using your Apple Watch for fitness tracking, staying up to date with notifications, or simply adding a touch of personalization to your everyday life, we hope this guide has been helpful in setting up your Apple Watch. Get ready to enjoy the convenience and innovation that comes with wearing an Apple Watch on your wrist!