Introduction
Welcome to our guide on how to open up an Inspiron Gaming Laptop! Whether you’re looking to upgrade your laptop’s components or simply need to troubleshoot an issue, opening up your laptop can seem like a daunting task. However, with the right tools and step-by-step instructions, it’s much easier than you might think.
Opening up your Inspiron Gaming Laptop can give you access to its internal components, including the RAM, storage drive, and battery. This allows you to upgrade or replace these components for better performance or to fix any issues you may be experiencing. So, if you’re ready to take control of your laptop’s hardware, let’s get started!
Please note that opening up your laptop may void the warranty, so proceed at your own risk. Additionally, it’s always a good idea to back up your important files before performing any hardware changes.
In this guide, we will walk you through the process step-by-step, ensuring that you have a clear understanding of each stage. We will cover the tools you’ll need, how to properly shut down and disconnect your laptop, removing the battery, and the detailed steps of opening up the laptop and accessing its internal components. We will also provide tips on how to upgrade or replace these components and guide you through the process of putting everything back together.
Don’t worry if you’re a beginner; we’ll explain each step in a beginner-friendly manner. By the end of this guide, you’ll have the skills and knowledge necessary to confidently open up your Inspiron Gaming Laptop and perform any necessary upgrades or repairs.
So, without further ado, let’s dive into our step-by-step instructions on how to open up an Inspiron Gaming Laptop and take control of its hardware!
Tools Needed
Before you begin opening up your Inspiron Gaming Laptop, it’s important to gather the necessary tools to ensure a smooth and successful process. Here are the essential tools you will need:
- Screwdriver set: You will need a set of precision screwdrivers with various sizes and head types. This will allow you to unscrew and remove the screws holding the laptop’s casing together.
- Compressed air: A can of compressed air is useful for removing any dust or debris that may have accumulated inside the laptop. This will help keep the internal components clean and improve overall performance.
- Anti-static wristband: To protect the sensitive components of your laptop from electrostatic discharge, it’s recommended to wear an anti-static wristband. This will help prevent any damage caused by static electricity when handling the internal components.
- Plastic pry tools: Plastic pry tools are handy for safely separating the laptop’s casing without causing any damage. These tools are designed to gently pry open the edges of the laptop and ensure a smooth opening process.
- Labeling stickers: It’s a good idea to have some labeling stickers on hand to mark and identify the screws or components you remove. This will make it easier to put everything back together correctly and prevent any confusion.
- Cloth or microfiber towel: Having a clean cloth or microfiber towel nearby is essential for cleaning any fingerprints or smudges on the laptop’s surfaces.
Make sure you have all of these tools prepared and easily accessible before you begin opening up your laptop. Having the right tools will make the process much smoother and reduce the risk of damaging any components or the laptop itself.
Now that you have gathered the necessary tools, you’re ready to move on to the next step: shutting down and disconnecting your Inspiron Gaming Laptop.
Step 1: Shut Down and Disconnect
Before you begin opening up your Inspiron Gaming Laptop, it’s crucial to shut it down properly and disconnect it from any power source. This will ensure your safety and prevent any damage to the laptop or its components.
Here’s how to shut down and disconnect your laptop:
- Save your work: Before shutting down your laptop, save any unsaved work to prevent data loss.
- Close all applications: Close any open applications or programs running in the background.
- Shut down the laptop: Click on the “Start” menu, then select “Shut Down” or “Power Off.” Allow the laptop to fully shut down before proceeding.
- Disconnect the power cord: Once the laptop is powered off, unplug the power cord from the electrical outlet or the laptop’s power adapter. This will ensure that there is no electrical current flowing through the laptop, reducing the risk of electric shock.
- Remove any peripheral devices: If you have any external devices, such as USB drives, mice, or headphones, connected to the laptop, disconnect them to avoid any interference during the disassembly process.
- Prepare a clean workspace: Find a clean, well-lit workspace where you can safely work on your laptop. It’s essential to have enough space to lay out the laptop and its components without clutter or obstructions.
Following these steps will ensure that your laptop is properly shut down and disconnected from any power sources before proceeding to open it up. It’s crucial to prioritize your safety and the safety of your laptop throughout the process.
Now that you’ve shut down and disconnected your Inspiron Gaming Laptop, it’s time to move on to the next step: removing the battery.
Step 2: Remove Battery
Now that your Inspiron Gaming Laptop is shut down and disconnected, the next step is to remove the battery. Removing the battery is vital to ensure the safety of the internal components and to prevent any electrical mishaps.
Here’s how to remove the battery from your Inspiron Gaming Laptop:
- Locate the battery release latch: Most laptops have a battery release latch or switch that needs to be activated to remove the battery. Look for this latch or switch on the bottom or side of your Inspiron Gaming Laptop.
- Slide the latch or switch: Once you’ve located the battery release latch, slide it in the direction indicated (often an arrow) to unlock the battery.
- Remove the battery: With the latch released, gently slide the battery out of its compartment. Be careful not to force it or cause any damage to the battery or the laptop.
It’s important to handle the battery with care, as it can be delicate. Avoid dropping or mishandling it to prevent any damage.
Removing the battery not only ensures the safety of the internal components but also allows you to work on the laptop without the risk of electrical shock. With the battery removed, you will have better access to the laptop’s internal components for any necessary upgrades or repairs.
Once you’ve successfully removed the battery, set it aside in a safe place where it won’t be damaged. Now, you’re ready to move on to the next step: removing the screws to open up the laptop.
Step 3: Remove Screws
With the battery safely removed, the next step in opening up your Inspiron Gaming Laptop is to remove the screws that secure the laptop’s casing. These screws hold the laptop together and need to be taken out to access the internal components.
Follow these steps to remove the screws:
- Prepare the screwdriver: Select the appropriate size and head type of the screwdriver from your set that matches the screws on your laptop. Ensure a snug fit to avoid damaging the screws.
- Identify the screws: Carefully examine the bottom of your laptop for screws. They are usually located around the edges or in specific areas marked with symbols or labels.
- Unscrew the screws: Begin unscrewing the screws one by one using the appropriate screwdriver. Ensure the screwdriver is inserted fully into the screw head to avoid stripping the screws.
- Keep track of the screws: As you remove each screw, place it in a small container or use labeling stickers to mark their location and keep them organized. This will make it easier to reassemble the laptop later.
- Remove all screws: Continue unscrewing and removing all the screws from the laptop’s bottom. There may be different types of screws, so keep track of their locations and types if necessary.
It’s crucial to take your time and be gentle when removing the screws to avoid stripping them or causing any damage to the laptop’s casing or components.
Once you’ve successfully removed all the screws, keep them in a safe place and prepare to move on to the next step: opening up the laptop.
Step 4: Open the Laptop
Now that the screws securing the laptop’s casing have been removed, it’s time to open up your Inspiron Gaming Laptop. Opening the laptop will provide you access to its internal components, allowing you to perform maintenance, upgrades, or repairs.
Here’s how to open your laptop:
- Position the laptop: Lay the laptop down on a soft and clean surface with the bottom facing up. This will ensure that the laptop remains stable during the opening process.
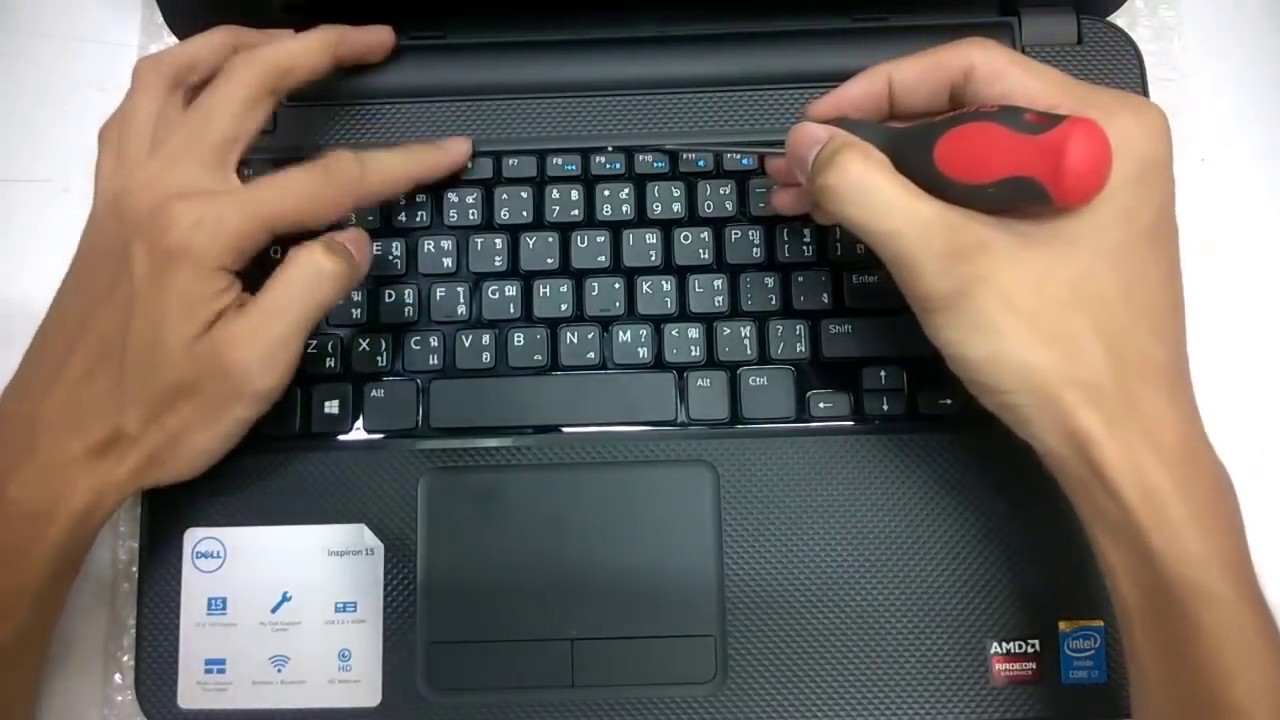
- Gently pry open the casing: Use plastic pry tools or your fingers to carefully separate the top and bottom halves of the laptop’s casing. Start near a corner and gently work your way around the laptop’s edges.
- Apply even pressure: As you pry open the casing, make sure to distribute the pressure evenly to prevent any warping or cracking of the laptop’s components.
- Remove the top half of the casing: Once the casing is separated, slowly lift the top half of the laptop’s casing, revealing the internal components underneath. Be mindful of any cables or connectors that may still be attached to the casing.
It’s essential to take your time and be cautious while opening the laptop to avoid causing any damage or dislodging any internal components. If you encounter resistance or difficulty in opening the casing, double-check that all screws have been removed.
With the laptop opened, you now have a clear view of the internal components and can proceed with performing any necessary upgrades, replacements, or repairs.
Take a moment to appreciate the inner workings of your Inspiron Gaming Laptop, but remember to handle the internal components with care to prevent any damage. Now, it’s time to move on to the next step: accessing the internal components.
Step 5: Access Internal Components
With your Inspiron Gaming Laptop now open, you have clear access to its internal components. This step will guide you through the process of identifying and accessing these components, allowing you to make necessary upgrades or repairs.
Here’s how to access the internal components of your laptop:
- Identify the internal components: Take a moment to familiarize yourself with the layout of the internal components. This may include the RAM slots, storage drive(s), wireless card, and other relevant components.
- Disconnect any cables or connectors: Before working on any internal component, ensure that you disconnect any attached cables or connectors. This will prevent any accidental damage or strain.
- Remove any securing clips or brackets: Some components may be secured by clips or brackets. Carefully remove these to release the component.
- Handle components with care: When handling internal components, such as RAM modules or storage drives, avoid touching any sensitive connectors or circuits. Hold them by the edges or use an anti-static wristband to minimize the risk of static discharge damage.
- Take note of component locations: As you remove and replace components, make note of their original locations to ensure proper reassembly later on.
Remember that each laptop model may have different internal components and layouts. It’s crucial to refer to your laptop’s documentation or manufacturer’s website for specific instructions and diagrams.
By following these steps, you can confidently access the internal components of your Inspiron Gaming Laptop. Whether you need to upgrade the RAM, replace the storage drive, or install a new wireless card, this access allows you to complete the necessary tasks effectively.
Now that you have accessed the internal components, you can proceed to the next step: upgrading or replacing the components as needed.
Step 6: Upgrade or Replace Components
Now that you have accessed the internal components of your Inspiron Gaming Laptop, you have the opportunity to upgrade or replace them to enhance the performance or fix any issues you may be experiencing. This step will guide you through the process of upgrading or replacing components.
Here’s how to upgrade or replace components in your laptop:
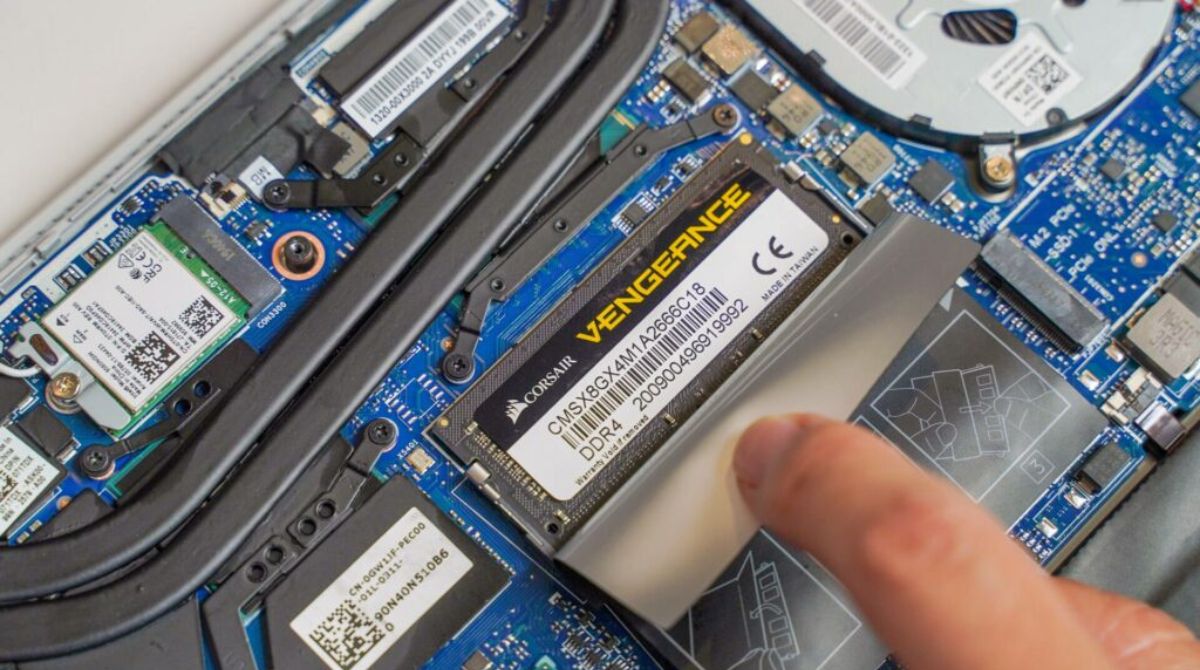
- RAM: If you want to improve your laptop’s multitasking capabilities and overall performance, consider upgrading the RAM. Locate the RAM slots on your laptop’s motherboard and remove the existing modules by releasing the retaining clips. Then, align the new RAM module with the slot and firmly press it in until the clips lock it into place.
- Storage Drive: To increase storage capacity or upgrade to a faster drive, replace the existing storage drive. Remove the screws securing the drive and slide it out of its slot. Insert the new drive and secure it with the screws. Remember to reinstall the operating system and any necessary software on the new drive.
- Wireless Card: If you’re experiencing connectivity issues or want to upgrade to a faster wireless standard, consider replacing the wireless card. Disconnect the antennas connected to the existing card and remove the screws securing it. Then, replace it with the new card and secure it with screws. Reattach the antennas to the new card.
- Battery: If your laptop’s battery no longer holds a charge or has decreased capacity, you can replace it. Disconnect the battery cable and remove any screws securing the battery in place. Replace it with a new battery, ensuring that it is properly aligned and secured.
Remember, each laptop model may have specific component requirements or compatibility limitations. Before purchasing any new components, check the laptop’s documentation or manufacturer’s website for compatibility information.
Additionally, if you are unsure about upgrading or replacing components yourself, it’s recommended to seek professional assistance to avoid any accidental damage to your laptop.
With the components upgraded or replaced to your satisfaction, you’re ready to move on to the final step: putting everything back together.
Step 7: Put It Back Together
After successfully upgrading or replacing components in your Inspiron Gaming Laptop, it’s time to put everything back together and secure the laptop’s casing. This final step will guide you through reassembling the laptop and ensuring everything is properly aligned and secured.
Follow these steps to put your laptop back together:
- Reattach the top half of the casing: Carefully lower the top half of the laptop’s casing back onto the bottom half. Ensure that all cables and connectors are properly aligned and not trapped between the two halves.
- Press the casing together: Apply gentle pressure to the edges of the laptop’s casing to align and secure the two halves. Work your way around the edges, ensuring an even and snug fit.
- Reinsert and tighten the screws: Begin inserting the screws into their respective locations, using the screwdriver to tighten them securely. Refer to your notes or labeling stickers to ensure each screw is placed correctly.
- Connect external devices: Reconnect any external devices you had disconnected, such as USB drives or headphones.
- Reinsert the battery: Slide the battery back into its compartment, ensuring it is properly aligned and securely seated. Lock it in place by sliding the latch or switch back to its original position.
- Connect the power cord: Plug the power cord back into the laptop’s power adapter or the electrical outlet, depending on your setup.
- Power on your laptop: Press the power button to turn on your laptop and verify that everything is functioning properly.
Take your time during the reassembly process to ensure that everything is aligned correctly and securely fastened. Double-check all connections and screws before proceeding to power on your laptop.
Once your laptop is back together and powered on, make sure to test all upgraded or replaced components to ensure they are functioning as expected.
Congratulations! You have successfully put your Inspiron Gaming Laptop back together, with upgraded or replaced components ready to improve your laptop’s performance.
Conclusion
Congratulations on successfully opening up your Inspiron Gaming Laptop and upgrading or replacing its internal components! By following the step-by-step instructions in this guide, you have gained the knowledge and confidence to perform maintenance, repairs, or upgrades on your laptop’s hardware.
Remember, opening up your laptop may void the warranty, so proceed with caution and at your own risk. Additionally, always back up your important files before making any hardware changes to avoid any potential data loss.
Throughout this guide, you learned how to shut down and disconnect your laptop, remove the battery, unscrew and open the laptop, access the internal components, and upgrade or replace components such as RAM, storage drives, wireless cards, and batteries.
It’s essential to handle all components with care, ensuring that you align them properly and secure them in place during reassembly. Taking your time and following the manufacturer’s guidelines for compatibility will help prevent accidental damage to your laptop.
Now that you have successfully put your laptop back together, enjoy the improved performance or functionality of the upgraded or replaced components. Your Inspiron Gaming Laptop is now tailored to your needs and ready for many more hours of gaming, productivity, or entertainment.
We hope this guide has been helpful in demystifying the process of opening up your laptop and performing component upgrades or replacements. Remember to always refer to your laptop’s documentation or manufacturer’s website for specific instructions and compatibility information.
Thank you for using this guide, and happy computing with your newly upgraded Inspiron Gaming Laptop!


