Introduction
Welcome to this article on how to open a Lenovo Ultrabook. Lenovo Ultrabooks are known for their sleek design and high-performance capabilities. Whether you need to upgrade a component, replace a faulty part, or simply explore the inner workings of your Ultrabook, knowing how to open it is essential.
Opening a Lenovo Ultrabook may seem like a daunting task, but with the right tools and careful instructions, you can easily access the internal components. This guide will take you through the step-by-step process of opening your Ultrabook, allowing you to make any necessary changes or repairs.
Before we begin, it’s important to note that opening your Ultrabook may void the warranty, so proceed at your own discretion. Additionally, make sure to handle all components and tools with care to prevent any damage or injury.
If you’re ready to dive into the inner workings of your Lenovo Ultrabook, let’s get started with gathering the necessary tools.
Step 1: Gathering the necessary tools
Before you begin the process of opening your Lenovo Ultrabook, you’ll need to gather a few essential tools. Having these tools on hand will make the process smoother and ensure that you have everything you need to safely access the internal components.
Here are the tools you’ll need:
- Small Phillips head screwdriver: This will be used to remove the screws holding the Ultrabook’s bottom cover in place.
- Plastic pry tools: These specialized tools are designed to help you pry open the Ultrabook’s casing without causing any damage.
- Anti-static wrist strap: This will help protect your Ultrabook’s sensitive components from electrostatic discharge (ESD) that could occur during the process.
- Disposable gloves: While not mandatory, wearing disposable gloves can prevent smudges and fingerprints on the internal components.
Make sure the screwdriver is the correct size for the screws in your Ultrabook, as using the wrong size can strip the screws or damage the screwdriver.
All of these tools are readily available at most computer hardware stores or online retailers. Once you have gathered these tools, you are ready to move on to the next step: shutting down the Ultrabook.
Step 2: Shutting down the Ultrabook
Before you can proceed with opening your Lenovo Ultrabook, it is crucial to shut it down properly. This ensures that all processes are safely terminated, reducing the risk of data loss or damage to the internal components.
Follow these steps to shut down your Ultrabook:
- Save your work and close all open applications.
- Click on the “Start” button in the bottom left corner of the screen.
- Select “Power” from the menu that appears.
- Choose “Shut down” and wait for the Ultrabook to power off completely.
It is important to wait for the Ultrabook to completely shut down before proceeding to the next step. This ensures that all processes have ceased, minimizing the risk of electrical shock or other issues when opening the device.
Once your Lenovo Ultrabook is fully shut down, you are ready to move on to the next step: removing the bottom cover.
Step 3: Removing the bottom cover
With your Lenovo Ultrabook properly shut down, it’s time to remove the bottom cover to gain access to the internal components. Removing the bottom cover may differ slightly depending on the specific model of your Ultrabook, but the general process is as follows:
- Place your Ultrabook on a flat, sturdy surface, ensuring that there is enough space to work comfortably.
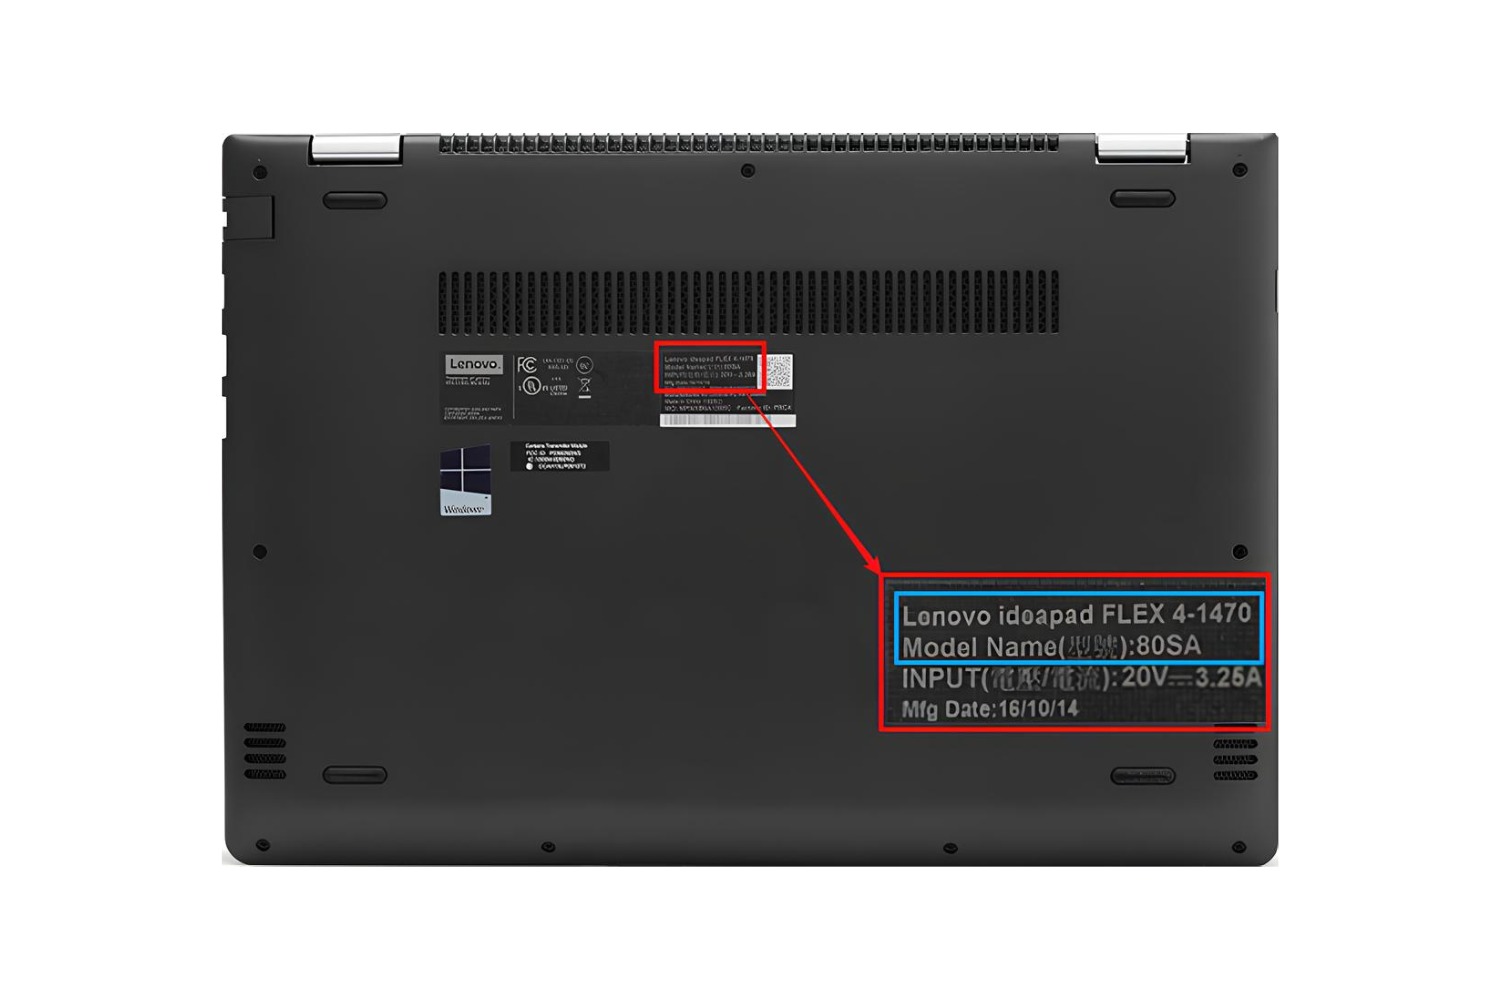
- Take your small Phillips head screwdriver and locate the screws on the bottom cover of your Ultrabook. They are typically labeled or marked with small icons.
- Using the Phillips head screwdriver, carefully unscrew and remove each screw from the bottom cover. Keep the screws organized and in a safe place to avoid losing them.
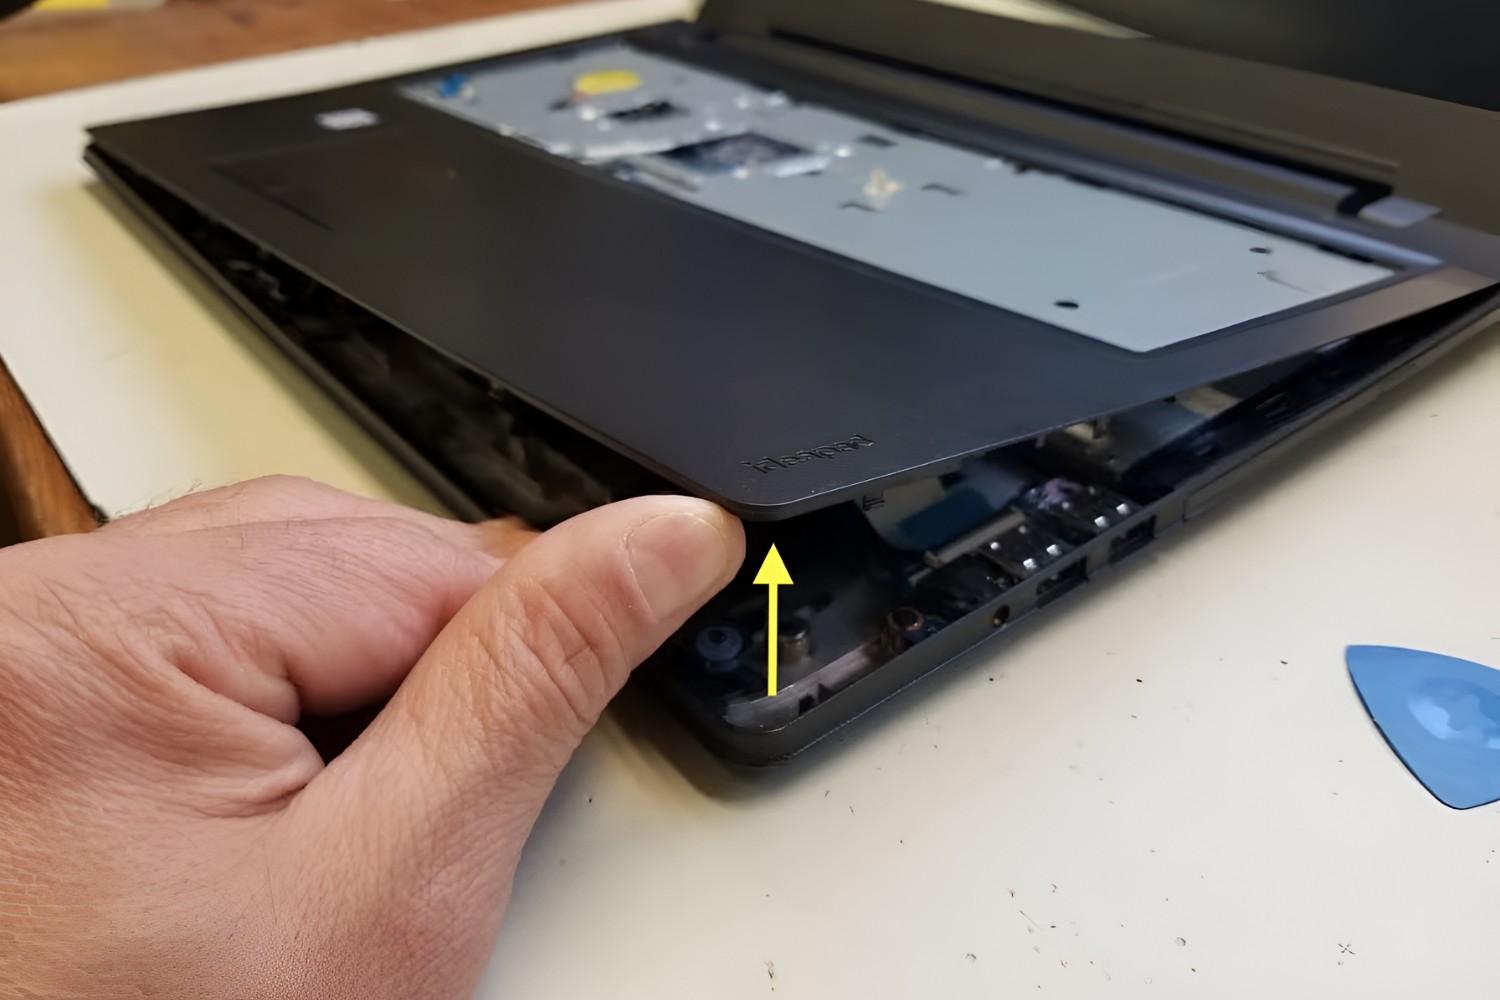
- Once all the screws are removed, gently pry open the bottom cover. This can usually be done using one of the plastic pry tools. Start at one corner and work your way around the edges, applying gentle pressure to release the clips securing the cover.
- Continue prying open the bottom cover until it is completely detached from the Ultrabook’s body.
Be mindful not to use excessive force when prying open the cover, as this could cause damage to the clips or the cover itself. Take your time and be patient throughout the process.
Once the bottom cover is removed, set it aside in a safe place for later reassembly. Now that you have successfully removed the bottom cover, you are ready to proceed to the next step: disconnecting the battery.
Step 4: Disconnecting the battery
Now that you have successfully removed the bottom cover of your Lenovo Ultrabook, the next step is to disconnect the battery. Disconnecting the battery is an essential safety measure to prevent any electrical issues or damage to the internal components while you work on your Ultrabook.
Follow these steps to disconnect the battery:
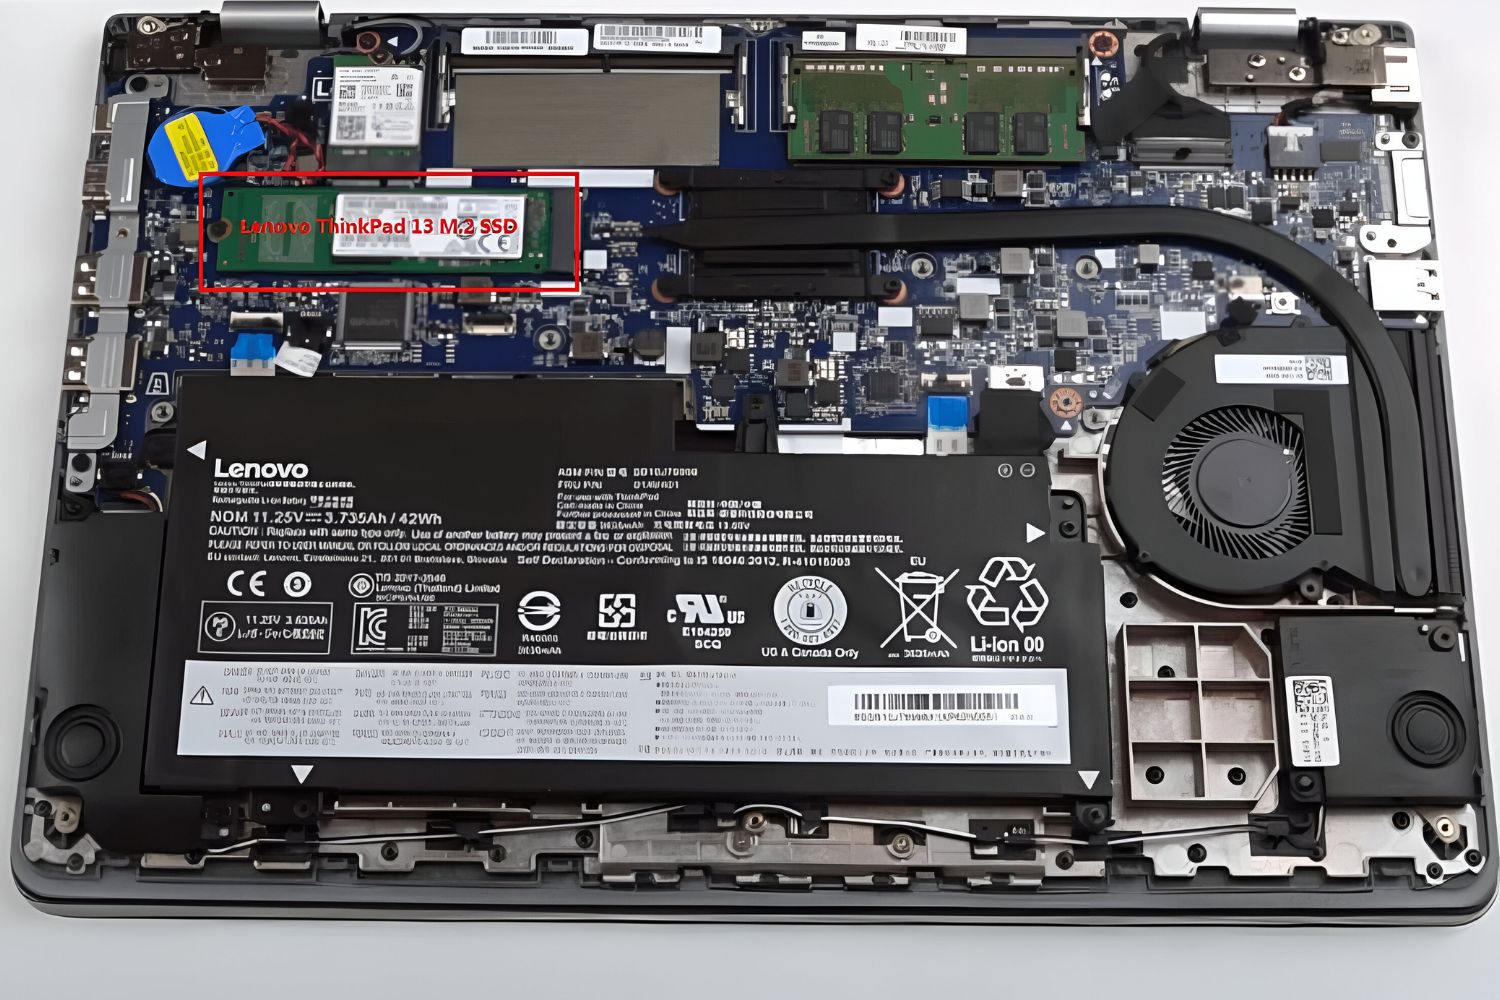
- Locate the battery connector, which is usually a small plug attached to the motherboard.
- Gently pull the battery connector straight out from its socket. Be careful not to twist or bend the connector during this process.
- Once the battery connector is disconnected, double-check to ensure a clean and secure separation between the connector and the socket.
Disconnecting the battery effectively cuts off the power supply to the Ultrabook, minimizing the risk of electrical shock or damage to the internal components. However, it is still recommended to proceed with caution and avoid touching any exposed circuitry or components.
Keep in mind that some Ultrabooks may have a built-in battery that cannot be easily disconnected. In such cases, it is best to refer to the manufacturer’s documentation or seek professional assistance to ensure the safe disconnection of the battery.
Now that the battery is disconnected, you are ready to move on to the next step: accessing the internal components of your Lenovo Ultrabook.
Step 5: Accessing the internal components
With the battery safely disconnected, you can now begin accessing the internal components of your Lenovo Ultrabook. This step involves locating and removing any additional covers or shields that may be obstructing your access to the desired components.
Here’s how you can access the internal components:
- Identify the specific component(s) you want to access, such as the RAM, hard drive, or wireless card.
- Look for any additional covers or shields that are covering these components.
- Using a screwdriver or plastic pry tool, carefully remove the screws or clips holding the covers or shields in place.
- Gently lift or slide the covers or shields to expose the desired components.
It’s crucial to take your time and exercise caution when removing the covers or shields to avoid damaging any delicate components. Ensure that you are applying even pressure and that all screws or clips are fully removed before attempting to lift or slide the cover or shield.
Once you have successfully accessed the internal components, you can proceed with the necessary actions, such as upgrading or replacing components, cleaning dust accumulations, or troubleshooting specific issues.
Remember to be mindful of static electricity and exercise proper ESD precautions throughout this process. Avoid touching any sensitive components and, if possible, handle them by their edges or non-metallic parts.
Now that you have accessed the internal components, you are ready to move on to the next step: installing or replacing components as needed.
Step 6: Installing or replacing components
Now that you have accessed the internal components of your Lenovo Ultrabook, you can proceed with installing or replacing any necessary components. Whether you want to upgrade your RAM, install a new hard drive, or replace a faulty component, this step will guide you through the process.
Here’s how you can install or replace components in your Ultrabook:
- Familiarize yourself with the specific instructions for the component you wish to install or replace. These instructions can usually be found in the user manual or on the manufacturer’s website.
- Ensure that you have the correct replacement component or the new component you wish to install.
- Following the instructions for the specific component, carefully insert or remove it into the appropriate slot or socket.
- Double-check that the component is properly seated and secured in its slot or socket.
It’s crucial to handle the components with care, avoiding excessive force or improper alignment. Take note of any specific orientation or alignment requirements outlined in the component’s instructions.
If necessary, refer to online tutorials or seek professional assistance for complex installations or replacements. Professional guidance can ensure that the process is carried out correctly and without damage to your Ultrabook or its components.
Once you have successfully installed or replaced the desired component, you are ready to move on to the next step: reassembling your Lenovo Ultrabook.
Step 7: Reassembling the Ultrabook
After successfully installing or replacing the components in your Lenovo Ultrabook, it’s time to reassemble the device. Proper reassembly ensures that all the internal components are securely in place and that the Ultrabook functions correctly.
Follow these steps to reassemble your Lenovo Ultrabook:
- Retrieve the bottom cover that you set aside earlier.
- Carefully align the bottom cover with the Ultrabook’s body, ensuring that all the screw holes and clips are properly aligned.
- Starting at one corner, gently press down on the cover to secure it in place.
- Using the small Phillips head screwdriver, screw in and tighten the screws that hold the bottom cover in place. Make sure to follow a diagonal or crisscross pattern to ensure even tightening.
- Once all the screws are tightened, give the bottom cover a gentle press to check for any loose sections or gaps. If necessary, review the alignment and secure any areas that require additional attention.
Take your time during the reassembly process to ensure proper alignment and secure fastening of the bottom cover. This will prevent any potential issues or damage that may arise from loose components.
With the Ultrabook successfully reassembled, you are now ready for the final step: turning on your Lenovo Ultrabook.
Step 8: Turning on the Ultrabook
After completing the reassembly process, it’s time to power on your Lenovo Ultrabook and ensure that everything is functioning as expected. Follow these steps to turn on your Ultrabook:
- Double-check that the Ultrabook is connected to a power source, either through the AC adapter or a charged battery.
- Make sure that all external devices, such as USB drives or peripherals, are disconnected.
- Press the power button located on the Ultrabook’s keyboard or chassis.
After pressing the power button, your Lenovo Ultrabook should begin to boot up. You may see the manufacturer’s logo or a loading screen during this process. Be patient as the Ultrabook initializes its components and operating system.
If your Ultrabook displays any error messages or fails to boot properly, double-check the connections and ensure that all the components are properly seated. In the event of persistent issues, consult the manufacturer’s documentation or contact technical support for further assistance.
Once your Ultrabook successfully boots up and you are able to access the operating system, take a moment to test the functionality of the components you installed or replaced. Check that the system recognizes the upgraded RAM, new hard drive, or any other new components.
Congratulations! You have successfully opened, accessed, and made changes to your Lenovo Ultrabook. Enjoy the enhanced performance or functionality it now offers.
Conclusion
Opening a Lenovo Ultrabook may seem daunting at first, but with the right tools, proper precautions, and step-by-step instructions, it can be a manageable process. By following the steps outlined in this guide, you can safely access the internal components of your Ultrabook, giving you the ability to upgrade, replace, or troubleshoot various parts.
Remember, it’s essential to proceed with caution when working on your Ultrabook. Be mindful of static electricity and use an anti-static wrist strap when handling delicate components. Take your time during each step, ensuring that everything is properly aligned, seated, and fastened.
If you ever feel unsure or uncomfortable with opening your Ultrabook, it’s recommended to seek professional help from a certified technician. They can guide you through the process or perform the necessary upgrades or repairs on your behalf.
Lastly, always keep in mind that opening your Ultrabook may void the warranty, so it’s important to weigh the benefits against the potential risks. If your Ultrabook is still within its warranty period, consider contacting the manufacturer for authorized service options.
By successfully opening and accessing the internal components of your Lenovo Ultrabook, you have gained valuable knowledge and the ability to customize and maintain your device. Whether you’re adding more RAM for improved performance or replacing a faulty hard drive, this newfound skill opens up a world of possibilities for optimizing your Ultrabook to meet your specific needs.
With careful planning, thorough research, and attention to detail, you can confidently navigate the process of opening and working on your Lenovo Ultrabook, unlocking its full potential and ensuring its longevity.


