Introduction
Welcome to this guide on how to move photos to an SD card on your Note 4. If you find yourself running out of storage space on your device or simply want to free up some internal memory, moving your photos to an SD card can be a great solution.
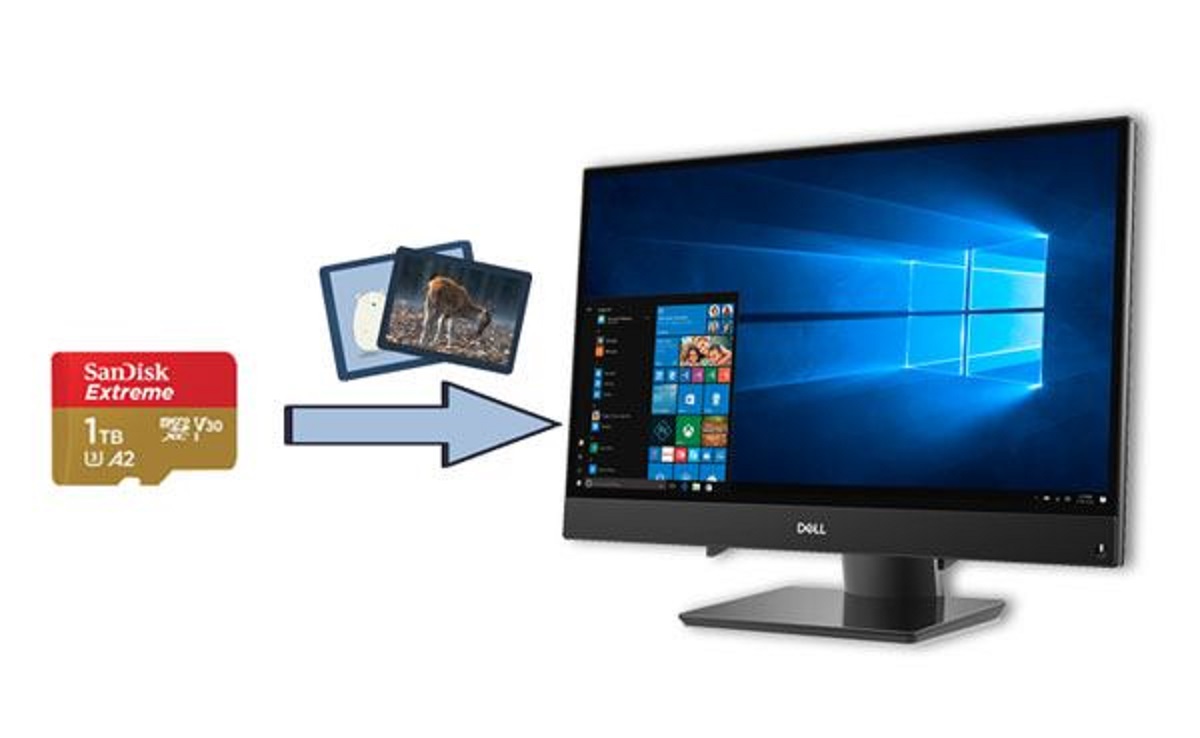
The Note 4 offers expandable storage through a removable SD card, allowing you to store photos, videos, and other files with ease. By transferring your photos to the SD card, you can ensure that your precious memories are safe and easily accessible, even if you switch to a new device or experience a phone malfunction.
With the step-by-step instructions in this guide, you will learn how to seamlessly move your photos to the SD card. The process is straightforward and can be completed in just a few minutes, so let’s get started!
Note: Before proceeding with the steps outlined in this guide, please ensure that you have an SD card inserted into your Note 4. If you don’t have an SD card, you can easily purchase one from a local electronics store or online retailer.
Step 1: Insert your SD card into your Note 4
The first step in moving your photos to an SD card on your Note 4 is to ensure that the SD card is properly inserted into your device. Here’s how you can do it:
- Locate the SD card slot on your Note 4. The slot is typically located on the side of the device, near the volume buttons.
- Use a SIM card removal tool or a small paperclip to gently eject the SD card tray. Insert the tool or paperclip into the small hole next to the slot and apply light pressure. The tray will pop out.
- Take your SD card and place it into the SD card tray. Make sure that the gold contacts on the SD card are facing down and aligned with the contacts in the tray. You may need to push gently to secure the card in place.
- Once the SD card is securely inserted, push the tray back into the device until it clicks into place.
- Now, power on your Note 4. It will automatically detect the SD card and prepare it for use.
That’s it! Your SD card is now inserted and ready to be used for storing your photos. In the next step, we will guide you through accessing the storage settings on your Note 4.
Step 2: Access the storage settings on your Note 4
Now that you have successfully inserted your SD card into your Note 4, it’s time to access the storage settings on your device. These settings will allow you to manage your storage options and choose the SD card as the destination for your photos. Follow the steps below to access the storage settings:
- Unlock your Note 4 by entering your passcode, PIN, or using the fingerprint scanner.
- From the home screen, swipe down from the top of the screen to reveal the notification panel.
- In the notification panel, tap on the gear icon at the top-right corner to open the Settings menu.
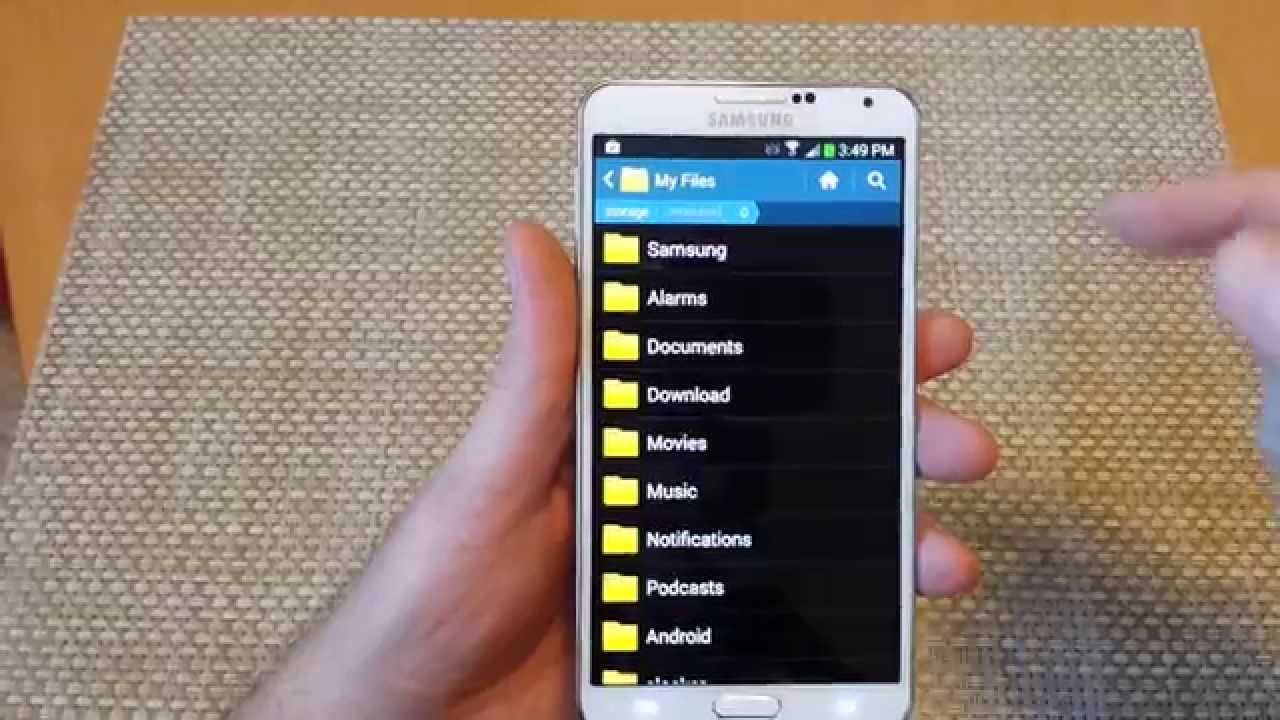
- In the Settings menu, scroll down and tap on the “Storage” option. This will open the storage settings for your device.
Alternatively, you can access the storage settings by going to the Apps menu, tapping on “Settings,” and then selecting the “Storage” option.
Once you have accessed the storage settings, you will be able to see the available storage options on your Note 4. This includes the internal storage and the newly inserted SD card. In the next step, we will guide you on how to select the SD card as the destination for your photos.
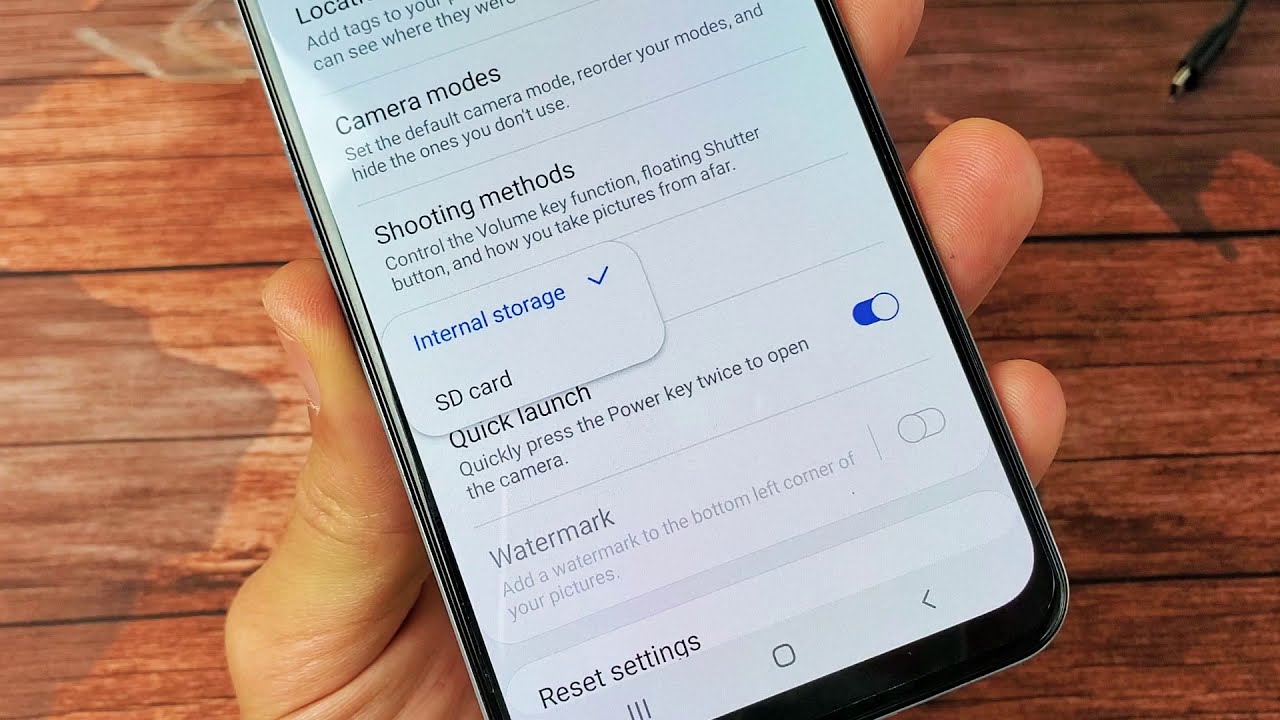
Step 3: Select the option to move photos to the SD card
Now that you have accessed the storage settings on your Note 4, it’s time to select the option to move your photos to the SD card. Follow the steps below to complete this process:
- In the storage settings menu, you will see a breakdown of the storage space on your device. Look for the option that says “Storage settings” or “Internal storage.”
- Tap on the “Storage settings” or “Internal storage” option to open the storage details.
- Within the storage details, you will find an option called “Photos” or “Gallery”. Tap on this option to open the settings specifically for your photos.
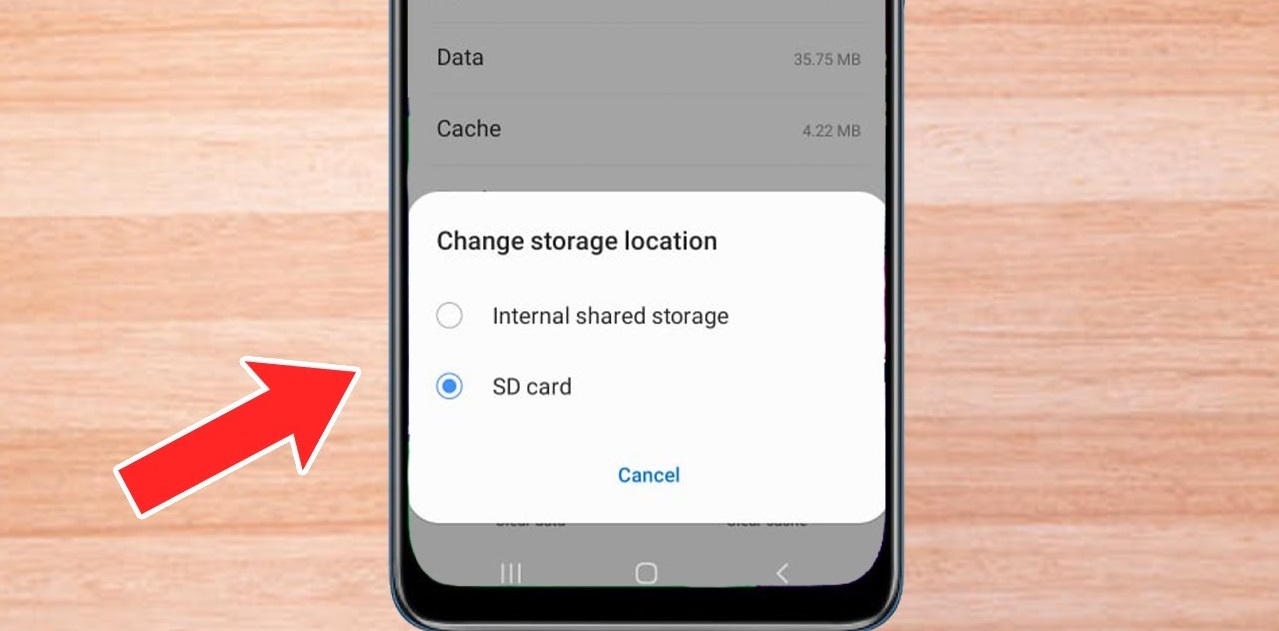
- In the photo settings, you should see an option to change the storage location. This may be labeled as “Storage location,” “Default storage,” or something similar.
- Tap on the option to change the storage location and select the SD card as the desired destination for your photos.
- Once you have selected the SD card as the storage location, your Note 4 will prompt you to confirm the change. Tap on “OK” or “Confirm” to proceed.
After confirming the change, your Note 4 will begin the process of transferring your photos to the SD card. The time it takes to complete this process will depend on the number and size of your photos. Please ensure that you have sufficient battery life and a stable internet connection during this process.
Great job! You have successfully selected the option to move your photos to the SD card on your Note 4. In the next step, we will guide you on how to choose the specific photos you want to transfer.
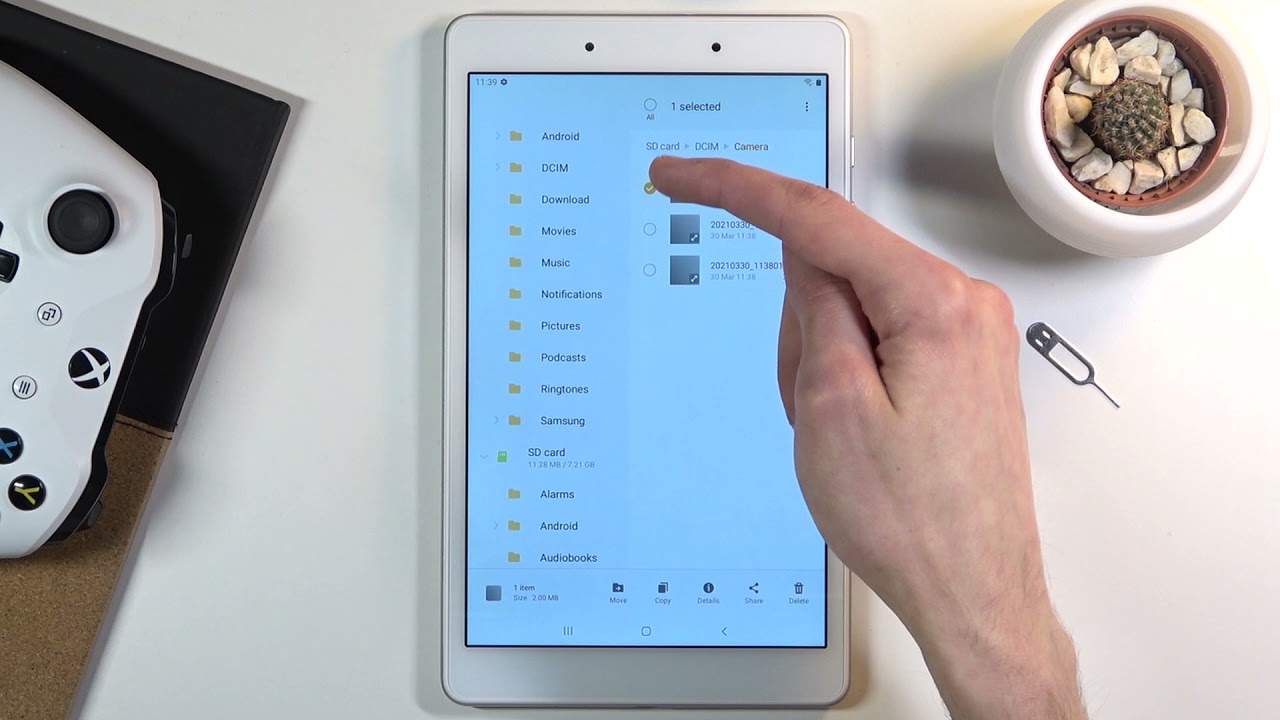
Step 4: Choose the photos you want to transfer
Now that you have selected the SD card as the storage location for your photos, it’s time to choose the specific photos you want to transfer. Follow the steps below to complete this process:
- Open the Gallery app on your Note 4. This app is where you can view all the photos and videos on your device.
- Browse through your photos and select the ones you want to transfer to the SD card. You can do this by tapping on each photo individually or by using the photo selection feature in the app.
- If your Gallery app has a selection feature, tap on the icon or option that allows you to select multiple photos at once. This will make the process quicker and more efficient.
- Once you have selected the desired photos, look for the option to move or transfer them. This option is usually represented by an icon or a menu item, such as “Move,” “Transfer,” or “Copy to SD card.”
- Tap on the move or transfer option, and your Note 4 will start transferring the selected photos to the SD card. You may see a progress bar or a notification indicating the status of the transfer process.
- Wait for the transfer process to complete. The time it takes will depend on the number and size of the selected photos. Avoid interrupting the process or disconnecting your device until it’s finished.
Once the transfer process is complete, you can verify that the photos have been successfully moved to the SD card. In the next step, we will guide you on how to do this.
Step 5: Start the transfer process
Now that you have chosen the specific photos you want to transfer to the SD card, it’s time to initiate the transfer process. Follow the steps below to start transferring your selected photos:
- In the Gallery app on your Note 4, make sure that you have selected the desired photos to be transferred.
- Once you have made your selection, look for an option that allows you to initiate the transfer process. This option is usually represented by an icon or a menu item, such as “Move,” “Transfer,” or “Copy to SD card.”
- Tap on the move or transfer option, and your Note 4 will begin the process of transferring the selected photos to the SD card. You may see a progress bar or a notification indicating the status of the transfer process.
- While the transfer is in progress, it is important to avoid interrupting the process or disconnecting your device. Ensure that you have sufficient battery life and a stable internet connection to prevent any issues during the transfer.
- Depending on the number and size of the selected photos, the transfer process may take some time to complete. However, you can monitor the progress and wait patiently for the transfer to finish.
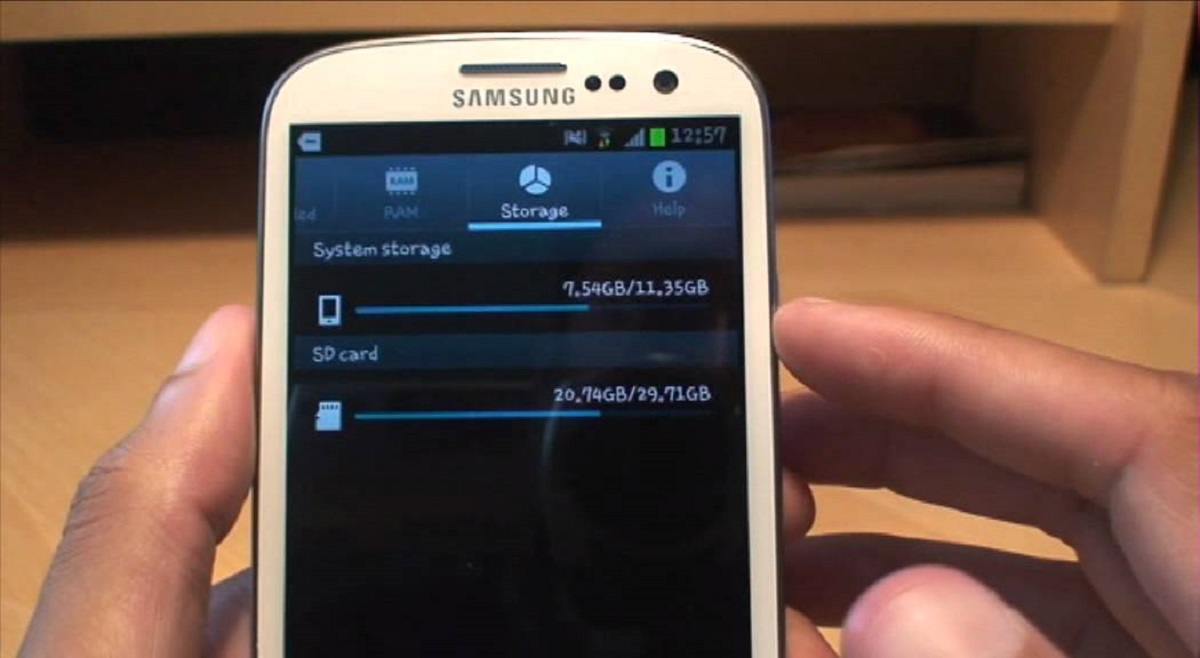
During the transfer process, it is important to also keep an eye on the available storage space on both your device and the SD card. This will ensure that you do not exceed the capacity of either storage location and can make necessary adjustments if needed.
Congratulations! You have now started the transfer process for your selected photos. In the next step, we will guide you on how to verify that the photos have been successfully moved to the SD card.
Step 6: Verify that the photos have been successfully moved to the SD card
After completing the transfer process, it’s important to verify that the photos have been successfully moved to the SD card on your Note 4. Follow the steps below to ensure that the transfer was successful:
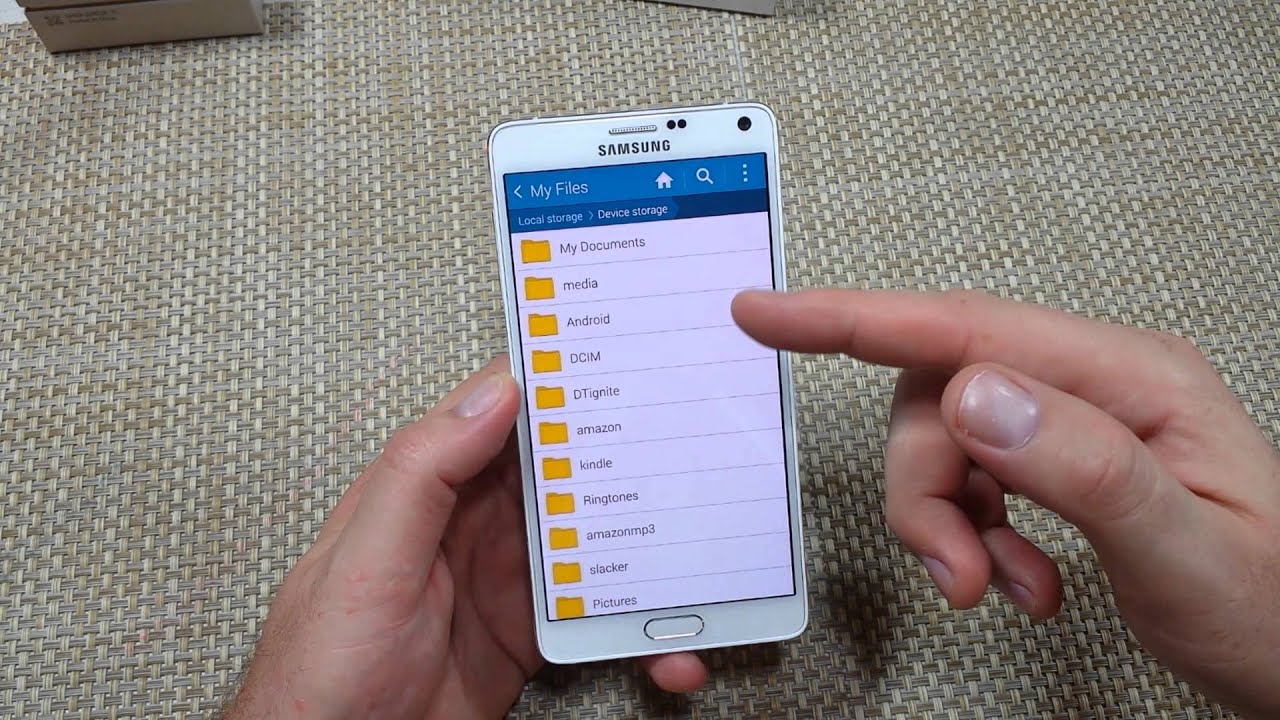
- Open the Gallery app on your Note 4.
- Navigate to the SD card section of the Gallery app. This section is usually labeled as “SD card,” “External storage,” or similar.
- Browse through the photos in the SD card section and look for the images you recently transferred. You can scroll through the photos or use the app’s search or filter option to locate specific photos.
- Tap on the transferred photos to open them and ensure that they are viewable without any issues. Check for any discrepancies or missing images that may have occurred during the transfer.
- In addition to checking the Gallery app, you can also connect your Note 4 to a computer using a USB cable and access the SD card files from your computer. This will allow you to further verify the presence of the transferred photos.
If you encounter any issues or have trouble locating the transferred photos, double-check the storage settings on your Note 4 to ensure that the SD card is selected as the default storage location for your photos.
Congratulations! You have successfully verified that the photos have been moved to the SD card on your Note 4. Your precious memories are now securely stored on the external storage, providing you with more space on your device. Enjoy the convenience and ease of accessing your photos from the SD card whenever you need them.
Conclusion
Congratulations on successfully moving your photos to the SD card on your Note 4! By following the step-by-step instructions outlined in this guide, you have freed up valuable internal storage space and ensured that your precious memories are securely stored on the external SD card.
Remember, the ability to expand storage through an SD card is a great feature offered by the Note 4. It allows you to store a large number of photos, videos, and other files without worrying about running out of space. Plus, having your photos stored on an SD card provides the added advantage of easily transferring them to a new device or backing them up for safekeeping.
Now that you have successfully moved your photos to the SD card, you can continue capturing new memories without worrying about storage limitations. Just make sure to periodically check your SD card and clear any unnecessary files to keep it optimized.
We hope that this guide has been helpful in assisting you with transferring your photos to the SD card on your Note 4. If you have any further questions or need additional assistance, don’t hesitate to consult the user manual of your device or reach out to a Samsung support representative for further guidance.
Thank you for choosing the Note 4 and maximizing its storage capabilities. Enjoy the convenience and peace of mind that comes with having your cherished photos stored securely on the external SD card.