Why CPU Temperature Matters While Gaming
When it comes to gaming, maintaining the optimal temperature of your CPU is crucial for smooth performance and longevity of your gaming rig. The CPU, or Central Processing Unit, is the brain of your computer and handles all the calculations and tasks necessary to run your games.
During intense gaming sessions, the CPU can generate a significant amount of heat. If the temperature of the CPU exceeds safe limits, it can lead to thermal throttling, where the CPU automatically slows down to prevent damage. This can result in a drop in frame rates, laggy gameplay, and even system crashes.
Excessive heat can also reduce the lifespan of your CPU and other components. Over time, constant exposure to high temperatures can cause thermal degradation, which can affect the performance and stability of your system.
Monitoring your CPU temperature while gaming allows you to take proactive measures to prevent overheating and maintain optimal performance. By keeping an eye on the temperature, you can identify any potential issues and take necessary steps to cool down your CPU and prevent any negative impact on your gaming experience.
Furthermore, monitoring CPU temperature can help you identify if your cooling system is working efficiently. If you notice consistently high temperatures, it could indicate a problem with your cooling solution, such as a faulty fan or improper airflow within your gaming PC. By addressing these issues promptly, you can prevent long-term damage to your hardware and ensure smooth gameplay.
Overall, paying attention to CPU temperature while gaming is essential for ensuring the longevity and performance of your gaming rig. It allows you to take proactive measures to prevent overheating, optimize cooling systems, and maintain a smooth and uninterrupted gaming experience for years to come.
How to Check CPU Temperature on Windows
Checking your CPU temperature on Windows is a simple and straightforward process. There are several methods you can use to monitor your CPU temperature, including built-in tools, third-party software, and BIOS.
1. Using Built-in Windows Tools: Windows 10 has a built-in Task Manager that can display your CPU temperature. To access it, press Ctrl+Shift+Esc to open the Task Manager. Then, go to the Performance tab and select the CPU option. You will see the CPU temperature displayed on the right-hand side.
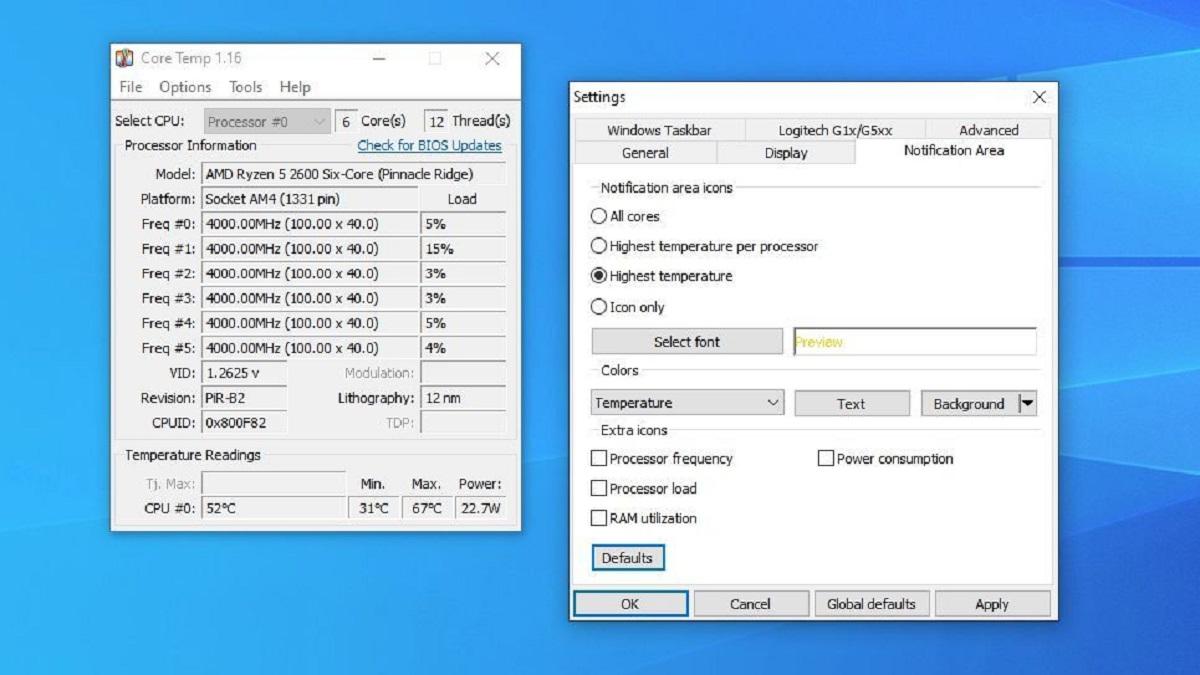
2. Third-Party Software: There are numerous free third-party software options available to check your CPU temperature on Windows. Some popular choices include Core Temp, HWMonitor, and SpeedFan. These software programs provide detailed information about your CPU temperature, fan speeds, and other relevant data in real-time.
3. BIOS: Another method to check CPU temperature is by accessing your computer’s BIOS. Restart your computer and press the specific key (usually Del or F2) to enter the BIOS settings. Look for a section related to hardware monitoring or system health, where you can find CPU temperature readings.
Remember, when using third-party software or accessing BIOS, ensure that you download software from trusted sources and make any changes in BIOS settings with caution, as improper adjustments can potentially damage your system.
By monitoring your CPU temperature on Windows, you can keep track of your system’s thermal performance, identify any potential issues, and take the necessary steps to maintain an optimal temperature for smooth gaming.
How to Check CPU Temperature on Mac
If you are using a Mac and want to check your CPU temperature, there are a few methods available to help you monitor and keep an eye on your system’s thermal performance.
1. Using Third-Party Applications: One way to check CPU temperature on Mac is by using third-party applications. Programs like iStat Menus, smcFanControl, and Intel Power Gadget provide comprehensive real-time information about your Mac’s CPU temperature, fan speeds, and other vital system statistics. These applications offer customizable widgets and menu bar displays for easy access to temperature readings.
2. Terminal Commands: Mac also has built-in terminal commands that allow you to check CPU temperature. Open the Terminal app (you can find it in the Utilities folder within the Applications folder), and then type the command sudo powermetrics –samplers smc -i 1000 and press Enter. This command will display various system metrics, including CPU temperature, power usage, and more.
3. macOS Activity Monitor: The macOS Activity Monitor provides basic CPU temperature information. Simply open the Activity Monitor (you can find it in the Utilities folder within the Applications folder), and then go to the Energy tab. Here, you can view the CPU usage, temperature, and power usage for each running process.
When using third-party applications or terminal commands, make sure to download them from trusted sources and follow the instructions carefully to avoid any potential issues. It is worth noting that some third-party applications may require a small purchase for full access to advanced features.
By regularly checking your CPU temperature on your Mac, you can ensure that your system is running within safe limits and take appropriate actions, such as adjusting fan speeds or resolving any cooling issues, to maintain optimal performance while gaming or performing other resource-intensive tasks.
Popular CPU Temperature Monitoring Software
There are several popular CPU temperature monitoring software options available that provide detailed and real-time information about your CPU temperature, fan speeds, and other system metrics. These software programs can help you keep track of your system’s thermal performance and ensure that your CPU is running within safe temperature limits. Here are some of the most popular options:
1. Core Temp: Core Temp is a lightweight and easy-to-use software that provides accurate CPU temperature readings. It displays the temperature of each individual core of your CPU, as well as other details such as clock speeds and voltage. Core Temp features customizable notifications and supports a wide range of processors.
2. HWMonitor: HWMonitor is another popular choice for monitoring CPU temperature. It provides comprehensive real-time information about your system’s temperature, fan speeds, voltages, and more. HWMonitor supports a wide range of sensors and offers a user-friendly interface for easy navigation and monitoring.
3. SpeedFan: SpeedFan is a powerful software that not only monitors CPU temperature but also allows you to control fan speeds and optimize cooling performance. It provides detailed temperature readings for various components of your system, including the CPU, GPU, and hard drives. SpeedFan also offers customizable fan profiles and alerts for efficient cooling management.
4. Open Hardware Monitor: Open Hardware Monitor is an open-source software that provides detailed temperature readings for various hardware components, including the CPU. It displays information such as voltage, clock speeds, and fan speeds. Open Hardware Monitor offers a customizable interface and supports a wide range of sensors.
5. NZXT CAM: NZXT CAM is a comprehensive monitoring software that not only provides temperature readings but also monitors various other system metrics such as GPU temperature, memory usage, and network performance. It offers a visually appealing interface with customizable widgets and graph displays for easy monitoring and analysis.
These are just a few examples of the popular CPU temperature monitoring software available. When choosing a software, consider factors such as compatibility with your CPU, user interface preferences, and additional features you may require for optimal monitoring experience. Remember to download software from trusted sources and keep them updated for the best results.
How to Monitor CPU Temperature in BIOS
The BIOS (Basic Input/Output System) is a firmware interface that allows you to control and configure various settings of your computer, including monitoring hardware information such as CPU temperature. Monitoring CPU temperature in the BIOS can provide reliable and real-time readings. Here’s how you can do it:
1. Restart your computer: Start by restarting your computer and entering BIOS. The specific key to enter BIOS may vary depending on your motherboard manufacturer, but commonly used keys include Del, F2, F10, or Esc. Consult your computer or motherboard manual for the correct key.
2. Navigate to the Hardware Monitoring section: Once you are in the BIOS, navigate to the hardware monitoring or system health section. The location and naming of this section may differ between BIOS versions, but it is typically found under the main menu or advanced options.
3. Locate CPU temperature: In the hardware monitoring section, look for the CPU temperature reading. The exact terminology may vary, but it is generally labeled as “CPU Temperature,” “System Temperature,” or something similar. The temperature may be displayed in Celsius (°C) or Fahrenheit (°F).
4. Monitor the temperature: Take note of the CPU temperature and observe any fluctuations as you perform various tasks on your computer. Ensure that the temperature remains within safe limits for your specific CPU model. In general, temperatures below 80°C (176°F) are considered safe for most modern CPUs.
5. Exit BIOS: Once you have finished monitoring the CPU temperature, exit the BIOS by saving any changes (if necessary) and restarting your computer.
Remember that accessing and modifying BIOS settings should be done with caution, as any incorrect changes can potentially harm your computer. Consult your computer or motherboard’s manual for more specific instructions related to your particular BIOS version.
Monitoring CPU temperature in the BIOS can be useful if you want to gather accurate readings without the need for additional software. It allows you to ensure that your CPU is running at safe temperatures and helps you identify any cooling issues that may need attention.
Best Practices for Monitoring CPU Temperature While Gaming
Monitoring CPU temperature while gaming is crucial for maintaining optimal performance and preventing any potential damage to your hardware. Here are some best practices to follow when monitoring CPU temperature while gaming:
1. Use Reliable Temperature Monitoring Software: Make sure to use reputable and reliable temperature monitoring software to accurately measure your CPU temperature. Choose software that provides real-time readings, customizable alerts, and other relevant system metrics.
2. Monitor CPU Temperature in Real Time: Keep your temperature monitoring software open and visible while gaming. This will allow you to keep an eye on the CPU temperature in real time and quickly identify any spikes or unusual fluctuations.
3. Set Temperature Alerts: Configure your temperature monitoring software to send alerts when the CPU temperature exceeds a certain threshold. This will notify you if the temperature reaches potentially dangerous levels, allowing you to take immediate action to prevent damage.
4. Observe Temperature Trends: Pay attention to temperature trends over time. Monitor how the temperature changes during different gaming sessions or under different workloads. This can help you identify any patterns or potential issues with cooling performance.
5. Optimize Cooling Solutions: Ensure that your cooling system is functioning effectively. Regularly clean dust from cooling fans and heat sinks to maintain proper airflow. Consider adding additional fans or upgrading your cooling system if necessary to enhance heat dissipation.
6. Maintain Proper Ventilation: Make sure that your gaming rig is placed in a well-ventilated area. Avoid obstructing air vents or blocking the airflow around your computer. This will help dissipate heat more efficiently and prevent overheating.
7. Adjust Fan Speeds: Some temperature monitoring software allows you to adjust fan speeds manually or through automated control. Experiment with different fan speed settings to find a balance between cooling performance and noise levels.
8. Manage Overclocking: If you have overclocked your CPU, be aware that it can lead to increased heat generation. Monitor the temperature closely when gaming with overclocked settings and ensure that it stays within safe limits. Consider dialing back the overclocking if the temperature becomes too high.
9. Regularly Clean and Maintain Your PC: Regularly clean your gaming PC to prevent dust buildup, which can hinder airflow and increase temperatures. Additionally, keep your operating system and drivers up to date to ensure optimal performance and compatibility.
10. Consider CPU Temperature as Part of Your Gaming Routine: Make monitoring CPU temperature a habit as part of your gaming routine. By regularly checking and addressing any temperature issues, you can prevent hardware damage, optimize performance, and ensure an enjoyable and uninterrupted gaming experience.
By following these best practices, you can effectively monitor and manage CPU temperature while gaming, ensuring that your system operates within safe parameters and performs at its best.
How to Keep CPU Temperature Under Control While Gaming
Keeping your CPU temperature under control while gaming is essential to prevent overheating and ensure optimal performance. Here are some effective strategies to help you maintain a cool CPU temperature during gaming sessions:
1. Ensure Proper Airflow: Make sure your gaming PC has adequate airflow by keeping air vents clear and unobstructed. Position your computer in a well-ventilated area and consider using additional case fans or a liquid cooling system for improved heat dissipation.
2. Clean Your PC Regularly: Dust buildup can restrict airflow and increase CPU temperature. Regularly clean your PC, removing dust from fans, heat sinks, and vents. Use compressed air or a soft brush to gently clean these components.
3. Optimize Fan Speeds: Adjust the fan speeds in your PC’s BIOS or using third-party software to balance cooling performance and noise levels. Increase fan speeds during gaming sessions to improve airflow and decrease CPU temperature.
4. Apply High-Quality Thermal Paste: Proper thermal paste application between the CPU and heatsink ensures efficient heat transfer. Use a high-quality thermal paste and reapply it as needed to maintain optimal thermal conductivity.
5. Avoid Overclocking: Overclocking increases the CPU’s power and clock speed, resulting in higher heat generation. If you’re experiencing high CPU temperatures, consider reverting to default or stable clock speeds instead of overclocking.
6. Adjust In-Game Settings: Graphics-intensive games can put a significant load on the CPU. Adjusting in-game settings such as resolution, anti-aliasing, and graphics quality can reduce CPU usage and lower temperatures without compromising visual quality significantly.
7. Take Breaks and Monitor Temperature: Engaging in long gaming sessions can put sustained strain on your CPU. Take periodic breaks to allow your system to cool down. During breaks, monitor your CPU temperature to ensure it remains within safe limits.
8. Improve Case Cooling: Install case fans strategically to improve airflow and cool your entire system. Consider adding intake and exhaust fans to create a positive air pressure environment for efficient heat dissipation.
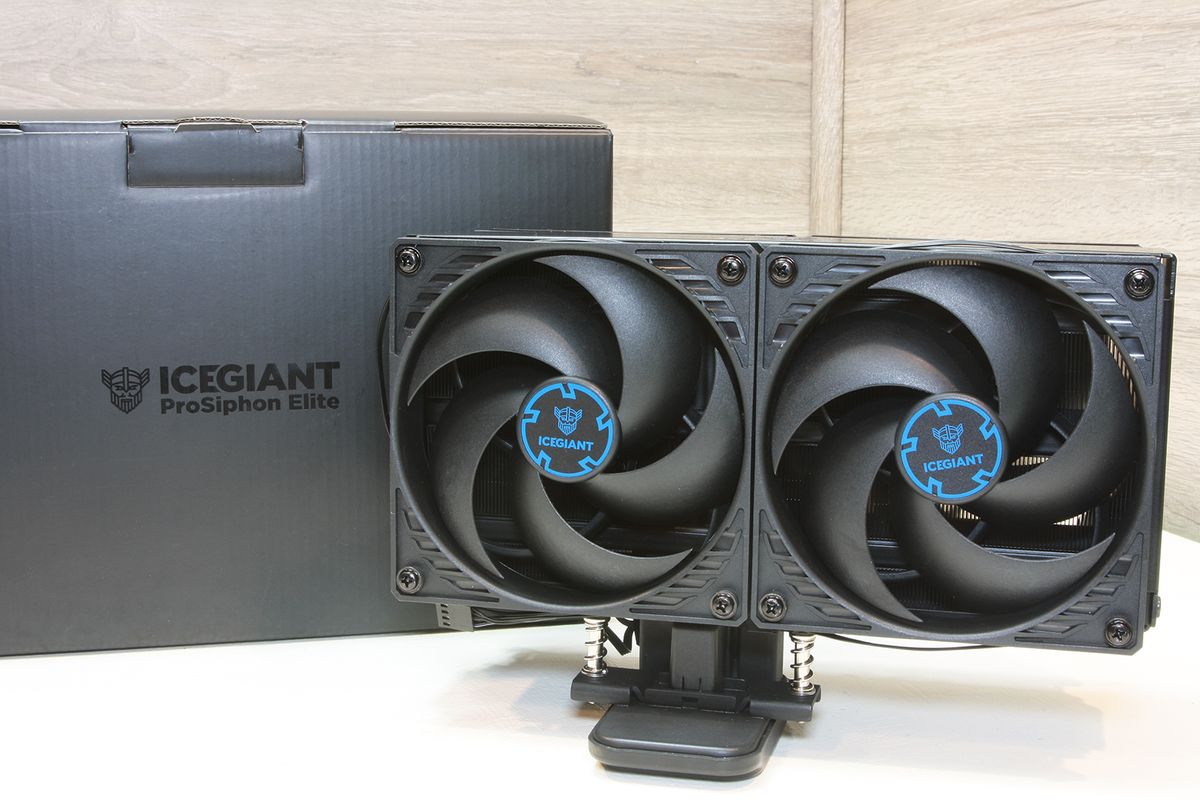
9. Invest in an Aftermarket CPU Cooler: Stock CPU coolers may not always provide adequate cooling for gaming. Upgrading to an aftermarket CPU cooler, such as an air cooler or a liquid cooling system, can significantly bring down CPU temperatures during intense gaming sessions.
10. Monitor CPU Temperatures: Utilize temperature monitoring software to keep track of your CPU temperature in real-time. Set up alerts to notify you of any sudden temperature spikes, allowing you to address cooling issues promptly.
By implementing these strategies, you can effectively keep your CPU temperature under control while gaming, ensuring optimal performance and longevity for your system.
Conclusion
Monitoring CPU temperature while gaming is vital for maintaining optimal performance, prolonging the lifespan of your hardware, and ensuring a smooth gaming experience. By actively monitoring and managing CPU temperature, you can prevent overheating, protect your components from damage, and keep your system running at its best.
Start by using reliable temperature monitoring software to track your CPU temperature in real-time. This will enable you to observe temperature trends, set alerts for high temperatures, and make informed decisions to prevent any potential thermal issues.
Additionally, implementing best practices such as optimizing airflow, cleaning your PC regularly, adjusting fan speeds, and avoiding excessive overclocking will help keep your CPU temperature under control. Regularly monitor and maintain your cooling system, and consider upgrading to aftermarket CPU coolers or improving case cooling if needed.
Remember to adjust in-game settings and take breaks during extended gaming sessions to alleviate strain on your CPU. By practicing these habits, you can minimize CPU temperature spikes and ensure a stable gaming experience.
Overall, a well-monitored and adequately cooled CPU enhances system stability, extends the lifespan of your hardware, and offers optimal performance for your gaming endeavors. Make CPU temperature monitoring and control an integral part of your gaming routine. By doing so, you can enjoy gaming sessions that are not only visually stunning but also reliable and efficient, all while safeguarding the longevity of your gaming rig.