Introduction
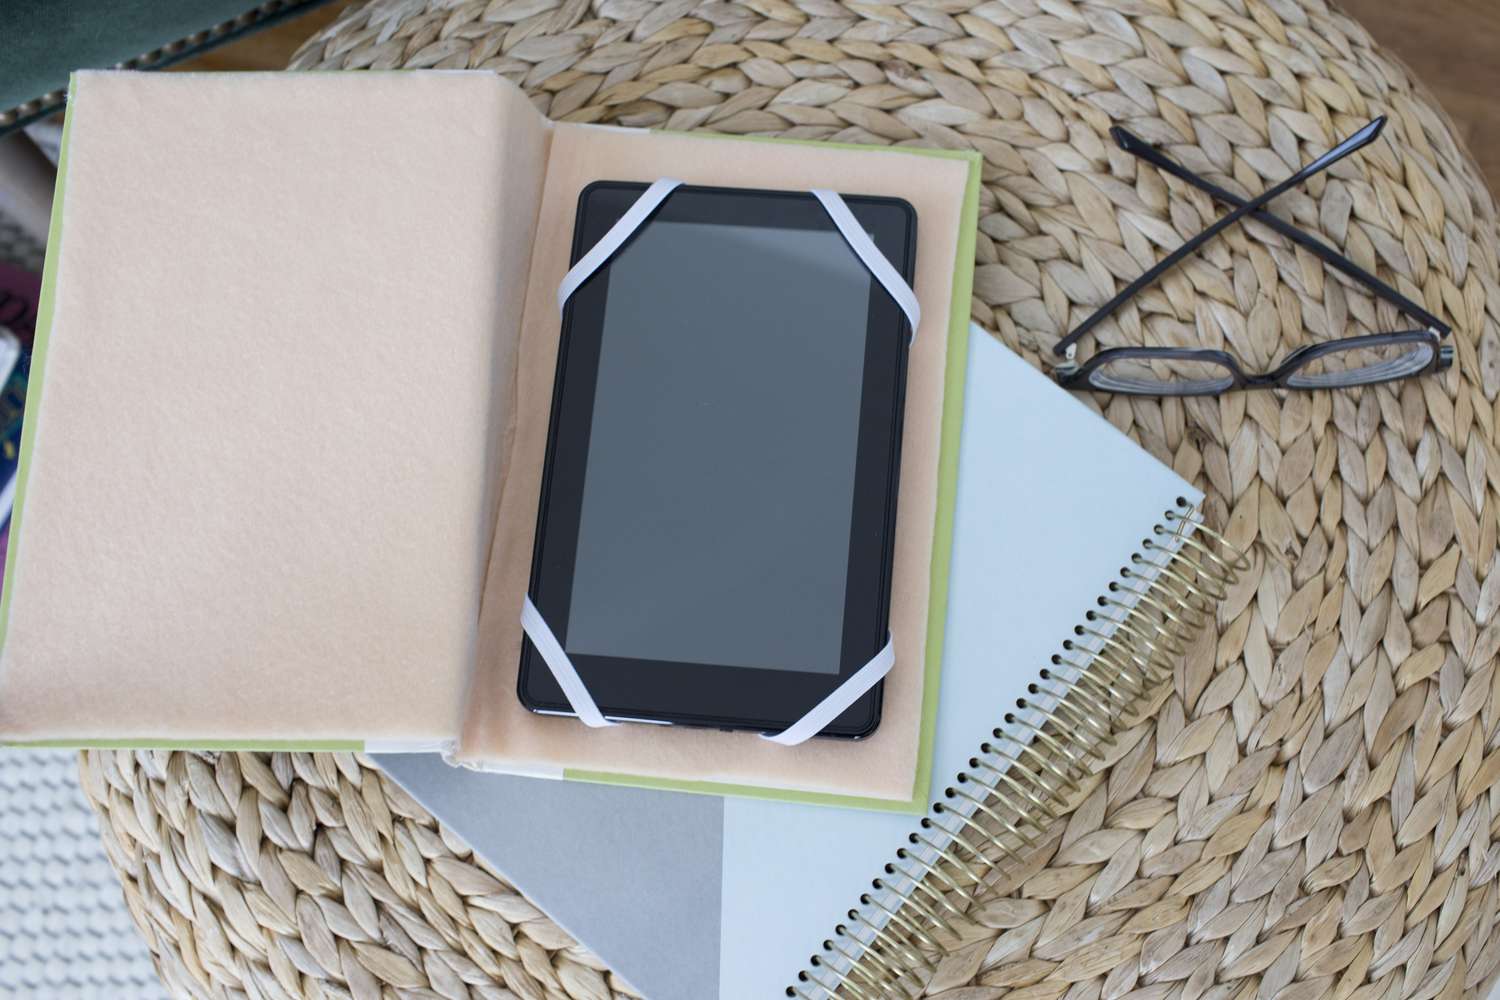
Welcome to this guide on how to make a tablet cover! If you’re tired of using generic, mass-produced covers for your tablet, then this DIY project is perfect for you. Not only will you be able to customize the design to suit your style, but you’ll also have the satisfaction of creating something unique with your own hands. Plus, it’s a great way to protect your tablet from scratches, dust, and spills.
In this step-by-step tutorial, we’ll walk you through the process of making a tablet cover from scratch. You don’t need to be an experienced seamstress to accomplish this project; even if you’re a beginner, you’ll find the instructions easy to follow.
To get started, we’ll first gather the necessary materials. Then, we’ll guide you through measuring your tablet and selecting the right fabric to ensure a perfect fit. Next, we’ll show you how to cut the fabric and sew the edges together using a sewing machine or hand sewing, depending on your preferences and resources. We’ll also cover how to add a closure to keep your tablet secure and how to add decorative details for a personalized touch.
By the end of this guide, you’ll have a beautiful and functional tablet cover that reflects your style and personality. So, let’s dive in and create a cover that perfectly suits your tablet!
Materials Needed
Before we jump into the process of making a tablet cover, let’s gather all the materials you’ll need for this project. Don’t worry; you won’t require any fancy or expensive supplies. Most of the items can be easily found at a craft store or even repurposed from materials you may already have at home. Here’s a list of what you’ll need:
- Fabric of your choice
- Lining fabric
- Interfacing
- Thread
- Measuring tape or ruler
- Fabric scissors
- Sewing machine or needle and thread
- Pins
- Velcro or a button and elastic
- Sewing pins or clips
- Iron and ironing board
The most important material is the fabric. Choose a fabric that not only appeals to your taste but also provides durability and protection for your tablet. Consider using cotton, denim, or even faux leather, depending on your preferences. The lining fabric should complement the external fabric and add an extra layer of protection.
Interfacing is essential for adding structure and stability to the cover. It prevents the cover from sagging and ensures it maintains its shape. Make sure you choose the right weight of interfacing suitable for your fabric.
Thread is another crucial component. Select a thread color that matches or complements the fabric you’ve chosen. A sturdy thread that can withstand wear and tear is recommended.
Measuring tape or a ruler is necessary for accurately measuring your tablet’s dimensions. This step is crucial to ensure a snug fit for your tablet.
Fabric scissors are essential for cutting the fabric cleanly and accurately. Invest in a pair of quality scissors for a precise and neat finish.
If you have a sewing machine, it will significantly speed up the sewing process. However, if you don’t have one, don’t worry! You can always sew your tablet cover by hand. Just make sure you have a needle and thread on hand.
Pins or clips are useful for securing the fabric during sewing. Choose whichever option you prefer or have available.
Lastly, you’ll need a closure for your tablet cover, such as Velcro or a button and elastic. This will keep your tablet securely in place when the cover is closed.
Once you have gathered all these materials, you’re ready to move on to the next step: measuring your tablet. Let’s get started!
Step 1: Measuring the Tablet
Before we begin cutting and sewing the fabric for your tablet cover, it’s crucial to accurately measure your tablet. This step ensures a precise and snug fit, providing optimal protection and functionality. Here’s how to measure your tablet:
- Start by placing your tablet on a flat surface.
- Take a measuring tape or ruler and measure the length of your tablet from one edge to the opposite edge. Write down this measurement.
- Next, measure the width of your tablet, from one side to the other. Note down this measurement as well.
- If your tablet has extra thickness due to a case or cover, measure the thickness as well, from the bottom edge to the top edge. Add this measurement to the length of your tablet.
It’s important to be as accurate as possible when measuring your tablet. Even a slight discrepancy in measurements can affect the fit of the cover. Take your time and double-check the measurements to ensure precision.
Once you have the measurements, you can use them as a reference when cutting the fabric for your tablet cover. Keep in mind that you’ll need to add a seam allowance to accommodate the sewing process. Typically, a 1/2-inch seam allowance is sufficient, but you can adjust it based on your preferences and the thickness of the fabric.
By measuring your tablet accurately, you’re ready to move on to the next step: choosing the perfect fabric for your tablet cover. Let’s explore the various fabric options and find the one that suits your style and needs!
Step 2: Choosing the Fabric
Now that you have the measurements of your tablet, it’s time to select the fabric for your tablet cover. The fabric you choose will not only determine the look of the cover but also its durability and functionality. Here are some factors to consider when choosing the fabric:
1. Durability: Look for a fabric that can withstand daily use and provide sufficient protection for your tablet. Fabrics like cotton canvas, denim, or upholstery fabrics are known for their durability.
2. Padded or Non-padded: Decide whether you want a padded cover for extra cushioning or a non-padded cover for a sleeker look. If you opt for a padded cover, consider using foam or quilt batting to provide the necessary padding.
3. Style: Choose a fabric that reflects your personal style and complements your tablet. Consider patterns, colors, and textures that you find appealing. You can go for a classic solid color, a vibrant pattern, or even a textured fabric like faux leather.
4. Easy to Clean: Keep in mind that your tablet cover may become dirty or stained over time. It’s advisable to select a fabric that is easy to clean, either by spot cleaning or machine washing. Check the fabric care instructions to ensure proper maintenance.
5. Lining Fabric: Don’t forget to choose a lining fabric that complements the external fabric. The lining will not only add a professional finish but also provide an extra layer of protection for your tablet.
Take your time to browse through fabric options, both online and at local fabric stores. You can also repurpose old fabric or clothing if you want to give your tablet cover a unique and eco-friendly twist.
Once you’ve decided on the fabric, make sure to purchase enough yardage to accommodate the measurements of your tablet, including the seam allowance. It’s always better to have a little extra fabric than to run out in the middle of the sewing process.
With the fabric selected, it’s time to move on to the next step: cutting the fabric according to your tablet’s measurements. Let’s get started on crafting the perfect fit for your tablet!
Step 3: Cutting the Fabric
With the measurements of your tablet in hand and the fabric chosen, it’s time to cut the fabric for your tablet cover. Precise cutting is crucial for achieving a professional and snug fit. Here’s how to cut the fabric:
- Start by preparing your workspace. Lay out the fabric on a clean, flat surface. Ensure that there are no wrinkles or folds.
- Using a measuring tape or ruler, mark the measurements of your tablet on the fabric. Add the seam allowance to each side of the measurements.
- With the measurements marked, it’s time to cut the fabric. Use fabric scissors to cut along the marked lines. Take your time and cut carefully to maintain accuracy.
- If you want to create a padded cover, repeat the cutting process with the interfacing and lining fabric. Cut them to the same size as the external fabric.
- Once everything is cut, double-check the dimensions to ensure you have accurately cut the fabric to the required size.
If you’re making a non-padded cover, cutting just the external fabric will suffice. However, if you prefer a padded cover, you’ll need to cut the interfacing and lining fabric as well. The padded cover will provide additional protection for your tablet.
Remember to handle the fabric carefully to prevent fraying or damage. If needed, you can use fabric fray stopper along the cut edges to prevent unravelling.
Once you have finished cutting the fabric, you’re ready to move on to the next step: sewing the edges of the tablet cover. Let’s bring all the pieces together and start creating your custom tablet cover!
Step 4: Sewing the Edges
Now that you have the fabric pieces cut to the right size, it’s time to sew the edges of your tablet cover. This step will give your cover a clean and polished finish. Here’s how you can sew the edges:
- Start by placing the lining fabric and external fabric right sides together, with the interfacing (if using) on top of the lining fabric.
- Pin or clip the edges together, ensuring that all corners and sides are aligned.
- Using a sewing machine or needle and thread, stitch around the edges of the cover, leaving the top open.
- For a clean finish, use a 1/2-inch seam allowance and backstitch at the beginning and end of each seam to secure the stitches.
- If you’re using a sewing machine, remember to remove the pins or clips as you sew to prevent damage to the machine.
- Once you’ve sewn all the edges, trim any excess fabric and clip the corners diagonally to reduce bulk and create crisp corners.
- Turn the cover right side out and use a point turner or a blunt object to push out the corners for a neater appearance.
- Press the edges with an iron to give the cover a smooth and professional finish.
If you’re creating a padded cover, avoid sewing the interfacing. Instead, sew the edges of the lining fabric and the external fabric, leaving the top open. Then, insert the interfacing between the lining and external fabric layers before proceeding.
Take your time as you sew to ensure straight and even stitches. If you’re new to sewing, practice on scrap fabric first to gain confidence.
With the edges sewn, your tablet cover is starting to take shape. The next step is adding a closure to keep your tablet securely in place. Let’s move on to the next step and add a functional and stylish closure!
Step 5: Adding a Closure
Now that the edges of your tablet cover are sewn, it’s time to add a closure to keep your tablet securely in place. Whether you prefer a simple closure or something more decorative, there are several options to choose from. Here’s how you can add a closure:
- Start by deciding on the type of closure you want for your cover. Some common options include Velcro, buttons, snaps, or even elastic band loops.
- If you’re using Velcro, cut two small pieces: one for the front flap and the other for the back body of the cover. Make sure to position them in the proper places – one on the front flap and the other on the corresponding spot on the back body.
- If you prefer using buttons, you’ll need to create buttonholes on the front flap and sew buttons on the back body. Follow your sewing machine’s instructions for creating buttonholes and securely sewing the buttons.
- For a snap closure, mark the positions where the snaps should be placed. Use specific snap tools or a hammer and a protective base to attach the snaps securely.
- If you want to use elastic bands, sew small loops on the front flap and sew corresponding buttons or Velcro pieces on the back body to hold the elastic bands in place.
- Whichever closure option you choose, ensure that it provides a secure hold for your tablet and allows easy access when needed.
Consider the functionality and aesthetics when deciding on the closure option. A closure not only keeps your tablet in place but also adds a decorative element to the cover. Choose one that matches your style and complements the overall design of the tablet cover.
Once the closure is added, test it to ensure it functions properly. Open and close the cover multiple times to make sure it securely fastens and releases easily. If adjustments are needed, make them before proceeding to the next step.
With the closure in place, we’re almost done creating your custom tablet cover. The next step is to add some decorative details to personalize the cover further. Let’s move on to the next step and add some creative flair to your tablet cover!
Step 6: Adding Decorative Details
Now that the functional aspects of your tablet cover are complete, it’s time to add some decorative details to make it truly unique and personalized. Adding these creative touches can elevate the overall look of your cover and showcase your personal style. Here are a few ideas to inspire you:
- Embroidery or Appliqué: Add small embroidered designs or appliqués to the front flap of your cover. You can stitch your initials, a favorite symbol, or a design that reflects your interests.
- Trim or Lace: Attach decorative trims or lace along the edges of the cover or around the closure for a delicate and beautiful touch. Choose a trim that complements the fabric and adds an extra layer of detail.
- Patchwork: If you have small fabric scraps or leftover pieces, create a patchwork design by sewing them together to form a unique pattern. This adds a charming and eclectic look to your tablet cover.
- Button Embellishments: Sew on buttons in different sizes, colors, or shapes to add visual interest to the front flap. You can arrange them in a specific pattern or randomly for a playful look.
- Contrasting Stitching: Use colorful or metallic threads to sew decorative stitches along the edges or around the closure. This adds a pop of color and a touch of whimsy to your tablet cover.
- Fabric Paint or Markers: If you enjoy painting or drawing, use fabric paint or markers to create a custom design on the fabric. Let your creativity flow and express your artistic side.
Remember to consider the overall aesthetic of your tablet cover and choose decorative details that enhance its look and feel. Experiment with different ideas and techniques to find the ones that resonate with you.
Once you’ve added the decorative details, step back and admire your handiwork. Your tablet cover is now not only functional but also a reflection of your creativity and personal style.
With the decorative details complete, we’re almost finished creating the perfect tablet cover. The final step is to test the cover and ensure it fits your tablet correctly. Let’s move on to the last step and make sure everything fits like a glove!
Step 7: Testing the Tablet Cover
Congratulations! You’ve reached the final step in creating your own tablet cover. Now, it’s time to test the cover and ensure that it fits your tablet correctly. Here’s what you should do:
- Gently slide your tablet into the cover, making sure it fits snugly.
- Close the cover using the chosen closure method, whether it’s Velcro, buttons, snaps, or elastic.
- Check that the tablet is securely held in place and that the closure fastens properly.
- Open and close the cover a few times to ensure that it opens and closes smoothly without any constraints.
- Test the functionality of the tablet within the cover. Make sure you can access all the buttons, ports, and features without any obstruction.
- Check for any loose threads, uneven edges, or other imperfections. Trim or fix them as needed to create a polished final product.
If you notice any issues during the testing phase, don’t worry. Small adjustments can be made to improve the fit and functionality of the cover. You can add a few extra stitches, trim the fabric slightly, or reinforce the closure if necessary.
Testing the cover not only ensures that your tablet fits well but also gives you the opportunity to make any final adjustments and perfect your creation before use.
Once you’re satisfied with the fit and functionality of the tablet cover, you can proudly use it to protect your tablet. Enjoy the satisfaction of knowing that you’ve made a one-of-a-kind cover, tailored to your style and preferences.
With the testing complete, you’ve successfully created your own tablet cover! Take a moment to appreciate your handcrafted creation and the effort you’ve put into making it unique.
Thank you for following this step-by-step guide on how to make a tablet cover. We hope you’ve enjoyed the process and are pleased with the final result. Happy tablet use, protected by your custom-made cover!
Conclusion
Congratulations on completing your tablet cover! By following the steps outlined in this guide, you’ve successfully crafted a custom-made cover that not only protects your tablet but also showcases your personal style and creativity. The journey from measuring and cutting fabric to sewing the edges, adding a closure, and incorporating decorative details has allowed you to create a unique and functional accessory.
Throughout this DIY project, you’ve discovered the importance of accurate measurements, fabric selection, and precise sewing techniques. With the added touch of decorative details, your tablet cover has become a reflection of your individuality and craftsmanship.
Remember, this guide serves as a starting point, and you can always modify and adapt the steps to suit your preferences and needs. Get creative with your choice of fabrics, closures, and decorative elements to make the cover truly one-of-a-kind. Experiment with different designs, colors, and techniques to match your style and personality.
Now that you have your handmade tablet cover, take a moment to appreciate your accomplishment. Cherish the unique cover that you’ve created, and enjoy the peace of mind knowing that your tablet is protected in a personalized and stylish way.
Don’t hesitate to share your creation with others or inspire friends and family to make their own tablet covers. Encourage them to unleash their creativity and enjoy the satisfaction that comes from crafting something customized and functional.
Thank you for joining us on this DIY journey. We hope you’ve enjoyed the process and found it both educational and fulfilling. Have fun using and showcasing your tablet cover, and may it accompany you on many adventures!


