Introduction
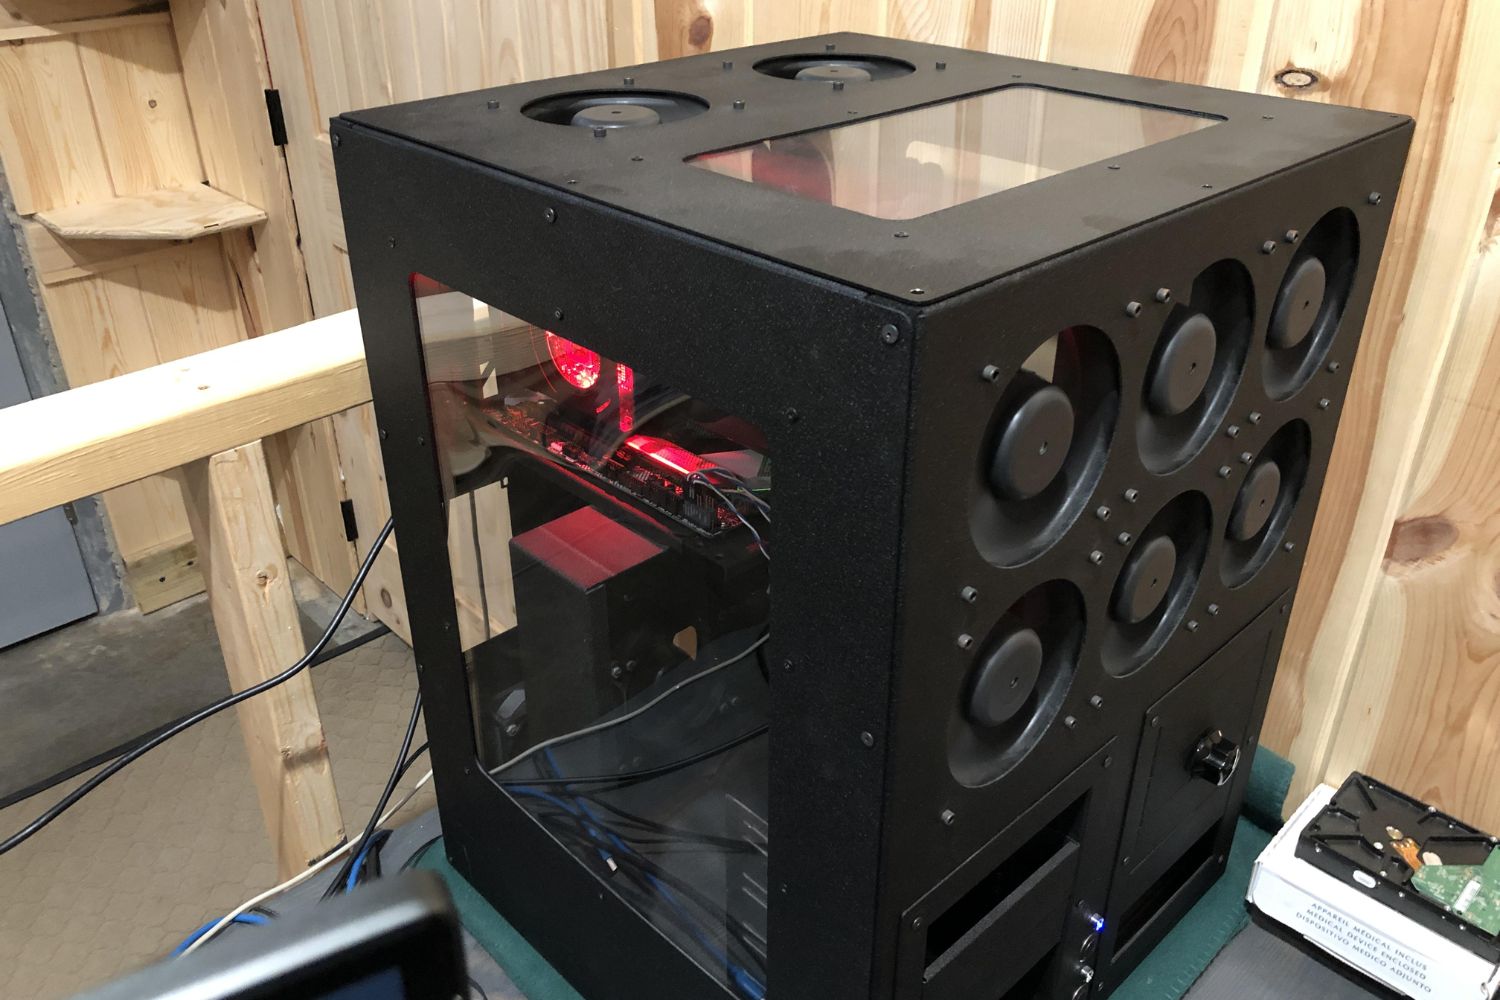
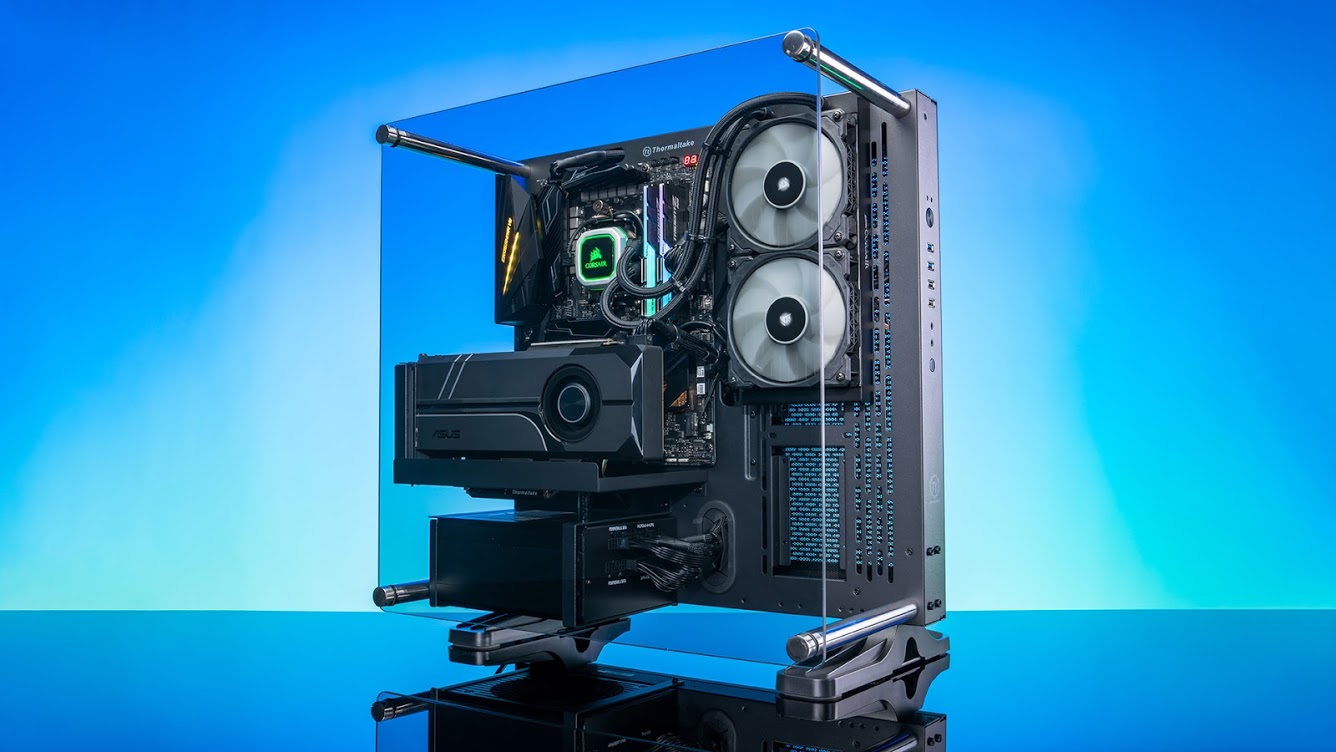
Welcome to the world of open-air PC cases! If you’re tired of the traditional closed-case design and want to try something different, building an open-air PC case might be the perfect option for you. An open-air PC case offers several benefits, including improved airflow, easier access to components, and a unique aesthetic appeal.
In this guide, we will walk you through the process of creating your own open-air PC case. We’ll cover everything from planning and gathering materials to the assembly and installation of components. By the end of this tutorial, you’ll have a fully functional open-air PC case that showcases your hardware and provides optimal cooling.
Before we dive into the details, it’s important to note that building an open-air PC case requires some technical knowledge and basic DIY skills. If you’re new to PC building, we recommend familiarizing yourself with the components and their installation process before attempting this project.
Now that we’ve covered the basics, let’s take a look at the equipment and tools you’ll need for this project.
Equipment and Tools Needed
Before you get started with building your open-air PC case, you’ll need to gather the necessary equipment and tools. Here’s a list of what you’ll need:
- PC components (motherboard, CPU, RAM, GPU, storage, etc.)
- PC case frame or stand (preferably made of sturdy material like metal or acrylic)
- Fans or cooling solution
- Screws and standoffs
- Screwdriver set
- Wire cutters/strippers
- Zip ties or cable management solutions
- Anti-static wrist strap
- Thermal paste
- Optional: LED lighting strips or accessories for customization
Make sure you have all the necessary PC components ready before starting this project. Additionally, it’s important to choose a case frame or stand that provides stability and adequate support for your components.
The screwdriver set will be used for screwing in components and attaching them to the case frame. The wire cutters/strippers will come in handy for managing and organizing cables. Zip ties or cable management solutions will help keep your cables tidy and prevent them from obstructing airflow.
Using an anti-static wrist strap is highly recommended to protect your components from static electricity during the installation process. It’s a small but crucial investment to ensure the longevity of your PC.
Thermal paste is required for CPU installation to ensure proper heat transfer between the CPU and the cooler. It’s important to apply the right amount of thermal paste to avoid overheating issues.
If you want to add a touch of personalization to your open-air PC case, you can consider using LED lighting strips or other accessories to create a custom lighting effect.
Now that you have all the necessary equipment and tools ready, let’s move on to the next step – planning your open-air PC case!
Step 1: Planning
Before you start building your open-air PC case, it’s important to have a solid plan in place. Proper planning will help ensure that you have a clear vision of what you want to achieve and will make the assembly process much smoother. Here are the key considerations for this step:
- Determine the design: Think about the overall design and layout of your open-air PC case. Consider factors such as the size and shape of the case frame, the number of components you want to accommodate, and the desired aesthetic appeal.
- Assess your hardware requirements: Take an inventory of the PC components you have or plan to purchase. Consider the size and compatibility of these components to ensure they will fit within the dimensions of your open-air case.
- Consider cooling options: Open-air PC cases rely on natural airflow for cooling. Decide whether you want to use fans or other cooling solutions to facilitate this airflow. Plan the placement and number of fans to maximize cooling efficiency.
- Plan for cable management: Effective cable management is important to maintain cleanliness and optimize airflow within your open-air PC case. Consider cable routing paths and available options for cable management solutions.
- Think about aesthetics: While functionality is crucial, aesthetics also play a role in the design of your open-air PC case. Consider any customizations, such as LED lighting or decorative elements, that you want to incorporate into the case.
Once you have a clear plan in place, take some time to sketch out your design and make any necessary adjustments. This will serve as a blueprint for the assembly process and help you stay organized throughout the build.
Remember, planning is a crucial step that sets the foundation for a successful open-air PC case build. Take your time to ensure that all aspects are considered and that you have a clear vision of the final product. With a well-thought-out plan, you’re ready to move on to the next step: gathering the materials for your open-air PC case.
Step 2: Gather Materials
Now that you have a clear plan in place for your open-air PC case, it’s time to gather all the necessary materials. Here’s a list of the key components and tools you’ll need:
- PC components: Make sure you have all the necessary PC components such as the motherboard, CPU, RAM, GPU, storage devices, and power supply unit. Double-check their compatibility and ensure they meet your requirements.
- PC case frame or stand: Look for a sturdy case frame or stand that suits your design preferences and provides proper support for your components. Materials like metal or acrylic are commonly used for open-air PC cases due to their durability.
- Fans or cooling solution: Determine the number of fans you’ll need for proper cooling and airflow within your open-air PC case. Consider factors such as size, CFM (cubic feet per minute) airflow, and noise levels to choose the right fans for your setup.
- Screws and standoffs: Ensure you have an adequate supply of screws and standoffs to secure your components to the case frame securely. Different components may require different types and sizes of screws, so it’s essential to have a variety on hand.
- Screwdriver set: A good quality screwdriver set with various sizes and types of screwdriver heads will be necessary for assembling your open-air PC case. Make sure you have the right tools to handle different types of screws.
- Wire cutters/strippers: You’ll need wire cutters or strippers to manage and organize cables within your open-air PC case. These tools will help you trim and strip wires as needed to achieve a neat and organized cable management setup.
- Zip ties or cable management solutions: Choose zip ties or other cable management solutions to keep your cables tidy and prevent them from obstructing airflow. These will help maintain a clean and organized appearance while aiding in proper cooling.
- Anti-static wrist strap: Protect your components from static electricity by using an anti-static wrist strap. This essential tool will minimize the risk of damaging your sensitive PC parts during the assembly process.
- Thermal paste: Ensure you have thermal paste on hand for proper heat transfer between your CPU and cooler. Using the correct amount of thermal paste is crucial to prevent overheating issues.
- Optional accessories: Consider any optional accessories you want to incorporate into your open-air PC case, such as LED lighting strips or other customizations. These accessories can add a personal touch and enhance the aesthetic appeal of your build.
Double-check that you’ve gathered all the necessary materials before proceeding to the next step. Having everything on hand will make the assembly process smoother and more efficient. With your materials ready, you’re now prepared to move on to the next step – preparing for the assembly of your open-air PC case.
Step 3: Preparation
Before diving into assembling your open-air PC case, it’s important to properly prepare your workspace and components. This step will help ensure a smooth and organized assembly process. Here are the key tasks to complete during the preparation stage:
- Clean and clear your workspace: Start by cleaning your workspace and removing any clutter that could hinder your progress. Make sure you have enough space to comfortably work on your open-air PC case and spread out the components and tools.
- Organize your components: Take the time to organize and lay out all the PC components you gathered earlier. Arrange them in a way that allows for easy access while assembling the open-air PC case.
- Prepare the case frame or stand: If your case frame or stand requires any assembly, follow the manufacturer’s instructions to put it together. Ensure that it is stable and securely positioned to support the weight of the components.
- Prepare your tools: Double-check that you have all the necessary tools readily available, such as the screwdriver set, wire cutters/strippers, and any specialized tools required for your specific components. Having your tools organized and within reach will save you time and frustration during the assembly process.
- Take anti-static precautions: Assemble your components in an electrostatic discharge (ESD)-safe environment. Wear an anti-static wrist strap and ground yourself by attaching it to a metal part of your PC case. This will help prevent damage to sensitive electronic components caused by static electricity.
- Review your plan: Take a moment to review your initial plan and design. Make sure you understand and have accounted for all the steps involved in building your open-air PC case.
By properly preparing your workspace and components, you’ll create a more efficient and stress-free assembly process. Taking the time to organize your materials and familiarize yourself with the steps ahead will help minimize any potentially avoidable mistakes. Once you’re fully prepared, you’re ready to move on to the exciting part – assembling your open-air PC case!
Step 4: Assembly
Now that you’ve completed the preparation stage, it’s time to move on to the exciting part – assembling your open-air PC case! Follow these steps to ensure a smooth and successful assembly process:
- Attach the motherboard: Start by attaching the motherboard to the case frame or stand using the provided standoffs. Make sure the motherboard aligns correctly with the I/O shield and screw it in place.
- Install the CPU and RAM: Carefully install the CPU into the motherboard’s socket and secure it according to the manufacturer’s instructions. Insert the RAM sticks into the appropriate slots, ensuring they are fully seated and locked into place.
- Mount the storage devices: Install your SSDs, HDDs, or other storage devices into their respective mounting brackets or slots. Secure them into place using screws or other mounting mechanisms provided.
- Install the power supply unit (PSU): Depending on your open-air case design, mount the PSU in the designated area. Connect the necessary power cables to the motherboard and components.
- Connect the fans: If you’re using fans for cooling, install them in the appropriate locations within the case. Connect the fan cables to the motherboard or fan controller, ensuring proper airflow direction. Secure any additional cooling solutions, such as liquid coolers, as per the manufacturer’s instructions.
- Connect the front panel connectors: Connect the front panel connectors from the case to the corresponding pins on the motherboard. This includes the power switch, reset switch, LED indicators, and USB ports. Refer to your motherboard manual for the correct pin layout.
- Route and manage cables: Take your time to route and manage the cables within your open-air PC case. Use zip ties or cable management solutions to secure and organize the cables, ensuring they do not obstruct airflow or interfere with component installation.
- Double-check everything: Before closing up the case, double-check all the connections and make sure everything is properly seated and secured. Check for any loose screws, misplaced cables, or potential issues that could affect the performance or safety of your open-air PC case.
Remember to consult the manuals and instructions provided with your components for specific installation details and any additional steps or considerations. Take your time and be meticulous during the assembly process to ensure a reliable and efficient build. Once you’ve completed the assembly steps, you’re ready to move on to the next stage – installing the components into your open-air PC case!
Step 5: Installing Components
With the open-air PC case assembled and the basic setup complete, it’s time to install the components into their designated slots. Follow these steps to ensure a successful component installation:
- Graphics card (GPU): Locate the PCIe slot on the motherboard and carefully insert the GPU into the slot. Secure the GPU by fastening it with screws or brackets, depending on your case design. Ensure a firm connection and check that the GPU power cables are properly connected.
- Storage devices: Connect the appropriate cables to your SSDs, HDDs, or other storage devices and attach them to their designated ports on the motherboard. Ensure a secure connection and fasten the devices using screws or drive bays if necessary.
- Additional expansion cards: If you have any additional expansion cards such as sound cards or network cards, insert them into the appropriate slots on the motherboard. Secure them in place and connect any necessary cables.
- Additional components: Install any other components, such as Wi-Fi cards, Bluetooth modules, or additional fans, according to the manufacturer’s instructions.
Throughout the component installation process, ensure that all connections are properly seated and secured. Take your time to organize and route any necessary cables, ensuring they do not obstruct airflow or interfere with the operation of the components.
Once you have completed the installation of all the components, it’s time to move on to the next step – cable management.
Step 6: Cable Management
Cable management is a crucial step in the assembly of your open-air PC case. Proper cable management not only improves the overall appearance of your build but also ensures efficient airflow and optimal cooling. Follow these steps to effectively manage your cables:
- Organize cables: Take the time to organize and group cables together based on their function. Separate power cables, data cables, and front panel connectors to make them easier to manage.
- Route cables: Route each cable along designated cable management channels or openings within the case. Utilize cable grommets or clips to secure cables in place and prevent them from tangling or obstructing airflow.
- Use zip ties or Velcro straps: Secure cables together by using zip ties or Velcro straps. Bundle cables neatly and avoid creating tight, kinked, or strained bends in the cables.
- Keep cables away from fans and moving parts: Ensure that cables are not near any moving parts, such as fans or the CPU cooler. This will prevent them from interfering with the operation of the components and minimize the risk of damage.
- Consider custom cable extensions: If aesthetics are important to you, consider using custom cable extensions for a cleaner and more visually appealing look. These extensions come in a variety of colors and styles, allowing you to match your build’s theme.
Throughout the cable management process, regularly check for any loose connections or cables that may have come undone. Ensure that all cables are properly connected and seated in their respective ports.
By effectively managing your cables, you will not only improve the overall aesthetics of your open-air PC case but also enhance airflow and cooling performance.
With the cables neatly organized and secured, it’s time to move on to the next step – testing your open-air PC case!
Step 7: Testing
Before considering your open-air PC case build complete, it’s essential to thoroughly test its functionality and performance. Testing allows you to identify any potential issues and ensure that all components are working as expected. Follow these steps to test your open-air PC case:
- Connect the power: Connect your power supply unit (PSU) to a power source and ensure it is switched off. Double-check all power connections to the motherboard, CPU, GPU, and other components.
- Power on the system: Press the power button on your open-air PC case to turn on the system. Listen for any abnormal noises, such as loud fans or clicking sounds. The motherboard should display diagnostic LEDs indicating that power is flowing properly through the system.
- Enter BIOS/UEFI: While the system is booting, press the appropriate key (usually displayed on-screen) to enter the BIOS/UEFI setup. This allows you to verify that the system recognizes all installed components and adjust any necessary settings.
- Check temperature and hardware monitoring: Install temperature and hardware monitoring software to keep an eye on the system’s temperature and verify that all components are operating within normal ranges. Ensure that fans are spinning correctly and adjust fan speeds if necessary.
- Run stress tests: To ensure stability and performance, run stress tests on your CPU and GPU. Use software like Prime95 or AIDA64 to stress test the CPU, and tools like FurMark or 3DMark to stress test the GPU. Monitor temperatures during these tests to ensure they stay within acceptable ranges.
- Check for software updates: Update your operating system, motherboard BIOS, and device drivers to the latest versions to ensure compatibility and optimal performance.
During the testing phase, keep an eye out for any abnormal behavior, such as unexpected shutdowns, error messages, or excessive heat. If you encounter any issues, refer to troubleshooting guides or seek help from online communities or technical support if needed.
Once you have thoroughly tested your open-air PC case and verified that everything is working as expected, you’re ready to move on to the final step – adding the final touches to your build!
Step 8: Final Touches
Congratulations on reaching the final step of your open-air PC case build! The final touches will help you add the finishing touches and make your build truly unique. Here are some ideas to consider for this step:
- Customize your case: Consider adding personal touches to your open-air PC case design. This can include applying custom decals or vinyl wraps, painting or powder coating the case frame, or using LED lighting strips to enhance the aesthetics.
- Cable management enhancements: Take a final look at your cable management and make any necessary adjustments for a cleaner appearance. Use cable combs or individually sleeved cables to further enhance the cable management and overall visual appeal of your build.
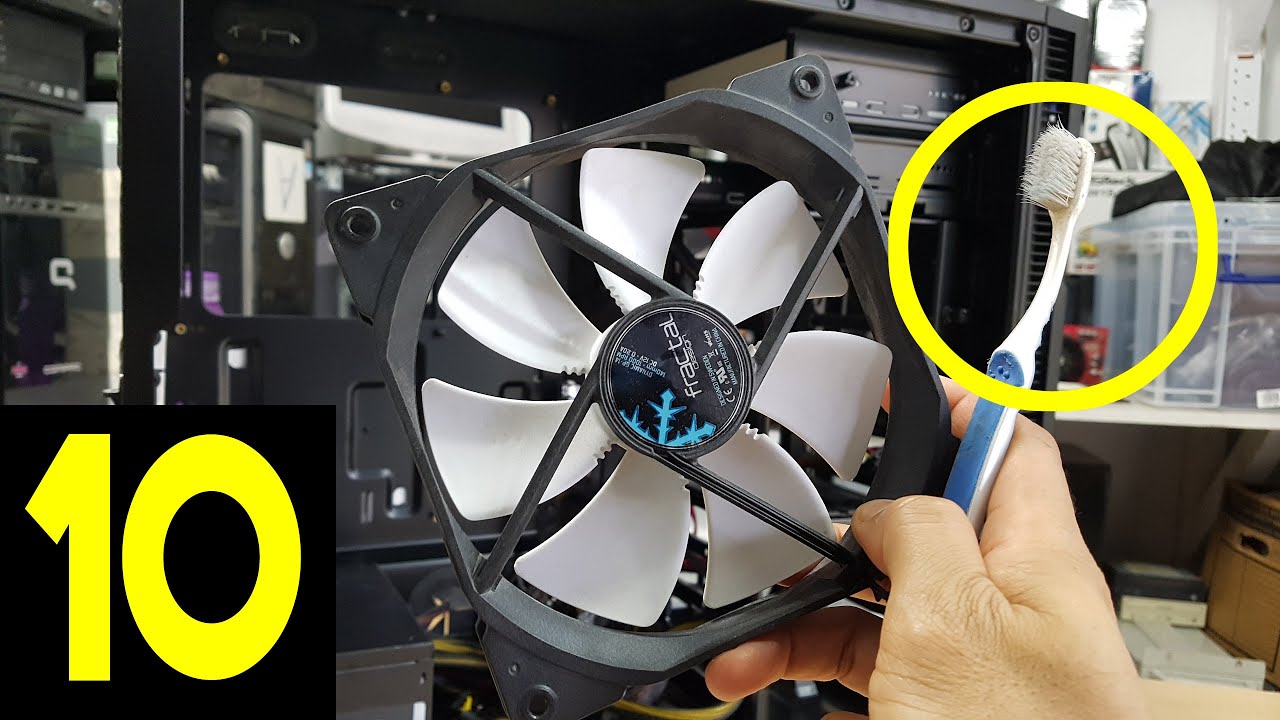
- Clean and dust your components: Use compressed air or a soft brush to remove any dust or debris accumulated on the components and within the case. This will help maintain proper airflow and preserve the longevity of your PC.
- Create a backup and system recovery plan: Set up a regular backup routine and establish a system recovery plan to protect your data and ensure the quick recovery of your system in case of any unforeseen issues.
- Document your build: Consider documenting your open-air PC case build process through photos or videos. This will not only serve as a memento but can also be a helpful reference for future troubleshooting or when upgrading components.
- Share your build: Show off your impressive open-air PC case build to the online PC building community. Share your experience, showcase your unique design, and inspire others with your creativity.
Remember, the final touches are all about adding your personal flair and making your open-air PC case build truly your own. Be creative and have fun with the process!
Once you have completed the final touches, take a step back and admire your creation. You’ve successfully built your very own open-air PC case, customized it to your liking, and ensured optimal performance and aesthetics.
Now it’s time to power up your open-air PC case, start using your system, and enjoy the fruits of your hard work. Happy computing!
Conclusion
Congratulations on completing your open-air PC case build! Through careful planning, gathering the necessary materials, and following the step-by-step process, you have successfully created a unique and functional PC case. By opting for an open-air design, you have unlocked advantages such as improved airflow, easier access to components, and an eye-catching aesthetic.
During the planning stage, you considered the design, assessed hardware requirements, planned cooling options, and thought about cable management and aesthetics. By gathering the right equipment and tools, you ensured a smooth assembly process. The steps of preparation, assembly, component installation, cable management, testing, and adding final touches all contributed to the successful completion of your open-air PC case build.
Remember, building and customizing an open-air PC case requires technical expertise and DIY skills. Take pride in the fact that you have created a unique PC case that showcases your hardware and reflects your personal style.
As you enjoy your newly built open-air PC case, keep in mind that regular maintenance, cleaning, and updating your system are crucial for optimal performance and longevity. Stay up-to-date with the latest software updates and driver releases, and consider periodic cleaning to prevent dust buildup.
Lastly, don’t hesitate to share your accomplishment with the PC building community. Show off your build, share your experience, and inspire others with your creativity and attention to detail.
Thank you for following this guide, and we hope you have found it helpful in creating your own open-air PC case. Enjoy your ultimate PC building experience and happy computing!