Introduction
Welcome to the fascinating world of PC building! Building your own PC can be a rewarding experience, allowing you to customize every aspect of your computer to meet your specific needs and preferences. One of the first steps in assembling your own PC is selecting the right PC case. The PC case not only houses all the important components of your computer but also plays a crucial role in the overall performance and aesthetics of your build.
Choosing the right PC case requires careful consideration of factors such as size, compatibility, cooling capability, and ease of installation. With a wide range of options available in the market, it’s essential to understand your requirements and prioritize them when making your decision. Whether you’re a gamer looking for a case that can accommodate powerful graphics cards or a content creator in need of ample storage space, there’s a perfect case out there for you.
Before diving into the PC building process, it’s important to gather the necessary tools and supplies. These usually include a screwdriver set, cable ties, thermal paste, and an anti-static wrist strap. Having these items at hand will ensure a smooth and efficient installation process.
In this guide, we will walk you through each step of constructing a PC case, ensuring that you have a comprehensive understanding of the process and the confidence to complete it successfully. From installing the motherboard and CPU to connecting the power supply, storage devices, and graphics card, we will cover all the essential tasks involved in building your own PC.
Follow along as we guide you through the process, providing helpful tips, and troubleshooting advice along the way. By the end of this guide, you’ll have a fully functional PC that you can take pride in as you enjoy its superior performance and personalized design.
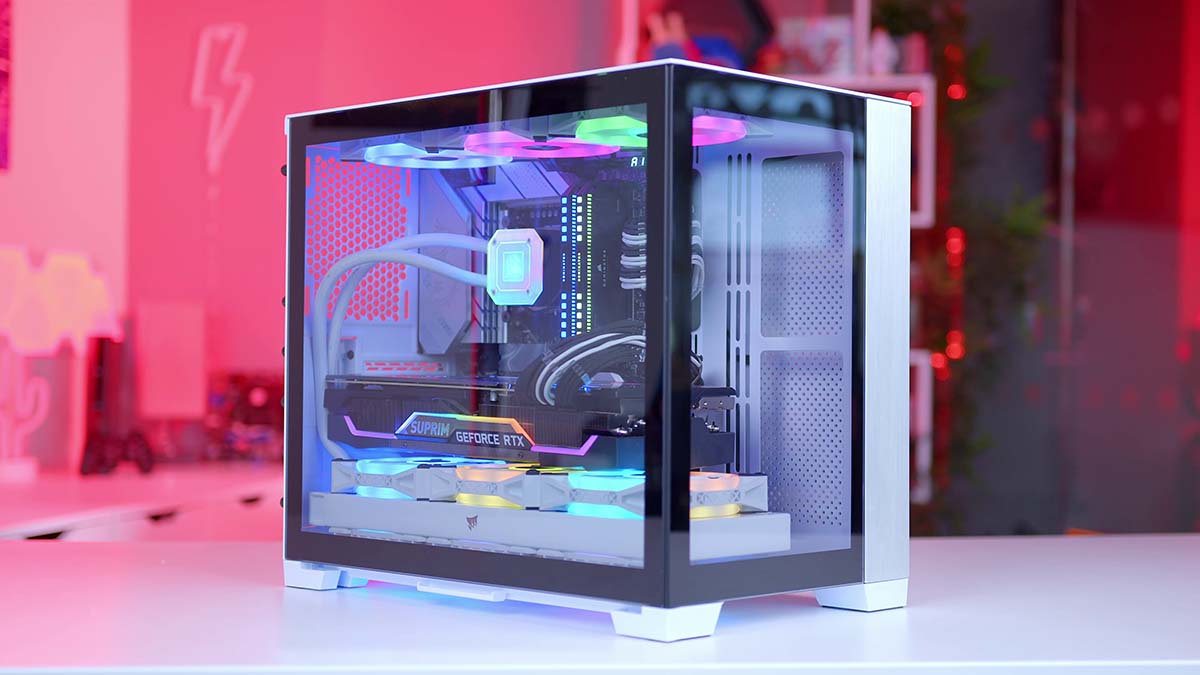
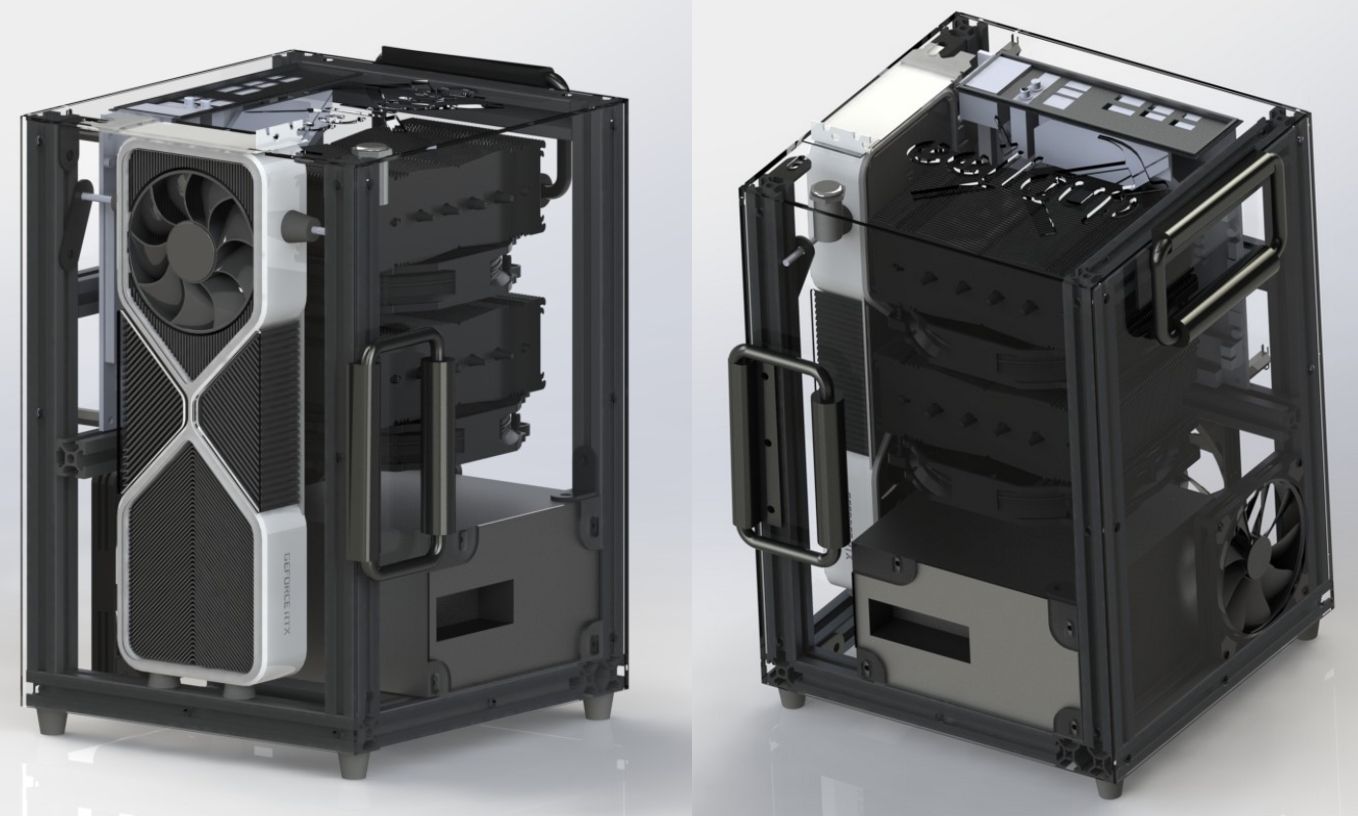
Choosing the Right PC Case
Selecting the perfect PC case is a critical decision in building your own PC. The case not only holds all your components securely but also determines the aesthetics and airflow of your system. Here are some key factors to consider when choosing the right PC case:
Size: PC cases come in various sizes, ranging from compact mini-ITX cases to full-tower behemoths. The size of the case largely depends on your needs and available space. If you have limited space or prefer a portable setup, a smaller form factor case may be ideal. On the other hand, larger cases offer more expansion slots and better cooling options.
Compatibility: Ensure that the PC case you choose is compatible with your motherboard form factor. Common form factors include ATX, Micro ATX, and mini-ITX. Additionally, consider the clearance for your CPU cooler and graphics card. A larger case provides more room for high-end components and facilitates better cable management.
Cooling Capability: Effective cooling is essential for maintaining optimal performance and longevity of your components. Look for a case that supports sufficient cooling options, such as fan mounts or radiator compatibility for liquid cooling. Some cases also feature built-in airflow mechanisms, such as dust filters and mesh panels, to enhance cooling efficiency.
Expansion Slots and Drive Bays: Consider the number of expansion slots and drive bays available in the case. If you plan to install multiple graphics cards or add expansion cards, ensure that the case can accommodate them. Similarly, if you require multiple storage drives, check for sufficient drive bays and support for specific drive sizes.
Cable Management and Build Quality: Look for a case with ample space behind the motherboard tray for cable routing. Good cable management not only improves airflow but also provides a cleaner and more organized build. Additionally, choose a case made from sturdy materials, with reliable build quality, ensuring durability and ease of installation.
Aesthetics: Last but not least, consider the visual appeal of the case. Choose a design and color that match your preference and blend well with your setup. Many cases offer customizable RGB lighting options, tempered glass panels, or unique designs to showcase your components and add a touch of personal style.
Remember, the right PC case is subjective and depends on your specific requirements. Take your time to research and compare different options, considering the factors mentioned above. By selecting a suitable PC case, you lay the foundation for a well-built, visually impressive, and high-performance PC.
Gathering the Necessary Tools and Supplies
Before diving into the process of building your PC case, it’s essential to gather all the necessary tools and supplies. Having the right equipment at hand ensures a smooth and efficient installation process. Here are the basic tools and supplies you’ll need:
Screwdriver Set: A reliable screwdriver set is essential for securing various components in your PC case. Opt for a set that includes both flathead and Phillips head screwdrivers to accommodate different screw types commonly found in PC hardware.
Cable Ties: Cable ties are invaluable for tidying up your cable management and improving airflow inside your case. They help secure and organize cables, preventing tangling and clutter. Make sure to have a variety of sizes and types to meet your specific requirements.
Thermal Paste: Thermal paste is necessary for ensuring proper heat transfer between your CPU and the cooler. It helps to fill in any microscopic gaps and promotes efficient cooling. Make sure to choose a high-quality thermal paste, as it can have a significant impact on your CPU’s temperature.
Anti-Static Wrist Strap: When handling sensitive electronic components, such as the motherboard and graphics card, it’s crucial to protect them from static electricity. An anti-static wrist strap grounds you and prevents static discharge that could potentially damage your components. This simple but effective tool is a must-have for any builder.
Zip Ties: Zip ties, also known as cable ties, are essential for securing cables and improving cable management. They are sturdy and reliable, allowing you to neatly organize and secure cables to the case or other components. Opt for reusable zip ties for added flexibility during future upgrades or modifications.
Storage Containers: Keeping small screws and other tiny components safe and organized is crucial during the build process. Utilize small storage containers or magnetic trays to keep track of them. This will save you time and frustration when you need to find a specific screw or other small parts later on.
Spare Parts: It’s always a good idea to have some spare screws or standoffs on hand, as they can sometimes go missing or get damaged during the build process. Keeping a small collection of commonly used spare parts can save you from delays or the need to make additional purchases.
By gathering and having these tools and supplies ready before you start building, you ensure a more organized and efficient process. This allows you to focus on assembling your PC case without any interruptions or delays. Remember, having the right tools makes all the difference in achieving a successful and hassle-free build.
Preparation Steps before the Build
Before you start building your PC case, it’s important to take a few preparation steps to ensure a smooth and successful build process. These steps will help you organize your components, prepare the workspace, and minimize any potential issues during assembly. Here are the essential preparation steps to follow:
Read the Manual: Start by thoroughly reading the manuals of your PC case and all the components you’ll be installing. Familiarize yourself with the specific instructions, recommended installation steps, and any precautions mentioned in the manuals. This will help you understand the requirements and ensure proper installation.
Clear the Workspace: Clear a clean, well-lit, and static-free workspace where you can comfortably assemble your PC case. Remove any clutter or unnecessary items to provide ample room for spreading out components and tools. This will help prevent accidents and ensure an organized workflow.
Ground Yourself: Static electricity can damage sensitive PC components, so it’s crucial to discharge any static buildup in your body. Use an anti-static wrist strap attached to a grounded surface or touch a grounded object before handling any components. This step is essential for protecting your valuable hardware.
Sort and Organize Components: Lay out all the components in a systematic manner, categorizing them according to their function. Separate screws, cable connectors, and other small components into labeled containers or on a magnetic tray. This will help you easily locate the required items during the build process.
Plan the Component Placement: Before installing any components, plan the layout of your PC case. Consider airflow and cable management to ensure optimal cooling and a clean aesthetic. Visualize the positioning of the motherboard, graphics card, storage devices, and other components to determine the most efficient arrangement.
Prepare the Motherboard: Install the CPU, RAM, and cooler onto the motherboard before inserting it into the case. Refer to the motherboard manual for specific instructions on correctly mounting the CPU and attaching the cooler. This step will minimize the chances of any accidental damage or interference during installation.
Inspect and Clean Components: Carefully inspect all the components for any visible signs of damage or manufacturing defects. Check for bent pins on the CPU or any other abnormalities. Additionally, use compressed air or lint-free cloths to clean dust or debris from the components. This ensures optimal performance and longevity.
Ensure Adequate Power Supply: Double-check that your power supply is compatible with your components and provides sufficient wattage. Refer to the power supply manual to determine the required connections and ensure you have the necessary cables and adapters.
By following these preparation steps, you set a strong foundation for a successful PC case build. Carefully read manuals, organize components, prepare the workspace, and check for any potential issues. This attention to detail and careful preparation will contribute to a smoother, safer, and more efficient build process.
Installing the Motherboard and CPU
Installing the motherboard and CPU is a crucial step in building your PC case. The motherboard serves as the backbone of your computer, providing connections and communication between all the components. Here’s a step-by-step guide to help you install the motherboard and CPU correctly:
- Prepare the Motherboard: Before installation, ensure that you have the correct mounting standoffs for your motherboard. These standoffs help align and secure the motherboard to the case. Install the standoffs in the appropriate locations by screwing them into the case’s mounting holes.
- Install the CPU: Carefully align the CPU with the socket on the motherboard, ensuring that the notches line up correctly. Gently place the CPU into the socket, making sure not to apply excessive force. Once properly aligned, close the socket lever to secure the CPU in place. Be careful to avoid touching the delicate pins on the CPU as this can cause damage.
- Apply Thermal Paste: Apply a small amount of thermal paste onto the center of the CPU. The thermal paste facilitates heat transfer between the CPU and the cooling solution. Use an appropriate method to spread the thermal paste evenly, such as a spreader or the cooler’s contact plate. Avoid using too much paste, as this can hinder heat dissipation.
- Mount the CPU Cooler: Install the CPU cooler following the manufacturer’s instructions. This typically involves attaching the cooler’s screws or clips to the designated mounting holes around the CPU socket. Ensure that the cooler is firmly seated and make the necessary connections to the motherboard for power and fan control.
- Position the Motherboard: Carefully lower the motherboard onto the mounting standoffs, aligning the screw holes with the standoffs. Take care not to trap any cables or wires underneath the motherboard. Once aligned, secure the motherboard to the case by inserting screws through the screw holes and tightening them snugly. Avoid overtightening, as this can damage the motherboard or cause warping.
- Connect Motherboard Cables: Connect the necessary cables from the power supply to the motherboard. This includes the main 24-pin power connector and the 4 or 8-pin CPU power connector. Ensure that the connections are secure and properly aligned.
- Attach Additional Components: Depending on your build, connect any additional components to the motherboard, such as RAM modules, expansion cards, and storage devices. Refer to the component manuals for specific installation instructions.
Take your time during the installation process, ensuring that each step is completed accurately and securely. Check all connections and ensure everything is properly aligned before proceeding. This will help avoid any potential issues and ensure a stable and functioning PC system.
Connecting Power Supply and Storage Devices
Connecting the power supply and storage devices is a vital part of building your PC case. The power supply provides the necessary electrical power to all the components, while storage devices store and retrieve data. Here’s a step-by-step guide to help you connect the power supply and storage devices correctly:
- Position the Power Supply: Install the power supply into its designated position in the case. Secure it in place using the screws provided. Ensure that the fan of the power supply is facing the correct direction to facilitate proper airflow.
- Connect the Main Power Cable: Attach the main power cable from the power supply to the motherboard’s 24-pin power connector. Make sure the connector is properly aligned and securely seated. This cable provides power to the motherboard and other components.
- Connect the CPU Power Cable: Connect the CPU power cable from the power supply to the motherboard’s 4 or 8-pin CPU power connector. This cable provides power to the CPU for proper operation.
- Connect SATA Cables: Connect SATA cables from the power supply to the storage devices, such as hard drives and solid-state drives (SSDs). Ensure that the SATA power connectors are securely plugged in. SATA cables transmit both power and data to the storage devices.
- Connect Data Cables: Attach the data cables to the storage devices and the motherboard. Use SATA data cables for SATA storage devices and connect one end to the device and the other to the corresponding SATA port on the motherboard. Ensure the connections are secure and properly aligned.
- Connect M.2 Storage (if applicable): If you have an M.2 storage device, check your motherboard manual for the designated M.2 slots. Align the M.2 storage device with the slot and secure it in place using the provided standoff and screw. Some M.2 slots may require the use of a thermal pad or heatsink for cooling.
- Connect Additional Power Cables: Depending on the specific components you’re using, you may need to connect additional power cables. Graphics cards often require dedicated power connectors, typically in the form of PCIe power cables. Refer to the graphics card manual for specific instructions on connecting these cables.
- Secure and Manage Cables: Once all the connections are made, ensure that the cables are properly routed and managed. Use cable ties or Velcro straps to secure and tidy up the cables, promoting better airflow and aesthetics.
Double-check all the connections to ensure they are secure and properly aligned. Take care not to force any connections or bend any pins. A well-connected and powered system is essential for the proper functioning of your PC, so it’s crucial to pay attention to detail during this process.
Installing the Graphics Card and Other Expansion Cards
Installing the graphics card and other expansion cards is an important step in building your PC case. The graphics card is responsible for rendering images, while other expansion cards can provide additional functionality to your system. Here’s a step-by-step guide to help you install these cards correctly:
- Locate PCIe Slots: Identify the available PCIe slots on your motherboard. These are typically used for graphics cards, sound cards, network cards, and other expansion cards. Refer to the motherboard manual to find the optimal slots for installation.
- Prepare the PCIe Slot: Remove the protective cover from the PCIe slot you’ll be using for the graphics card or expansion card. If there is a retention clip or screw near the slot, loosen or remove it to prepare the slot for installation.
- Insert the Card: Align the graphics card or expansion card with the appropriate PCIe slot. Gently but firmly push the card into the slot until it is fully seated. Ensure that the card’s brackets are aligned with the case’s rear cutouts.
- Secure the Card: Once the card is inserted, use the retention clip or screw to secure it in place. This prevents the card from accidentally coming loose. Ensure that the card is firmly fixed and aligned properly.
- Connect Power to the Graphics Card (if applicable): Some higher-end graphics cards require additional power connections to function properly. Connect the necessary power cables from the power supply to the graphics card’s power connectors. Refer to the graphics card manual for specific instructions on connecting these cables.
- Install Other Expansion Cards (if applicable): If you have any other expansion cards, such as sound cards or network cards, follow the same steps as above to insert and secure them in their respective PCIe slots. Connect any necessary power or data cables to these cards as well.
- Check Connections and Clearance: Double-check all connections to ensure they are securely plugged in. Ensure that there is sufficient clearance between the graphics card and other components to allow for proper airflow and cooling.
It is essential to handle these cards with care and avoid exerting excessive force during installation. Ensure that the cards are correctly aligned with the PCIe slot and securely fixed to prevent any potential issues during operation. Properly installing the graphics card and other expansion cards will allow your PC to utilize their full capabilities and enhance your overall computing experience.
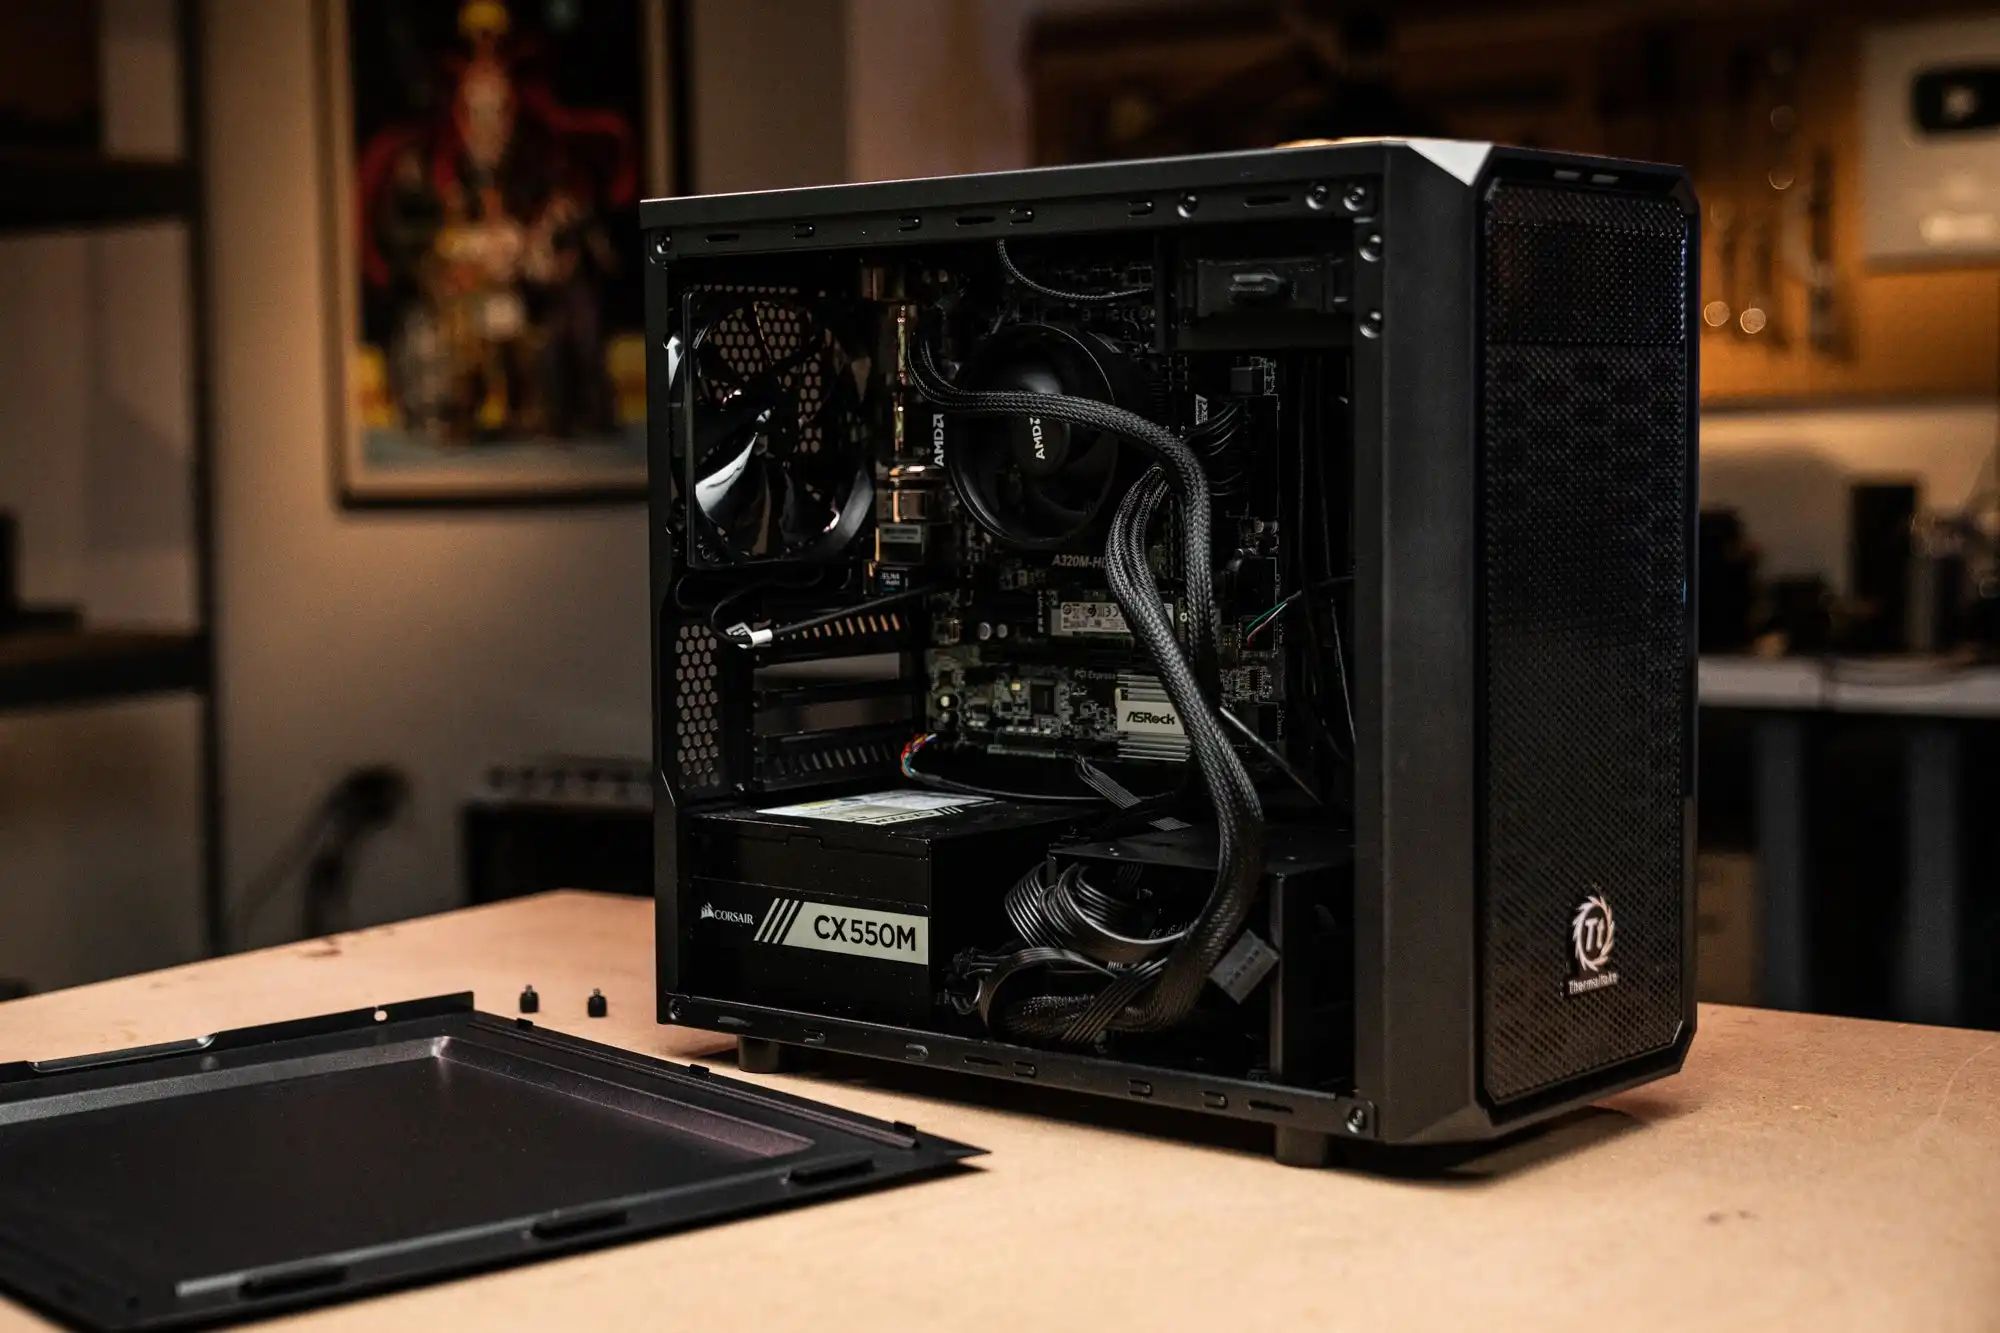
Connecting Cables and Wiring
Connecting cables and wiring is a crucial step in the PC case building process as it ensures proper communication and power distribution between components. Proper cable management not only improves airflow but also makes troubleshooting and future upgrades easier. Here’s a step-by-step guide to help you connect cables and wire your PC case:
- Refer to the Motherboard Manual: Consult the motherboard manual to identify the location and function of each header and connector. This will help you connect the cables correctly and avoid any confusion or errors.
- Front Panel Connectors: Connect the front panel connectors, including the power switch, reset switch, power LED, and HDD LED headers. The motherboard manual will provide detailed instructions on the layout and connection points for these cables.
- USB and Audio Headers: Connect the USB and audio front panel headers to the corresponding connectors on the motherboard. These headers allow you to connect USB ports and audio jacks located on the front of the PC case.
- SATA Cables: Connect SATA cables from the motherboard to the storage devices such as hard drives and SSDs. Ensure that the cables are properly aligned with the SATA ports on both the motherboard and storage devices.
- Power Supply Cables: Connect the necessary power supply cables to all the components in your PC case. This includes the motherboard, graphics card, storage devices, cooling fans, and any other components requiring power. Make sure the connections are secure and aligned correctly.
- Cable Management: Organize and route the cables carefully to optimize airflow and create a clean look. Use cable ties or Velcro straps to secure the cables and prevent them from obstructing the components or fans. Tuck away excess cables behind the motherboard tray or use cable management channels if available.
- Verify Connections: Double-check all the cable connections to ensure they are properly seated and secure. Verify that each cable is connected to the appropriate header or connector, and there are no loose or unplugged cables.
Proper cable management not only enhances the aesthetics of your PC case but also improves airflow, leading to better cooling performance. Ensuring that all the cables are connected correctly and managed effectively reduces the risk of loose connections and potential issues with power delivery or data transfer.
Installing Fans and Cooling System
Installing fans and a cooling system is vital for maintaining optimal temperatures and preventing overheating in your PC case. Adequate cooling ensures the longevity and stability of your components. Here’s a step-by-step guide to help you install fans and a cooling system:
- Identify Fan Mounting Points: Check your PC case for designated fan mounting points. These are usually located on the front, rear, and top of the case. Refer to the case manual to identify the optimal locations for airflow and cooling.
- Install Case Fans: Mount case fans in the designated locations. Connect the fan cables to the appropriate headers on the motherboard for power. Ensure that the fans are oriented to intake cool air from the front or bottom and exhaust hot air from the rear or top of the case.
- Consider Liquid Cooling (Optional): If you opt for liquid cooling, install the radiator and fans in the appropriate location. Ensure that the radiator is securely mounted and the fans are properly aligned to provide efficient cooling. Connect the pump, tubing, and radiator fans according to the liquid cooling system manufacturer’s instructions.
- Position CPU Cooler: Install the CPU cooler by following the manufacturer’s instructions. Some coolers use mounting brackets, while others require direct attachment to the motherboard. Ensure that the cooler is correctly aligned with the CPU and that any necessary thermal paste has been applied to facilitate heat transfer.
- Connect Cooling System Cables: Connect the fan cables from the CPU cooler and radiator fans to the appropriate headers on the motherboard or fan controller. Ensure that the connections are secure and properly aligned.
- Adjust Fan Speed (if applicable): Access the BIOS or software utility to adjust the fan speed settings. Depending on your preferences and the specific cooling requirements, you can set the fan speeds to operate at specific RPMs or adjust them dynamically based on temperature.
- Test Cooling System: Power on the PC and monitor the temperatures of your components using software utilities or the BIOS. Verify that the cooling system is functioning effectively and ensuring that temperatures remain within safe limits.
Ensuring proper installation and configuration of fans and the cooling system is crucial for maintaining a cool and stable operating environment for your PC. Proper airflow and temperatures contribute to the overall performance, reliability, and lifespan of your components.
Closing and Securing the PC Case
Once you have installed and connected all the components, it’s time to close and secure your PC case. Properly closing and securing the case ensures that everything stays in place and protects your components from dust and damage. Here’s a step-by-step guide to help you close and secure the PC case:
- Organize Cables: Take a final look at your cable management and make any necessary adjustments to ensure that cables are neatly arranged and not obstructing any components.
- Cable Routing: Ensure that all cables are routed through the designated cable management channels or holes in the case. This will help keep them organized and prevent them from getting tangled or interfering with any fans or components.
- Close the Side Panel: Carefully align the side panel with the case and slide it back into place. Use the screws provided to secure the side panel. Be cautious not to overtighten the screws as it may damage the case or strip the threads.
- Check for Loose Components: Give your PC case a gentle shake or tap to check for any loose components that may have shifted during the build process. Ensure that everything is secure and properly seated.
- Secure Additional Panels: If your PC case has additional panels, such as a top or front panel, secure them by following the manufacturer’s instructions. This helps with noise reduction and dust prevention, while also providing protection to the internal components.
- Final Dusting: Before powering on your PC, take a moment to clean any dust or debris that may have accumulated inside the case. Use compressed air or a soft brush to remove any loose particles, ensuring that the components are free from obstruction.
- Position the PC case: Place your PC case in its desired position, ensuring that there is enough space around it for proper airflow. Avoid placing it on carpets or near curtains to prevent dust buildup or potential airflow blockage.
- Reconnect Peripherals and Power: Reconnect your monitor, keyboard, mouse, and other peripherals to the appropriate ports on your PC. Plug in the power cord and switch on the power supply.
- Power On and Test: Press the power button on your PC case, and observe the startup process. Ensure that the fans are spinning, lights are on, and you can hear a POST (Power-On Self Test) beep or see the BIOS screen. This indicates that your PC is booting up correctly.
With these steps, you have successfully closed and secured your PC case. Your components are protected, and your PC is ready for operation. It’s recommended to periodically check the case for any loose screws, dust accumulation, or cable management improvements to maintain optimal performance and longevity of your PC.
Testing and Troubleshooting the Built PC
After completing the assembly of your PC case, it’s crucial to thoroughly test your system to ensure that all components are functioning properly. Testing allows you to identify any potential issues or errors and take necessary troubleshooting steps. Here’s a guide to help you test and troubleshoot your built PC:
- Power On and POST: Power on your PC and observe the Power-On Self Test (POST) process. Listen for any error beeps or check the display for any error messages. If you encounter any issues, consult your motherboard manual for an explanation of beep codes or error messages.
- Check BIOS Settings: Access the BIOS and verify that all components are detected correctly. Ensure that the CPU temperature and fan speed readings are within normal ranges. Make any necessary adjustments to the BIOS settings, such as boot order or XMP profiles for RAM.
- Test System Stability: Run stability tests or benchmarking software to stress-test your system’s components. Monitor CPU and GPU temperatures to ensure they are within acceptable limits. If your system crashes, freezes, or overheats, it may indicate an issue with cooling, hardware compatibility, or drivers.
- Update Drivers and Firmware: Ensure that you have installed the latest drivers for your graphics card, motherboard, and other hardware components. Check the manufacturer’s websites for driver updates or use dedicated software to automatically identify and install the latest drivers.
- Run Diagnostic Software: Use diagnostic tools, such as memtest86+ for RAM testing or CrystalDiskInfo for checking hard drive health, to identify any potential hardware issues. These tests can help pinpoint problems with specific components.
- Check System Temperatures: Continuously monitor the temperatures of your CPU and GPU during different loads, such as gaming or intensive tasks. Use software utilities or hardware monitoring tools to ensure that temperatures stay within safe operating limits.
- Troubleshoot Hardware Issues: If you encounter any hardware issues, such as a component not working or random system shutdowns, start by checking all cable connections and reseating components. Ensure that all components are fully seated in their respective slots.
- Consult Manufacturer Support: If troubleshooting steps and tests do not resolve the issue, refer to the manufacturer’s support resources, including their website, forums, or customer support. They can provide specific troubleshooting steps or warranty assistance if necessary.
- Document and Seek Professional Help: If you’re unable to resolve the issues, document the symptoms, error codes, and troubleshooting steps you have taken. Consider seeking assistance from professional repair services or contacting the retailer from whom you purchased the components.
Testing and troubleshooting your built PC is essential to ensure a stable and reliable system. By following these steps, you can identify and address any potential hardware or compatibility issues, ensuring your PC runs smoothly and meets your performance expectations.