Introduction
Welcome to the world of Discord, a popular communication platform for gamers and communities alike. In Discord, you can create and manage different channels for various purposes. One particularly useful feature in Discord is the ability to create an AFK (Away From Keyboard) channel. This channel is designed specifically for users who are inactive or away from their keyboards for an extended period of time.
The AFK channel ensures that users who are not actively participating in conversations do not clutter up other channels. By moving idle users to the AFK channel, it organizes the server and helps maintain a focused and engaged community. In this article, we will guide you through the simple process of creating an AFK channel in Discord and customizing it to suit your server’s needs.
Before we dive into the steps, it’s important to note that to create an AFK channel, you need to have the appropriate administrative permissions on your Discord server. Make sure you have the necessary roles or permissions before proceeding.
Prerequisites
Before we begin, there are a few prerequisites you need to ensure before creating an AFK channel in Discord:
- Administrative Access: To create an AFK channel, you need to have administrative access or the necessary permissions on your Discord server. If you’re not the server owner, make sure you have been granted the appropriate role or permission.
- Discord Server: You need to have a Discord server set up where you have the necessary administrative access. If you haven’t created a server yet, you can easily create one by following the steps outlined on the Discord website.
- Basic Knowledge of Discord: It’s helpful to have a basic understanding of how Discord works, including creating channels, managing roles, and adjusting permissions. If you’re new to Discord, you can explore the Discord support articles or watch tutorials to familiarize yourself with the platform.
Ensuring that you have these prerequisites in place will make the process of creating an AFK channel in Discord much smoother. So, double-check that you have administrative access, a Discord server, and a basic understanding of the platform before proceeding to the next steps.
Step 1: Creating a New Channel
The first step in setting up an AFK channel in Discord is to create a new channel specifically designated for idle users. Here’s how you can do it:
- Open Discord and navigate to your server where you want to create the AFK channel.
- On the left-hand side of the Discord window, you’ll see a list of channels. Right-click on any desired category or an existing channel where you want to create the AFK channel.
- From the menu that appears, select the “Create Channel” option.
- A window will pop up, prompting you to enter the details for the new channel. Give your AFK channel a name that clearly indicates its purpose, such as “AFK” or “Idle Users”.
- Customize other settings as per your preferences, such as the channel’s topic or description.
- Click on the “Create Channel” button to finalize the creation of the AFK channel.
By following these steps, you have successfully created a new channel dedicated to idle users in your Discord server. However, we still need to adjust the channel permissions and add the AFK role to ensure it serves its intended purpose. Let’s move on to the next step.
Step 2: Adjusting Channel Permissions
Once you have created the AFK channel, the next step is to adjust the channel permissions to ensure that only authorized users can view and interact with it. Here’s how you can do it:
- Right-click on the newly created AFK channel in Discord and select the “Edit Channel” option.
- In the Channel Settings window that appears, navigate to the “Permissions” tab.
- Here, you can customize the permissions for different roles and users in your server. By default, all roles and users will have no permissions for the AFK channel, which is what we want for an AFK channel.
- Make sure that the “Read Messages” and “Send Messages” permissions are set to “❌” for all roles. This ensures that users in the AFK channel can only view and not send any messages.
- Scroll down to check and adjust the permissions for other actions such as reactions, mentions, etc. It’s generally recommended to disable all these permissions to keep the channel focused on idle users.
- Once you have adjusted the permissions as per your preferences, click on the “Save Changes” button to apply the new permissions to the AFK channel.
By following these steps, you have successfully adjusted the channel permissions for the AFK channel, ensuring that only authorized users can view the channel and preventing any unwanted activity. Now, let’s proceed to the next step and add the AFK role to further manage the channel.
Step 3: Adding the AFK Role
In order to effectively manage the AFK channel, it’s important to assign a specific role to users who become idle. This role will help automate the process of moving idle users to the AFK channel. Here’s how you can add the AFK role:
- In Discord, go to your server settings by clicking on the server name at the top-left corner of the screen.
- From the menu that appears, select the “Roles” option.
- In the Roles settings, click on the “+ (plus)” button to create a new role.
- Give the role a name that clearly indicates its purpose, such as “AFK” or “Idle”.
- Customize other settings as per your preferences, such as the role’s color or permissions.
- Once you have created the AFK role, it’s time to set up a Discord bot or a moderation bot that can automatically assign this role to idle users. Different bots have varying methods of assigning roles, so make sure to check the documentation or support channels of the bot you’re using for detailed instructions.
- Once you have set up the bot and configured it to assign the AFK role to idle users, it will automatically move users to the AFK channel after a specified period of inactivity.
By following these steps, you have successfully added the AFK role and set it up to automate the process of moving idle users to the AFK channel. This helps keep the server organized, ensures active channels are free from clutter, and provides users with a designated space for when they are away from their keyboards.
Now that you’ve added the AFK role, let’s move on to the next step and adjust the AFK timeout to determine how much inactivity is required to move a user to the AFK channel.
Step 4: Setting the AFK Timeout
Now that you have the AFK channel and role set up, it’s time to configure the AFK timeout. The AFK timeout determines how long a user needs to be inactive before they are automatically moved to the AFK channel. Here’s how you can set the AFK timeout:
- In Discord, navigate to your server settings by clicking on the server name at the top-left corner of the screen.
- Click on the “Server Settings” option from the menu that appears.
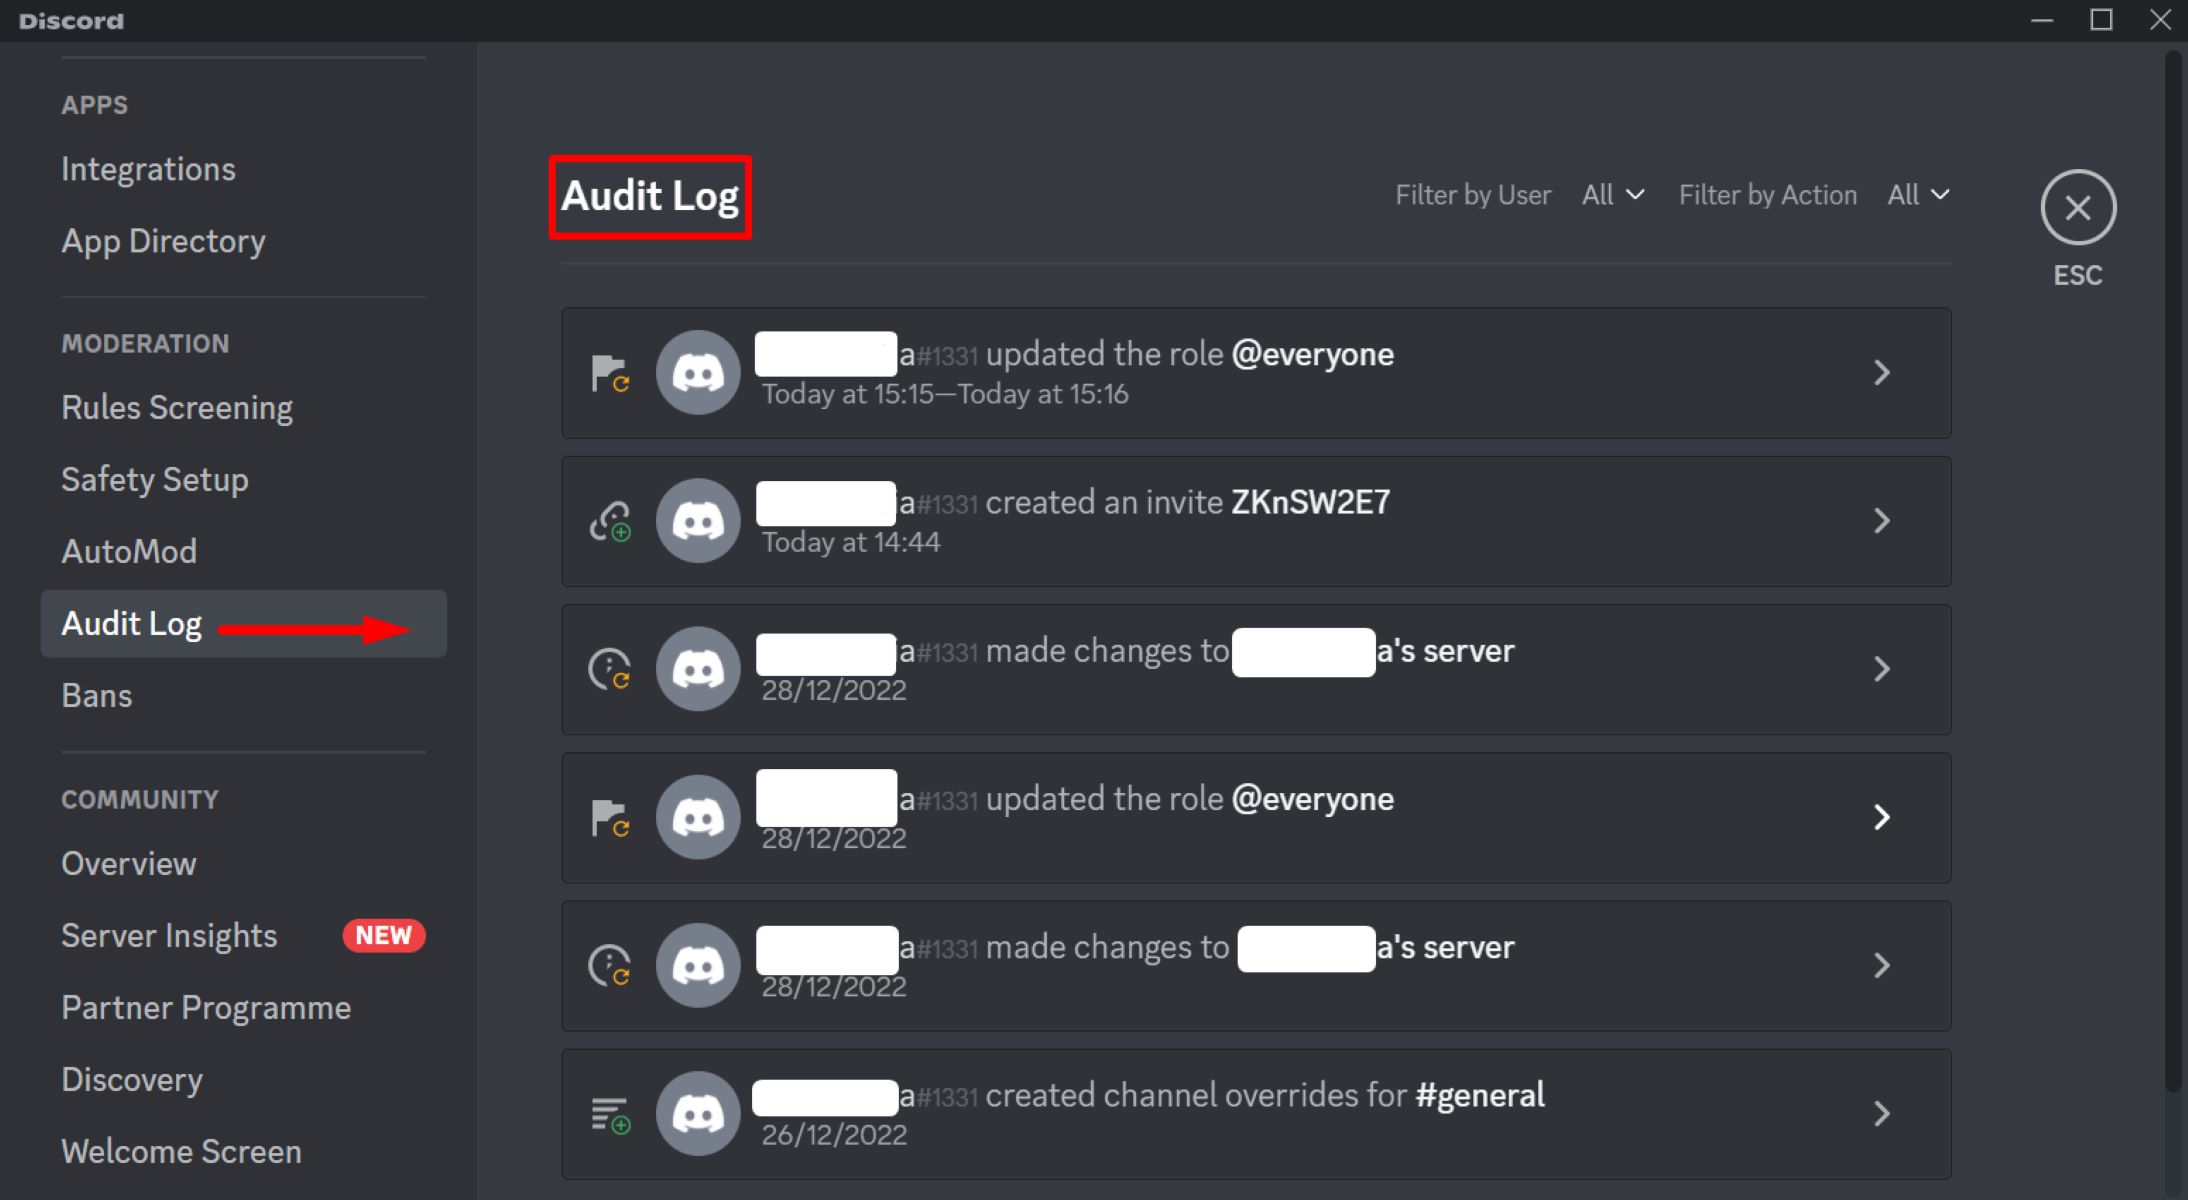
- In the Server Settings menu, select the “Moderation” tab.
- Scroll down until you find the “AFK Timeout” option.
- Adjust the slider or input the desired number of minutes for the AFK timeout. This determines the duration of inactivity after which a user will be moved to the AFK channel.
- Once you have set the AFK timeout to your preference, click on the “Save Changes” button to apply the new configuration.
With the AFK timeout set, users who are inactive for the specified duration will be automatically moved to the AFK channel. This ensures that active channels remain focused and clutter-free, while providing users with a designated space to indicate that they are away from their keyboards.
Now that you’ve set the AFK timeout, let’s move on to the final step and explore how you can customize the AFK channel to suit your server’s needs.
Step 5: Customizing the AFK Channel
After setting up the AFK channel and configuring its permissions, role assignment, and timeout, you can further customize the channel to enhance its functionality and appearance. Here are some ways you can customize the AFK channel:
- Channel Description: Add a description to the AFK channel to provide information about its purpose or any guidelines for users.
- Welcome Message: Set a custom welcome message using a Discord bot, which will automatically greet users when they are moved to the AFK channel.
- Channel Category: Assign the AFK channel to a specific category to keep your server strategically organized.
- Create a Bot Notification Channel: Create another channel specifically for bot notifications, where bots can announce when users are moved to the AFK channel.
- Channel Visibility: Adjust the visibility settings to make the AFK channel visible to only certain roles or users, if desired.
These customizations can help improve the functionality and experience of the AFK channel for your users. You can mix and match these options based on your server’s needs and preferences.
Remember to periodically review and update the settings and customizations of the AFK channel to ensure it continues to serve its purpose effectively. Experiment with different options and gather feedback from your community to find the best setup for your server.
Congratulations! You have successfully created an AFK channel in Discord, adjusted its permissions, added the AFK role, set the timeout, and customized the channel to suit your server’s needs. By implementing an AFK channel, you have taken a step towards maintaining an organized and engaging server.
Keep in mind that Discord provides numerous other features and functionalities that can further enhance your server’s experience. Exploring these features and continuously engaging with your community will contribute to a lively and vibrant Discord server.
Conclusion
Creating an AFK (Away From Keyboard) channel in Discord can significantly improve the organization and communication within your server. By following the steps outlined in this guide, you have successfully created an AFK channel, adjusted its permissions, added the AFK role, set the timeout, and customized it to suit your server’s needs. This dedicated channel ensures that inactive users are moved to a designated space, keeping other channels clutter-free and focused on active conversations.
Remember to periodically review and update the settings of the AFK channel to ensure its effectiveness. Experiment with additional customizations, such as adding descriptions or welcome messages, to enhance user experience and engagement in your server.
Discord offers a wide range of features and functionalities that can further enrich your server’s community. Take the time to explore and familiarize yourself with these features, and continuously engage with your members to create a lively and interactive Discord server.
By implementing an AFK channel, you are taking proactive steps towards maintaining an organized and engaging community. Embrace the opportunities that Discord provides and keep your server thriving!