Introduction
Creating a movie is a fantastic way to preserve and share your treasured memories. With the advent of technology, it has become easier than ever to turn your photos and videos into a captivating film. One such platform that offers a user-friendly interface and powerful editing capabilities is Google Photos.
In this guide, we will walk you through the step-by-step process of making a movie on Google Photos. Whether it’s a family vacation, a special event, or a collection of precious moments, you’ll learn how to transform your media into a professional-looking movie that you can proudly showcase to your friends and family.
Before we dive into the details, it’s worth mentioning that Google Photos provides a seamless integration with your Google account, ensuring that your movies are easily accessible and can be shared across various platforms and devices.
So, if you’re ready to embark on this creative journey, let’s get started with uploading and organizing your photos and videos!
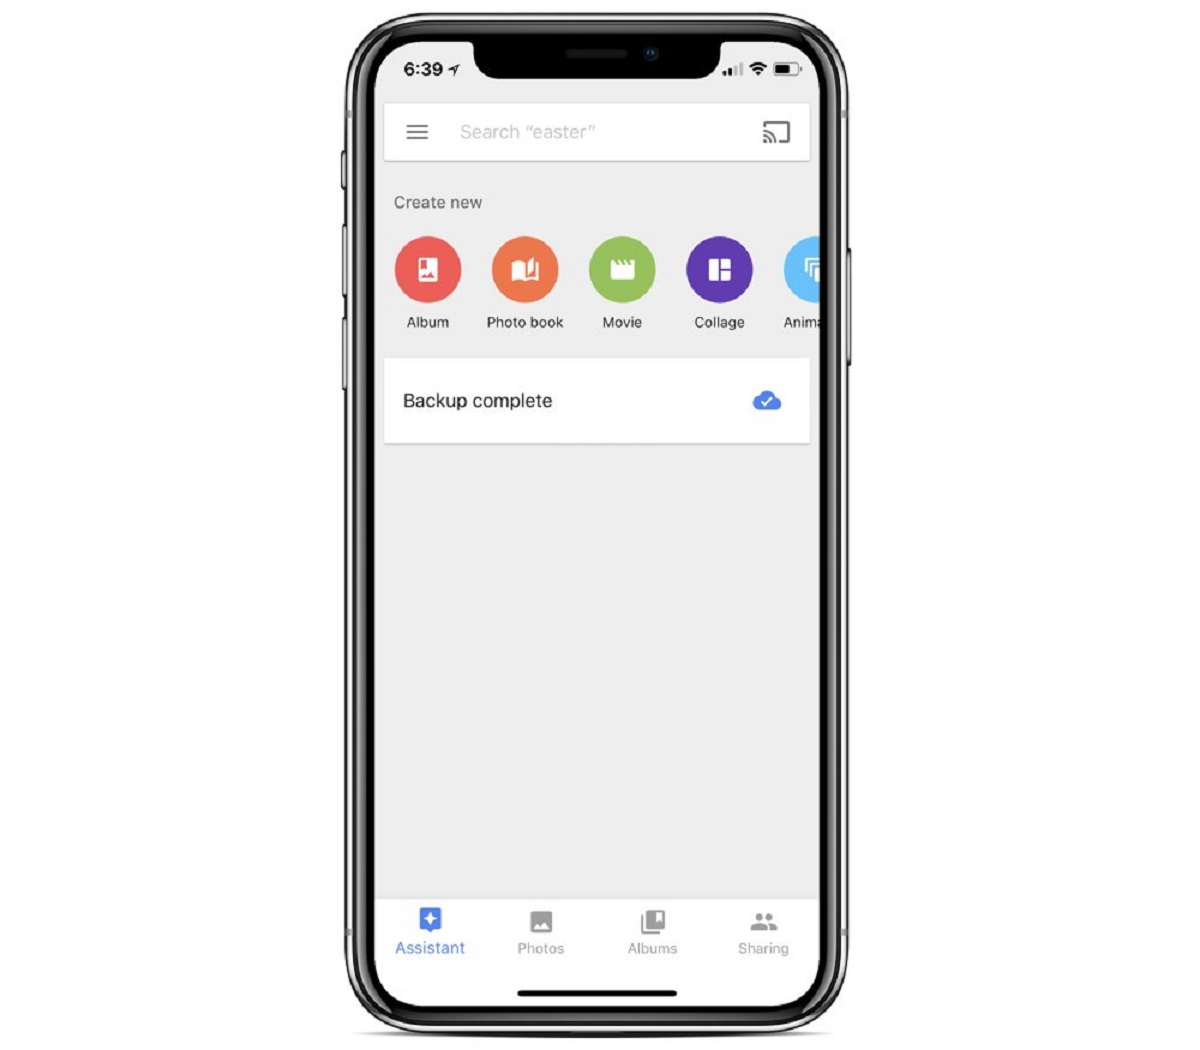
Step 1: Uploading and Organizing Your Photos and Videos
The first step in creating a movie on Google Photos is to upload and organize your photos and videos. Here’s how:
- Sign in and upload: Open Google Photos on your computer or mobile device and sign in to your Google account. Click on the “Upload” button and select the photos and videos you want to include in your movie. You can either drag and drop the files or choose them from your file explorer.
- Create albums: To keep your photos and videos organized, it’s a good idea to create albums. Click on the “Albums” tab and then select “Create Album.” Give your album a name and add the desired media files to it. This will make it easier to locate and select the specific content you want to include in your movie.
- Arrange the order: Once your photos and videos are uploaded and sorted into albums, you can arrange the order in which they will appear in your movie. Simply click on an album and drag the items to the desired position.
It’s important to note that Google Photos automatically organizes your media based on the date and location information attached to each file. This makes it even more convenient to find the content you need for your movie.
Now that you have successfully uploaded and organized your photos and videos, you’re ready to move on to the next step: selecting the photos and videos for your movie.
Step 2: Selecting the Photos and Videos for Your Movie
Now that your photos and videos are uploaded and organized, it’s time to choose the perfect ones for your movie. Follow these steps to make your selection:
- Browsing your library: Go to the “Library” tab in Google Photos and navigate to the specific album or folders where your desired photos and videos are located. Take your time to browse through the visuals and select the ones that best capture the essence of your story.
- Using search filters: Google Photos offers powerful search functionality, allowing you to narrow down your selection based on specific criteria. You can utilize filters like people, places, or objects to quickly find the photos and videos you want to include in your movie. Simply use the search bar at the top of the screen and enter the appropriate keywords.
- Adding to your movie: Once you’ve identified the photos and videos you want to use, select them by clicking on the checkboxes next to each item. You can choose multiple files at once. When you’ve made your selections, click on the “Add to movie” button which will be visible at the top of the screen.
Remember, the key during the selection process is to choose visuals that effectively convey your story or the theme of your movie. Look for images that evoke emotions, capture important moments, and showcase the highlights of your experience.
With your photos and videos chosen, it’s time to move on to the next step: editing your movie and bringing your vision to life.
Step 3: Editing Your Movie
Now that you have selected the photos and videos for your movie, it’s time to add that special touch through editing. Google Photos provides a range of editing tools to enhance your visuals and create a polished final product. Here’s how to edit your movie:
- Accessing the movie editor: To begin editing, go back to the “Library” tab in Google Photos and click on the movie you created. Next, click on the “Edit” button located at the top-right corner of the screen. This will open up the movie editor where you can make various adjustments and enhancements.
- Trimming and rearranging: One of the key editing features is the ability to trim the duration of photos or videos and rearrange their order within the movie. Simply select a file and click on the “Trim” button to adjust its start and end points. To rearrange the order, click on the file and drag it to the desired position. This allows you to create a seamless flow throughout your movie.
- Applying filters: Google Photos offers a range of filters that can add an artistic touch to your movie. Click on the “Filters” button and experiment with different options to find the style that best suits your vision. From vivid and vibrant to vintage and black-and-white, the choice is yours.
- Adjusting brightness and color: For further refinement, you can adjust the brightness, contrast, saturation, and other parameters of individual photos and videos. Click on a file, and then click on the “Adjust” button to fine-tune its appearance. This allows you to ensure that each visual element looks its best.
- Adding captions: To provide context or additional information, consider adding captions to your photos and videos. Click on a file, and then click on the “Caption” button to enter your text. You can customize the font, size, and position of the captions to align with your movie’s style.
By using these editing tools, you can truly personalize your movie and make it a unique representation of your memories. Once you’re satisfied with the edits, proceed to the next step: customizing your movie with music and text.
Step 4: Customizing Your Movie with Music and Text
Now that you have edited your movie’s visuals to perfection, it’s time to add another layer of creativity by customizing it with music and text. Here’s how to do it using Google Photos:
- Adding music: Music plays a crucial role in setting the tone and enhancing the emotional impact of your movie. Google Photos provides a library of royalty-free music that you can choose from. Click on the “Music” button in the movie editor, browse through the available options, and select the track that suits the mood of your movie. You can preview the music by clicking on the play button before making your final selection.
- Adjusting music duration: Once you have added the music, you can adjust its duration to align with the length of your movie. Click on the music track and drag the handles at either end to trim it down or extend it. This allows you to synchronize the music with the visuals and create a harmonious audio-visual experience.
- Introducing text: Text can be used to provide context, titles, or credits in your movie. Click on the “Text” button in the movie editor, and a text box will appear on the screen. Enter your desired text, customize the font, size, and position, and apply it to the specific scenes or transitions where you want it to appear.
- Transitions and effects: To add a professional touch to your movie, experiment with different transitions and effects. Click on the “Transitions” button in the movie editor, and choose from a variety of options like crossfade, fade to black, or slide transitions. Additionally, you can apply effects such as slow motion or pan and zoom to specific photos or videos for added visual interest.
- Previewing your movie: As you customize your movie with music, text, and effects, it’s vital to preview it to ensure everything fits seamlessly together. Click on the “Preview” button in the movie editor, and watch your movie in real-time to make any necessary adjustments.
By customizing your movie with music and text, you can add a professional and personal touch that elevates its overall impact and storytelling. Once you are satisfied with the customization, it’s time to move on to the next step: adding effects and transitions to your movie.
Step 5: Adding Effects and Transitions to Your Movie
Adding effects and transitions to your movie can enhance its visual appeal and smoothness. Google Photos offers a range of options to help you create a seamless and captivating viewing experience. Follow these steps to add effects and transitions:
- Accessing the effects and transitions: In the movie editor, click on the “Effects” button to explore the available options. You’ll find a variety of effects like cinematic, vintage, or black-and-white, each with its own unique style. Click on an effect to apply it to the entire movie or select specific photos and videos for targeted application.
- Choosing transitions: Transitions help in smoothly transitioning between scenes or adding a stylistic touch to your movie. Click on the “Transitions” button in the movie editor to access the transition options. Each transition has its own animation and style, such as fade, dissolve, or slide. Select the desired transition and apply it between photos or videos to create a seamless flow.
- Adjusting effects and transitions: Once you have added an effect or a transition, you can further customize it to fit your preferences. Click on the effect or transition, and use the available settings to control factors like intensity, duration, or direction. This enables you to fine-tune the visual impact according to your vision.
- Previewing and refining: It’s essential to preview your movie with effects and transitions to ensure they enhance the overall storytelling and visual experience. Click on the “Preview” button in the movie editor to watch your movie in real-time and make any necessary adjustments. This step allows you to refine and perfect the effects and transitions for a polished final result.
By carefully selecting and applying effects and transitions, you can elevate the visual aesthetics of your movie and create a more engaging and immersive experience for your audience. Once you’re satisfied with the effects and transitions, it’s time to move on to the final step: previewing and saving your movie.
Step 6: Previewing and Saving Your Movie
The final step in creating your movie on Google Photos is to preview it and save the finished product. Taking the time to review your movie ensures that everything is in place before sharing it with others. Here’s how to preview and save your movie:
- Previewing your movie: Before saving your movie, it’s essential to preview it to ensure that all the elements, such as photos, videos, music, effects, and transitions, are aligned with your vision. Click on the “Preview” button in the movie editor, sit back, and watch your movie in real-time. Take note of any areas that may need further adjustments or fine-tuning.
- Making final adjustments: If you notice any issues or areas that require improvement during the preview, go back to the respective editing steps and make the necessary adjustments. Fine-tune the timing, visual effects, or transitions until you’re satisfied with the overall presentation of your movie.
- Saving your movie: Once you are confident and happy with your movie, it’s time to save it. Click on the “Save” or “Finish” button in the movie editor, and Google Photos will process and generate the final version of your movie. Depending on the length and complexity of your movie, this may take a few minutes.
- Accessing your saved movie: Once your movie is saved, you can access it in the movie library within Google Photos. You can also download the movie to your device or share it directly with others. Google Photos offers various sharing options, including sharing via social media platforms, email, or generating a link to the movie.
By thoroughly previewing and saving your movie, you ensure that you present your final creation in the best possible light. It gives you the opportunity to make any last-minute tweaks and ensures that your movie is ready to be enjoyed and shared with others.
Now that you have successfully completed all the steps to create an impressive movie on Google Photos, you can proudly showcase your memories and storytelling through a beautifully crafted cinematic experience.
Conclusion
Creating a movie on Google Photos allows you to transform your photos and videos into a captivating visual story. By following the step-by-step process outlined in this guide, you can turn your cherished memories into a professional-looking movie that you can proudly share with others.
From uploading and organizing your photos and videos to selecting the perfect visuals, editing, customizing with music and text, adding effects and transitions, and finally previewing and saving your movie, Google Photos offers a user-friendly platform with a range of powerful editing tools and features.
During the process, you have the opportunity to personalize your movie, adding your creative touch through music, text, effects, and transitions. The ability to trim, rearrange, adjust brightness and color, apply filters, and even search for specific criteria ensures that you have complete control over the final product.
Don’t underestimate the importance of previewing your movie before saving it, as it allows you to make any final adjustments and ensure that your movie is a seamless and captivating piece of visual storytelling.
So, whether you want to commemorate a special event, relive a cherished memory, or create a unique gift for someone, making a movie on Google Photos is a fantastic option. It’s easy, intuitive, and offers endless possibilities for creativity.
So what are you waiting for? Dive into your photo and video library, unleash your imagination, and bring your memories to life through the art of movie-making with Google Photos.