Introduction
In today’s digital age, virtualization has become an essential tool for many professionals and enthusiasts alike. Virtual machines allow us to run multiple operating systems on a single physical computer, providing flexibility and convenience for various tasks such as software testing, development, and system administration.
While it is common to install operating systems from ISO or DVD images directly into a virtual machine, there may be instances where you want to load an operating system from an external hard drive. This can be useful when working with legacy systems, specialist distributions, or system recovery scenarios. In this article, we will explore the step-by-step process of loading an operating system from an external hard drive into a VM workstation.
Before we dive in, it’s important to note that this guide assumes you have basic knowledge of virtualization concepts and are familiar with using VM workstation software. Additionally, you will need to have the necessary software and hardware prerequisites in place, which we will discuss in the following sections.
Prerequisites
Before you begin the process of loading an operating system from an external hard drive into a VM workstation, there are a few things you need to have in place:
- A functional VM workstation software installed on your computer. There are several options available, such as VMware Workstation, Oracle VM VirtualBox, or Microsoft Hyper-V. Ensure that you have the latest version of the software installed.
- An external hard drive containing the operating system you wish to load into the virtual machine. Make sure the external hard drive is properly formatted and that the operating system image is compatible with the virtualization software you are using.
- Adequate disk space on your computer to create and run the virtual machine. You will need enough storage to accommodate the operating system image, along with any additional files or software you may want to install within the virtual machine.
- A stable internet connection, as you may need to download the necessary software or updates during the process.
It is also recommended to have a backup of any important files or data stored on your external hard drive, as the process of loading the operating system into the virtual machine may involve formatting the drive or making changes to its partition structure.
Once you have ensured that you have all the prerequisites in place, you are ready to proceed with the step-by-step process of loading an operating system from an external hard drive into a VM workstation.
Step 1: Downloading the Required Software
Before you can load an operating system from an external hard drive into a VM workstation, you will need to have the necessary software installed on your computer. Follow these steps to download the required software:
- Choose and download a virtualization software that best suits your needs. Popular options include VMware Workstation, Oracle VM VirtualBox, or Microsoft Hyper-V. Visit the official website of the software and locate the download page.
- Make sure to download the latest version of the software to ensure compatibility and access to the most up-to-date features and bug fixes.
- Once the download is complete, navigate to the download location and double-click on the installer file to begin the installation process.
- Follow the on-screen instructions provided by the installer to complete the installation. Make sure to select any desired customization options or preferences during the installation process.
- After the installation is complete, launch the virtualization software to verify that it is running correctly and ready to create and manage virtual machines.
Now that you have downloaded and installed the virtualization software, you are one step closer to loading an operating system from your external hard drive. The next step is to properly prepare the external hard drive before it can be used with the virtual machine.
Step 2: Preparing the External Hard Drive
Before you can load an operating system from your external hard drive into a VM workstation, you need to ensure that the drive is properly prepared. Follow these steps to prepare the external hard drive:
- Connect the external hard drive to your computer using a suitable USB cable or other appropriate connection method.
- If the external hard drive contains any important files or data, make sure to back them up to a safe location before proceeding, as the preparation process may involve formatting the drive or making changes to its partition structure.
- Open the disk management utility on your computer. This utility allows you to manage and manipulate the drives connected to your computer.
- Select the external hard drive from the list of available drives.
- Format the external hard drive, ensuring that the file system is compatible with the virtualization software you are using. Common file systems include NTFS, FAT32, and exFAT. If you are unsure which file system to choose, consult the documentation or support resources provided by the virtualization software.
- Create a new partition on the external hard drive. This partition will be used to store the operating system image and any other files or software you wish to install within the virtual machine. Allocate the desired amount of space for the partition and format it with the appropriate file system.
- Once the preparation process is complete, safely disconnect the external hard drive from your computer.
With the external hard drive properly prepared, you are now ready to create a new virtual machine in your VM workstation software. This will provide the foundation for loading the operating system from the external hard drive. Continue to the next step to learn how to create a virtual machine.
Step 3: Creating a New Virtual Machine in VM Workstation
Now that you have downloaded and installed the virtualization software and prepared the external hard drive, it’s time to create a new virtual machine in your VM workstation software. Follow these steps to create a new virtual machine:
- Launch your VM workstation software and locate the option to create a new virtual machine. The exact location of this option may vary depending on the software version, but it is usually found in the main menu or toolbar.
- Select the option to create a new virtual machine and choose a suitable name for your virtual machine. This name will help you identify and manage the virtual machine in the future.
- Select the operating system type and version that you plan to load from the external hard drive. If the exact operating system is not listed, choose the closest match or select the option for a generic operating system.
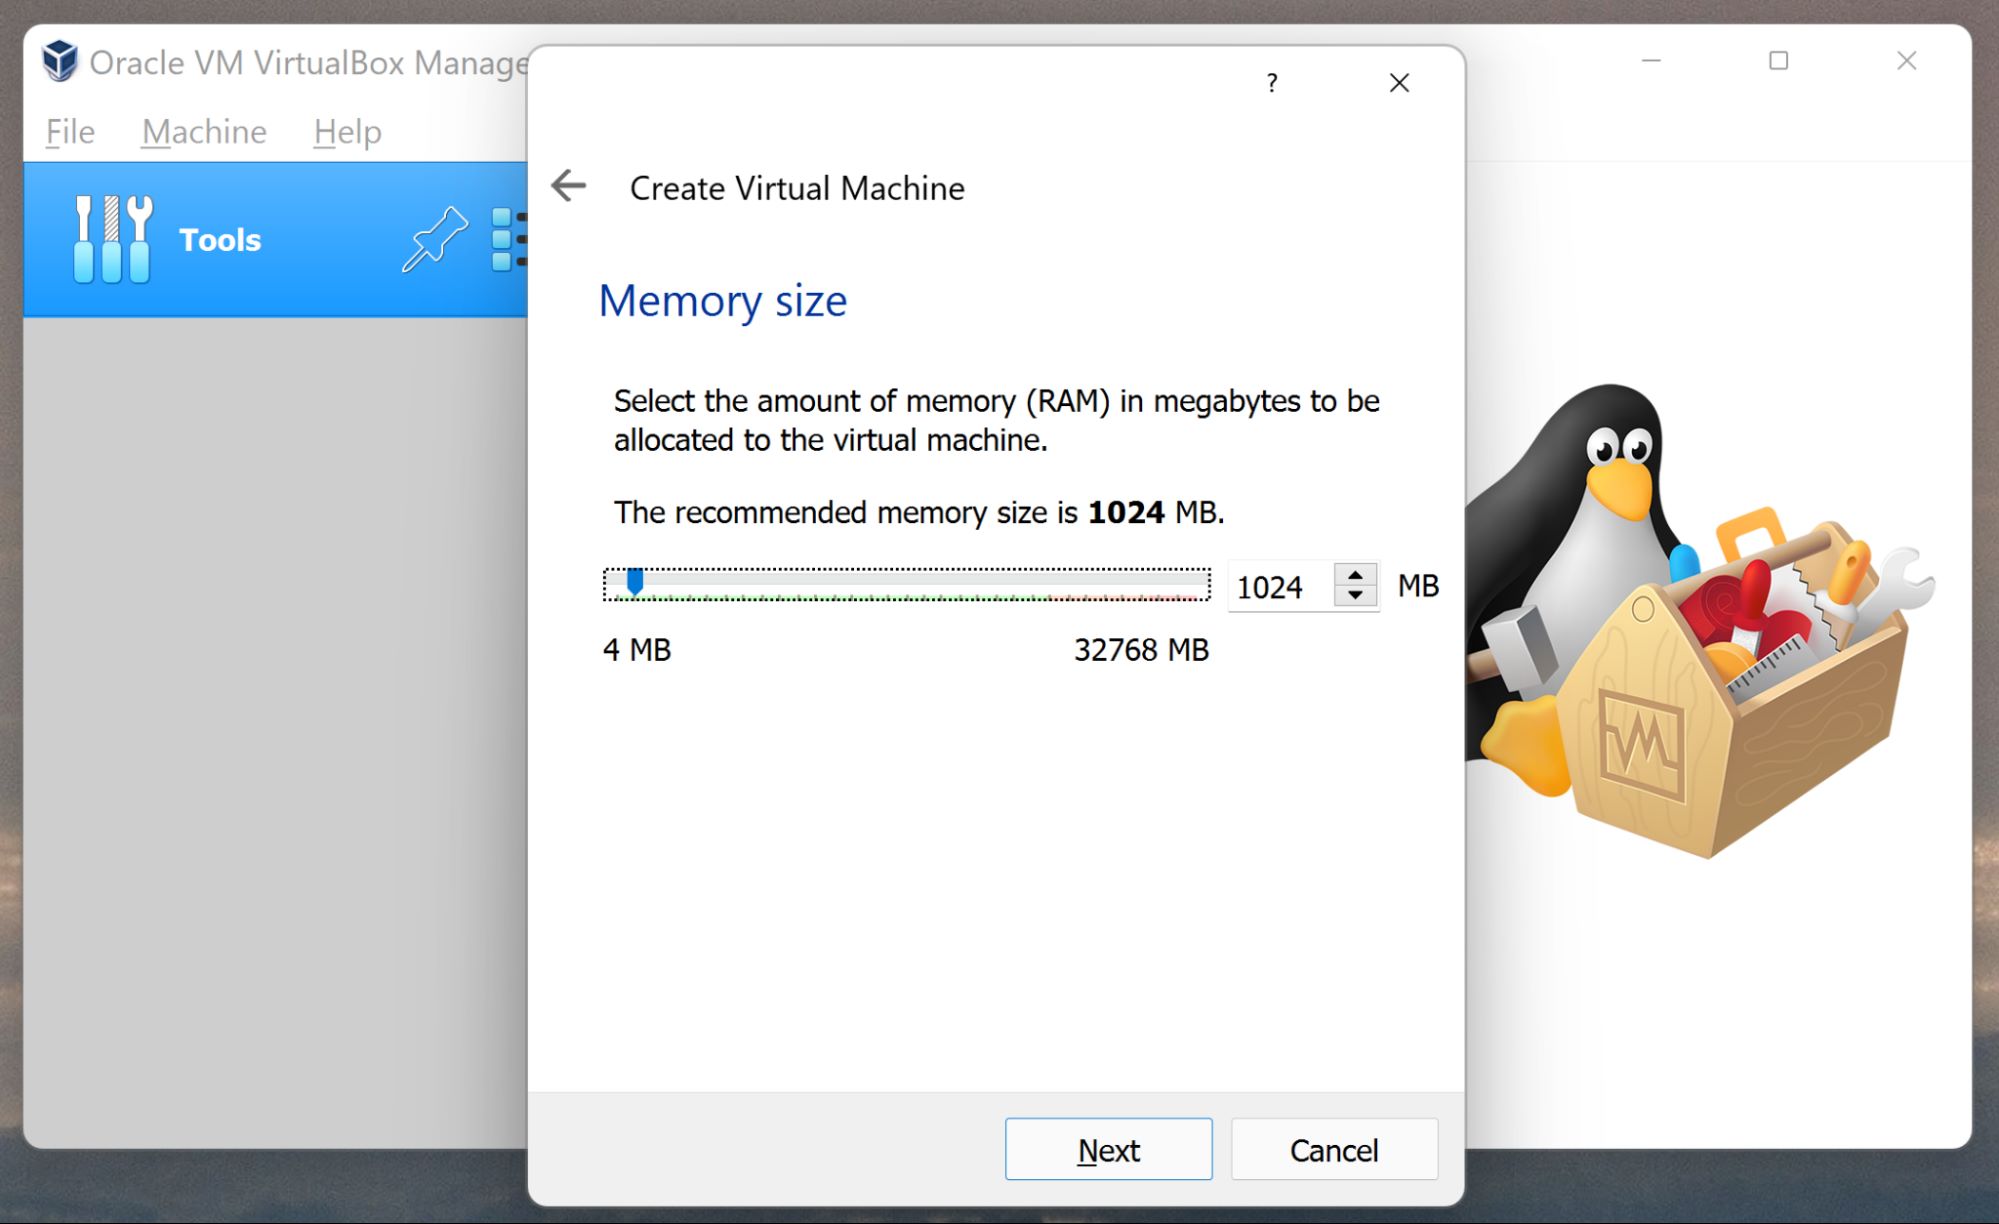
- Allocate the desired amount of memory (RAM) to the virtual machine. The amount of memory you allocate will depend on the requirements of the operating system and the resources available on your physical computer.
- Create a new virtual hard disk for the virtual machine. Choose the option to create a new disk rather than using an existing one. Specify the desired size and location for the virtual hard disk. The size should be large enough to accommodate the operating system image and any additional files or software you wish to install within the virtual machine.
- Configure any additional options or settings as per your requirements. This may include network settings, display options, and input/output devices.
- Review the summary of the virtual machine configuration and make any necessary adjustments. Once you are satisfied with the configuration, proceed to create the virtual machine.
Congratulations! You have successfully created a new virtual machine in your VM workstation software. In the next step, we will explore how to configure the virtual machine settings to prepare it for loading the operating system from the external hard drive.
Step 4: Configuring the Virtual Machine Settings
With the virtual machine created in your VM workstation software, it’s time to configure the settings to ensure it is ready to load the operating system from the external hard drive. Follow these steps to configure the virtual machine settings:
- Open the settings for the virtual machine by right-clicking on its name in the virtualization software’s interface and selecting the “Settings” option.
- Navigate to the “Hardware” or “Options” tab, depending on the specific virtualization software you are using. In this section, you can configure various aspects of the virtual machine’s hardware and virtualization settings.
- Ensure that the virtual CD/DVD drive is set to use the external hard drive as its source. This setting allows the virtual machine to access the operating system image stored on the external hard drive.
- Configure other hardware settings such as network adapters, sound devices, and USB ports as per your requirements. You can choose to enable or disable these options based on the resources available and the specific needs of your operating system.
- Check the virtual machine’s memory allocation and adjust it if necessary. Ensure that the allocated memory is sufficient for the operating system and any software you plan to install within the virtual machine.
- Review and modify the display and graphics settings as needed. Adjust the screen resolution, color depth, and other display options to optimize the virtual machine’s performance and visual output.
- Explore other advanced settings and options specific to your virtualization software. These may include CPU allocation, virtualization extensions, or power management settings.
- Once you have configured all the necessary settings, save and apply the changes.
By configuring the virtual machine settings, you have set the foundation for loading the operating system from the external hard drive. In the next step, we will discuss how to mount the external hard drive in the virtual machine to make it accessible during the installation process.
Step 5: Mounting the External Hard Drive in the Virtual Machine
Now that you have configured the virtual machine settings, the next step is to mount the external hard drive in the virtual machine. This will allow the virtual machine to access the operating system image stored on the external hard drive. Follow these steps to mount the external hard drive:
- Ensure that the virtual machine is powered off. You cannot mount the external hard drive while the virtual machine is running.
- Connect the external hard drive to your computer.
- In the virtualization software’s interface, open the settings for the virtual machine by right-clicking on its name and selecting the “Settings” option.
- Navigate to the “Hardware” or “Options” tab, depending on the specific virtualization software you are using.
- Select the virtual CD/DVD drive from the list of hardware components in the virtual machine’s settings.
- Select the option to use a physical drive or external drive for the virtual CD/DVD drive. Choose the external hard drive that contains the operating system image.
- Save and apply the changes to the virtual machine settings.
- Start the virtual machine. The operating system image stored on the external hard drive should now be accessible to the virtual machine.
By successfully mounting the external hard drive in the virtual machine, you are now ready to proceed with the installation of the operating system. In the next step, we will cover the process of installing the operating system from the external hard drive.
Step 6: Installing the Operating System from the External Hard Drive
Now that the external hard drive is mounted in the virtual machine, you can proceed with the installation of the operating system. Follow these steps to install the operating system from the external hard drive:
- Ensure that the virtual machine is powered on and that the external hard drive is connected to your computer.
- Within the virtual machine, you should see the external hard drive listed as a CD/DVD drive or as a removable device.
- Access the virtual machine’s boot menu or BIOS settings, commonly accessed by pressing a specific key during the startup process (such as F2 or Del).
- Configure the boot order to prioritize the CD/DVD drive or the removable device where the external hard drive is mounted. This will ensure that the virtual machine boots from the external hard drive.
- Save the changes and exit the boot menu or BIOS settings.
- The virtual machine should now boot from the external hard drive, and the operating system installation process will begin.
- Follow the on-screen prompts and instructions to complete the installation of the operating system. This process may vary depending on the specific operating system you are installing.
- During the installation, you may be prompted to choose the installation location or to partition the virtual hard disk. Make sure to select the appropriate options in accordance with your desired setup.
- After the operating system installation completes, the virtual machine will restart. Ensure that you remove any installation media (such as the external hard drive) from the virtual machine before it boots up again.
With the operating system successfully installed from the external hard drive, you are now ready to finalize the installation and begin running the OS within the virtual machine. Continue to the next step to complete the process.
Step 7: Finalizing the Installation and Running the OS
After installing the operating system from the external hard drive, the next step is to finalize the installation and begin running the OS within the virtual machine. Follow these steps to complete the process:
- Once the virtual machine has restarted after the operating system installation, you may be prompted to go through the initial setup process for the operating system. Follow the on-screen instructions to configure settings such as language, time zone, and user account details.
- Install any necessary drivers or software required for optimal functionality within the virtual machine. This may include graphic drivers, network drivers, or virtual machine tools provided by the virtualization software.
- Make any desired customizations or configurations within the operating system to suit your needs. This may include installing additional software, adjusting system settings, or setting up network connections.
- Ensure that you have the necessary security measures in place, such as enabling firewalls, updating antivirus software, and practicing safe browsing habits within the virtual machine.
- Test the functionality of the operating system within the virtual machine to ensure that all necessary features and applications are working properly. If you encounter any issues, consult the documentation or support resources provided by the virtualization software.
- Begin using the operating system within the virtual machine for your desired tasks, whether it’s software development, system administration, or any other purpose.
Remember to save your work and regularly back up any important files within the virtual machine to prevent data loss. Enjoy the flexibility and convenience of running an operating system from your external hard drive within a virtual machine!
Conclusion
With the step-by-step process outlined in this guide, you can successfully load an operating system from an external hard drive into a VM workstation. By following the necessary prerequisites, downloading the required software, preparing the external hard drive, creating a new virtual machine, configuring the virtual machine settings, mounting the external hard drive, and installing the operating system, you can leverage the power of virtualization and expand your computing capabilities.
By using virtual machines, you have the flexibility to run multiple operating systems on a single physical computer, enabling you to test software, develop applications, and perform system administration tasks in a controlled and isolated environment. Loading an operating system from an external hard drive can be particularly useful in scenarios where you are working with legacy systems, specialized distributions, or for system recovery purposes.
Remember to properly prepare the external hard drive, configure the virtual machine settings, and follow the installation process carefully to ensure a smooth and successful outcome. Take advantage of the flexibility and convenience offered by virtualization to enhance your productivity and expand your technical capabilities.
By understanding and implementing the steps outlined in this guide, you are well on your way to loading an operating system from an external hard drive into a VM workstation. Enjoy the power and versatility of virtual machines as you navigate through various operating systems and accomplish your computing goals.