Introduction
Group iMessages can be a great way to stay connected with friends, family, or colleagues. However, there may come a time when you no longer want to be a part of a particular group conversation. Whether it’s because the conversation has become too overwhelming or you simply feel like it’s time to move on, leaving a group iMessage is a straightforward process.
In this article, we will explore various methods that you can use to leave a group iMessage. From muting the conversation to deleting it altogether, we will guide you through the steps to regain control over your message notifications and keep your inbox organized.
Before we dive into the different methods, it’s important to note that leaving a group iMessage does not mean you are blocking or unfriending anyone. It simply means that you won’t receive any more messages from that specific group conversation. You can still individually message the participants and remain connected in other ways.
Now let’s take a look at the various methods you can use to leave a group iMessage and regain control over your messaging experience.
Method 1: Mute the Group Conversation
If you want to temporarily silence a group iMessage without leaving the conversation, muting is the way to go. Muting a group conversation will prevent any notifications from appearing on your device, allowing you to check and reply to messages at your own convenience.
Here’s how you can easily mute a group conversation:
- Open the Messages app on your device and locate the group conversation you want to mute.
- Swipe left on the conversation to reveal a list of options.
- Tap on the “More” button denoted by three dots.
- From the list of options, select “Hide Alerts”.
Once you have enabled the “Hide Alerts” feature, you will no longer receive any notifications for new messages within that group conversation. However, the conversation will still appear in your Messages app, and you can check it whenever you want.
It’s important to note that muting the conversation only affects your device. Other participants will still receive notifications and can continue to send messages. This option is perfect if you want to take a break from a lively discussion or temporarily reduce distractions.
If you ever want to unmute the conversation and start receiving notifications again, simply follow the same steps and toggle off the “Hide Alerts” feature.
Method 2: Hide Alerts for the Group Conversation
If you want to hide all notifications for a group iMessage, including sound and visual alerts, you can use the “Hide Alerts” feature. This method is useful when you want to completely silence a group conversation and avoid any distractions.
Here’s how you can hide alerts for a group conversation:
- Open the Messages app and locate the group conversation you want to hide alerts for.
- Swipe left on the conversation to reveal a list of options.
- Tap on the “More” button denoted by three dots.
- From the list of options, select “Hide Alerts”.
Once you enable the “Hide Alerts” feature, you will no longer receive any notifications for messages within that group conversation. The conversation will still appear in your Messages app, but you won’t be disturbed by any alerts.
It’s important to note that hiding alerts only affects your device. Other participants will still receive notifications and can continue sending messages. This option is perfect when you want to temporarily block notifications for a group conversation but keep it accessible for later reading or engagement.
If you wish to start receiving notifications again, follow the same steps and toggle off the “Hide Alerts” feature.
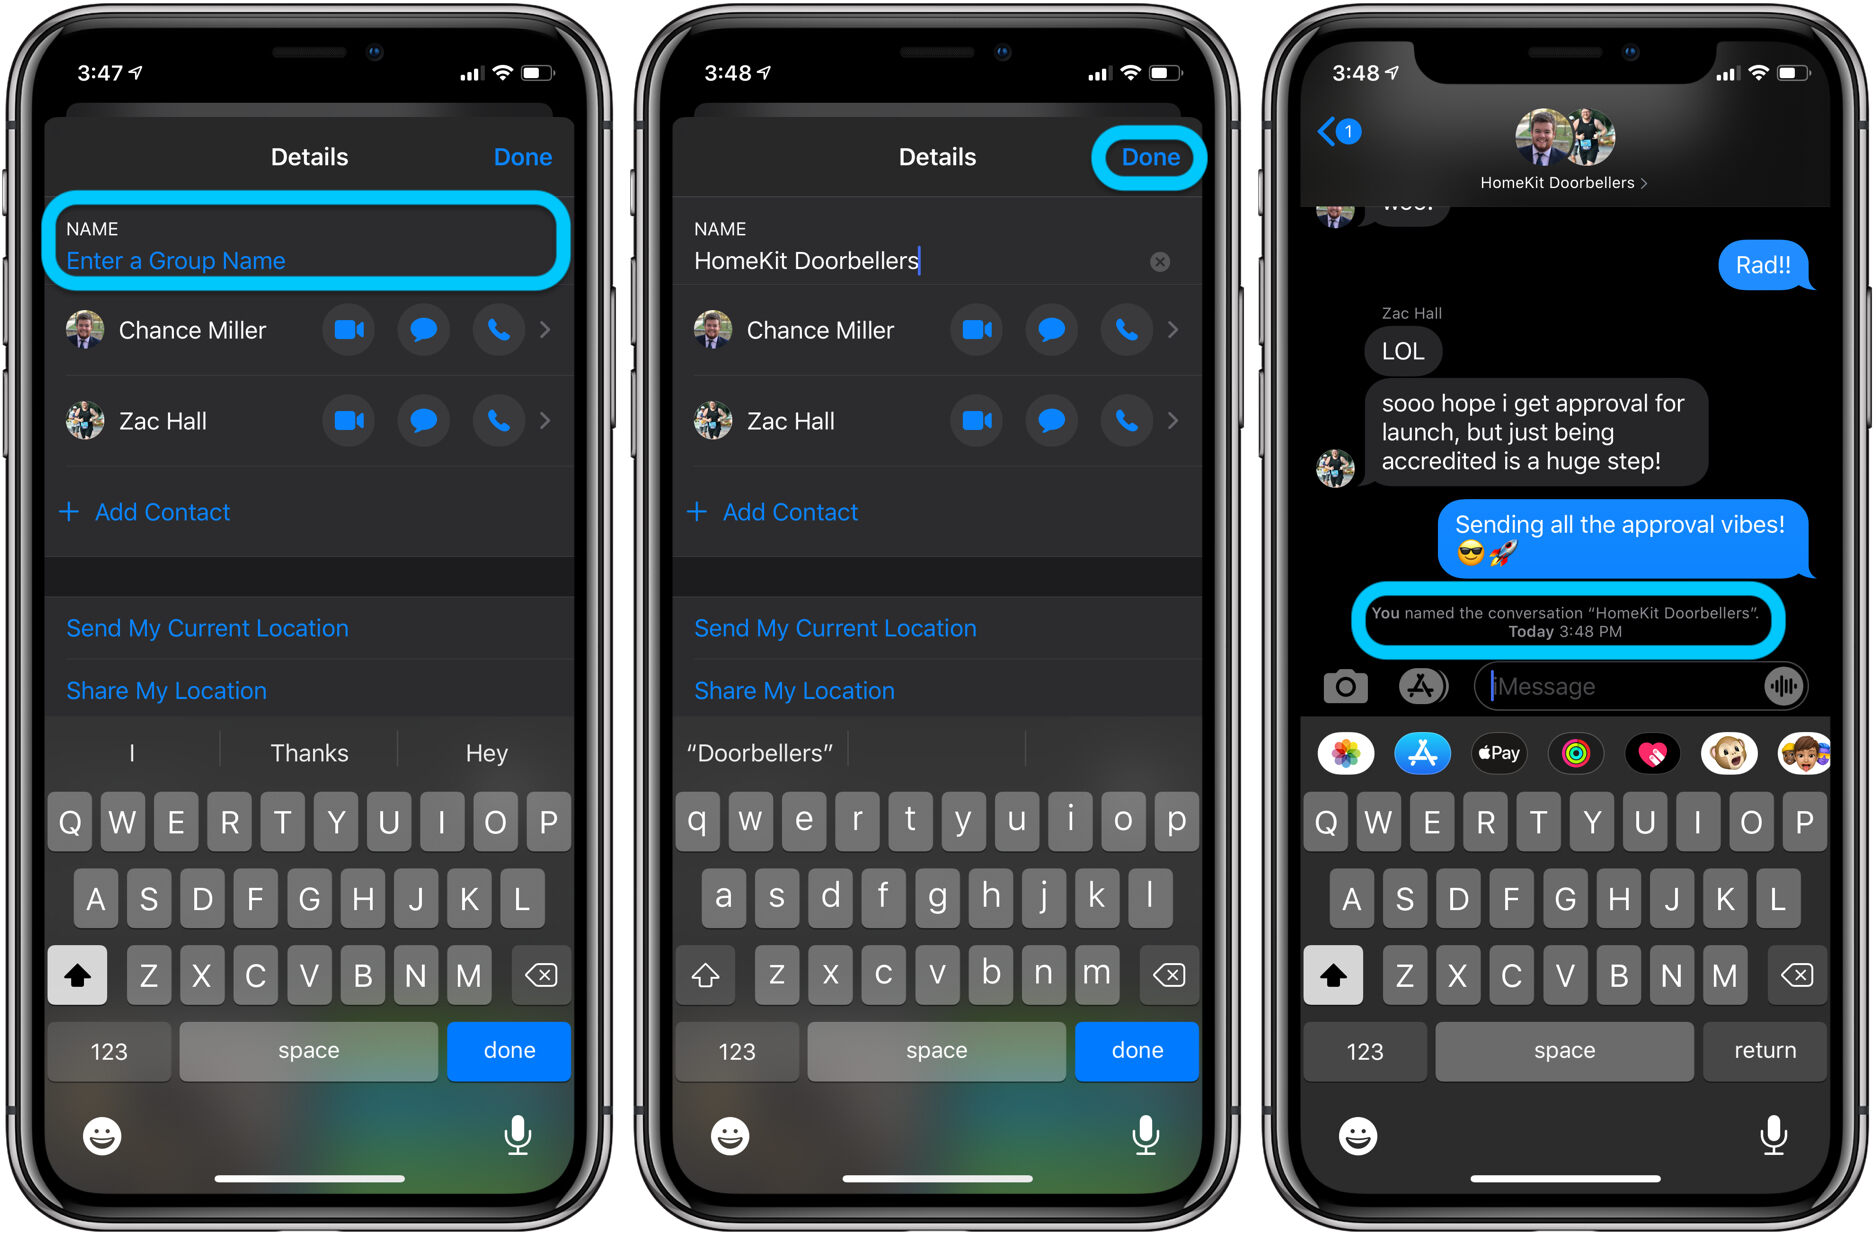
Method 3: Leave the Group Conversation
If you want to permanently remove yourself from a group iMessage and no longer receive any messages from that conversation, you can choose to leave the group. This method is ideal when you no longer wish to be a part of the discussion or when you feel the group is no longer relevant to you.
Here’s how you can leave a group conversation:
- Open the Messages app on your device and locate the group conversation you want to leave.
- Tap on the conversation to open it.
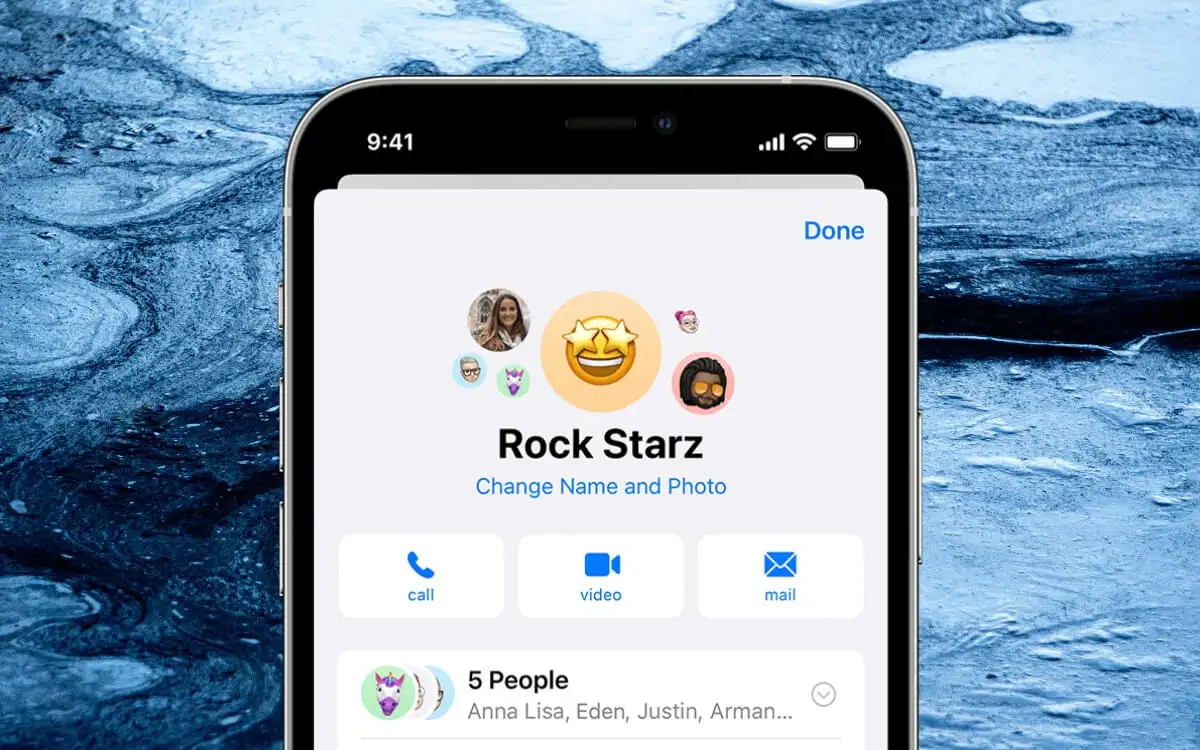
- Tap on the “i” (information) button located at the top right corner of the screen.
- Scroll down and tap on “Leave this Conversation”.
- A confirmation prompt will appear. Tap on “Leave this Conversation” again to confirm.
After you leave the group conversation, you will no longer receive any messages from that conversation. The conversation will also be removed from your Messages app.
It’s important to note that other participants in the group will be able to see that you have left the conversation. However, they will not be notified specifically when you leave.
If you change your mind and want to rejoin the group conversation, someone in the group will need to add you back or invite you again.
Method 4: Delete the Group Conversation
If you want to completely remove a group iMessage from your Messages app and erase all traces of the conversation, you can choose to delete it. This method is useful when you no longer need the conversation and want to declutter your message history.
Here’s how you can delete a group conversation:
- Open the Messages app on your device and locate the group conversation you want to delete.
- Swipe left on the conversation to reveal a list of options.
- Tap on the “Delete” button to remove the conversation.
After you delete the group conversation, it will be permanently removed from your Messages app, and you will no longer have access to it. This action cannot be undone, so make sure you’re certain about deleting the group conversation.
It’s important to note that deleting the conversation only affects your device. Other participants will still have the conversation in their respective devices.
If you ever want to regain access to the group conversation or view its content again, someone in the group will need to start a new conversation with you or add you back to an existing conversation.
Deleting the group conversation can help you maintain a clean and organized Messages app, as well as free up storage space on your device.
Conclusion
Leaving a group iMessage can be a simple yet important step in regaining control over your message notifications and maintaining a clutter-free messaging experience. Whether you want a temporary break from a group conversation or wish to permanently remove yourself from it, the methods mentioned in this article allow you to choose the option that suits your needs.
Muting a group conversation is ideal when you want to temporarily silence notifications without leaving the conversation entirely. This allows you to stay connected while reducing distractions.
Hiding alerts for a group conversation takes it a step further by completely blocking all notifications, giving you a quiet and uninterrupted messaging experience.
When you want to permanently leave a group conversation, the “Leave this Conversation” option is the way to go. You will no longer receive any messages from the group, and the conversation will be removed from your Messages app.
If you no longer need or want to see the group conversation in your Messages app, you can delete it. This action will permanently remove the conversation from your device and free up storage space.
Remember, leaving a group iMessage does not mean you are blocking or unfriending anyone. It simply means you will no longer receive messages from that specific group conversation. You can still individually message the participants and remain connected in other ways.
Take control of your messaging experience by utilizing these methods to mute, hide alerts, leave, or delete group iMessages. Adjust your settings according to your preferences and enjoy a more organized and personalized messaging environment.
Now, armed with these methods, you can confidently manage your group conversations and have a more tailored messaging experience on your device.