Introduction
Welcome to our comprehensive guide on how to add someone to an iMessage group chat! If you’re unfamiliar with iMessage, it is a popular messaging app exclusively available on Apple devices, which allows users to send text messages, photos, videos, and more, all within the Apple ecosystem. Group chats on iMessage are a convenient way to communicate with multiple people simultaneously, whether it’s for planning events, sharing information, or simply staying connected with a group of friends or colleagues.
Adding someone to an iMessage group chat is a straightforward process that can be done in just a few simple steps. In this article, we will walk you through the entire process, from opening the iMessage app to customizing the group chat settings. Whether you’re new to iMessage or just need a quick refresher, follow along as we guide you through each step.
Before we dive in, it’s worth mentioning that you can only add someone to an iMessage group chat if they have an Apple device and are using iMessage. If they are not using iMessage or have an Android device, they will not be able to join the group chat. With that said, let’s get started on how to add someone to an iMessage group chat!
Step 1: Open the iMessage app
The first step in adding someone to an iMessage group chat is to open the iMessage app on your Apple device. You can usually find the iMessage app on your home screen or in your app library. It’s recognizable by the familiar green speech bubble icon with a white word “Messages” inside.
If you don’t have the iMessage app installed on your device, you may need to download it from the App Store. Simply open the App Store, search for “iMessage,” and tap the “Install” button to get it on your device.
Once you have located the iMessage app, tap on it to open it. The app should load quickly and take you directly to your iMessage inbox. Here, you will see a list of your recent conversations and any existing group chats you’re part of.
If you’re using an iPhone, you can also access iMessage by swiping down from the top of your screen to open the Notification Center, then tapping on the iMessage notification. This will take you directly to the app for easy access.
Now that you have successfully opened the iMessage app, you’re ready to move on to the next step and start a new group chat. Keep reading to learn how!
Step 2: Start a new group chat
Starting a new group chat on iMessage is the next step to adding someone to the conversation. To begin, follow these simple instructions:
- Open the iMessage app on your Apple device, as we discussed in the previous step.
- Tap on the compose button, which is usually represented by a square with a pencil icon located at the top-right corner of the screen. Alternatively, you can also tap on the “New Message” button if it is available.
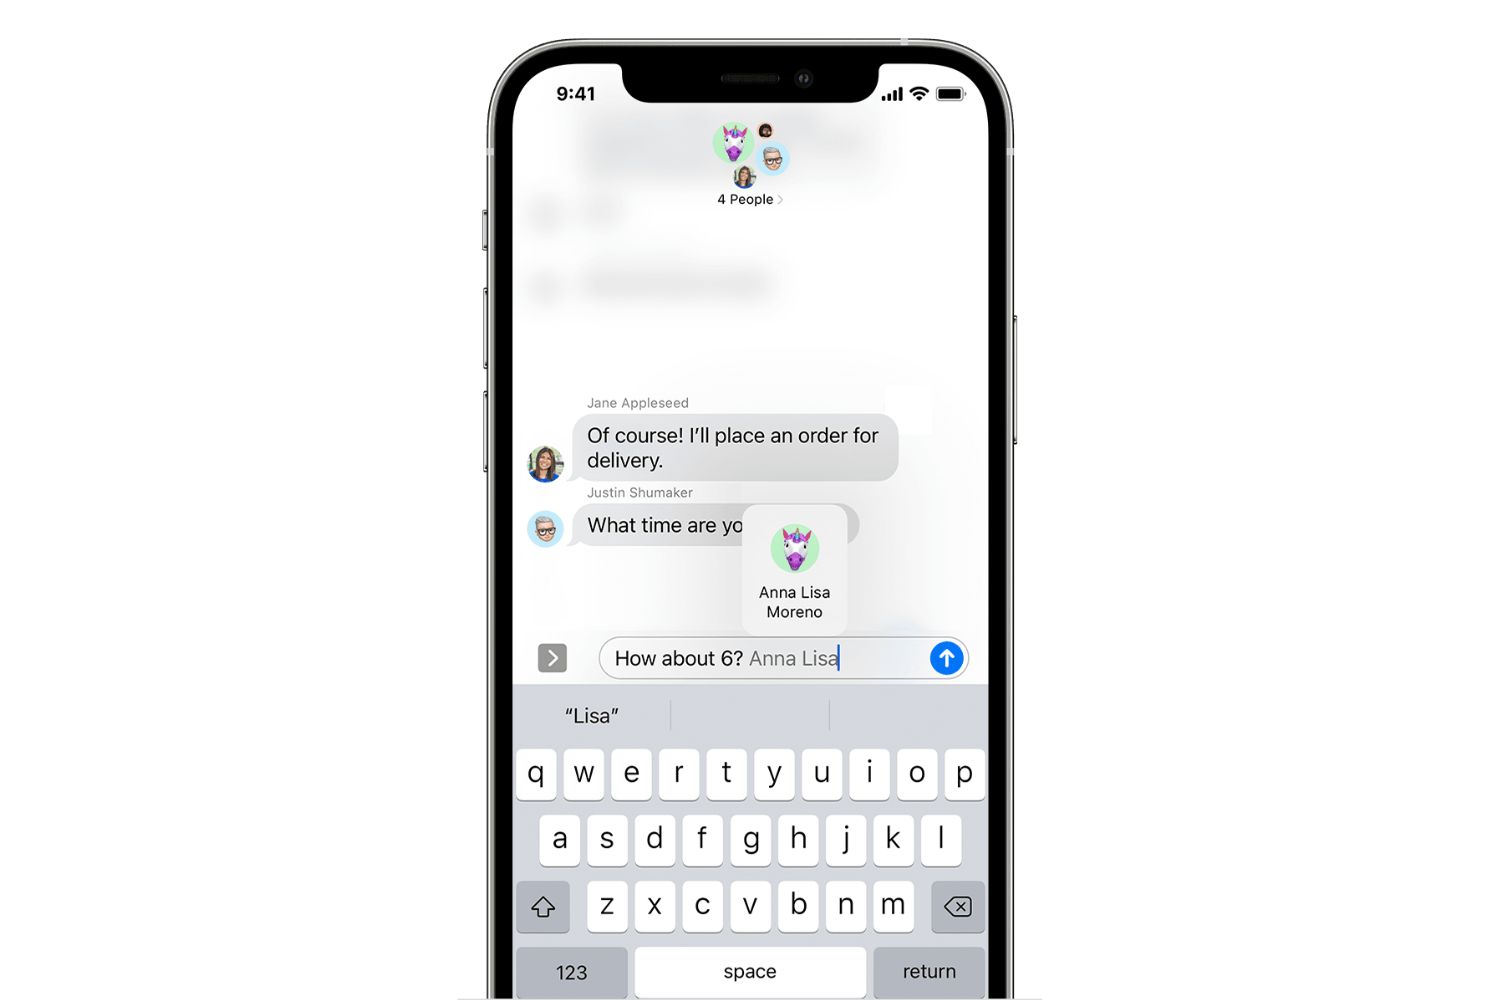
- A new message window will appear, allowing you to select the recipients for your group chat. To add someone to the conversation, start typing their name, email address, or phone number in the “To:” field.
- As you type, iMessage will suggest contacts from your address book or previous conversations. Simply tap on the contact you wish to add to the group chat. Repeat this step for each person you want to include in the conversation.
Alternatively, if you want to add multiple people at once, you can enter the first person’s name and then tap the “+” button next to their contact to add more participants. This way, you can include several individuals in the group chat with just a few taps.
Once you have selected all the participants for your group chat, you’re ready to move on to the next step and confirm the added participants. Stay tuned!
Step 3: Add contacts to the group chat
Now that you’ve started a new group chat on iMessage, it’s time to add the desired contacts to the conversation. Follow these steps to add contacts to the group chat:
- In the iMessage app, you should see the list of participants you’ve already added to the group chat at the top of the new message window.
- Right below the list of participants, there will be a field labeled “Add Contacts” or something similar.
- To add more contacts, tap on the “Add Contacts” field. This will open the contact selector.
- You can add contacts by typing their name, email address, or phone number in the search bar provided. As you type, iMessage will suggest matching contacts from your address book or previous conversations. Simply tap on the contact you want to add to the group chat.
- If you have a large contact list, you can also scroll through your contacts and manually select the ones you wish to add. Just tap on each contact to add them to the group chat.
- Repeat the process for each additional contact you want to include in the group chat.
Remember, you can add multiple contacts at once by tapping the “+” button next to a participant’s name and selecting additional contacts. This is an efficient way to add multiple contacts without having to go back and forth.
Once you have added all the desired contacts to the group chat, you’re ready to move on to the next step and confirm the added participants. Keep reading!
Step 4: Confirm the added participants
After adding contacts to the group chat on iMessage, it’s important to confirm the participants to ensure that all the intended individuals are included. Follow these steps to confirm the added participants:
- In the new message window, you should see the list of participants at the top of the screen. Take a moment to review the names or numbers displayed to make sure they are correct.
- If you need to remove a participant, simply tap on their name or number in the participant list. This will open a menu with options to remove the specific individual from the group chat.
- If you want to add more participants, you can tap on the “+” button next to the participant list and follow the same steps mentioned earlier to add additional contacts.
- Once you have confirmed that all the desired participants are included and any unwanted individuals have been removed, you can proceed to the next step.
Confirming the added participants is crucial to ensure smooth communication within the group chat. It helps prevent any mistakes or unintended exclusions, ensuring that everyone you want to be part of the conversation is included.
Once you have double-checked and confirmed the added participants, it’s time to move on to the next step and give the group chat a name. Stay tuned!
Step 5: Name the group chat
Now that you have confirmed the participants in the iMessage group chat, it’s time to give the conversation a name. Naming the group chat can make it easier to identify and differentiate it from other chats, especially if you’re part of multiple group conversations. Here’s how you can name the group chat:
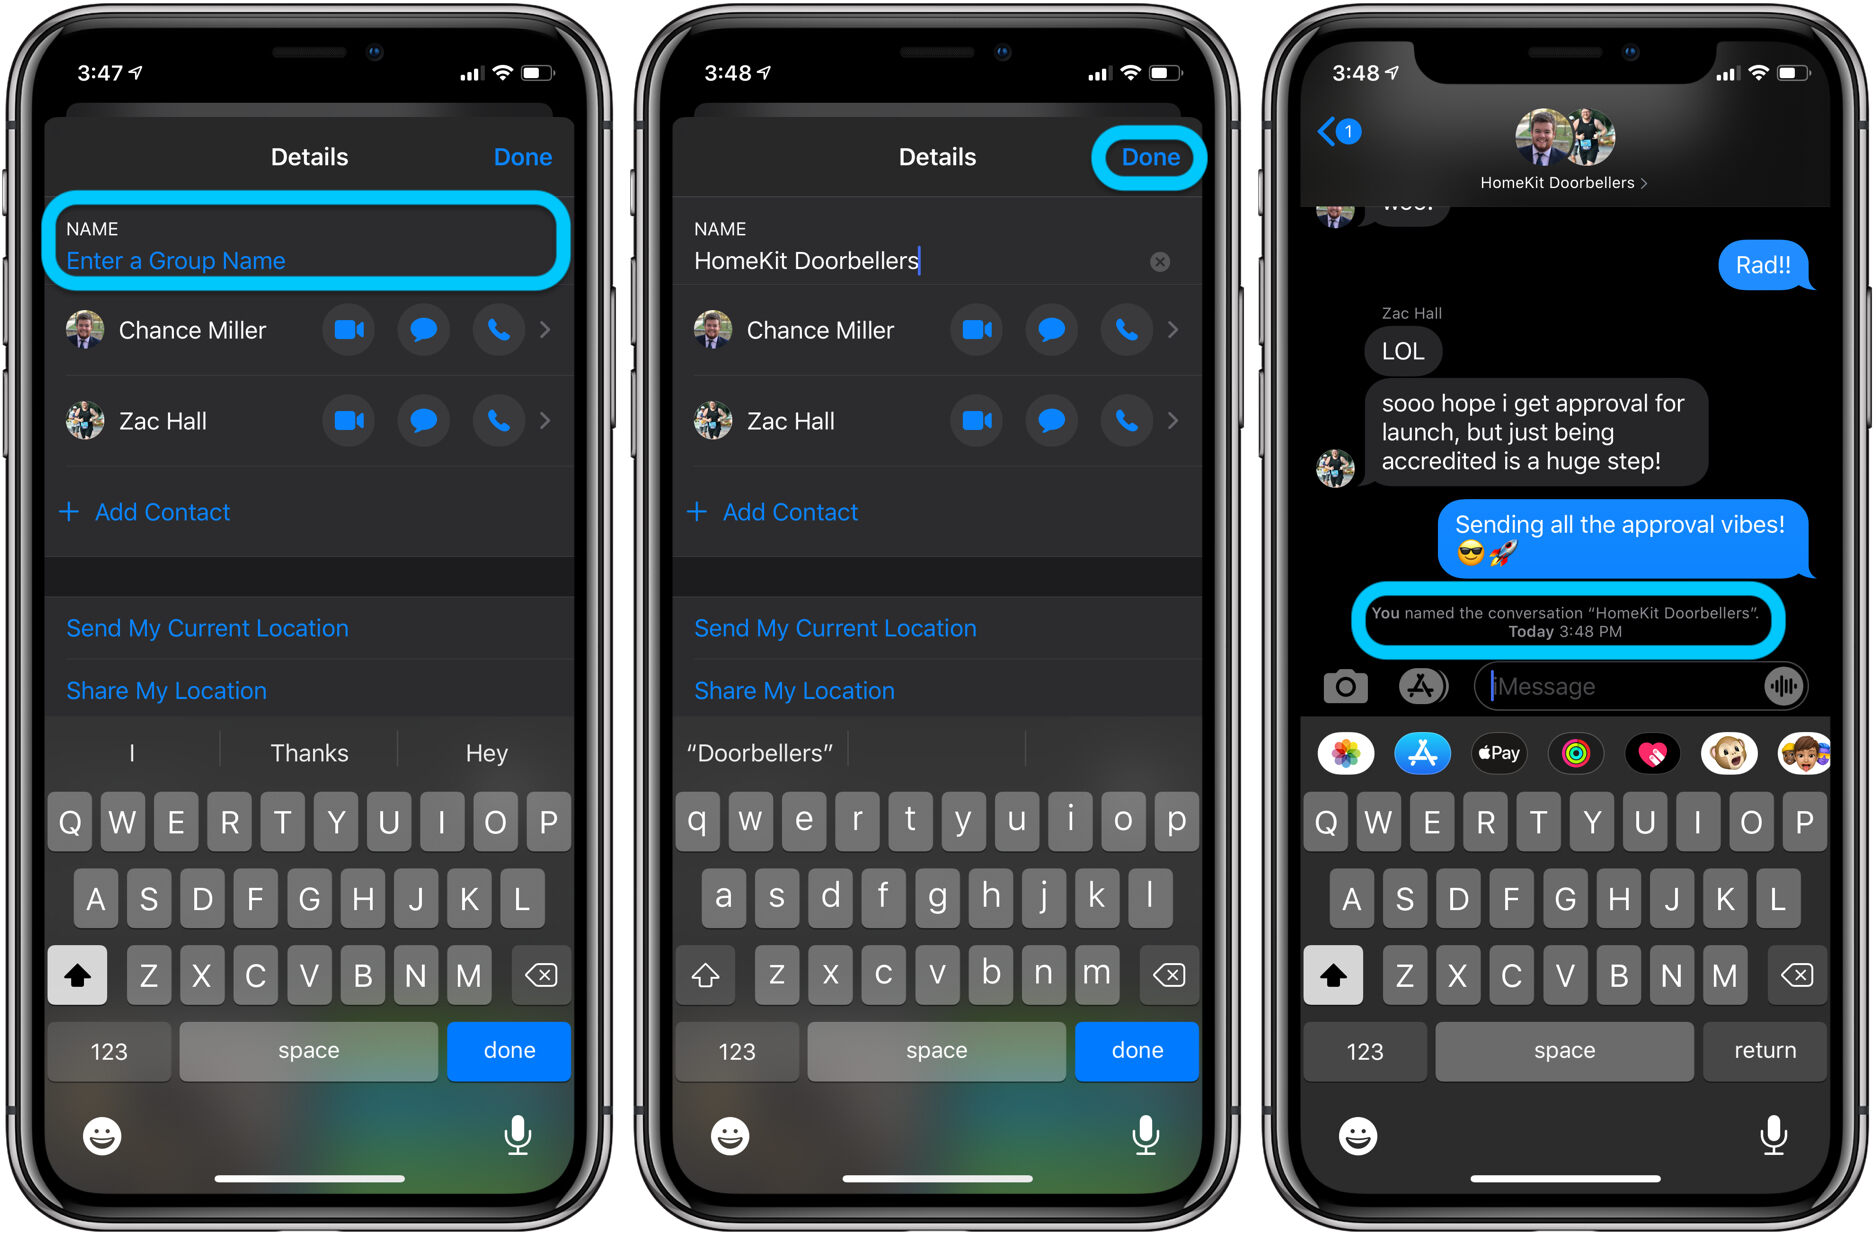
- In the new message window, where the list of participants is displayed, look for an option to add a group name. This option is usually located below the list of participants or labeled as “Group Name” or “Subject.”
- Tap on the designated field to enter a name for the group chat. You can choose any name that best represents the purpose or theme of the conversation.
- Type in the desired group chat name using the on-screen keyboard. You can be creative and choose a fun or descriptive name that reflects the group’s interests or purpose. For example, if the group chat consists of colleagues working on a project, you can name it “Project Collaborators.”
- Once you have entered the group name, tap “Done” or a similar button to save the name.
By giving the group chat a name, it becomes easier to locate and reference in your iMessage inbox. It also adds a personal touch to the conversation and helps participants identify the chat without confusion.
Now that you’ve successfully named the group chat, it’s time to move on to the final step: customizing the group chat settings. Let’s find out how in the next section!
Step 6: Customize the group chat settings
Once you have added participants, confirmed the list, and named the group chat, you have the option to further customize the settings to enhance your iMessage group chat experience. Here are some settings you can customize:
- Mute notifications: If you prefer to limit the number of notifications you receive from the group chat, you can mute the conversation. This will prevent your device from displaying notifications for new messages in the group chat. To do this, open the group chat, tap on the name at the top, and then toggle the “Hide Alerts” switch.
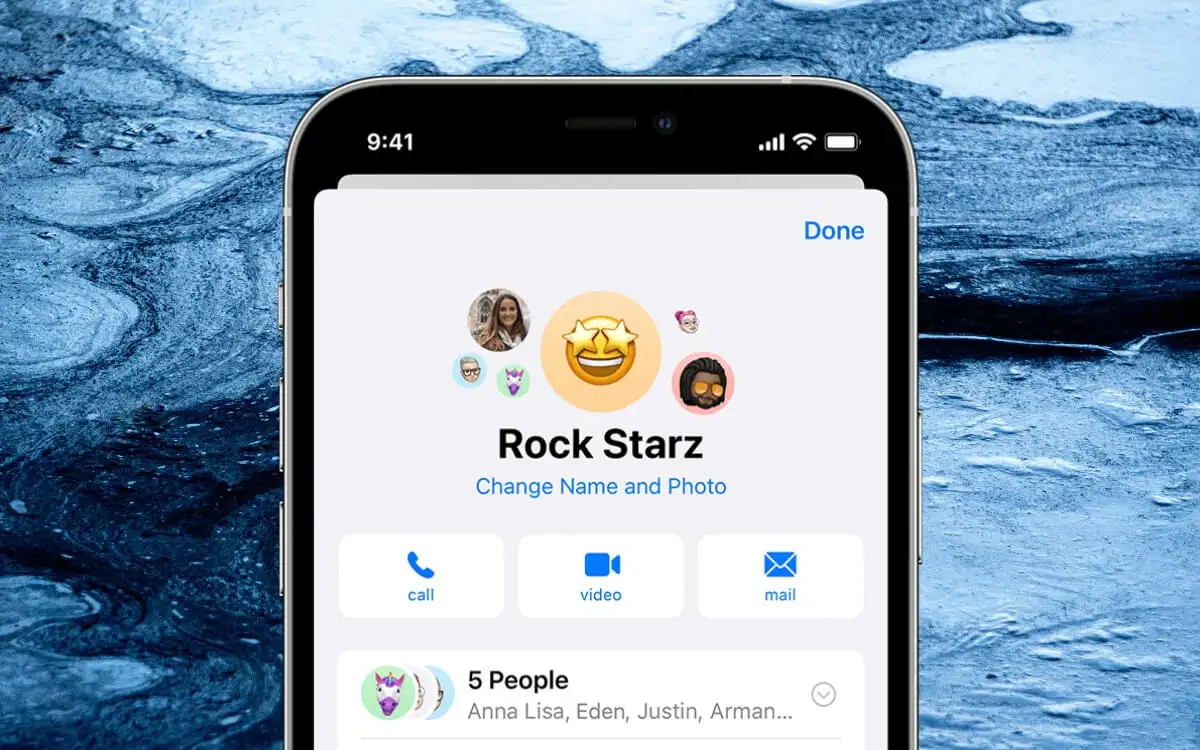
- Change group chat icon: By default, iMessage will assign a generic icon to the group chat. However, you can change the icon to make it more personalized and visually appealing. To do this, tap on the group chat name at the top, scroll down to find “Change Name and Photo,” and follow the prompts to select a new icon or even take a photo directly.
- Leave group chat: If you no longer wish to be part of the group chat, you have the option to leave. To leave a group chat, open the chat, tap on the group name at the top, scroll down, and tap “Leave this Conversation.” Keep in mind that once you leave, you will no longer be able to see new messages or participate in the conversation.
- Enable/disable read receipts: By default, iMessage displays read receipts, indicating when someone has read a message in the group chat. If you prefer to disable read receipts, open the chat, tap on the group name, scroll down to “Send Read Receipts,” and toggle the switch to turn them off.
- Customize notifications: If you want to receive notifications for the group chat but prefer to customize the alert style, sound, or vibration pattern, you can do so in the Notifications settings of your device. Open the Settings app, select “Notifications,” and find the iMessage app. From there, you can make the desired changes specific to the group chat.
Customizing the group chat settings allows you to tailor the experience to your preferences and needs. Feel free to explore these settings and adjust them to create the ideal group chat environment for you.
Congratulations! You have now successfully added someone to an iMessage group chat and customized the settings. Enjoy seamless communication with your friends, colleagues, or loved ones within the group chat!
Conclusion
Congratulations! You’ve reached the end of our guide on how to add someone to an iMessage group chat. We hope this step-by-step tutorial has been helpful in assisting you through the process. Adding someone to an iMessage group chat is a simple and convenient way to communicate with multiple people simultaneously.
Recapping the steps, you learned how to open the iMessage app, start a new group chat, add contacts to the group chat, confirm the added participants, name the group chat, and customize the group chat settings. Following these steps should help you navigate iMessage with ease and enjoy seamless group conversations.
Remember that iMessage group chats are exclusive to Apple devices and require participants to have iMessage enabled. If someone you want to add to a group chat does not have an Apple device or is not using iMessage, they will not be able to join the conversation.
Now that you’re equipped with the knowledge of adding someone to an iMessage group chat, go ahead and create those lively group conversations with your friends, family, or colleagues. Whether it’s for planning events, coordinating projects, or simply staying connected, iMessage group chats are a fantastic tool for seamless communication within the Apple ecosystem.
Thank you for reading our guide, and we hope you found it informative and useful. Happy chatting!