Introduction
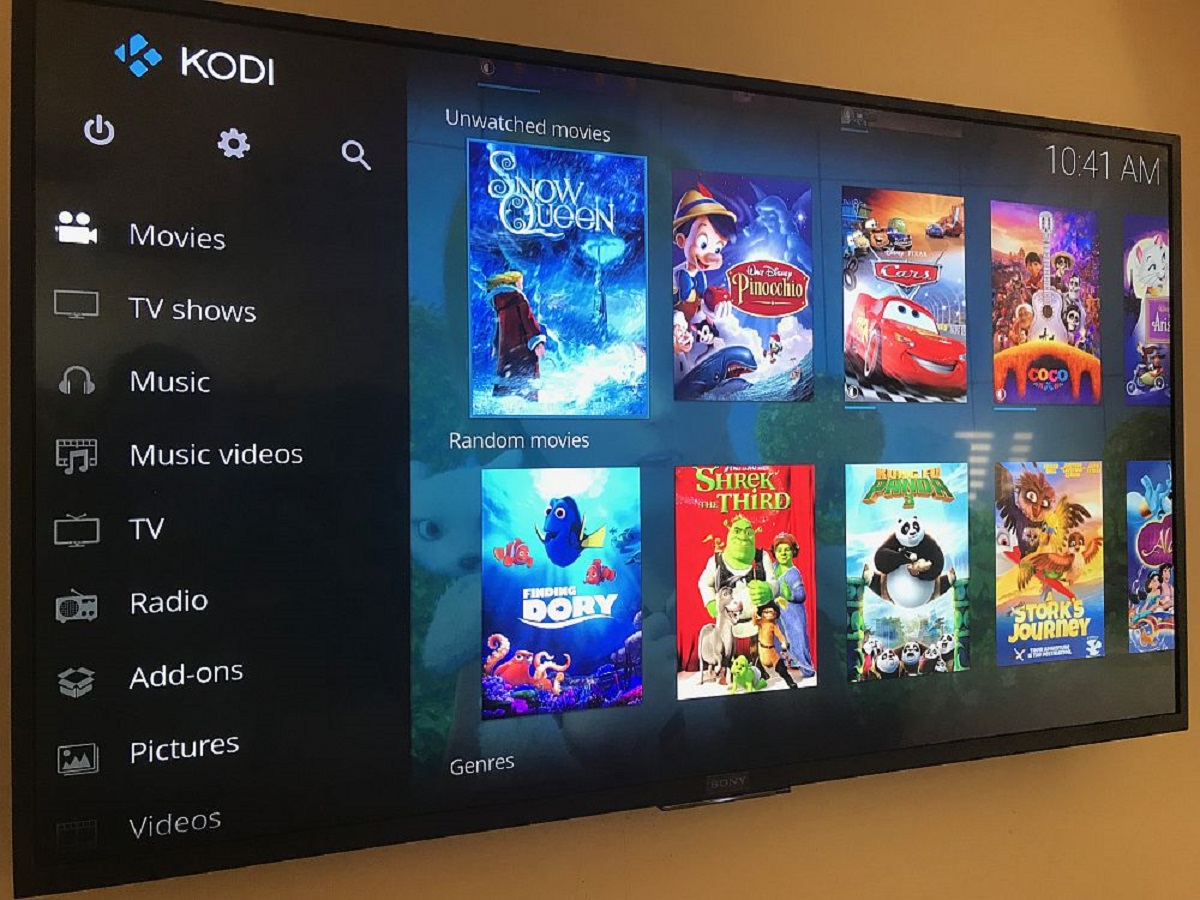
Welcome to our guide on how to install a VPN on Kodi. Kodi is a popular media player that allows users to stream a variety of content, including movies, TV shows, and live TV. However, due to geographical restrictions and content licensing agreements, some of this content may be blocked or unavailable in certain regions. This is where a VPN comes in.
A Virtual Private Network, or VPN, is a tool that encrypts your internet connection and routes it through a server located in a different region. By doing so, it masks your IP address and gives you a new one from the VPN server’s location. This allows you to bypass geo-restrictions and access content that would otherwise be unavailable in your country.
There are several reasons why you might want to use a VPN when using Kodi. Firstly, it provides an extra layer of security by encrypting your data and protecting your privacy. This is especially important if you frequently use public Wi-Fi networks or if you want to hide your online activities from ISPs, government surveillance, or hackers.
Secondly, a VPN allows you to access geographically restricted content on Kodi. For example, if a particular movie or TV show is only available in the United States, you can connect to a VPN server in the US and stream it on Kodi. This is useful for expatriates, travelers, or anyone who wants to enjoy content from different regions.
Lastly, using a VPN on Kodi can bypass internet service provider (ISP) throttling. ISPs sometimes intentionally slow down certain types of internet traffic, such as streaming video, to reduce the strain on their networks. By using a VPN, your internet traffic is encrypted and your ISP cannot determine the type of traffic you are generating, effectively bypassing any throttling measures.
In this guide, we will walk you through the process of installing a VPN on Kodi. Whether you’re a beginner or an experienced Kodi user, we’ve got you covered. By the end of this guide, you’ll be able to enjoy unrestricted access to content on Kodi and ensure that your connection is secure and private. Let’s get started!
What is VPN and why do you need it for Kodi?
A Virtual Private Network, or VPN, is a tool that creates a secure and encrypted connection between your device and the internet. It works by routing your internet traffic through a remote server and encrypting it, making it nearly impossible for anyone to intercept or decipher your data. But what does this have to do with Kodi?
When it comes to Kodi, a VPN serves two important purposes. Firstly, it enhances your online security and privacy. By encrypting your connection, a VPN shields your data from hackers, government surveillance, and even your own internet service provider (ISP). It prevents unauthorized access to your personal information and ensures that your online activities remain private and anonymous.
Secondly, and perhaps more importantly for Kodi users, a VPN allows you to bypass geographical restrictions on content. You see, certain streaming services and channels on Kodi are only available in specific countries due to licensing agreements. This means that if you’re not in the right location, you won’t be able to access that content.
With a VPN, however, you can overcome these restrictions. By connecting to a server in a different country, you can effectively change your IP address to that of the server. This tricks the streaming service or channel into thinking that you’re located in the same country, granting you access to restricted content. Whether it’s accessing US Netflix, BBC iPlayer, or other region-specific content, a VPN is the key to enjoying a wider range of streaming options on Kodi.
Furthermore, using a VPN on Kodi can also help you avoid ISP throttling. Some ISPs deliberately slow down certain types of internet traffic, such as streaming video, to alleviate network congestion. This can result in buffering issues and a frustrating streaming experience. However, a VPN encrypts your traffic and makes it difficult for your ISP to distinguish streaming from other online activities. By doing so, it effectively bypasses any throttling measures, allowing you to enjoy smooth and uninterrupted streaming on Kodi.
Overall, a VPN is essential for Kodi users who want to enhance their security, protect their privacy, and unlock a world of streaming possibilities. From enjoying geographically restricted content to bypassing ISP throttling, a VPN is a powerful tool that complements the Kodi experience perfectly.
Step 1: Choosing a VPN provider
The first step in installing a VPN on Kodi is to choose a reliable VPN provider. With so many options available in the market, it’s important to select a provider that offers the right features, security, and performance for your needs. Here are some factors to consider when choosing a VPN provider:
1. Security and Privacy: Look for a VPN provider that prioritizes security and privacy. Check if they offer strong encryption protocols such as OpenVPN or IKEv2. Additionally, ensure that they have a strict no-logs policy, meaning they do not track or store your online activities.
2. Server Network: A wide network of servers in different locations is important for accessing geo-restricted content. Make sure the VPN provider has servers in the countries where the content you want to stream is available.
3. Speed and Performance: Take into consideration the speed and performance of the VPN provider. Look for providers that offer fast and reliable connections, which are crucial for a seamless streaming experience on Kodi.
4. Device Compatibility: Check if the VPN provider supports the devices you plan to use Kodi on. Whether it’s a computer, smartphone, or streaming device, ensure that the VPN is compatible with your preferred device.
5. User-Friendly Interface: Look for a VPN provider that has an intuitive and user-friendly interface. A well-designed app or software makes it easier to connect to VPN servers and manage your settings.
6. Customer Support: Consider the level of customer support offered by the VPN provider. Look for providers that offer 24/7 live chat support or comprehensive documentation to help you troubleshoot any issues.
7. Pricing: Finally, compare the pricing plans of different VPN providers. While free VPNs may seem tempting, they often come with limitations and may compromise your privacy. Invest in a reputable paid VPN that offers a good balance of features and value for money.
By taking these factors into account, you can narrow down your choices and select a VPN provider that best suits your requirements. Once you’ve chosen a provider, you can move on to the next step of downloading and installing the VPN app.
Step 2: Downloading and installing the VPN app
Now that you have chosen a VPN provider, it’s time to download and install the VPN app onto your device. Each VPN provider may have slightly different instructions, but the process is generally straightforward. Follow these steps to get started:
1. Visit the VPN Provider’s Website: Go to the official website of the VPN provider you have chosen. Look for a “Download” or “Get Started” button on their homepage.
2. Select Your Device: The website should have a list of supported devices. Choose the operating system that matches your device, such as Windows, macOS, Android, or iOS.
3. Download the App: Click on the download button to start the download process. The app should be downloaded as an installer file (.exe for Windows or .dmg for macOS). Save the file to a location on your device that you can easily access.
4. Install the App: Once the download is complete, locate the installer file and double-click on it to start the installation process. Follow the on-screen instructions to install the VPN app. If prompted, grant any necessary permissions for the installation to proceed.
5. Launch the App: After the installation is complete, you can usually find the VPN app in your device’s applications folder or in the app drawer. Launch the app by double-clicking on its icon.
6. Log In or Create an Account: Upon launching the app, you will need to log in with your VPN provider account credentials. If you don’t have an account yet, you may need to sign up and create one. Follow the instructions provided by the VPN provider to complete this step.
7. Connect to a VPN Server: Once you are logged in, the VPN app should present you with a list of available server locations. Select a server location that is compatible with the content you wish to access on Kodi. Click on the “Connect” button to establish a connection to the VPN server.
8. Verify the Connection: After connecting to the VPN server, the VPN app should indicate that you are now connected and protected. You can also check your IP address to confirm that it has changed to the location of the VPN server.
That’s it! You have successfully downloaded and installed the VPN app on your device. In the next step, we will guide you through creating an account and logging in to the VPN app.
Step 3: Creating an account and logging in
Now that you have downloaded and installed the VPN app, the next step is to create an account and log in. This step is necessary to authenticate your access to the VPN service. Follow these steps to create an account and log in:
1. Open the VPN App: Launch the VPN app on your device by locating it in your applications folder or app drawer. Double-click on the app icon to open it.
2. Sign Up or Create an Account: If you don’t have an account with the VPN provider, look for a “Sign Up” or “Create Account” option within the app. Click on it to proceed.
3. Fill in the Required Information: The account creation page will ask for specific information such as your name, email address, and a password. Fill in the required fields with accurate information. Make sure to choose a strong and unique password to protect your account.
4. Agree to the Terms and Conditions: Read through the terms and conditions or privacy policy provided by the VPN provider. If you agree with the terms, select the checkbox or click on the “Agree” button to proceed.
5. Complete the Account Creation Process: Follow any additional instructions provided by the VPN provider to complete the account creation process. This may include verifying your email address or setting up additional security measures.
6. Log In with Your Account: Once you have created an account, return to the VPN app login screen. Enter your email address and the password you set during the account creation process. Click on the “Log In” or “Sign In” button to proceed.
7. Select a Server Location: After logging in, you will typically be presented with a list of available server locations. Select a server that is appropriate for your desired content on Kodi. The closer the server is to your physical location, the faster your connection speed is likely to be.
8. Connect to the VPN Server: With your account logged in, click on the “Connect” button or similar option within the VPN app to establish a connection to the selected server. The VPN app should indicate that you are now connected and protected.
Congratulations! You have successfully created an account and logged in to the VPN app. In the next step, we will guide you through connecting to a VPN server to secure your connection while using Kodi.
Step 4: Connecting to a VPN server
Now that you have created an account and logged in to the VPN app, it’s time to connect to a VPN server. This step establishes a secure and encrypted connection between your device and the selected server. Follow these steps to connect to a VPN server:
1. Open the VPN App: Launch the VPN app on your device by locating it in your applications folder or app drawer. Double-click on the app icon to open it.
2. Select a Server Location: Within the VPN app’s interface, you will typically find a list of available server locations. Depending on the VPN provider, you may see a map or a dropdown list of locations. Select a server that suits your needs, such as one in a country where your desired content is accessible.
3. Connect to the Server: Once you have selected a server location, click on the “Connect” button or similar option within the VPN app. The app will establish a connection to the chosen server and encrypt your internet traffic.
4. Wait for Connection Confirmation: After initiating the connection, it may take a few moments for the VPN app to establish a secure connection with the server. The app will typically display a connection progress indicator.
5. Verify the Connection: Once the connection is established, the VPN app will indicate that you are connected to the selected server. You may see a green icon or a message stating that you are protected. You can also check your IP address to ensure that it has changed to the location of the VPN server.
6. Test the Connection: To ensure that the VPN connection is successful, open a web browser or any other application that requires internet access. Visit a website that displays your IP address, such as “whatismyip.com,” to verify that your IP address matches the location of the VPN server.
7. Disconnect from the Server: When you have finished using the VPN, you can disconnect from the server. Open the VPN app and click on the “Disconnect” or similar button. The VPN app will terminate the connection to the server, and you will revert to your original IP address.
That’s it! You have successfully connected to a VPN server. Your internet traffic is now encrypted and routed through the chosen server, providing you with privacy, security, and access to region-restricted content. In the next step, we will guide you through setting up the VPN on Kodi.
Step 5: Setting up VPN on Kodi
Now that you have connected to a VPN server, the next step is to set up the VPN on Kodi. This will ensure that all your Kodi traffic is routed through the VPN, providing you with a secure and private streaming experience. Follow these steps to set up the VPN on Kodi:
1. Launch Kodi: Open the Kodi media player on your device. If you haven’t already installed Kodi, you can download it from the official website and follow the installation instructions for your operating system.
2. Navigate to Settings: From the home screen of Kodi, select the gear icon in the upper-left corner to access the Settings menu.
3. Click on “System Settings”: In the Settings menu, navigate to the “System” tab and click on “System Settings.”
4. Go to the “Add-ons” section: Within the System Settings, select the “Add-ons” tab on the left-hand side of the screen.
5. Enable Unknown Sources: In the Add-ons section, make sure that the “Unknown Sources” option is enabled. This allows you to install third-party add-ons on Kodi.
6. Install the VPN Add-on: Return to the Kodi home screen and select the “Add-ons” menu on the left panel. Click on the box icon in the upper-left corner to access the Add-on browser.
7. Choose “Install from Repository”: In the Add-on browser, select “Install from Repository” to browse the add-ons available in the official Kodi repository.
8. Select the VPN Provider: Look for the VPN provider you have chosen and click on it. You will usually find VPN add-ons under the “Services” category or the provider’s name.
9. Install the VPN Add-on: After selecting the VPN add-on, click on the “Install” button to begin the installation process. Wait for the add-on to be downloaded and installed.
10. Configure the VPN Add-on: Once the VPN add-on is installed, return to the Kodi home screen and go to the “Add-ons” menu. Find the newly installed VPN add-on and open it.
11. Enter Your VPN Account Credentials: Within the VPN add-on’s interface, you will need to enter your VPN account credentials such as username and password. Follow the prompts and enter the required information to authenticate your VPN connection.
12. Select a VPN Server: After entering your credentials, you will typically have the option to select a server location. Choose a server that aligns with your desired content or streaming preferences.
13. Connect to the VPN: Click on the “Connect” button or similar option within the VPN add-on to establish a connection to the selected server. The VPN add-on will initiate the connection and display a status indicating that you are connected.
That’s it! You have successfully set up the VPN on Kodi. Your Kodi streaming traffic is now encrypted and routed through the VPN, ensuring privacy, security, and access to geo-restricted content. In the next step, we will guide you through verifying your VPN connection.
Step 6: Verifying your VPN connection
After setting up the VPN on Kodi, it’s important to verify that your VPN connection is working properly. This step ensures that all your Kodi traffic is indeed routed through the VPN, providing you with the desired privacy, security, and access to geo-restricted content. Follow these steps to verify your VPN connection:
1. Open Kodi: Launch the Kodi media player on your device.
2. Access System Information: From the Kodi home screen, navigate to the Settings menu by clicking on the gear icon in the upper-left corner. In the System Settings menu, select “System Information.”
3. Check IP Address: In the System Information screen, locate the “Network” section. Look for the “IP Address” entry and compare it with the IP address of the VPN server you selected. If the IP addresses match, it means that your Kodi traffic is being routed through the VPN server.
4. Visit Geo-Restricted Content: Test the accessibility of geo-restricted content on Kodi. Select a streaming add-on or channel that is only available in a specific region and attempt to stream content. If the content plays without any issues, it indicates that your VPN connection is successfully bypassing geo-restrictions.
5. Use a Geo-Location Website: Visit a geo-location website, such as “iplocation.net” or “whatismyipaddress.com,” through the web browser on your Kodi device. These websites will display information about your current IP address and its location. Verify that the IP address shown matches the location of the VPN server you connected to.
6. Perform DNS Leak Test: To ensure that your DNS requests are not leaking while using the VPN on Kodi, you can perform a DNS leak test. There are several websites that offer such tests, such as “dnsleaktest.com” or “ipleak.net.” These tests will check if your DNS requests are being sent to your ISP or if they are successfully routed through the VPN server.
7. Check for IP and DNS Leaks: If the DNS leak test shows your original IP address or DNS requests leaking, it may indicate a configuration issue with your VPN or Kodi. Double-check your VPN settings, ensure that you are connected to the correct server, and try again.
8. Troubleshoot VPN Connection: If you encounter any issues during the verification process or notice any concerns, refer to the troubleshooting section provided by your VPN provider. They may have specific instructions or resources to help you diagnose and resolve any VPN connection issues.
By following these steps, you can effectively verify your VPN connection while using Kodi. Ensuring that your traffic is properly encrypted, your IP address is changed, and your DNS requests are secure adds an extra layer of privacy and security to your streaming experience. In the next step, we will provide some tips for troubleshooting common VPN-related issues that you may encounter.
Step 7: Troubleshooting common issues
While setting up and using a VPN on Kodi, you may encounter some common issues. Troubleshooting these issues can help ensure a smooth and uninterrupted streaming experience. Here are some tips for troubleshooting common VPN-related issues:
1. Connection Errors: If you are unable to establish a connection to the VPN server, double-check your login credentials and ensure that you have an active subscription with the VPN provider. Restarting the VPN app or your device may also help resolve connection errors.
2. Slow Speeds: If you experience sluggish performance or slow speeds while using the VPN on Kodi, try connecting to a different server location. A server closer to your physical location may provide faster connection speeds. Additionally, disconnecting from other devices or applications that are using a large amount of bandwidth can help improve speeds.
3. Buffering Issues: If you encounter buffering issues while streaming content on Kodi with the VPN enabled, try selecting a server location closer to the content source. Additionally, choosing a server with a lower load or opting for servers optimized for streaming may help reduce buffering issues.
4. DNS Leaks: If you suspect DNS leaks or are experiencing issues with DNS resolution, ensure that your VPN app is configured to handle DNS requests. Some VPN apps offer options to use custom DNS servers or to prevent DNS leaks. Enabling these features can help mitigate DNS-related issues.
5. Compatibility Issues: If you are using a VPN app that is not specifically designed for Kodi, compatibility issues may arise. Ensure that you are using a VPN app or add-on that is compatible with your specific version of Kodi. Updating both Kodi and the VPN app to their latest versions can also help resolve compatibility issues.
6. Firewall or Antivirus Restrictions: In some cases, firewalls or antivirus software may interfere with the VPN connection. Temporarily disabling these security measures or adding exceptions for the VPN app can help troubleshoot connection issues.
7. Contact VPN Support: If you have tried the above troubleshooting steps and are still experiencing issues, reach out to the customer support team of your VPN provider. They can provide personalized assistance and guide you through resolving any persistent problems.
Remember, each VPN provider may have specific troubleshooting steps or resources available on their website. Referring to these resources or contacting their support team can provide valuable insights and solutions tailored to your specific VPN setup.
By troubleshooting common issues, you can ensure a seamless experience while using a VPN with Kodi. Addressing any connectivity, speed, buffering, or compatibility problems will help you enjoy secure and unrestricted streaming on your Kodi media player.
Conclusion
Congratulations! You have successfully learned how to install and set up a VPN on Kodi. By following the steps outlined in this guide, you can now enjoy a secure, private, and unrestricted streaming experience on your Kodi media player.
A VPN adds an extra layer of security to your internet connection by encrypting your data and routing it through a remote server. It not only protects your privacy but also allows you to access geo-restricted content on Kodi. With a VPN, you can stream your favorite movies, TV shows, and live TV channels from anywhere in the world.
Remember to choose a reliable VPN provider that prioritizes security, offers a wide server network, and provides excellent performance. Take into consideration factors such as device compatibility, user-friendly interface, and customer support before making your decision.
Once you have selected a VPN provider, proceed with downloading and installing their app onto your device. Create an account, log in, and connect to a VPN server to secure your connection. Then, set up the VPN on Kodi by installing the VPN add-on and configuring it with your account credentials.
After verifying your VPN connection, you can troubleshoot any common issues that may arise, such as connection errors, slow speeds, buffering problems, or DNS leaks. Refer to the troubleshooting tips provided in this guide or reach out to your VPN provider’s customer support for further assistance.
By taking these steps, you can unleash the full potential of Kodi, accessing a vast array of content while ensuring your privacy and online security.
Remember, always use a VPN responsibly and abide by the laws and regulations of your country. Enjoy streaming on Kodi, knowing that your connection is protected and your online activities remain private.


