Introduction
Kodi 17 is a powerful media center that allows you to stream movies, TV shows, and more from a wide range of sources. One of the key features of Kodi is its ability to support subtitles, making it easier for viewers to understand and follow their favorite videos in different languages or for the hearing impaired. Subtitles not only enhance the viewing experience but also enable access to content that may otherwise be difficult to understand or inaccessible.
Installing subtitles on Kodi 17 is a straightforward process that anyone can do. In this article, we will guide you through the step-by-step instructions on how to install and enable subtitles on Kodi 17, so you can enjoy your favorite movies and TV shows with ease.
Whether you’re a beginner or have been using Kodi for a while, this article will provide you with all the information you need to install subtitles and elevate your viewing experience. So, let’s get started with the installation process and unlock the world of subtitles on Kodi 17!
Step 1: Launch Kodi 17
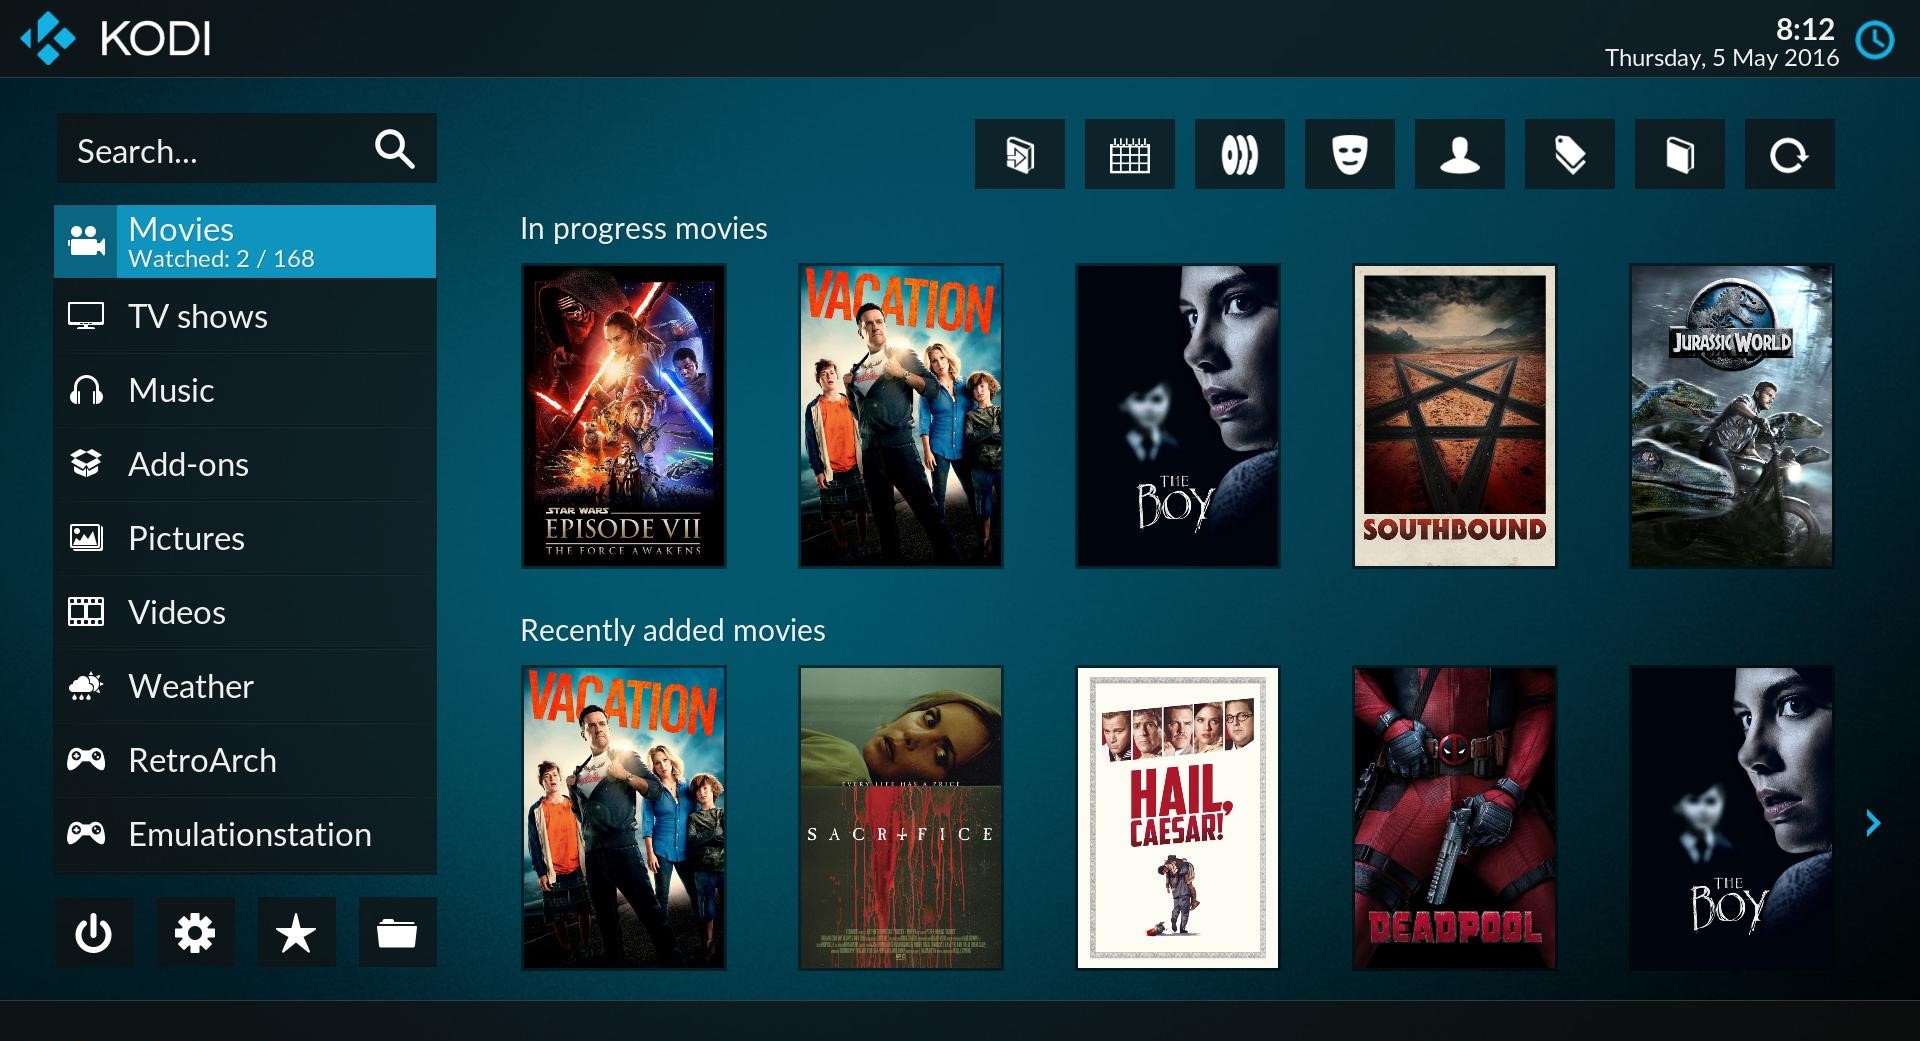
The first step in installing subtitles on Kodi 17 is to launch the Kodi application on your device. Whether you are using a computer, smartphone, tablet, or a dedicated Kodi device, the process is the same. Look for the Kodi icon on your home screen or in your app drawer and click or tap on it to open the application.
Once Kodi 17 is launched, you will be greeted with a sleek and user-friendly interface. The main home screen of Kodi includes various options such as Movies, TV Shows, Music, Add-ons, and more. Kodi is highly customizable, so feel free to personalize the interface based on your preferences.
Kodi 17 supports a wide range of platforms, including Windows, Mac, Linux, Android, iOS, and more. It also works on popular streaming devices such as Amazon Fire TV Stick and Roku. No matter which device you are using, make sure you have the latest version of Kodi 17 installed to ensure compatibility and access to all the features and updates.
Launching Kodi 17 is the starting point for installing subtitles, so ensure that you have a stable internet connection and enough free space on your device to smoothly run the application. Now that you have successfully launched Kodi 17, it’s time to move on to the next step and access the settings menu to continue with the subtitle installation process.
Step 2: Access the Settings menu
Once you have launched Kodi 17, the next step is to access the settings menu. The settings menu allows you to customize various aspects of the Kodi application, including the subtitle settings.
To access the settings menu, navigate to the top-left corner of the Kodi home screen. Here, you will find a gear icon, which represents the settings. Click or tap on the gear icon to enter the settings menu.
Alternatively, you can also access the settings menu by using the navigation bar at the bottom of the Kodi home screen. Simply scroll to the right until you reach the last option, which is the gear icon. Selecting the gear icon will also take you to the settings menu.
Upon entering the settings menu, you will see a list of different categories such as Player, Interface, System, Add-ons, and more. These categories allow you to customize specific aspects of Kodi according to your preferences.
For the purpose of installing subtitles, we need to focus on the Player category. Navigate to the Player category by either scrolling down within the settings menu or using the left-hand side navigation menu.
Now that you have successfully accessed the settings menu, it’s time to move on to the next step and enter the System Settings to further configure the subtitle settings.
Step 3: Enter the System Settings
After accessing the settings menu in Kodi 17, the next step is to enter the System Settings. The System Settings menu allows you to configure various settings related to your Kodi installation, including the subtitle settings.
To enter the System Settings, scroll down within the settings menu until you find the category labeled “System.” Click or tap on the “System” category to enter the System Settings.
Within the System Settings, you will find several options to customize your Kodi installation. These options include Display, Audio, Input, Internet Access, and more. For the purpose of installing subtitles, we need to focus on the Player settings.
Navigate to the Player settings by scrolling down within the System Settings or using the left-hand side navigation menu. Select the “Player” option to access the Player settings.
Within the Player settings, you will find a range of options related to video playback, including subtitle settings. These settings allow you to configure how subtitles are displayed, the font style, size, and color, and other advanced options.
Take your time to explore the various subtitle settings in the Player section. You can adjust the settings according to your preferences and requirements. Once you have configured the subtitle settings to your liking, you are ready to move on to the next step and install the OpenSubtitles add-on to enable subtitles in Kodi 17.
Step 4: Enable Expert Mode
Enabling Expert Mode in Kodi 17 gives you access to advanced settings and options that are not available in the default interface. This step is particularly important for installing the OpenSubtitles add-on, as it requires making changes in the advanced settings.
To enable Expert Mode, navigate to the lower-left corner of the Kodi home screen and click or tap on the gear icon to access the settings menu. Within the settings menu, scroll down and click or tap on the “Interface” category.
Within the Interface settings, you will find several options to customize the general appearance and behavior of Kodi. In this step, we need to enable Expert Mode to access the advanced settings. To do this, scroll down within the Interface settings until you find the “Expert” option. Toggle the switch next to “Expert” to enable it.
Enabling Expert Mode will unlock additional settings and options that were previously hidden in the default interface. This allows you to have more control over the configuration and customization of Kodi 17.
Once Expert Mode is enabled, you can proceed to the next step and install the OpenSubtitles add-on, which will enable you to download and display subtitles for your favorite videos in Kodi 17.
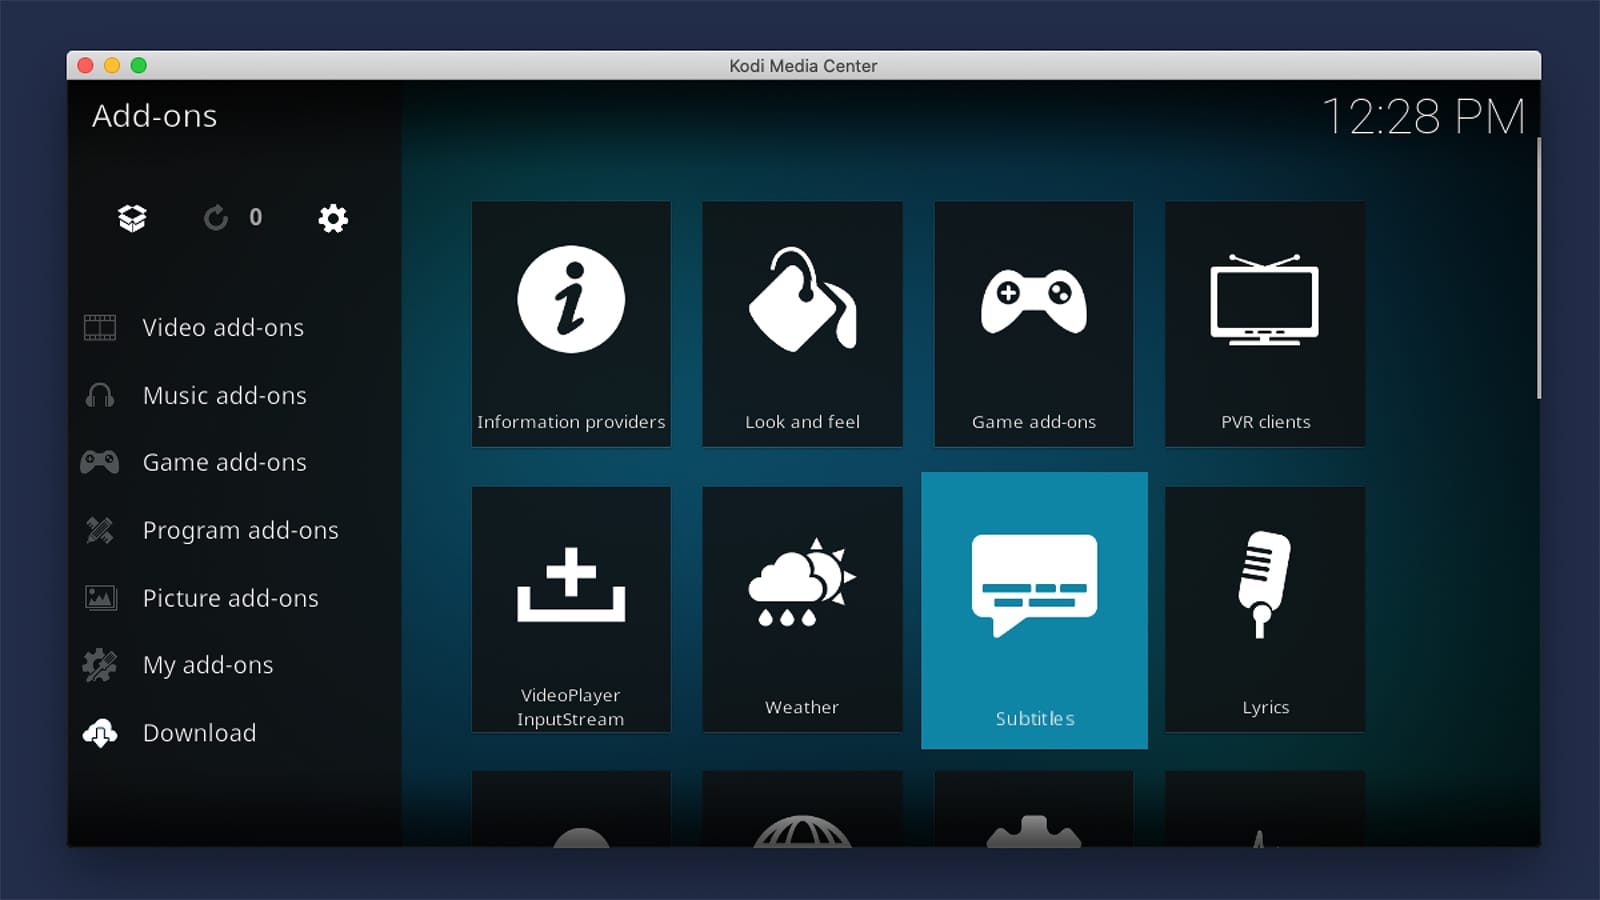
Step 5: Select the Add-ons option
After enabling Expert Mode in Kodi 17, the next step is to select the Add-ons option. This will allow you to access and manage the add-ons installed in Kodi, including the OpenSubtitles add-on that enables subtitles.
To select the Add-ons option, navigate to the left-hand side menu in the Kodi settings menu. Scroll down until you find the “Add-ons” category and click or tap on it.
Once you enter the Add-ons section, you will see different options to manage add-ons, including the ability to install new add-ons, enable or disable existing ones, and configure their settings.
In this step, we will focus on installing the OpenSubtitles add-on. Depending on your preference, you can either explore the available add-ons or go straight to the OpenSubtitles add-on installation.
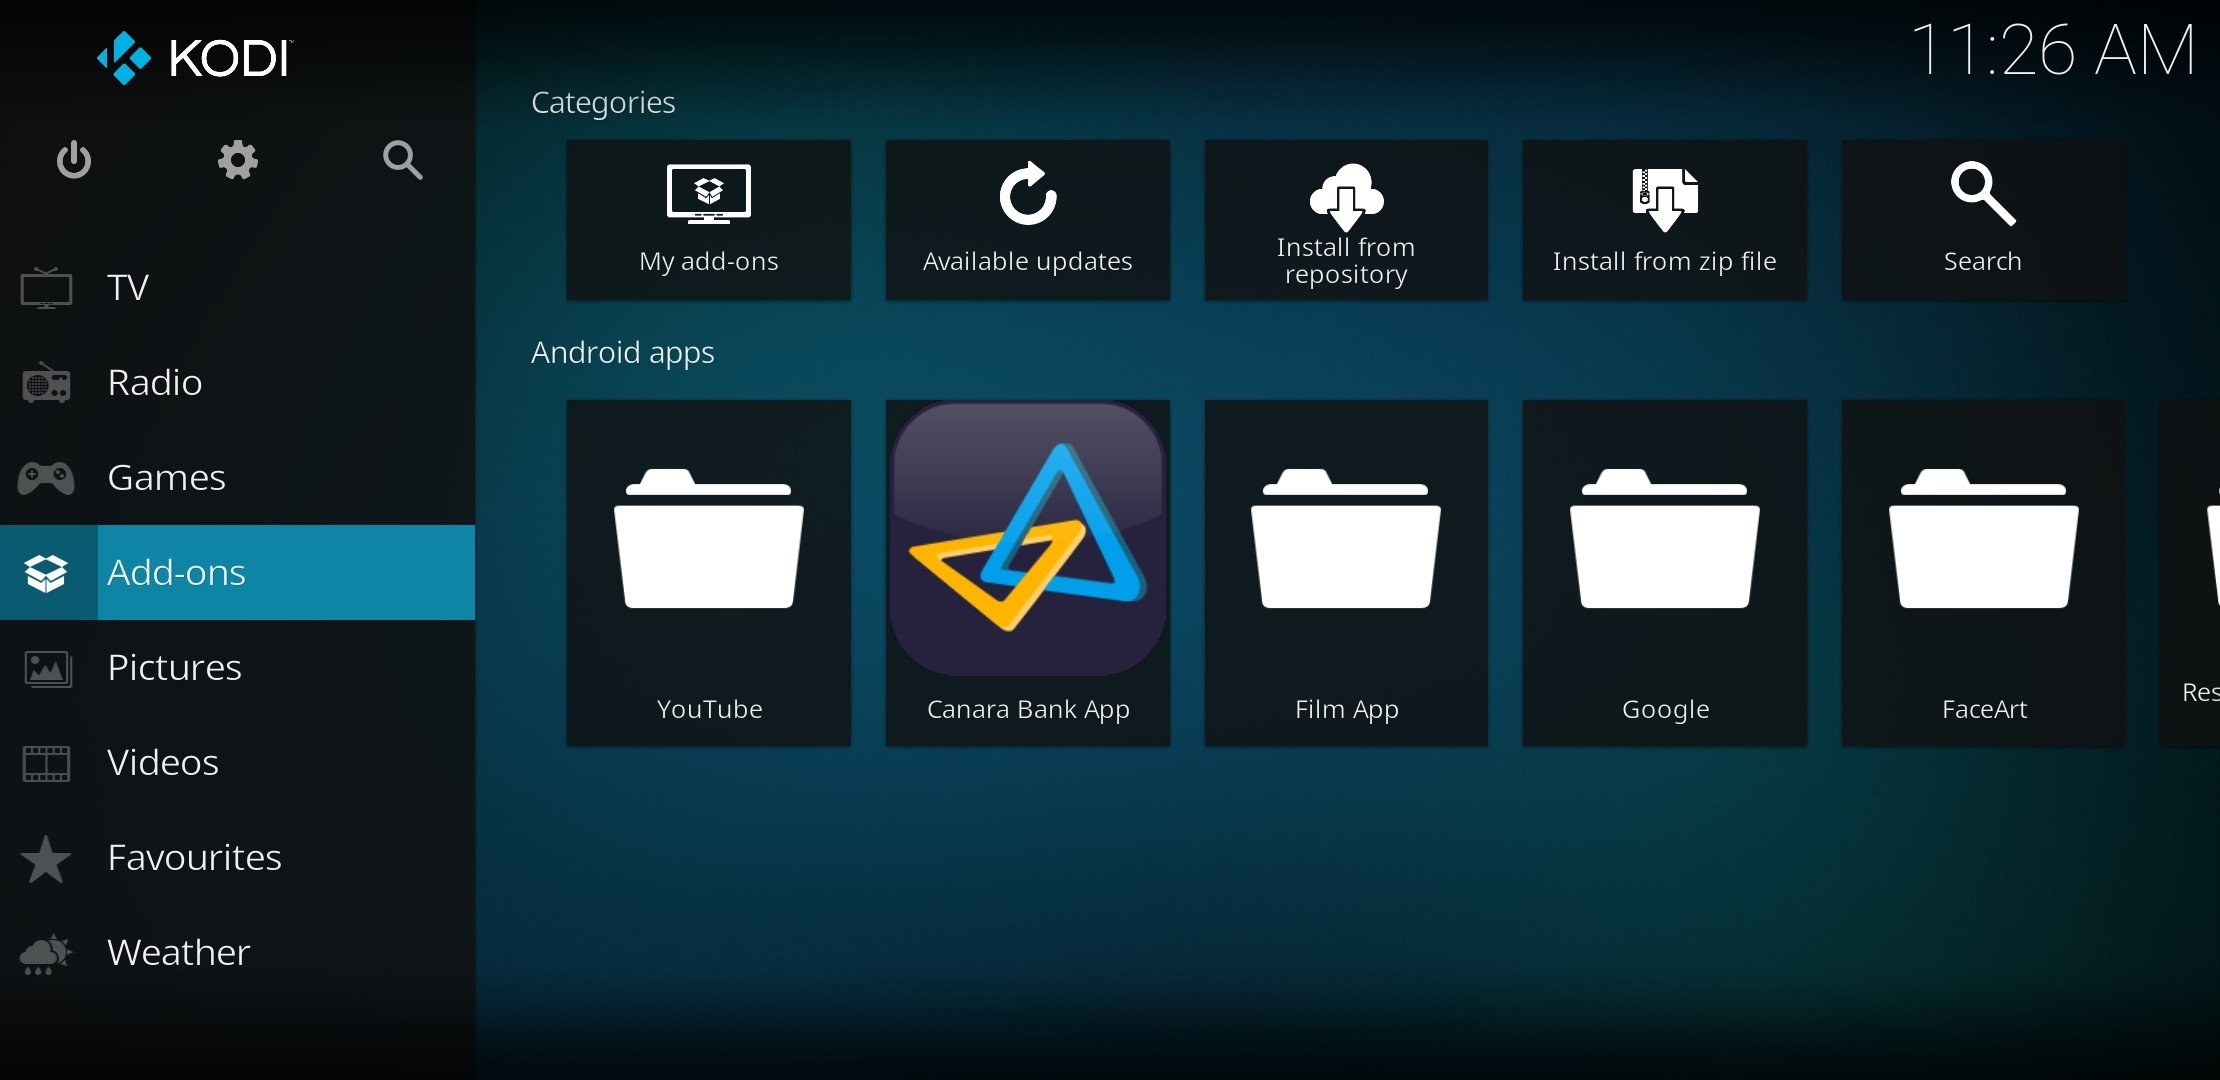
To install the OpenSubtitles add-on, click or tap on the “Install from repository” option. This will provide you with a list of repositories or sources where you can find various add-ons.
Look for the official Kodi repository or any trusted third-party repository that hosts the OpenSubtitles add-on. Once you find the repository, click or tap on it to access the available add-ons within that repository.
Search for the OpenSubtitles add-on and select it to begin the installation process. You may be prompted to confirm the installation and agree to any terms or conditions.
After the installation is complete, you will receive a notification confirming that the OpenSubtitles add-on has been installed successfully. Now you can move on to the next step and configure the OpenSubtitles add-on to enable subtitles in Kodi 17.
Step 6: Install the OpenSubtitles add-on
Installing the OpenSubtitles add-on is a crucial step in enabling subtitles in Kodi 17. The OpenSubtitles add-on allows you to download and display subtitles for your favorite movies and TV shows, enhancing your viewing experience.
To install the OpenSubtitles add-on, start by accessing the Add-ons section in the Kodi settings menu. Navigate to the left-hand side menu and scroll down until you find the “Add-ons” category. Click or tap on it to enter the Add-ons section.
Within the Add-ons section, select the “Install from repository” option. This will provide you with a list of repositories or sources where you can find various add-ons.
Look for the official Kodi repository or any trusted third-party repository that hosts the OpenSubtitles add-on. Once you find the repository, click or tap on it to access the available add-ons within that repository.
Search for the OpenSubtitles add-on and select it to begin the installation process. You may be prompted to confirm the installation and agree to any terms or conditions.
Kodi will now download and install the OpenSubtitles add-on. The installation progress will be displayed on the screen, and once it is complete, you will receive a notification confirming the successful installation.
With the OpenSubtitles add-on installed, you now have the ability to download and display subtitles for your videos in Kodi 17. However, there is one more step to complete before you can utilize the add-on.
Next, you need to configure the OpenSubtitles add-on by registering an account on opensubtitles.org and entering your account information in Kodi. This will allow you to access subtitles from the OpenSubtitles database.
Let’s move on to the next step and register an account on opensubtitles.org to enable the full functionality of the OpenSubtitles add-on.
Step 7: Configure the OpenSubtitles add-on
After installing the OpenSubtitles add-on in Kodi 17, the next step is to configure it by registering an account on opensubtitles.org and entering your account information in Kodi. This will allow you to access subtitles from the OpenSubtitles database and enjoy them with your favorite videos.
To configure the OpenSubtitles add-on, navigate back to the Kodi home screen and go to the Add-ons section. Select the OpenSubtitles add-on to open its settings.
Within the OpenSubtitles settings, you will find various options to customize the behavior of the add-on. However, before you can access these options, you need to register an account on opensubtitles.org.
Click or tap on “Register an account” within the OpenSubtitles settings. This will open a browser window or a built-in browser within Kodi, directing you to the opensubtitles.org website.
On the opensubtitles.org website, click or tap on the “Register” button to create a new account. Follow the registration process, providing the required information such as username, password, and email address.
After successfully registering an account, navigate back to Kodi and enter your OpenSubtitles username and password in the respective fields within the OpenSubtitles add-on settings.
Once you have entered your account information, click or tap on the “OK” or “Save” button to save the settings. This will authorize your Kodi installation to access subtitles from the OpenSubtitles database.
With the OpenSubtitles add-on now configured, you can start enjoying subtitles with your videos in Kodi 17. The add-on will automatically search for and download subtitles for your movies or TV shows, providing you with an enhanced viewing experience.
Now that you have successfully configured the OpenSubtitles add-on, it’s time to enable subtitles for a specific video in Kodi 17. Let’s move on to the next step and learn how to enable subtitles for a video.
Step 8: Register an account on opensubtitles.org
In order to fully utilize the functionality of the OpenSubtitles add-on in Kodi 17, you need to register an account on the opensubtitles.org website. Registering an account will allow you to access the extensive database of subtitles and enhance your viewing experience.
To register an account on opensubtitles.org, you will need to navigate to the opensubtitles.org website using a web browser on your computer or mobile device.
Once on the website, look for the registration link or button, which is usually located at the top right corner of the page. Click or tap on it to proceed with the registration process.
Fill out the registration form with the required information, including your desired username, password, email address, and any additional details that may be necessary.
Make sure to choose a strong password and provide a valid email address, as you may need to confirm your registration through an email verification process.
After submitting the registration form, you will receive a confirmation email from opensubtitles.org. Follow the instructions in the email to complete the registration process and activate your account.
Once your account is activated, you can return to Kodi 17 and proceed to configure the OpenSubtitles add-on by entering your newly registered username and password in the add-on settings.
Registering an account on opensubtitles.org not only allows you to access subtitles for your favorite movies and TV shows but also opens up the possibility of contributing to the community by uploading and sharing subtitles with others.
By registering an account on opensubtitles.org, you become part of a vast community of subtitle enthusiasts, making it easier for everyone to enjoy video content in different languages and with accurate subtitles.
Now that you have registered an account on opensubtitles.org, you are ready to enter your account information in the OpenSubtitles add-on settings and unlock the full potential of subtitles in Kodi 17.
Step 9: Enter the OpenSubtitles username and password
After registering an account on opensubtitles.org, the next step is to enter your OpenSubtitles username and password in the OpenSubtitles add-on settings in Kodi 17. This will authenticate your Kodi installation and allow it to access subtitles from the OpenSubtitles database.
Start by launching Kodi 17 and navigating to the Add-ons section in the settings menu. Select the OpenSubtitles add-on to open its settings.
Within the OpenSubtitles settings, you will find fields to enter your OpenSubtitles username and password. Click or tap on the respective fields to bring up the keyboard and enter your credentials.
Ensure that you enter your username and password accurately to avoid any authentication issues. Double-check for any typos or mistakes in your entries.
Once you have entered your OpenSubtitles username and password, click or tap on the “OK” or “Save” button to save the settings. This will authorize your Kodi installation to access the OpenSubtitles database to download and display subtitles for your videos.
After saving the settings, Kodi will test the connection to the OpenSubtitles server to ensure that the authentication is successful. If the connection is established, you will receive a confirmation message indicating that the connection is working correctly.
With your OpenSubtitles username and password entered and the connection established, you are now ready to enjoy subtitles for your movies and TV shows in Kodi 17.
Remember, by entering your OpenSubtitles credentials, you gain access to a massive collection of subtitles contributed by the opensubtitles.org community. This means you can enjoy videos in different languages and access subtitles for an immersive viewing experience.
Now that you have successfully entered your OpenSubtitles username and password, you can proceed to enable subtitles for a specific video in Kodi 17.
Step 10: Enable subtitles for a video in Kodi 17
Now that you have configured the OpenSubtitles add-on in Kodi 17 and entered your OpenSubtitles username and password, you can enable subtitles for a specific video and enhance your viewing experience.
To enable subtitles for a video in Kodi 17, start by launching the Kodi application on your device. Navigate to the “Videos” section on the Kodi home screen and select the video you want to watch.
Once the video starts playing, pause it by pressing the “OK” or “Enter” button on your remote control or by using the on-screen controls.
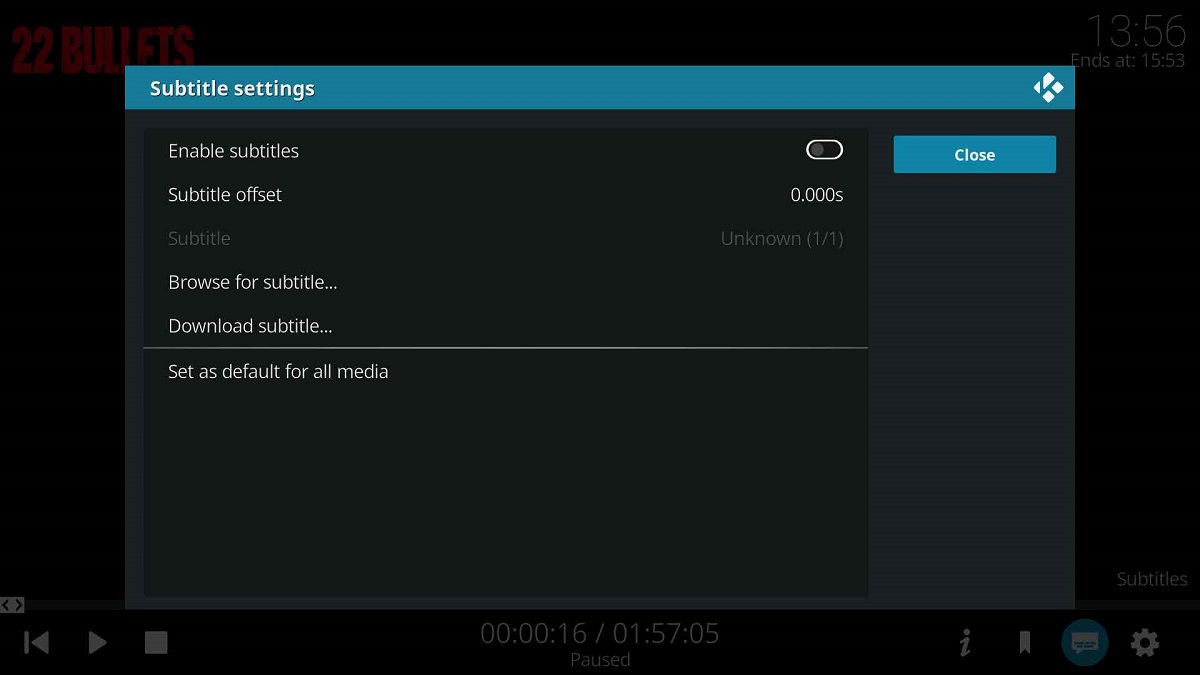
With the video paused, navigate to the bottom of the screen and look for the subtitle icon, which usually looks like a speech bubble or a letter “S.” Click or tap on the subtitle icon to access the subtitle settings.
Within the subtitle settings, you will have the option to enable or disable subtitles, choose the subtitle language, adjust the font size and style, and make any other necessary adjustments to enhance the subtitle display.
Click or tap on the “Enable” option to turn on subtitles for the video. Kodi will automatically search for and download the appropriate subtitles from the OpenSubtitles database based on the video’s title and language.
Once the subtitles are downloaded, they will be displayed on the screen when you resume playing the video. You can also adjust the subtitle settings while the video is playing by accessing the subtitle icon and making further adjustments.
Enjoy your video with the added benefit of subtitles, allowing you to follow the dialogue, understand foreign languages, or enhance accessibility for the hearing-impaired.
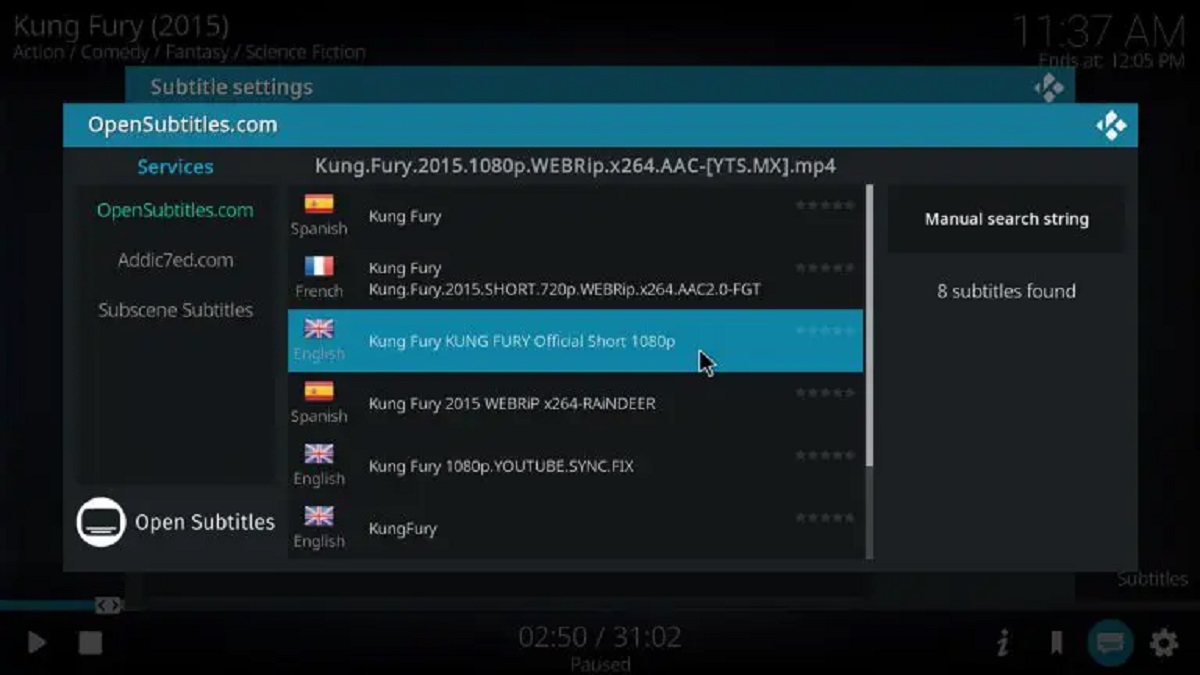
If the subtitles don’t appear or if they are not synchronized correctly with the video, you can manually search for alternate subtitles within the subtitle settings. Kodi provides options to search for specific subtitles based on the subtitle file or manually inputting search criteria.
By enabling subtitles for your video in Kodi 17, you can fully experience and enjoy your favorite movies and shows regardless of the language or any hearing impairments.
Now that you know how to enable subtitles for a video in Kodi 17, you can explore a wide range of content and make the most out of your multimedia experience.
Conclusion
Installing and enabling subtitles on Kodi 17 is a simple and effective way to enhance your media playback experience. By following the step-by-step guide in this article, you have learned how to install the OpenSubtitles add-on, configure it with your OpenSubtitles account, and enable subtitles for your videos.
Subtitles not only provide a better understanding of dialogues and enhance accessibility for those with hearing impairments, but they also enable you to enjoy content in different languages without missing out on important details.
Kodi 17 offers a user-friendly interface and a vast library of add-ons that further extend its capabilities. With the OpenSubtitles add-on installed, you have access to a massive collection of subtitles contributed by a vibrant community of subtitle enthusiasts.
Remember to explore the various subtitle settings in Kodi 17, allowing you to customize the appearance, font size, and style of the subtitles according to your preferences and viewing environment.
Whether you are watching movies, TV shows, or other videos, subtitles can greatly enhance your viewing experience and make content more accessible and enjoyable. With Kodi 17 and the OpenSubtitles add-on, you have the tools to unlock the power of subtitles and immerse yourself in the world of multimedia.
Now that you are equipped with the knowledge and skills to install and enable subtitles on Kodi 17, it’s time to start enjoying your favorite videos with subtitles. Take advantage of this feature to expand your viewing options and make the most of your multimedia experience.