Introduction
Welcome to the world of PHP, the popular server-side scripting language that powers millions of websites and applications worldwide. PHP offers a wide range of functionalities and is an essential tool for web developers. In this article, we will guide you through the process of installing PHP on a Windows operating system.
Whether you are a beginner or an experienced developer, this step-by-step guide will help you successfully set up PHP on your Windows machine. You don’t need to be an expert in coding to follow along; we will provide clear instructions and explanations along the way.
Installing PHP on Windows is crucial if you plan on running a local development server or working on PHP-based projects. By installing PHP locally, you can test your applications in a secure and controlled environment, ensuring that everything is functioning as expected before going live.
Before we jump into the installation process, let’s take a quick look at the prerequisites you’ll need to have in place.
Prerequisites
Before you can install PHP on your Windows machine, there are a few prerequisites that need to be met:
- Windows Operating System: Make sure you are running a supported version of Windows, such as Windows 10, Windows 8, or Windows 7.
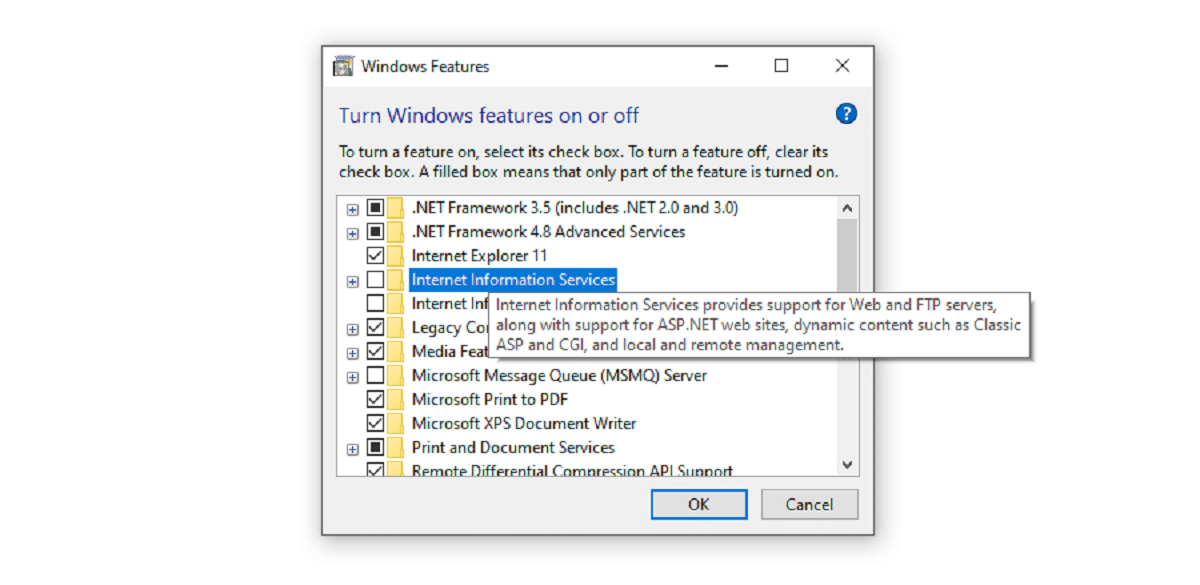
- Web Server Software: You will need to have a web server software installed on your computer. The most popular ones are Apache, IIS (Internet Information Services), and Nginx.
- Database Software: If your PHP application requires a database, make sure you have a compatible database software installed, such as MySQL or PostgreSQL.
- Internet Connection: While it’s not mandatory, having a stable internet connection will allow you to easily download and update PHP and its extensions.
If you don’t have a web server software or a database software installed, don’t worry. We will cover the installation of Apache and MySQL in separate articles, but you can also use other web server software and database software of your choice.
Once you have met the prerequisites, you can proceed to the next steps and start the installation process. Remember, having a solid foundation will ensure a smooth installation experience and seamless usage of PHP on your Windows machine.
Step 1: Download PHP
The first step in installing PHP on your Windows machine is to download the PHP binaries. Binaries are precompiled files that contain all the necessary components to run PHP on your computer.
Here’s how you can download PHP:
- Visit the official PHP website at php.net/downloads.php.
- On the downloads page, you will see multiple PHP versions available. Choose the version that you want to install based on your requirements. It is recommended to download the latest stable version for optimal performance and security.
- Next, select the Windows Binary format that matches your system architecture (32-bit or 64-bit). If you’re unsure about your system’s architecture, you can check it by right-clicking on “This PC” or “My Computer” and selecting “Properties.”
- Click on the download link for the selected PHP version and format. This will initiate the download process.
- Once the download is complete, you will have a .zip file containing the PHP binaries. Extract the contents of the .zip file to a location of your choice. For example, you can create a folder named “PHP” in the C:\ drive and extract the files there.
Great! Now that you have downloaded and extracted the PHP binaries, you are ready to move on to the next step: configuring PHP.
Step 2: Extract the PHP files
Now that you’ve downloaded the PHP binaries, it’s time to extract the files from the downloaded .zip archive. This will make the necessary PHP files and folders available for configuration and usage.
Follow these steps to extract the PHP files:
- Navigate to the location where you downloaded the PHP .zip file.
- Right-click on the .zip file and select “Extract All” or a similar option depending on your operating system.
- In the extraction wizard, choose the destination folder where you want to extract the PHP files. It is recommended to extract the files to a location that is easily accessible, such as the root of your C:\ drive or a dedicated folder like C:\PHP.
- Click “Extract” to begin the extraction process. Depending on the size of the .zip file, this may take a few moments.
- Once the extraction is complete, you will have a folder containing all the PHP files and folders.
Congratulations! You have successfully extracted the PHP files to a designated location. The extracted PHP files will be the foundation of your PHP installation and will be used in the subsequent steps.
In the next step, we will dive into the configuration of PHP to make it work seamlessly with your web server software. So let’s move on to Step 3!
Step 3: Configure PHP
Now that you have extracted the PHP files, it’s time to configure PHP to work with your web server software. Configuration involves tweaking the PHP settings to meet your specific requirements and enabling the necessary extensions for optimal functionality.
Follow the steps below to configure PHP:
- Navigate to the location where you extracted the PHP files in Step 2.
- Locate the file named
php.ini-developmentand make a copy of it. Rename the copy tophp.ini. This is the configuration file for PHP. - Open the
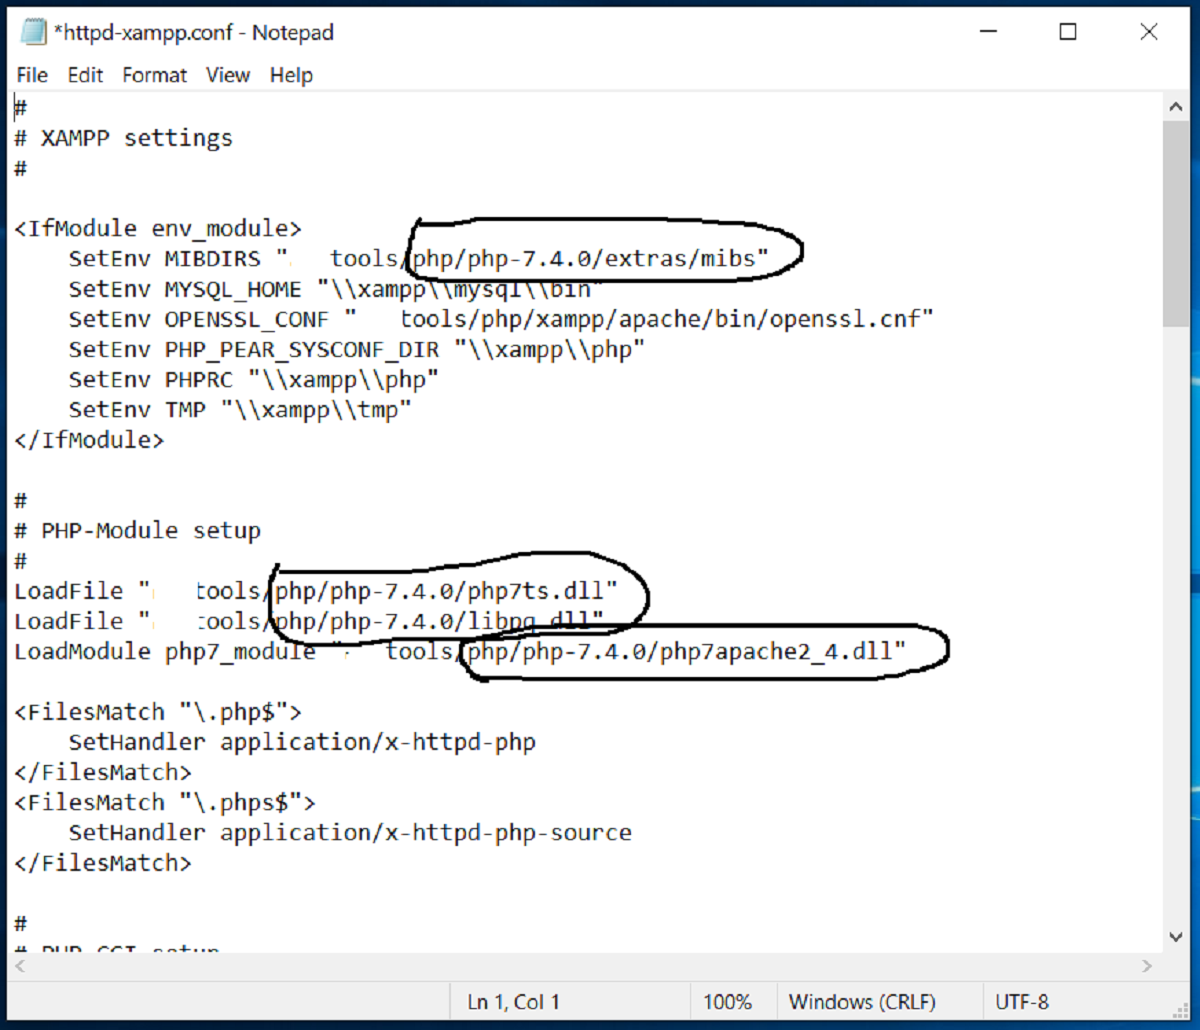
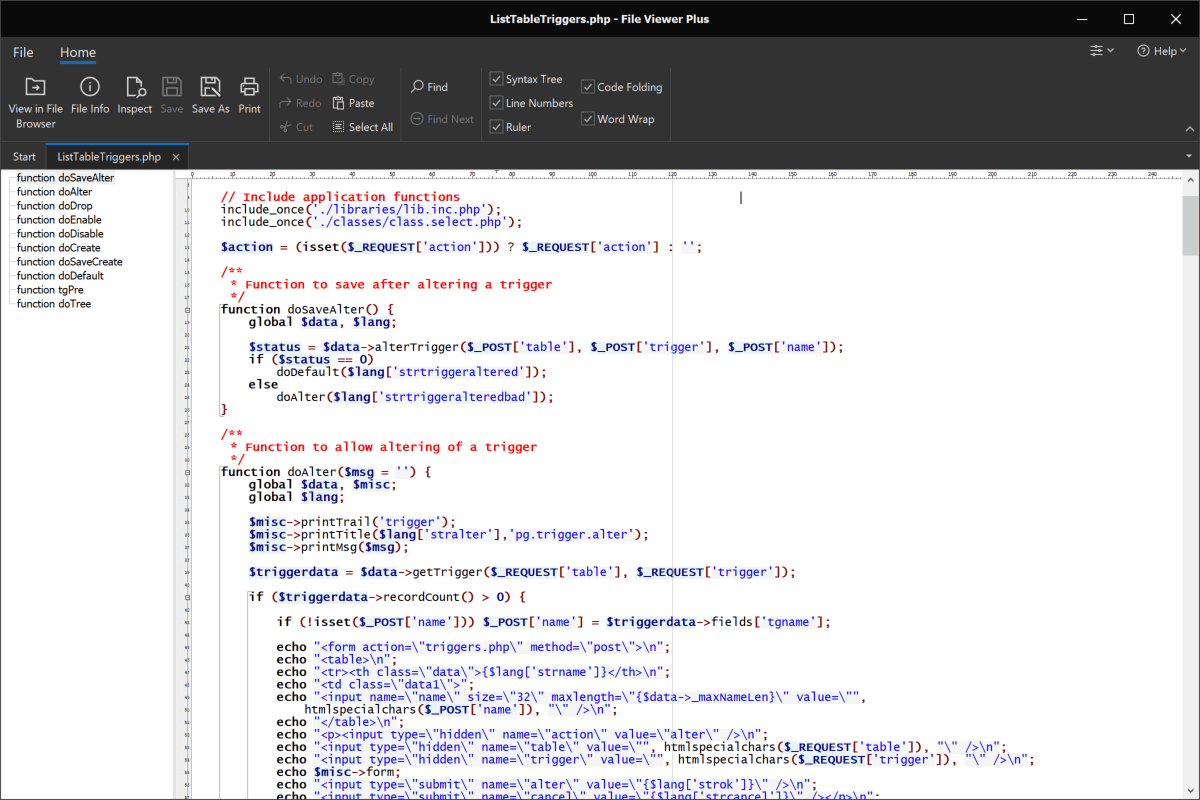
php.inifile using a text editor of your choice. You can use a code editor like Notepad++ or a simple text editor like Notepad. - Inside the
php.inifile, you will find various settings that you can modify based on your requirements. Some common settings to consider are:extension_dir: This setting specifies the directory path where PHP will look for extensions. Make sure the path is correctly set.error_reporting: This setting determines the level of error reporting. Customize this setting based on your development or production needs.post_max_sizeandupload_max_filesize: Adjust these settings to allow PHP to handle larger file uploads, if required.
- Save the changes to the
php.inifile after configuring the necessary settings.
Once you have configured the php.ini file, you are one step closer to completing the PHP installation process. In the next step, we will add PHP to the system’s PATH to make it globally accessible. So let’s move on to Step 4!
Step 4: Add PHP to the system’s PATH
To make PHP globally accessible from the command line, you need to add the PHP executable to the system’s PATH variable. This allows you to run PHP commands from anywhere on your Windows machine without specifying the full path to the PHP executable.
Follow the steps below to add PHP to the system’s PATH:
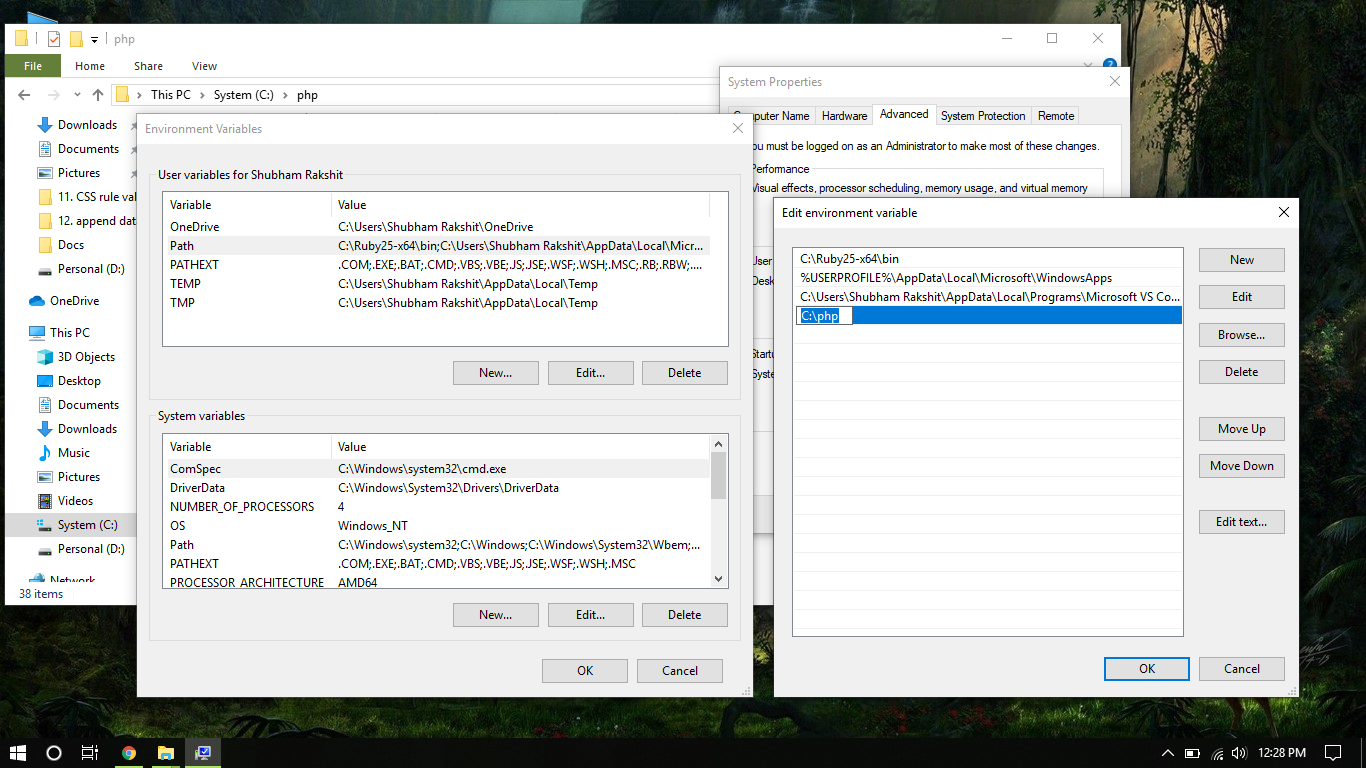
- Open the Start menu and search for “Environment Variables”. Click on the “Edit the system environment variables” option that appears in the search results.
- In the “System Properties” window, click on the “Environment Variables” button at the bottom right.
- In the “Environment Variables” window, locate the “Path” variable under the “System variables” section and click on the “Edit” button.
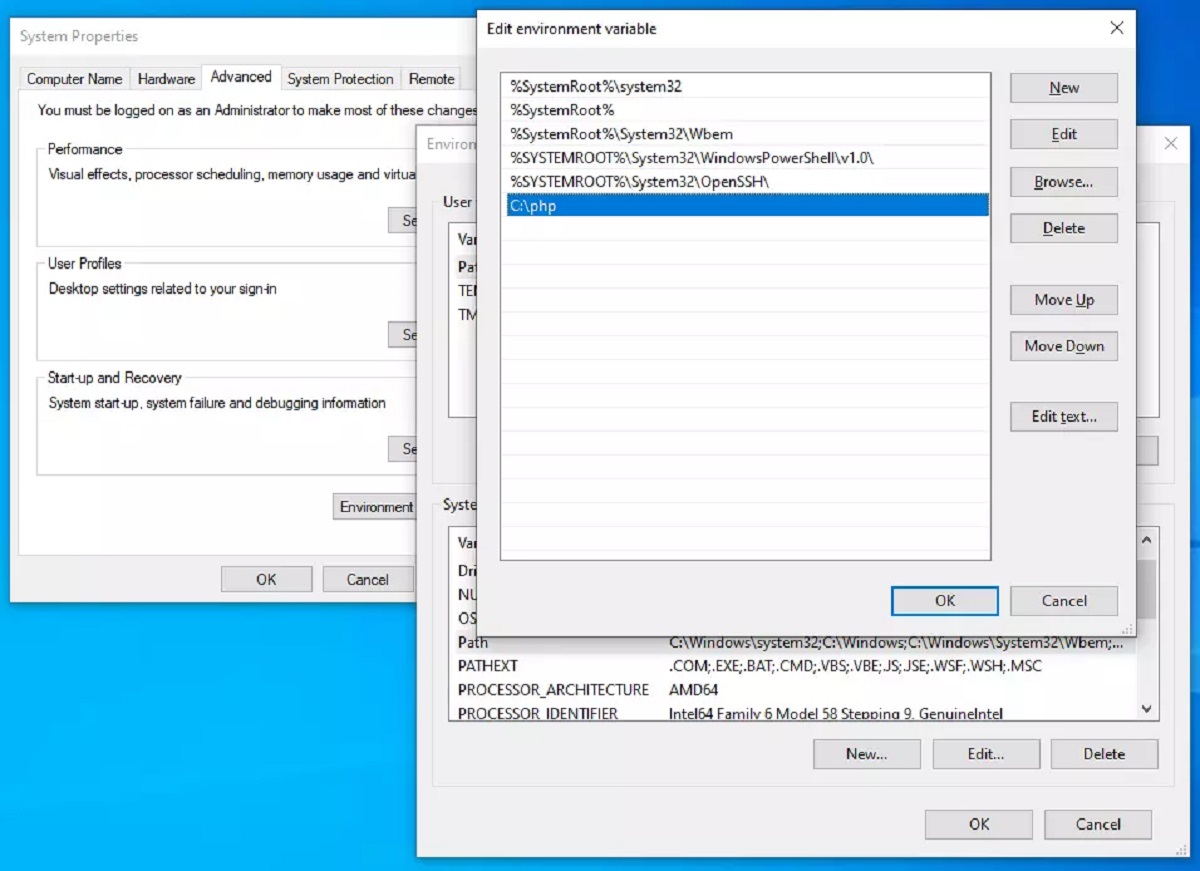
- A new window will open, showing the list of paths in the “Path” variable. Click on the “New” button to add a new entry.
- In the text field, enter the path to the directory where you extracted the PHP files (e.g., C:\PHP) and click “OK”.
- Click “OK” on all open windows to save the changes and close the windows.
That’s it! You have added PHP to the system’s PATH variable, making it accessible from anywhere on your Windows machine. In the next step, we will test the PHP installation to ensure everything is set up correctly. Let’s move on to Step 5!
Step 5: Test PHP installation
Now that you have successfully installed and configured PHP on your Windows machine, it’s time to perform a test to ensure that PHP is working correctly. This step will verify that PHP can execute code and communicate with the web server software.
Follow the steps below to test your PHP installation:
- Create a new file with a “.php” extension in a text editor.
- Insert the following PHP code into the file:
- Save the file with a “.php” extension. For example, you can name it “test.php”.
- Move the saved file to the document root of your web server. This is usually a directory called “htdocs” or “www” within your web server software’s installation folder.
- Open a web browser and enter the following URL in the address bar:
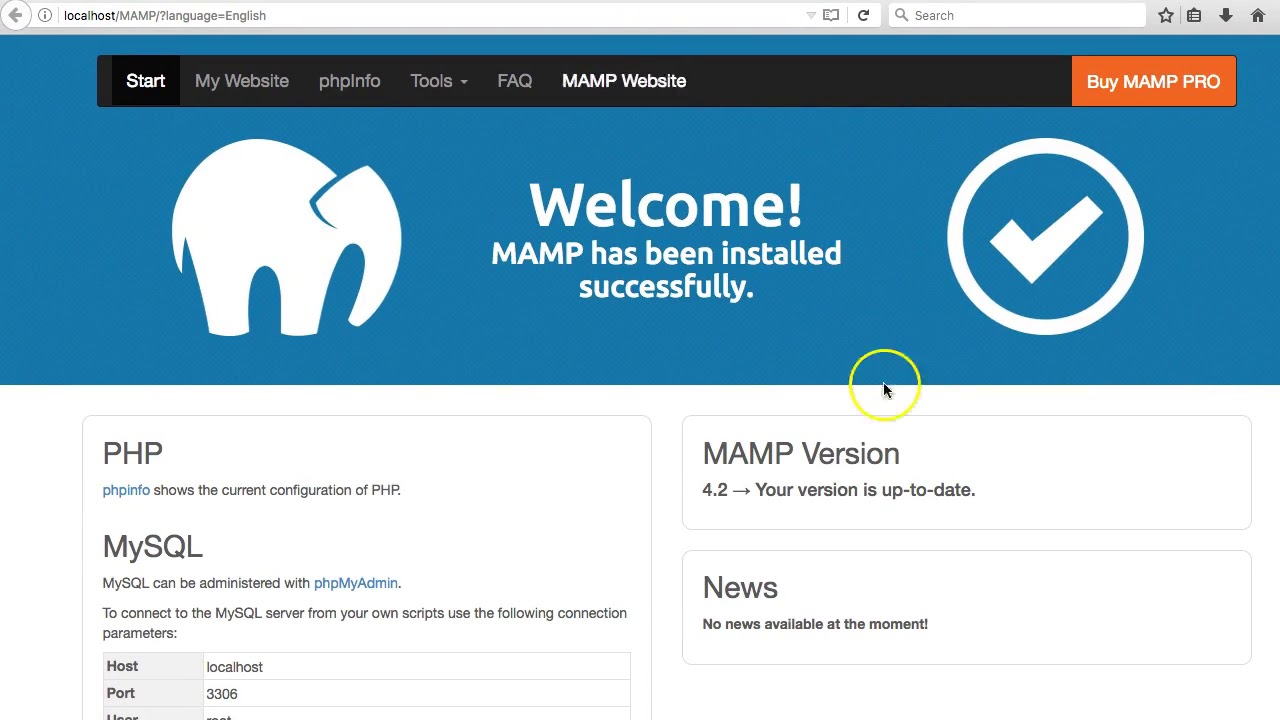
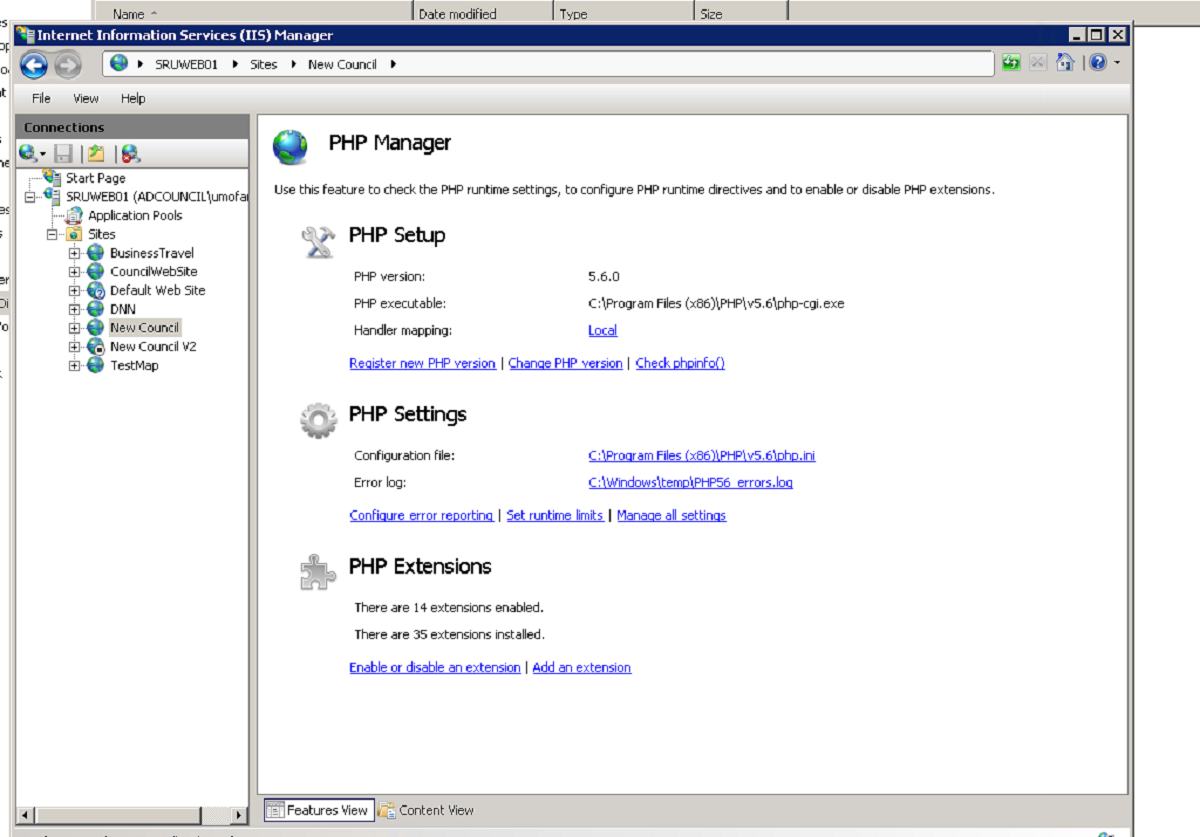
http://localhost/test.php. - If PHP is correctly installed and configured, you should see a page displaying detailed information about your PHP installation. This page is generated by the
phpinfo()function. - If the PHP information page appears as expected, congratulations! PHP is installed and functioning properly.
php
If you encounter any issues or do not see the PHP information page, double-check your installation and configuration steps. It’s possible that you missed a step or made an error in the process. Make sure that the PHP files are in the correct location, the configuration settings are accurate, and the web server software is running.
Once you have successfully tested your PHP installation, you are ready to start building and running PHP applications on your Windows machine.
That completes the step-by-step guide to installing PHP on Windows. You are now equipped with the necessary knowledge to set up PHP and embark on your journey to creating dynamic web applications.
Conclusion
Congratulations! You have successfully installed PHP on your Windows machine. By following the steps outlined in this guide, you now have a fully functional PHP environment that is ready for building and running PHP applications.
We started by outlining the prerequisites for installing PHP, ensuring that you have the necessary software and components in place. We then went through each step of the installation process, including downloading the PHP binaries, extracting the files, configuring PHP settings, adding PHP to the system’s PATH, and testing the installation to verify its functionality.
Now that PHP is installed, you can start exploring the vast possibilities that this powerful scripting language offers. PHP allows you to create dynamic websites, interact with databases, process form data, generate XML/JSON files, and much more.
Remember to keep your PHP installation up to date by regularly checking for updates and patches from the official PHP website. This will ensure that you have the latest security fixes and performance improvements.
As you continue your PHP journey, make use of online resources, tutorials, and forums to expand your knowledge and enhance your skills. PHP is a versatile language with a strong community, so don’t hesitate to seek help and learn from others.
Enjoy exploring the world of PHP development on your Windows machine. Happy coding!