Introduction
Welcome to this step-by-step guide on how to install Android on a mini PC. With the advancements in technology, mini PCs have become popular due to their compact size and versatility. One of the main advantages of a mini PC is that it can be easily customized to suit your specific needs. By installing Android on a mini PC, you can enjoy all the benefits of the Android operating system on a larger screen.
Android, developed by Google, is known for its user-friendly interface, wide range of applications, and smooth performance. Installing Android on a mini PC allows you to transform it into a powerful device capable of running various Android apps, games, and multimedia content.
Before we dive into the installation process, it’s important to note that the steps may vary depending on the specific model and hardware of your mini PC. It’s always a good idea to check the manufacturer’s website or user manual for any specific instructions.
In this guide, we will go through each step required to install Android on a mini PC, from checking the specifications and selecting the Android version to preparing a bootable USB drive and installing the operating system. So, let’s get started!
Step 1: Check the Mini PC Specifications
Before you begin the process of installing Android on your mini PC, it’s crucial to ensure that your device meets the necessary specifications. Checking the specifications will help you determine if your mini PC is compatible with the Android operating system and will prevent any potential issues during the installation process.
The most important specifications to consider are the processor, RAM, storage capacity, and graphics capabilities of your mini PC. While Android can run on a variety of hardware configurations, it’s recommended to have a mini PC with at least a dual-core processor, 2GB of RAM, and 16GB of storage for a smooth experience.
Additionally, it’s essential to check if your mini PC supports booting from a USB drive. This is necessary for installing Android using a bootable USB drive. Most modern mini PCs have this feature, but it’s always better to confirm it beforehand.
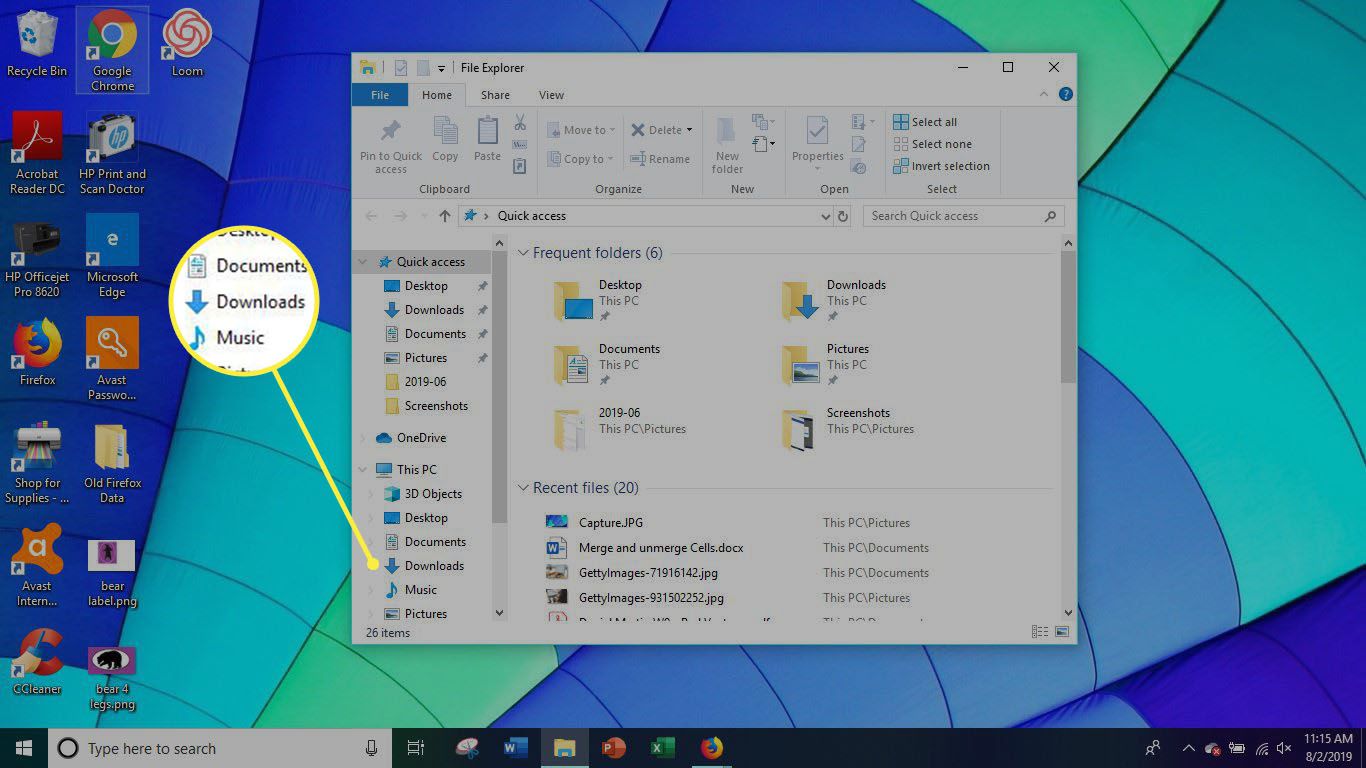
If you’re unsure about the specifications of your mini PC, you can usually find this information in the user manual or on the manufacturer’s website. Alternatively, you can check the “System Information” panel in the Windows operating system by right-clicking on the “My Computer” or “This PC” icon and selecting “Properties.”
Once you have confirmed that your mini PC meets the necessary specifications, you can proceed to the next step of selecting the Android version that suits your requirements. Having the right version of Android for your mini PC will ensure optimal performance and compatibility with your device.
Step 2: Select the Android Version
Now that you have checked the specifications of your mini PC, it’s time to select the Android version that you want to install. Android offers a range of versions, each with its own features and optimizations.
The latest version of Android may not always be the best choice for a mini PC, as it requires higher hardware specifications. Therefore, it’s important to consider the compatibility of the Android version with your mini PC’s hardware.
If your mini PC has limited resources, such as lower RAM or storage capacity, you may want to consider installing a lighter version of Android, such as Android KitKat or Android Lollipop. These versions are designed to run smoothly on devices with lower specifications.
On the other hand, if your mini PC has higher specifications and you want access to the latest features and improvements, you can opt for the latest version of Android. However, keep in mind that there may be more system requirements and a larger installation size.
It’s also worth considering if you want to install a stock Android version or a customized version, such as LineageOS or CyanogenMod. Customized versions often offer additional features and customization options, but they may require more technical knowledge to install and maintain.
To make an informed decision, it’s recommended to research different Android versions and their compatibility with your mini PC. You can visit the official Android website or other reliable sources to gather information about the features, requirements, and performance of each version.
After selecting the Android version, you can proceed to the next step of downloading the Android image, which will be used to install Android on your mini PC.
Step 3: Download the Android Image
Now that you have selected the Android version, it’s time to download the Android image that you will use to install the operating system on your mini PC. The Android image is a compressed file containing all the necessary files and software to run Android on your device.
To download the Android image, you will need to visit the official website of the Android version or the customized version you have chosen. Look for the “Downloads” or “Install” section on the website, where you will find the appropriate image file for your mini PC.
Make sure to download the correct image file that matches the architecture of your mini PC. Most mini PCs use the x86 or x64 architecture, so ensure that the Android image you download is compatible with your device.
Once you have located the correct image file, click on the download link and save the file to a location on your computer with sufficient storage space. The download may take some time, depending on the size of the Android image and the speed of your internet connection.
After the download is complete, double-check the integrity of the downloaded image file by verifying its checksum or comparing its file size to the one mentioned on the website. This will ensure that the file was downloaded without any errors or corruption.
With the Android image downloaded and verified, you are now ready to proceed to the next step of preparing a bootable USB drive, which will be used to install Android on your mini PC.
Step 4: Prepare a Bootable USB Drive
Preparing a bootable USB drive is an essential step in the process of installing Android on your mini PC. This USB drive will contain the necessary files and software to initiate the installation process.
To prepare a bootable USB drive, you will need a USB flash drive with sufficient storage capacity. It’s recommended to use a USB drive with a capacity of at least 8GB to ensure that it can accommodate the Android image and any additional files.
You will also need a tool to create a bootable USB drive. There are several free tools available online, such as Rufus or Universal USB Installer, that you can use for this purpose. These tools provide a user-friendly interface that simplifies the process.
Start by connecting the USB drive to your computer and opening the bootable USB tool. Select the USB drive from the available options and choose the Android image you downloaded in the previous step as the source file.
Make sure to double-check the selected USB drive to avoid formatting the wrong drive and losing any important data. Formatting the drive will erase all existing data, so ensure that you have backed up any important files before proceeding.
After selecting the correct options, click on the “Create” or “Start” button to start the process of creating the bootable USB drive. The tool will extract the Android image and copy all the necessary files onto the USB drive.
Once the process is complete, you will have a bootable USB drive ready to install Android on your mini PC. Keep the USB drive safely as it will be used in the next steps of the installation process.
With the bootable USB drive prepared, you are now ready to move on to the next step of connecting the USB drive to your mini PC and entering the BIOS settings.
Step 5: Connect the USB Drive to the Mini PC
Now that you have prepared a bootable USB drive, it’s time to connect it to your mini PC to initiate the installation process. Follow the steps below to connect the USB drive:
- Make sure your mini PC is powered off.
- Locate the USB ports on your mini PC. Usually, they can be found on the front or back panel of the device.
- Insert the USB drive into one of the available USB ports. Ensure that it is inserted securely.
Once the USB drive is connected, you are ready to move on to the next step of entering the BIOS settings on your mini PC. The BIOS settings will allow you to specify the boot order and prioritize the USB drive as the primary boot device.
Note: If your mini PC doesn’t have USB ports, you may need to use an OTG (On-The-Go) adapter to connect the USB drive to the mini PC’s micro-USB port or any other available port as specified by the manufacturer.
It’s important to follow the specific instructions provided by the mini PC manufacturer for connecting USB drives or using adapters to ensure compatibility and a smooth installation process.
With the USB drive connected to your mini PC, proceed to the next step of entering the BIOS settings.
Step 6: Enter BIOS Settings
Entering the BIOS settings is an important step in order to change the boot priority and ensure that your mini PC boots from the USB drive. Follow the instructions below to enter the BIOS settings:
- Power on your mini PC.
- On the startup screen, you will see a message indicating which key(s) to press to enter the BIOS settings. Common keys are F2, Del, Esc, or F10. Press the specified key repeatedly, usually before the operating system’s logo appears.
- This will take you to the BIOS settings screen. The interface may vary depending on the manufacturer, but commonly, you will find a navigation menu on the screen.
- Use the arrow keys on your keyboard to navigate through the BIOS menu. Look for an option related to “Boot” or “Boot Priority”. It may also be named “Advanced BIOS Features” or something similar.
- Select the option that allows you to change the boot device priority. Usually, you will see a list of devices, and you can use the designated key (usually + or -) to change the order.
- Move the USB drive to the top of the boot priority list. This will ensure that the mini PC boots from the USB drive first.
- Once you have changed the boot priority, navigate to the “Save & Exit” option in the BIOS menu.
- Select “Save Changes and Exit” or a similar option to save the changes you made to the BIOS settings.
The mini PC will now restart and attempt to boot from the USB drive. This will start the installation process for Android on your mini PC.
Remember that the process of entering the BIOS settings may differ slightly depending on the mini PC manufacturer and model. Refer to the user manual or manufacturer’s website for specific instructions if needed.
In the next step, we will cover how to set the boot priority to USB, ensuring a successful installation of Android.
Step 7: Set Boot Priority to USB
After entering the BIOS settings, you need to set the boot priority to ensure that your mini PC boots from the USB drive. Follow the steps below to set the boot priority to USB:
- Navigate to the “Boot” or “Boot Priority” section in the BIOS settings. This section may also be named “Boot Options”, “Boot Order”, or something similar.
- Look for the option titled “Boot Priority” or “Boot Sequence”. Select it to access the boot device priority list.
- Using the arrow keys, move the USB drive to the top of the boot device priority list. This will designate the USB drive as the primary boot device.
- If there are other devices listed in the boot priority list, such as hard drives or optical drives, arrange them according to your preference.
- Save the changes made to the boot priority by selecting the “Save & Exit” or similar option.
- Confirm the changes and exit the BIOS settings. The mini PC will restart with the new boot priority settings.
With the boot priority set to the USB drive, your mini PC will now attempt to boot from the USB drive when restarted. This is crucial for initiating the installation process of Android on your mini PC.
It’s important to note that the steps for setting the boot priority may vary depending on the BIOS interface and manufacturer. Refer to your mini PC’s user manual or the manufacturer’s website for specific instructions if needed.
In the next step, we will discuss how to save and exit the BIOS settings to start the installation of Android on your mini PC.
Step 8: Save and Exit BIOS
Once you have set the boot priority to the USB drive, it’s important to save the changes you made in the BIOS settings and exit the BIOS interface. Saving and exiting will ensure that the new boot priority settings take effect and that the mini PC will attempt to boot from the USB drive. Follow the steps below to save and exit the BIOS:
- Make sure the USB drive is still connected to the mini PC.
- In the BIOS settings, look for an option labeled “Save & Exit” or a similar term. This option is typically located at the bottom or top-right corner of the screen.
- Select the “Save & Exit” option using the designated key or by pressing the Enter key.
- A prompt may appear asking you to confirm the changes and save them. Verify that the USB drive is listed as the first boot device.
- Choose the “Yes” or “OK” option to save the changes and exit the BIOS settings.
- The mini PC will now reboot and attempt to boot from the USB drive. This will initiate the installation process for Android on your mini PC.
It’s important to note that the steps for saving and exiting the BIOS may vary depending on the BIOS interface and manufacturer. If you encounter any difficulties or if the mini PC does not boot from the USB drive, consult the user manual or the manufacturer’s website for specific instructions.
In the next step, we will guide you through the process of installing Android on your mini PC.
Step 9: Install Android on Mini PC
After successfully setting the boot priority and saving the changes in the BIOS settings, your mini PC will now boot from the USB drive and start the installation process for Android. Follow the steps below to install Android on your mini PC:
- Wait for the mini PC to boot from the USB drive. This may take a few moments, as the system initiates the installation process.
- You will see a prompt on the screen asking you to confirm the installation of Android. Use the arrow keys on your keyboard to navigate and select the “Install” or “Start” option.
- The installation process will begin, and you may be prompted to select the language and agree to the terms and conditions of the Android operating system.
- Follow the on-screen instructions to proceed through the installation process. You may be asked to choose the installation location and customize certain settings according to your preferences.
- Be patient, as the installation process may take some time to complete. The mini PC will automatically restart as part of the installation process.
- Once the installation is finished, you will see a notification indicating that Android has been installed successfully on your mini PC.
- Remove the USB drive from the mini PC and restart the device. Android will now boot up on your mini PC.
- Follow the initial setup prompts, such as configuring Wi-Fi, signing in with your Google account, and customizing your Android settings.
- Once the setup is complete, you can begin exploring the Android operating system and enjoy the wide range of apps, features, and functionality it offers.
Congratulations! You have successfully installed Android on your mini PC. Now you can utilize your mini PC for various tasks, such as browsing the internet, streaming media, playing games, and much more.
If at any point during the installation process you encounter any issues or errors, refer to the documentation provided by the Android version or customized version you have installed, or seek online forums and communities for assistance.
Now that you have installed Android on your mini PC, you can make the most out of this versatile operating system and enjoy the benefits it offers.
Step 10: Reboot the Mini PC
After successfully installing Android on your mini PC, it’s important to reboot the device to confirm that everything is working correctly. Follow the steps below to reboot your mini PC:
- If your mini PC is still powered on, shut it down by clicking on the “Start” button and selecting “Shutdown” from the power options.
- Once the mini PC is completely powered off, press the power button to turn it back on.
- During the startup process, you will see the manufacturer’s logo and may have to press a specific key to access the boot menu. Refer to your mini PC’s manual or the manufacturer’s website for the appropriate key.
- In the boot menu, select the option to boot from the internal storage device, which contains the newly installed Android operating system.
- Press Enter or the specified key to confirm your selection and proceed with booting into Android.
After the reboot, your mini PC will start up with the newly installed Android operating system. You will be greeted with the Android interface, where you can set up your device, customize settings, and begin exploring the wide range of apps and features.
If the mini PC successfully boots into Android without any issues, it indicates that the installation was successful. Take some time to familiarize yourself with the Android environment and customize it according to your preferences.
In case you encounter any problems during the reboot process, refer to the manufacturer’s documentation or seek assistance from online resources and community forums.
Congratulations! You have successfully rebooted your mini PC with the newly installed Android operating system. Enjoy the benefits and flexibility of Android on your mini PC!
Conclusion
Congratulations! You have successfully installed Android on your mini PC, allowing you to enjoy the benefits of this versatile operating system on a larger screen. By following the step-by-step guide outlined in this article, you have transformed your mini PC into a powerful device capable of running various Android apps, games, and multimedia content.
Throughout the installation process, you learned the importance of checking the mini PC specifications, selecting the appropriate Android version, and downloading the Android image from a reliable source. You also discovered how to prepare a bootable USB drive and set the boot priority to ensure successful installation.
Remember, the specific steps may vary depending on the model and manufacturer of your mini PC, so always refer to the user manual or the manufacturer’s website for any specific instructions and compatibility requirements.
Now that you have Android installed on your mini PC, the possibilities are endless. You can use it for various tasks, including web browsing, media streaming, gaming, productivity, and much more. Explore the vast library of apps available on the Google Play Store and customize your Android experience to suit your needs.
Should you encounter any issues during the installation process or while using Android on your mini PC, don’t hesitate to seek assistance from online forums, user communities, or the official support channels of the Android version or customized version you have installed.
Enjoy your new Android-powered mini PC and make the most out of its capabilities. Whether for work or leisure, Android offers a seamless and user-friendly experience that will enhance your computing experience. Have fun exploring all the possibilities that Android has to offer!
Thank you for following this guide, and may your Android journey on your mini PC be filled with excitement and productivity!