Introduction
Have you ever wished that your Android phone could do more? Well, with a few simple steps, you can turn your Android phone into a mini PC and unlock a whole new world of possibilities. By connecting your phone to a monitor, adding a keyboard and mouse, and making a few customizations, you can transform your pocket-sized device into a powerful productivity tool.
Whether you want to work on documents, surf the web, or even stream movies on a larger screen, this guide will walk you through the process of turning your Android phone into a mini PC. The best part is that you don’t need any special equipment or technical expertise to get started. Just follow the steps outlined in this article, and you’ll be well on your way to experiencing the convenience and versatility of a mini PC.
In this guide, we will cover everything from choosing the right Android phone for your needs to configuring the display and audio settings. We’ll also explore the various productivity apps you can install to enhance your workflow and discuss how to connect to the internet and manage your files. Additionally, we’ll provide troubleshooting tips and tricks to help you overcome any obstacles along the way.
So, whether you have an old Android phone gathering dust in a drawer or you simply want to maximize the potential of your current device, get ready to embark on an exciting journey of transforming your Android phone into a mini PC.
Choosing the Right Android Phone
When it comes to turning your Android phone into a mini PC, one of the first considerations is choosing the right device. While any Android phone should technically work, there are a few key features you should keep in mind to ensure a seamless experience.
Firstly, you’ll want to look for a phone with a powerful processor and sufficient RAM. This will ensure that your mini PC can handle multitasking and run demanding apps without any lag. Additionally, a larger screen size will enhance your productivity and make it easier to work on documents or browse the web.
Storage capacity is another important factor to consider. Opt for a phone with ample storage or one that allows for expandable storage through a microSD card. This will give you plenty of room to install apps, store files, and keep your mini PC running smoothly.
Another feature to look out for is the availability of video output options. Some Android phones have built-in HDMI or USB-C ports, while others may require an adapter or docking station to connect to a monitor. Make sure to check the specifications of your phone to determine the best method for connecting it to a larger screen.
Last but not least, consider the battery life of the phone. Since you’ll be using it as a mini PC, it’s crucial to have a device that can keep up with your work or entertainment needs without constantly needing to be plugged in. Look for a phone with a long-lasting battery or consider investing in a portable power bank for extended use.
By taking these factors into account, you’ll be able to choose an Android phone that is well-suited for transforming into a mini PC. Remember, the more powerful and feature-packed your device is, the more potential you have for a seamless and efficient computing experience.
Preparing Your Android Phone
Before you can transform your Android phone into a mini PC, there are a few steps you need to take to prepare your device.
The first step is to ensure that your phone is running the latest version of the Android operating system. This can usually be checked and updated in the “Settings” menu under “System Updates” or a similar option. Keeping your phone’s software up to date not only improves performance but also ensures compatibility with the latest apps and features.
Next, it’s important to free up some storage space on your phone. Delete any unnecessary apps, files, or media to make room for the new applications and files you’ll be using on your mini PC. You can also transfer files to an external storage device or cloud storage service to create even more space.
Once you have decluttered your phone, it’s a good idea to back up your important data. Connect your phone to a computer and transfer any important files, photos, or documents to a safe location. This will ensure that your data is protected in case anything goes wrong during the transformation process.
After backing up your data, it’s time to optimize your device for the mini PC experience. Disable any unnecessary background processes or apps that might consume resources and slow down your phone. You can do this by going to the “Settings” menu and navigating to the “Apps” or “Application Manager” section. Disable or uninstall any apps that you don’t need for productivity purposes.
Lastly, it’s a good idea to invest in a sturdy stand or phone holder. This will allow you to position your phone in an upright position to comfortably view and interact with the screen. You can find a variety of stands and holders designed specifically for smartphones online or in electronics stores.
By following these steps, you will ensure that your Android phone is prepared and optimized for its new role as a mini PC. Now that your phone is ready, it’s time to move on to the next steps and start connecting it to a monitor and setting up peripherals.
Connecting Your Android Phone to a Monitor
Once you have prepared your Android phone, the next step in turning it into a mini PC is connecting it to a monitor. This will allow you to utilize a larger screen for enhanced productivity and viewing experience.
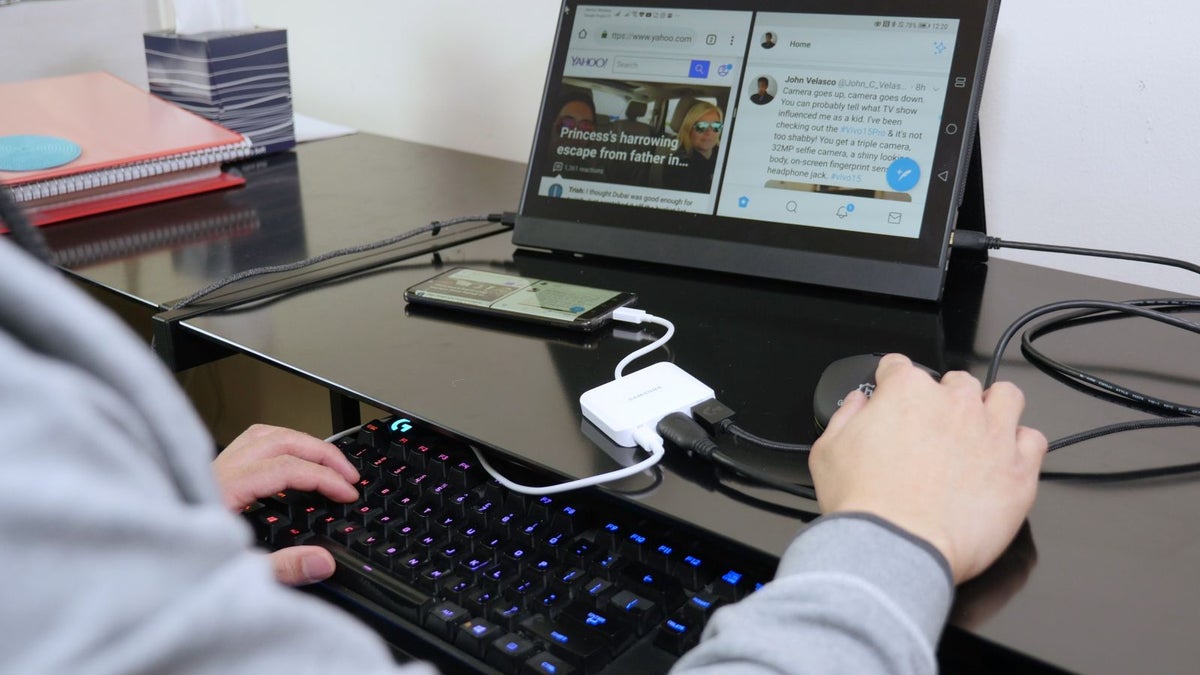
The method you use to connect your phone to a monitor depends on the available ports and connections on both your phone and the monitor. One common option is to use an HDMI cable. If your phone has a built-in HDMI port or supports HDMI output through a USB-C or micro-USB port, simply connect one end of the HDMI cable to your phone and the other end to the monitor. Switch the input source on the monitor to the appropriate HDMI port, and you should see your phone’s screen display on the monitor.
If your phone does not have an HDMI port or you prefer a wireless connection, you can utilize technologies such as Miracast or Chromecast. Miracast allows you to mirror your phone’s screen wirelessly to a Miracast-enabled monitor or TV. Simply enable screen mirroring on your phone and select the Miracast option on the monitor. Chromecast, on the other hand, requires a separate dongle that plugs into the HDMI port of the monitor and connects to your phone through a Wi-Fi network. You can then cast content from your phone to the monitor using compatible apps.
Another option to consider is using a docking station or adapter. Some Android phones support docking stations that connect to a monitor and provide additional ports and connectors, such as USB and Ethernet. Alternatively, you can use an adapter that converts your phone’s port (USB-C, micro-USB, etc.) into an HDMI or DisplayPort output, allowing you to connect to a monitor with the corresponding input.
Once your phone is connected to the monitor, you may need to adjust display settings to optimize the output. Access the display settings on your phone and adjust the resolution, orientation, and other settings as desired. This will ensure that the content on your phone is properly scaled and displayed on the monitor.
With your Android phone successfully connected to a monitor, you can now enjoy the benefits of a larger screen and make the most of your mini PC setup. In the next section, we’ll discuss how to set up a keyboard and mouse for a complete computing experience.
Setting Up a Keyboard and Mouse
Now that you have connected your Android phone to a monitor, it’s time to set up a keyboard and mouse to further enhance your mini PC experience. While your phone’s touchscreen is sufficient for many tasks, using a physical keyboard and mouse can significantly improve productivity and ease of use.
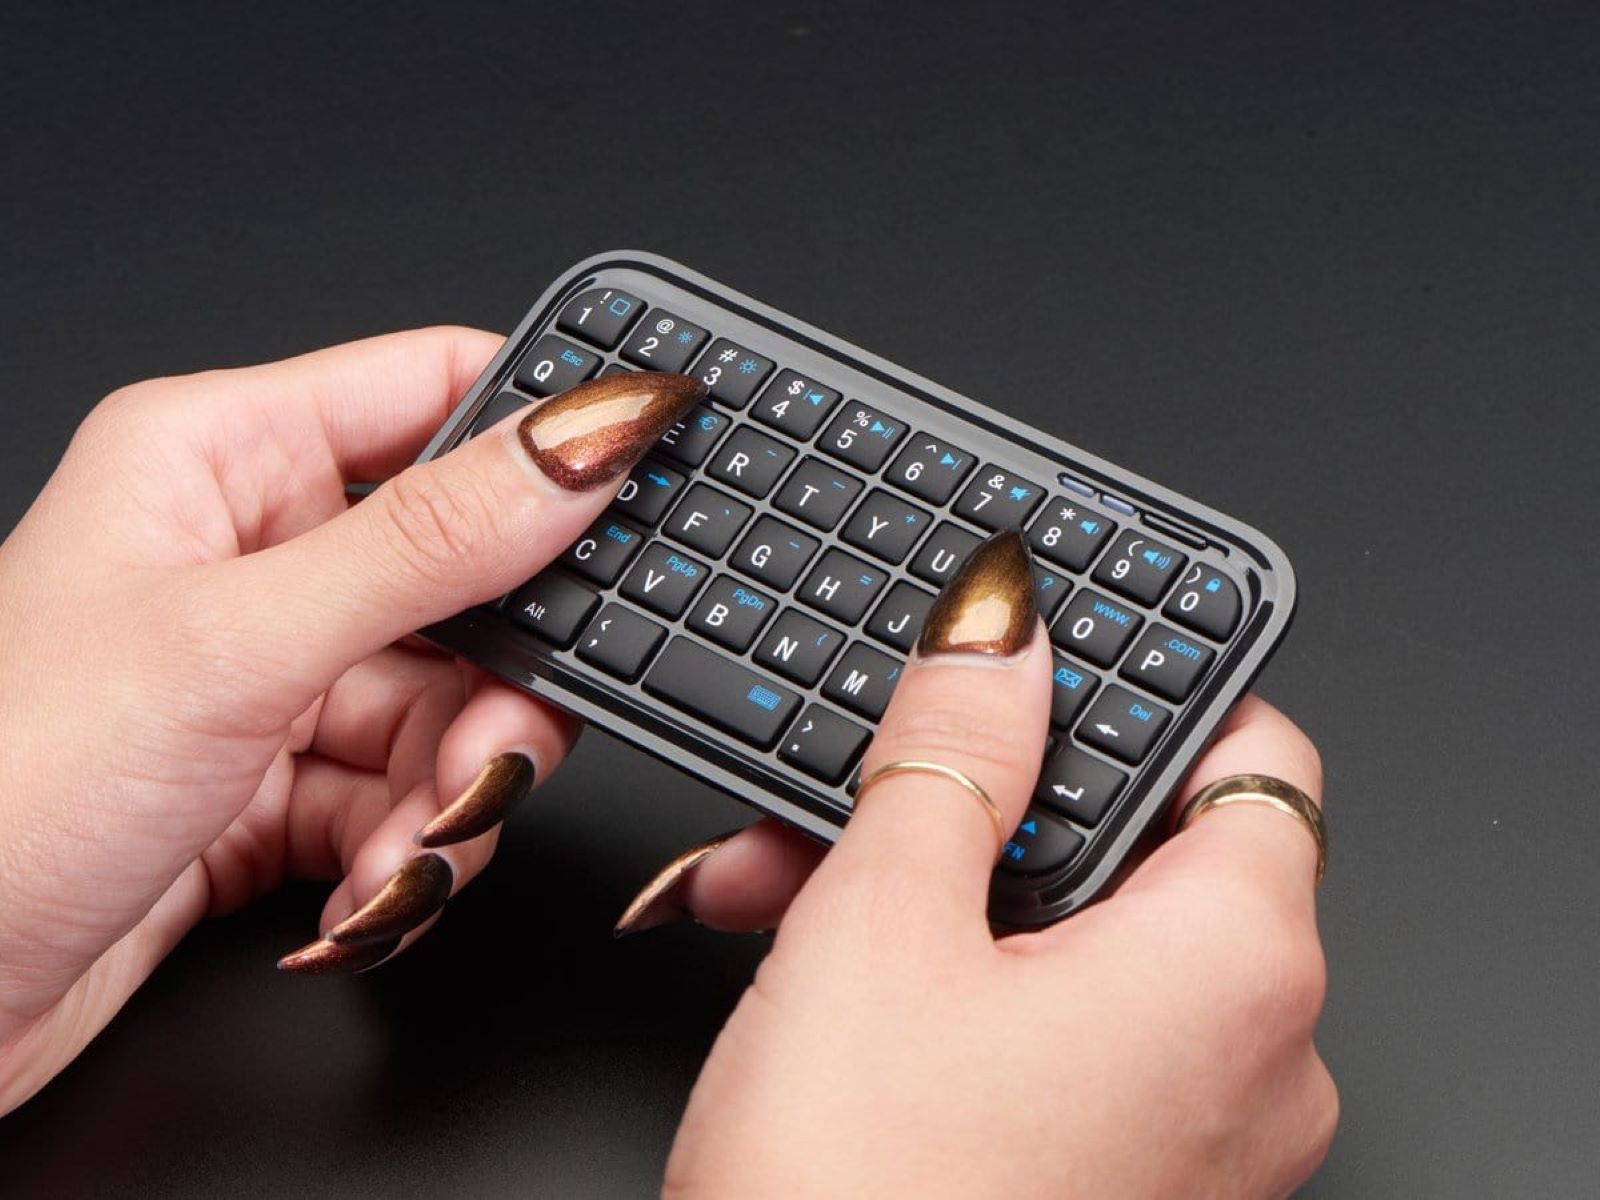
Firstly, let’s consider the keyboard. You have several options when it comes to choosing a keyboard for your Android mini PC. If you prefer a traditional typing experience, you can connect a USB or Bluetooth keyboard directly to your phone. Many Android phones support USB OTG (On-The-Go) functionality, allowing you to connect external USB devices like keyboards. Simply connect the keyboard to your phone using a USB OTG adapter, and it should be recognized instantly.
Alternatively, you can opt for a wireless Bluetooth keyboard. These keyboards offer the convenience of a cable-free setup and can be easily paired with your phone. Make sure your Android phone has Bluetooth capability and follow the manufacturer’s instructions to pair the keyboard.
Next, let’s discuss the mouse. Similar to the keyboard, you can choose between a wired or wireless mouse. For a wired setup, connect the mouse to your phone using a USB OTG adapter. The phone should detect the mouse, and you’ll be able to use it for navigation and interaction on the monitor.
If you prefer a wireless solution, look for a Bluetooth mouse that can be paired with your phone. Enable Bluetooth on your Android phone, put the mouse in pairing mode, and follow the on-screen instructions to complete the process.
Once your keyboard and mouse are connected, you may need to adjust some settings on your Android phone. Go to the “Settings” menu, navigate to the “Language & Input” or “Keyboard & Mouse” section, and customize the settings as desired. You can choose your preferred keyboard layout, set up keyboard shortcuts, adjust mouse sensitivity, and more.
Note: Some Android phones offer built-in trackpad functionality, which allows you to use the phone’s touchscreen as a virtual trackpad when a mouse is connected. Check if your phone has this feature and enable it if desired.
With a keyboard and mouse in place, you now have a complete and comfortable computing setup using your Android mini PC. In the next section, we’ll explore how to configure display and audio settings for an optimal multimedia experience.
Configuring Display and Audio Settings
Once you have connected your Android phone to a monitor and set up a keyboard and mouse, it’s time to configure the display and audio settings to ensure an optimal multimedia experience on your mini PC.
Firstly, let’s focus on the display settings. Access the display settings on your Android phone by going to the “Settings” menu and selecting “Display” or a similar option. Here, you can adjust the screen resolution, orientation, brightness, and other visual aspects to suit your preferences. It’s recommended to set the resolution to the native resolution supported by your monitor for the best image quality.
If your monitor supports it, you can enable the “Screen Zoom” or “Display Scaling” feature to adjust the size of text and icons, making them more comfortable to read and interact with. Experiment with different scaling options until you find the one that suits you best.
Now let’s move on to audio settings. If you want to enjoy a better audio experience, you can connect external speakers or headphones to your Android phone. Plug them into the headphone jack or use a USB or Bluetooth connection depending on the available options. Once connected, go to the sound settings on your phone and ensure that the audio output is set to the connected device.
If your monitor has built-in speakers, you can also choose to use them for audio playback. Adjust the volume settings on both your Android phone and the monitor to achieve the desired sound level. Additionally, you can explore the sound enhancement options available in the settings to further enhance the audio quality to your liking.
For a more immersive multimedia experience, consider connecting your Android phone to a home theater system or soundbar that supports HDMI or Bluetooth connections. This will provide a powerful audio output that complements the visual display on your monitor.
Lastly, it’s worth mentioning that some Android phones offer a “Desktop Mode” or “Multitasking View” feature that transforms the interface into a more desktop-like experience when connected to a larger screen. Check if your phone has this feature and enable it for a more streamlined and efficient workflow.
By configuring the display and audio settings on your Android mini PC, you can tailor the experience to your personal preferences and enjoy a visually and acoustically rich environment for work or entertainment purposes. In the next section, we’ll explore the various productivity apps you can install to make the most of your Android mini PC setup.
Installing Android Apps for Productivity
Now that your Android phone is transformed into a mini PC, it’s time to enhance your productivity by installing the right apps. The Google Play Store offers a wide range of apps that can help you work more efficiently and stay organized. Here, we will explore some essential productivity apps to consider installing on your Android mini PC.
1. Office Suite: A reliable office suite app like Microsoft Office or Google Docs will allow you to create, edit, and view documents, spreadsheets, and presentations. You can easily work on files stored on your phone, cloud storage, or even collaborate with others in real-time.
2. Note-Taking App: Install a note-taking app like Evernote or Google Keep to jot down quick ideas, create to-do lists, and organize your thoughts. These apps often come with features like reminders, tags, and synchronization across devices.
3. Cloud Storage App: Install a cloud storage app like Google Drive, Dropbox, or OneDrive to access and save your files from anywhere. This allows you to seamlessly synchronize your documents, photos, and other files between your Android mini PC and other devices.
4. Email Client: A dedicated email client app like Gmail or Microsoft Outlook will help you stay on top of your emails and manage multiple accounts efficiently. These apps often come with advanced features, such as email filtering, snoozing, and push notifications.
5. Task Manager: Use a task management app like Todoist or Any.do to create and organize your tasks, set reminders, and track your progress. These apps offer features like due dates, subtasks, and collaboration options to help you stay productive.
6. File Manager: Install a file manager app like Solid Explorer or ES File Explorer to easily navigate and manage your files on your Android mini PC. These apps allow you to copy, move, delete, and rename files, as well as access files on external storage devices.
7. Password Manager: For enhanced security and convenience, consider using a password manager app like LastPass or Dashlane. These apps store and encrypt your passwords, making it easy to log in to your accounts securely across devices.
8. Communication Tools: Install communication apps like Slack or Microsoft Teams to stay connected with your team, schedule meetings, and collaborate on projects. These apps often offer messaging, video conferencing, and file sharing capabilities.
These are just a few examples of the numerous productivity apps available for Android. Explore the Google Play Store to find apps that suit your specific needs and preferences. Remember to read reviews, check ratings, and consider the app’s features, user interface, and compatibility with your Android phone before installing.
By installing the right apps, you can transform your Android mini PC into a powerful productivity tool that helps you get things done efficiently. In the next section, we’ll discuss how to connect your Android mini PC to the internet for seamless online access.
Connecting to the Internet
Connecting your Android mini PC to the internet is crucial for accessing online resources, staying connected, and maximizing the functionality of your device. Fortunately, there are several ways to connect your Android phone to the internet.
1. Wi-Fi Connection: The most common and convenient method is to connect to a Wi-Fi network. Navigate to the Wi-Fi settings on your Android phone by going to the “Settings” menu and selecting “Wi-Fi” or a similar option. Enable Wi-Fi and select the desired network from the available options. Enter the password if required, and your device will connect to the network.
2. Mobile Hotspot: If you don’t have access to a Wi-Fi network, you can use your Android phone as a mobile hotspot. This allows you to share your phone’s internet connection with other devices. Enable the “Mobile Hotspot” or “Tethering” option in the network settings of your Android phone. Set a password for the hotspot, and other devices can connect to it through Wi-Fi.
3. Mobile Data: If your Android phone has a cellular data plan, you can also connect to the internet using mobile data. Enable the “Mobile Data” option in the network settings of your phone. Keep in mind that using mobile data may incur additional charges depending on your mobile plan and internet usage.
4. Ethernet Connection: Some Android phones support Ethernet connectivity through a USB or Ethernet adapter. Check if your phone has this capability and connect it to a wired network using an appropriate adapter. This is especially useful when Wi-Fi is not available or you require a more stable and faster internet connection.
Once your Android phone is connected to the internet, you can browse websites, download apps and files, stream media, and perform various online activities just like you would on a traditional PC. Make sure to keep your phone’s software and apps updated to ensure optimal performance and security.
If you encounter any connectivity issues, ensure that you have a stable internet connection, check your network settings, and restart your phone if necessary. It’s also a good idea to position your phone closer to the Wi-Fi router or hotspot for a stronger signal.
With your Android mini PC seamlessly connected to the internet, you can make the most of online resources, collaborate with others, and access cloud-based services. In the next section, we’ll discuss how to use file manager and storage options on your Android mini PC.
Using File Manager and Storage Options
Managing files and storage is an essential aspect of using your Android mini PC effectively. With the help of a file manager app and various storage options, you can easily organize, access, and transfer files on your device.
Start by using a file manager app such as Solid Explorer, ES File Explorer, or Google Files. These apps provide a user-friendly interface to navigate through the files and folders on your Android mini PC.
You can use the file manager to copy, move, delete, and rename files and folders. It also allows you to create new folders to keep your files organized. Furthermore, some file managers offer advanced features like cloud storage integration, FTP client, and zip/unzip capabilities for added convenience.
When it comes to storage options, your Android mini PC offers various choices to suit your needs:
1. Internal Storage: Android phones typically come with internal storage where you can save apps, files, and media. You can access the internal storage through the file manager and organize your content accordingly.
2. External Storage: Many Android phones support expandable storage via a microSD card. Insert a compatible microSD card into the designated slot and use the file manager app to move files to the external storage. This allows you to free up space on your phone’s internal storage and store a larger number of files.
3. Cloud Storage: Take advantage of cloud storage services like Google Drive, Dropbox, or OneDrive. Install the corresponding apps on your Android mini PC to access your files stored in the cloud. This allows for seamless synchronization and accessibility across multiple devices.
4. USB OTG: If your Android phone supports USB On-The-Go (OTG) functionality, you can connect external USB drives or other USB devices directly to your phone using an OTG adapter. This offers additional storage options and the ability to transfer files between different devices.
Remember to keep your storage organized by creating folders and categorizing files based on their type or purpose. Regularly delete any unnecessary files or move them to long-term storage to free up space and maintain optimal performance.
Additionally, consider backing up your important files to an external hard drive, cloud storage, or a computer. This ensures that you have a secure copy of your data in case of accidental loss or device failure.
With an efficient file manager and utilizing different storage options, you can keep your files organized, manage storage effectively, and access your important data with ease on your Android mini PC.
In the next section, we’ll discuss how to customize your Android mini PC to personalize the user experience and enhance productivity.
Customizing Your Android Mini PC
One of the great advantages of using an Android mini PC is the ability to customize the user interface and personalize your device according to your preferences. Here are some ways to customize your Android mini PC and make it truly your own.
1. Launcher: Install a custom launcher from the Google Play Store to modify the home screen, app icons, and overall look and feel of your device. Launchers like Nova Launcher, Microsoft Launcher, or Evie Launcher offer a wide range of customization options and themes to choose from.
2. Widgets: Take advantage of widgets to display useful information or perform specific actions right on your home screen. Widgets can provide quick access to weather updates, calendar events, music playback controls, and more. Long-press on the home screen and select “Widgets” to add and customize them.
3. Wallpapers: Set your favorite wallpaper to personalize the background of your Android mini PC. Choose from the pre-installed wallpapers or download high-quality images from the internet. Long-press on the home screen, select “Wallpapers,” and choose the desired image.
4. Themes and Icon Packs: Many launchers and third-party apps offer themes and icon packs to change the appearance of your device’s user interface. Browse through the available options on the Google Play Store and apply the desired theme or icon pack to give your Android mini PC a fresh new look.
5. Notification Settings: Customize the way notifications appear and behave on your device. Access the notification settings in the “Settings” menu and configure notification preferences for individual apps, such as the notification tone, priority, and silent mode.
6. Keyboard and Input Settings: Modify the keyboard settings to enhance your typing experience. Adjust settings like autocorrect, gesture typing, keypress sound, and vibration. You can also install and select alternative keyboards from the Google Play Store to find the one that suits you best.
7. Accessibility Options: Explore the accessibility settings to enable features that improve usability and cater to specific needs. Options such as larger text, color inversion, and custom gestures can enhance the usability and accessibility of your Android mini PC.
8. App Shortcuts and Gestures: Many launchers and apps offer shortcuts and gesture controls that allow you to perform actions quickly. For example, you can set up a gesture to launch your favorite app or assign shortcuts to specific actions like taking a screenshot or opening settings.
9. Live Wallpapers: Spice up your Android mini PC with dynamic and interactive live wallpapers. These wallpapers can add movement and visual interest to your home screen, creating a more engaging and vibrant experience. Choose from the selection available in the Google Play Store.
Experiment with different customization options to find the look and feel that resonates with your personal style and preferences. Customizing your Android mini PC not only offers visual appeal but also enhances the overall user experience and productivity.
In the next section, we’ll provide some troubleshooting tips and tricks to help you overcome common challenges and ensure the smooth functioning of your Android mini PC.
Troubleshooting Tips and Tricks
While using your Android mini PC, you may encounter some common issues or face challenges that can hinder your experience. Here are some troubleshooting tips and tricks to help you overcome these obstacles:
1. Performance Issues: If you experience slow performance or lag, try closing unnecessary apps running in the background. Clear the cache of your applications or restart your device to free up memory and improve performance.
2. Connectivity Problems: If you’re facing Wi-Fi connectivity issues, make sure you’re within range of the network and that the Wi-Fi password is correct. Restart your router, toggle Wi-Fi on and off, or forget and reconnect to the network to resolve any connection problems.
3. Screen Rotation Issues: If the screen does not rotate when you tilt your device, check if the screen rotation lock is enabled. Swipe down from the top of the screen to access the quick settings panel and toggle the rotation lock icon to enable or disable it.
4. App Crashes: If an app crashes frequently, try updating it to the latest version from the Google Play Store. If the issue persists, clear the app’s cache or data through the app settings or uninstall and reinstall the app to resolve any compatibility or performance problems.
5. Insufficient Storage: If you’re running out of storage space, review and delete unnecessary files or move them to external storage or cloud storage. Uninstall unused apps or use a storage management app to identify and clear out large files or unnecessary data.
6. Battery Drain: To optimize battery life, reduce screen brightness, disable background app refresh, and close unused apps. Use battery optimization settings in the “Settings” menu to extend battery life and enable battery-saving modes when needed.
7. Audio Issues: If you’re facing audio problems while using external speakers or headphones, ensure that they are properly connected. Adjust the volume levels on your Android mini PC and the connected device, and check the sound settings to ensure the correct audio output is selected.
8. System Updates: Regularly check for system updates on your Android mini PC and install them when available. These updates often contain bug fixes, performance improvements, and security patches that can resolve various issues and optimize the device’s functionality.
9. Factory Reset: If you’re still experiencing persistent issues or your Android mini PC is not functioning as expected, you can try performing a factory reset. This will restore your device to its original settings and erase all data, so make sure to back up your important files before proceeding.
Remember to consult the user manual or documentation specific to your Android mini PC for troubleshooting advice particular to your device. Additionally, online forums and support communities can be valuable resources for finding solutions to specific issues or seeking assistance from fellow users.
By utilizing these troubleshooting tips and tricks, you can resolve common problems, improve performance, and ensure a smooth and enjoyable experience while using your Android mini PC.
Conclusion
Congratulations! You have now learned how to turn your Android phone into a mini PC, unlocking a world of possibilities for productivity and entertainment. By following the steps outlined in this guide, you can maximize the potential of your device and transform it into a powerful tool for work, creativity, and leisure.
We started by choosing the right Android phone, considering factors such as processor power, RAM, storage capacity, and video output options. Then, we prepared the phone by ensuring it was running the latest software, freeing up storage space, backing up important data, and optimizing its performance.
Next, we explored how to connect your Android phone to a monitor, set up a keyboard and mouse for a comfortable desktop experience, and configure display and audio settings for optimal multimedia output.
We discussed the importance of installing productivity apps such as office suites, note-taking apps, cloud storage apps, and communication tools to enhance your workflow. Alongside this, we explored various methods to connect your Android mini PC to the internet for seamless online access.
Managing files and storage options was another crucial aspect we covered, emphasizing the use of file manager apps and exploring internal storage, external storage, cloud storage, and USB OTG options.
Customizing your Android mini PC was highlighted as a way to personalize your device and make it truly your own. We discussed launcher options, widgets, wallpapers, themes, and icon packs that allow you to create a unique user interface.
Lastly, we provided troubleshooting tips and tricks to help you overcome common challenges, ensuring a smooth functioning of your Android mini PC.
With this knowledge in hand, you are well-equipped to unleash the full potential of your Android phone and elevate it to the status of a mini PC. Enjoy the convenience, functionality, and versatility that this transformation brings, and make the most of your Android mini PC in your day-to-day activities.


