Introduction
Welcome to the step-by-step guide on how to install a Solid State Drive (SSD) on an eMachines ET1331G-03W computer. Upgrading your computer’s storage to an SSD can greatly improve its speed and overall performance, allowing for faster boot times, quicker application launches, and improved file transfer speeds.
SSDs are significantly faster and more reliable than traditional hard drives, as they use flash memory technology instead of spinning disks. This makes them an excellent choice for those looking to breathe new life into their aging computer.
In this guide, we will walk you through the process of installing an SSD on an eMachines ET1331G-03W computer. We will cover everything from gathering the necessary tools and materials to completing the installation and formatting the drive. By following these steps, you’ll be able to enjoy the benefits of an SSD and enhance your computer’s performance.
Before we begin, it’s important to note that opening your computer and performing hardware upgrades may void your warranty. Ensure that your warranty has expired or consult the manufacturer’s guidelines before proceeding with the installation. Additionally, make sure to adequately ground yourself to prevent any damage from static electricity.
Let’s dive in and get started on upgrading your eMachines ET1331G-03W computer with a blazing-fast Solid State Drive!
Step 1: Gather the necessary tools and materials
Before you begin the installation process, make sure you have all the required tools and materials. Having everything on hand will ensure a smooth and efficient installation. Here’s what you’ll need:
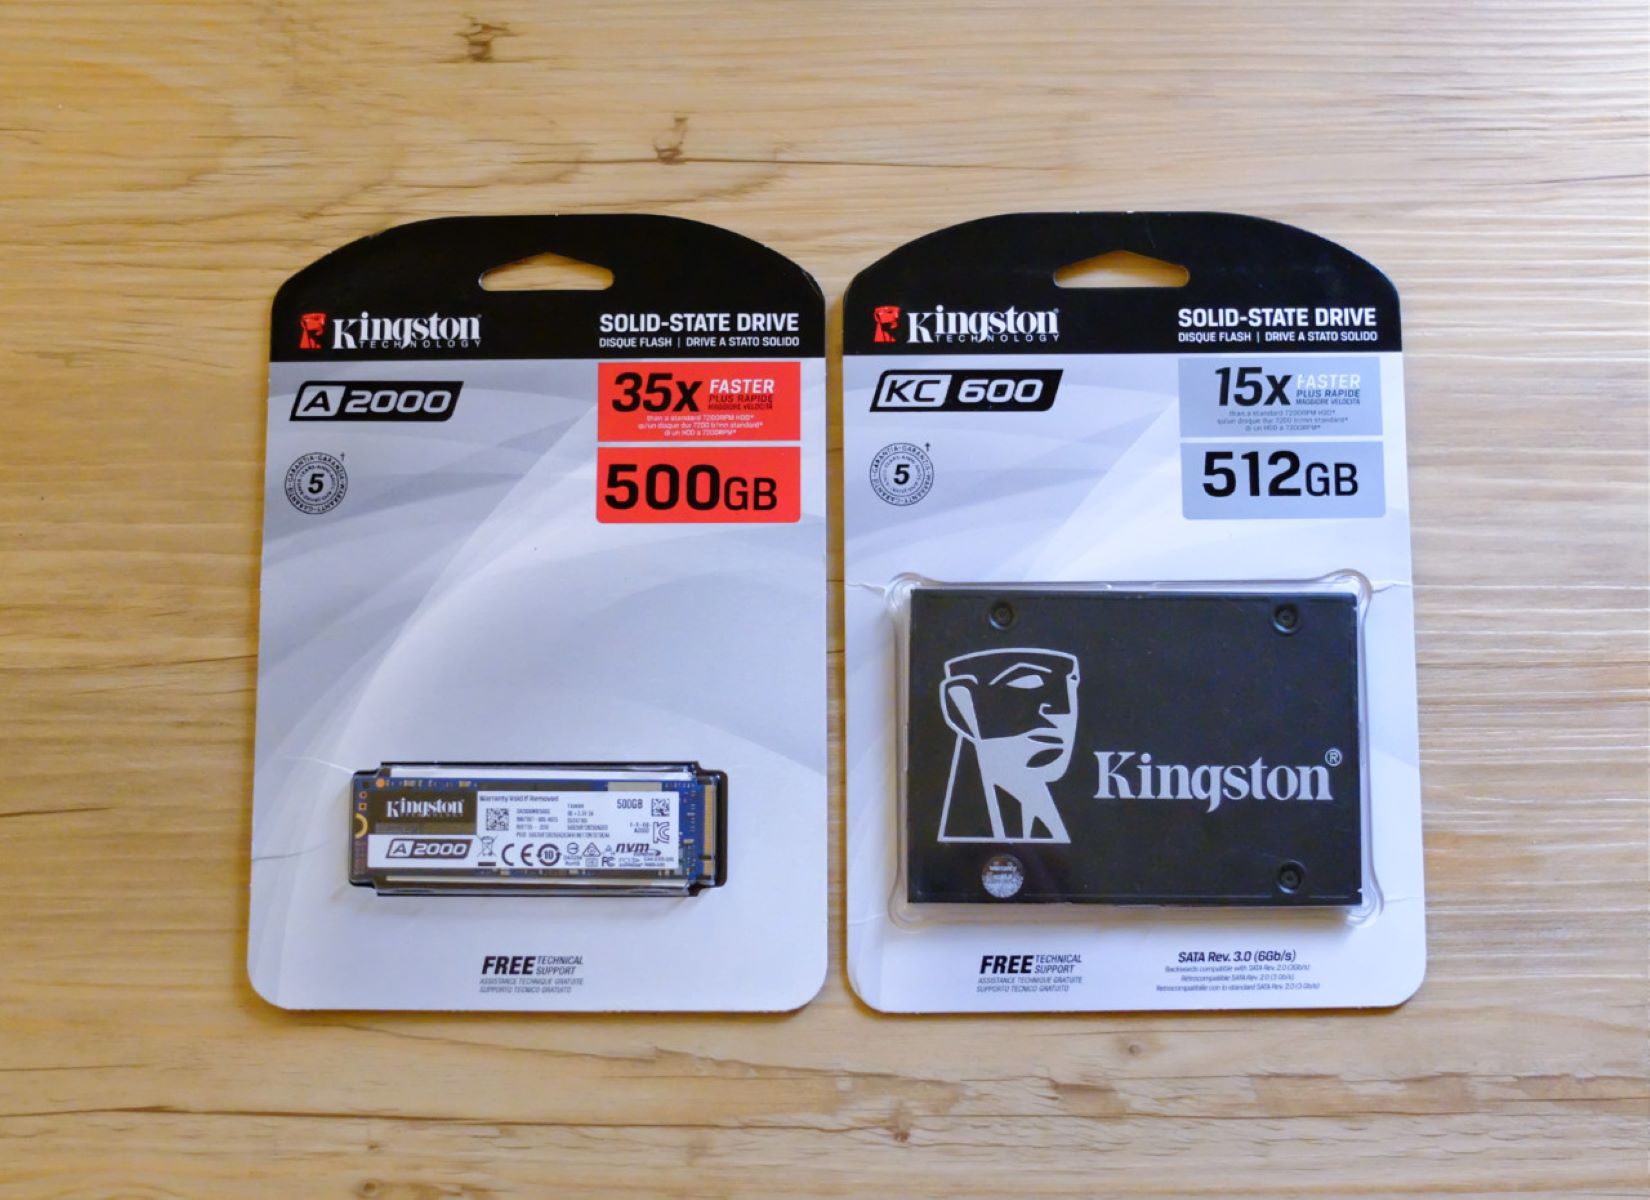
- SSD: Purchase a compatible SSD with the desired storage capacity. Consider factors such as speed, brand, and warranty when selecting the SSD.
- Screwdriver: Prepare a Phillips screwdriver of the appropriate size to remove and install screws on your computer’s case.
- Static wrist strap: Protect your computer and its components from static electricity by wearing a wrist strap or grounding yourself before handling any internal parts.
- External storage: To transfer your data from the existing hard drive to the new SSD, have an external storage device, such as a USB flash drive or portable hard drive, ready for the backup process.
- Data transfer software: Obtain data transfer software, such as a cloning or backup program, to transfer your existing files and operating system to the new SSD.
- User manuals or online resources: Gather any user manuals or online resources specific to your eMachines ET1331G-03W computer model. These resources will provide guidance and support throughout the installation process.
Ensure that you have all the necessary tools and materials before proceeding to the next step. This will save you time and prevent any unnecessary interruptions during the installation process. Once you’ve gathered everything, you’re ready to move on to the next step: backing up your data.
Step 2: Backup your data
Before proceeding with the installation, it is crucial to backup all your important data, including documents, photos, videos, and any other files you want to preserve. This step ensures that you don’t lose any valuable information during the installation process. Here’s how you can back up your data:
- Select a backup method: Determine the most suitable backup method for your needs. You can choose to manually copy your files to an external storage device, use a cloud-based backup service, or utilize data transfer software to clone your existing hard drive to the new SSD.
- Backup your files: Follow the instructions provided by your chosen backup method to transfer your files to a secure location. Ensure that all your important data is safely stored before proceeding to the next step.
- Verify your backup: Double-check your backup to ensure that all the necessary files have been successfully transferred. Take the time to go through your backed-up data and make sure everything is complete and accessible.
By backing up your data before the installation, you mitigate any risks of losing valuable files during the process. It provides a safety net in case of any unforeseen circumstances or errors that may occur during the SSD installation.
Once you have successfully backed up your data and confirmed its integrity, you’re ready to proceed to the next step: shutting down your computer and disconnecting all cables.
Step 3: Shut down your computer and disconnect all cables
Before you begin working on your computer’s internal components, it’s important to power it down and disconnect all cables. Following these steps ensures your safety and prevents any damage to the computer. Here’s what you need to do:
- Save your work and close all open applications: Make sure to save any work in progress and close all open applications before shutting down your computer. This ensures that you don’t lose any unsaved data during the process.
- Shut down your computer: Click on the “Start” button and choose the “Shut Down” option from the menu. Wait for the computer to completely shut down before proceeding to the next step.
- Disconnect all cables: Unplug all the cables connected to your computer, including the power cable, monitor cable, keyboard, mouse, and any other peripherals. This will prevent any accidental electrical shocks and allow for easy access to the internal components.
- Ground yourself: Static electricity can damage sensitive computer components. To prevent this, ground yourself by either using a grounding strap or by touching a metal object such as the computer case before proceeding.
By following these steps, you ensure that your computer is safely powered down and disconnected from any power source. This eliminates the risk of electrical shocks and protects your computer’s internal components from any damage.
With your computer safely shut down and cables disconnected, you’re now ready to move on to the next step: opening the computer case to access the internal components.
Step 4: Open the computer case
Now that your computer is powered down and disconnected, it’s time to open the computer case to access the internal components. Opening the case will allow you to install the Solid State Drive (SSD) properly. Follow these steps to open the computer case:
- Locate the computer case screws: Look for the screws securing the computer case. These screws are usually located on the back or side panel of the case. Use a Phillips screwdriver to remove them.
- Remove the side panel: Carefully slide off or lift the side panel of the computer case. This will give you access to the internal components, including the hard drive bay where you will install the SSD.
- Set aside the side panel: Keep the removed side panel in a safe place where it won’t get damaged. You may need it later to close the computer case after installing the SSD.
- Ground yourself: Before touching any internal components, remember to ground yourself again to discharge any static electricity and prevent damage to the computer’s delicate parts.
By following these steps, you can safely open your computer case and gain access to the internal components. Take care not to force any parts or apply excessive pressure during this process to avoid any unnecessary damage to the computer case or the components inside.
With the computer case open, you’re now ready to proceed to the next step: locating the hard drive bay where the SSD will be installed.
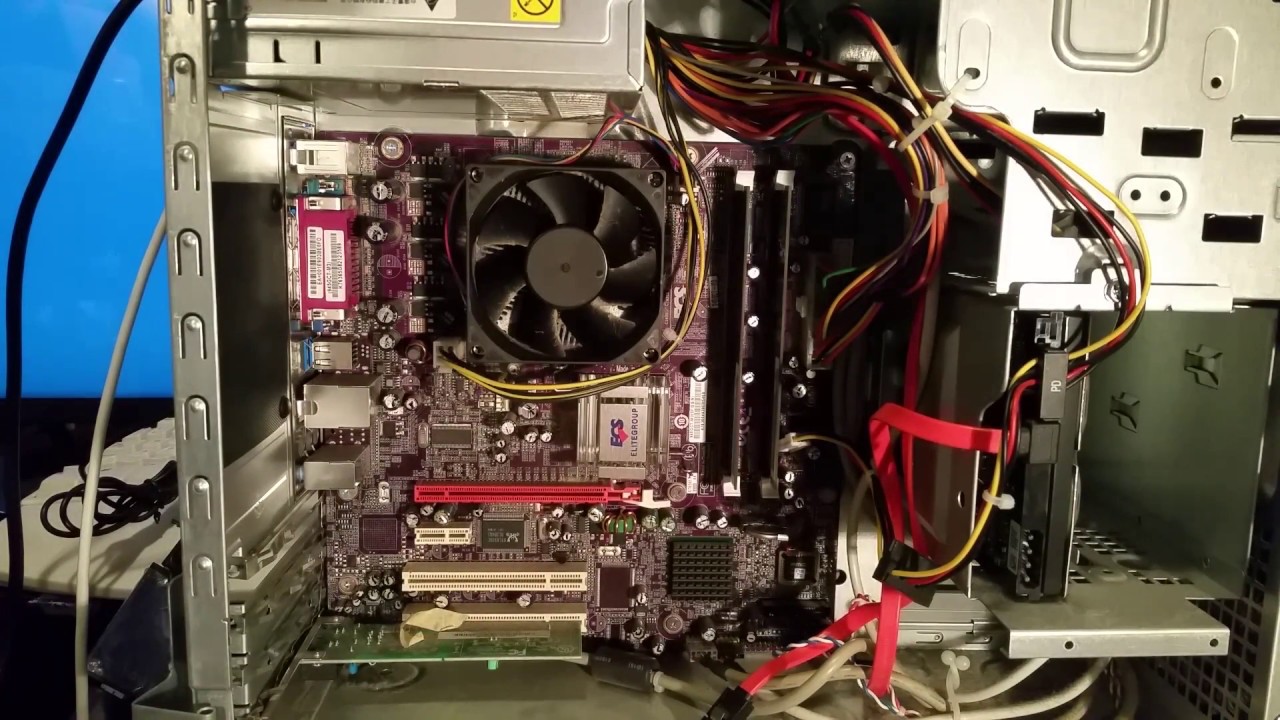
Step 5: Locate the hard drive bay
After opening the computer case, your next step is to locate the hard drive bay where the Solid State Drive (SSD) will be installed. The hard drive bay is the designated area inside the computer case where the storage drives are typically placed. Follow these steps to find the hard drive bay:
- Consult the computer manual: If you have the computer manual or documentation available, refer to it for specific instructions on locating the hard drive bay. The manual will provide detailed information on the internal layout of your computer and the location of the drive bays.
- Look for drive bays: Inside the computer case, look for the drive bays, which are usually located toward the front or bottom of the case. These bays are typically rectangular-shaped slots where the storage drives are installed. They may be labeled or color-coded for easy identification.
- Identify the existing hard drive: If your computer already has a hard drive installed, visually identify it within the drive bay. This will help you differentiate it from the new SSD you will be installing.
It’s worth noting that the placement and design of the drive bays may vary depending on the computer model. If you’re having trouble locating the hard drive bay, refer to the manufacturer’s documentation or seek assistance from online resources or forums specific to your computer model.
Once you have successfully located the hard drive bay, you’re ready to proceed to the next step: removing the existing hard drive (if applicable) to make way for the SSD installation.
Step 6: Remove the existing hard drive
If your computer already has a hard drive installed, you’ll need to remove it before proceeding with the installation of the Solid State Drive (SSD). Removing the existing hard drive allows you to make room for the new SSD. Follow these steps to remove the existing hard drive:
- Identify the connectors: Take note of the connectors attached to the existing hard drive. There are typically two connectors: the power connector and the data connector. The power connector supplies power to the drive, while the data connector allows data transfer between the drive and the motherboard.
- Disconnect the cables: Gently detach the power connector and the data connector from the existing hard drive. Carefully grip the connectors and pull straight outwards to avoid bending or damaging the pins.
- Remove mounting screws: Locate the screws securing the existing hard drive to the drive bay or mounting bracket. Use a Phillips screwdriver to remove these screws. Keep them in a safe place as you may need them for securing the new SSD later.
- Slide out the hard drive: Once the screws are removed, slide the existing hard drive out of the drive bay. Be mindful of any brackets or trays that may be holding the drive in place, and gently maneuver the drive until it is completely free.
- Set aside the removed hard drive: Keep the removed hard drive in a safe place in case you need to access or retrieve any data from it in the future.
By following these steps, you can safely remove the existing hard drive from your computer, making way for the installation of the new Solid State Drive (SSD). Remember to handle all components with care and avoid applying excessive force to prevent any accidental damage.
With the existing hard drive removed, you’re now ready to proceed to the next step: inserting the Solid State Drive into the drive bay.
Step 7: Insert the Solid State Drive into the bay
With the existing hard drive removed, it’s time to insert the new Solid State Drive (SSD) into the designated drive bay. Properly inserting the SSD ensures a secure and stable connection. Follow these steps to insert the SSD into the bay:
- Orient the SSD: Take a close look at the SSD, and identify the connectors on one side. These connectors will align with the corresponding connectors in the drive bay. Orient the SSD accordingly to ensure a proper fit.
- Align the SSD with the drive bay: Carefully position the SSD in the drive bay, aligning the connectors on the SSD with the connectors in the drive bay. Ensure that the SSD is in the correct orientation and that it fits properly within the bay.
- Slide the SSD into the bay: Gently push the SSD into the drive bay until it is fully inserted. Use even pressure and avoid forcing the SSD to prevent any damage to the connectors or the drive itself.
- Secure the SSD: If there are mounting holes or brackets in the drive bay, use the screws that were removed from the previous hard drive to secure the SSD in place. Tighten the screws gently, ensuring that the SSD does not move or wiggle once secured.
It’s important to note that different computer models may have varying methods for securing the SSD in the drive bay. Some may require additional brackets or trays, while others may have tool-less installation methods. Refer to your computer’s documentation or online resources for specific instructions for your model if needed.
With the SSD securely inserted into the drive bay, you’re now ready to proceed to the next step: connecting the necessary cables to the SSD.
Step 8: Secure the solid state drive in place
Now that the Solid State Drive (SSD) is inserted into the drive bay, it’s time to secure it in place to ensure a stable and secure connection. Securing the SSD properly will prevent any accidental movement or disconnection during use. Follow these steps to secure the SSD:
- Check for mounting holes or brackets: Inspect the drive bay and SSD to determine if there are mounting holes or brackets available for securing the SSD. Some computer cases may have specific brackets or trays to hold the SSD, while others may require screws directly into the drive bay.
- Align the mounting holes: If your computer case has mounting holes, align them with the corresponding holes on the SSD. Make sure the SSD is positioned correctly and fits securely within the drive bay.
- Insert and tighten screws: If your computer case utilizes screws to secure the SSD, insert the screws into the mounting holes and tighten them gently. Avoid over-tightening to prevent damage to the SSD or the drive bay. Ensure that the SSD is held firmly in place without excessive movement.
- Use brackets or trays: If your computer case includes specialized brackets or trays for securing the SSD, carefully insert the SSD into the designated slot. Follow the manufacturer’s instructions for securing the SSD within the brackets or trays.
It’s crucial to ensure that the SSD is securely fastened in place to prevent any accidental dislodging or movement. A loose connection can potentially cause data loss or interfere with the performance of your computer. Take your time to properly secure the SSD before proceeding to the next step.
With the SSD securely in place, you’re now ready to move on to the next step: connecting the necessary cables to the SSD.
Step 9: Connect the cables to the Solid State Drive
With the Solid State Drive (SSD) securely in place, the next step is to connect the necessary cables to ensure proper functionality. The cables will provide power and allow data transfer between the SSD and other components of your computer. Follow these steps to connect the cables to the SSD:
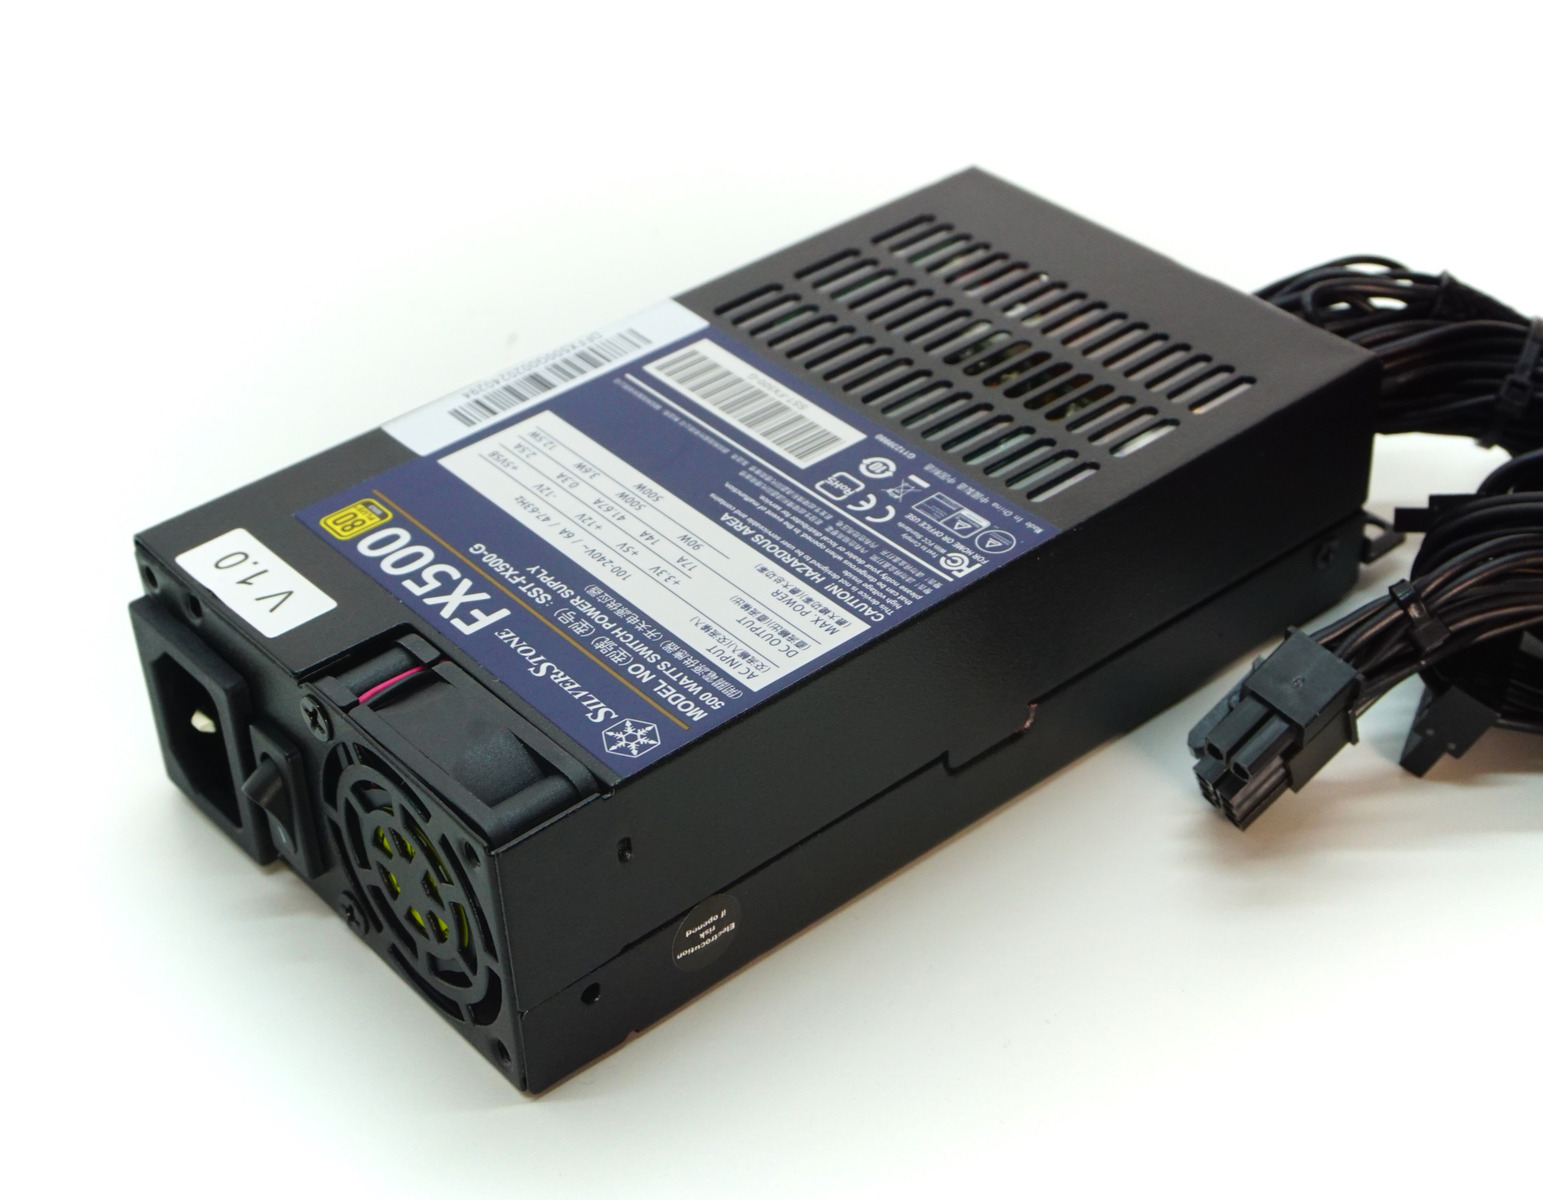
- Locate the power and data connectors: Identify the power connector and the data connector on the SSD. The power connector is usually a smaller, rectangular connector, while the data connector is typically a wider, L-shaped connector.
- Connect the power cable: Take the power cable from your power supply unit and plug it into the power connector on the SSD. Ensure that the connector matches the shape and orientation of the SSD’s power connector and insert it firmly to establish a secure connection.
- Connect the data cable: Take a SATA data cable and connect one end to the data connector on the SSD. The other end of the cable should be connected to a SATA port on your motherboard. Align the connectors properly and insert them firmly to ensure a stable connection.
- Verify cable connections: Double-check the power and data cable connections to ensure they are properly seated and securely attached. Ensure that the cables are not twisted or strained, as this can cause connectivity issues or damage the connectors.
It’s worth noting that the exact cable connections may vary depending on your computer’s configuration and the availability of specific ports. Refer to your computer’s documentation or online resources for specific instructions if needed.
Once you have connected the necessary cables to the SSD, you’re ready to move on to the next step: closing the computer case.
Step 10: Close the computer case
Now that the Solid State Drive (SSD) is properly connected and secured, it’s time to close the computer case. Closing the case ensures that all internal components are protected and that the computer is ready for operation. Follow these steps to close the computer case:
- Check for any loose cables: Before closing the case, ensure that all cables connected to the SSD and other components are neatly organized and secured. Make sure no cables are obstructing any fans or other moving parts inside the case.
- Align the case panels: Carefully align the side panel(s) of the computer case with the edges of the case itself. The panel should fit flush with the case, with no gaps or misalignment.
- Slide the panel into place: Slide the side panel(s) into the case, ensuring that it is properly seated and aligned. Apply gentle pressure to slide the panel until it is fully closed and secure.
- Tighten the screws: If your case uses screws to secure the side panel(s), use a Phillips screwdriver to tighten them. Be cautious not to overtighten the screws to avoid damaging the case or stripping the screw threads.
Once the computer case is closed, make sure that all screws are properly tightened and that the panels are securely in place. Give the case a gentle shake to ensure that nothing is loose or rattling inside.
With the computer case closed and all components properly secured, you’re ready to power up your computer and proceed with formatting the newly installed Solid State Drive (SSD).
Step 11: Power up your computer and format the Solid State Drive
With the computer case closed, it’s time to power up your computer and format the newly installed Solid State Drive (SSD). Formatting the SSD prepares it for use, allowing the operating system to recognize and utilize the drive. Follow these steps to power up your computer and format the SSD:
- Reconnect all cables: Double-check that all cables, including power and data cables, are securely connected to the SSD and other components. Ensure that everything is properly seated and snugly connected.
- Plug in the power cable: Connect the power cable to the power supply unit, then plug it into a power outlet. Make sure the power cable is inserted securely at both ends.
- Power on the computer: Press the power button on your computer to turn it on. You should see the computer’s startup screen and hear the fans spinning. Wait for the computer to boot up and reach the operating system desktop.
- Open the Disk Management tool: Once you are on the desktop, right-click the Start button and select “Disk Management” from the menu. This will open the Disk Management utility, which allows you to manage and format your drives.
- Identify the Solid State Drive: In the Disk Management window, locate the newly installed SSD. It should be listed as a new, unformatted drive. Take note of the disk number assigned to the SSD, as you will need it for the next step.
- Format the SSD: Right-click on the SSD in the Disk Management window and select “Format” from the context menu. Follow the prompts to choose a file system, allocation unit size, and volume label. You can typically select NTFS as the file system and leave the other settings as their default values.
- Confirm the format: After selecting the format options, click “OK” or “Finish” to confirm and start the formatting process. Formatting may take some time depending on the size of the SSD. Once the process is complete, the SSD will be ready for use.
It’s important to note that formatting the SSD will erase any existing data, so make sure you have backed up all your important files before proceeding.
With the SSD formatted and ready for use, you have successfully installed and prepared the drive for optimal performance in your eMachines ET1331G-03W computer. Enjoy the improved speed and responsiveness that the SSD will bring to your computing experience!
Conclusion
Congratulations! You have successfully completed the installation of a Solid State Drive (SSD) on your eMachines ET1331G-03W computer. By following the step-by-step guide, you have upgraded your computer’s storage to a faster and more reliable solution, enhancing its overall performance and responsiveness.
Throughout the installation process, you gathered the necessary tools and materials, backed up your data to prevent any potential loss, shut down the computer, opened the case, located the hard drive bay, removed the existing hard drive (if applicable), inserted and secured the SSD in the drive bay, connected the necessary cables, closed the computer case, and finally, powered up the computer and formatted the SSD to make it ready for use.
With the SSD installed and formatted, you can now experience faster boot times, quicker application launches, and improved file transfer speeds. The SSD’s flash memory technology provides reliability and durability, maximizing the lifespan of your storage solution.
Remember to keep the existing hard drive in a safe place and refer to your computer’s documentation or online resources for guidance on how to properly dispose of it or repurpose it, if desired.
We hope this guide has been helpful in guiding you through the installation process. Enjoy the performance boost and increased productivity that your new SSD will bring to your eMachines ET1331G-03W computer!