Introduction
Installing 80mm PC case fans is a great way to improve airflow and maintain optimal temperature levels in your computer system. Whether you’re a gaming enthusiast, a content creator, or simply someone who uses their computer for everyday tasks, having efficient cooling is crucial to ensure the longevity of your hardware components.
In this guide, we will walk you through the step-by-step process of installing 80mm PC case fans. These fans are commonly used due to their compact size and compatibility with most PC cases. By following these instructions, you will be able to equip your computer with additional cooling power, promoting better performance and reducing the risk of overheating.
Before proceeding with the installation process, it’s important to gather the necessary tools and materials. This will ensure a smooth and hassle-free experience. You will need a Phillips screwdriver, 80mm PC case fans (make sure to check the specifications of your computer case for compatibility), and thermal paste (optional, but recommended for improved heat transfer).
Proper ventilation is crucial for optimal performance and longevity of your hardware. Installing additional fans can help to dissipate heat generated by internal components such as the CPU and the graphics card. Without adequate airflow, these components can overheat, leading to decreased performance, system instability, and even permanent damage. By installing 80mm PC case fans, you’ll actively cool these components, extending their lifespan and keeping your system running smoothly.
Now that we’ve covered the importance of proper cooling and the benefits of installing additional fans, let’s dive into the step-by-step process of installing 80mm PC case fans. Follow the instructions carefully, and soon you’ll be enjoying improved airflow and better thermal management in your computer system.
Tools and materials needed
Before you can begin the installation process, it’s important to gather the necessary tools and materials. Here’s a list of what you’ll need:
- Phillips screwdriver: This will be used to remove and secure screws during the installation process.
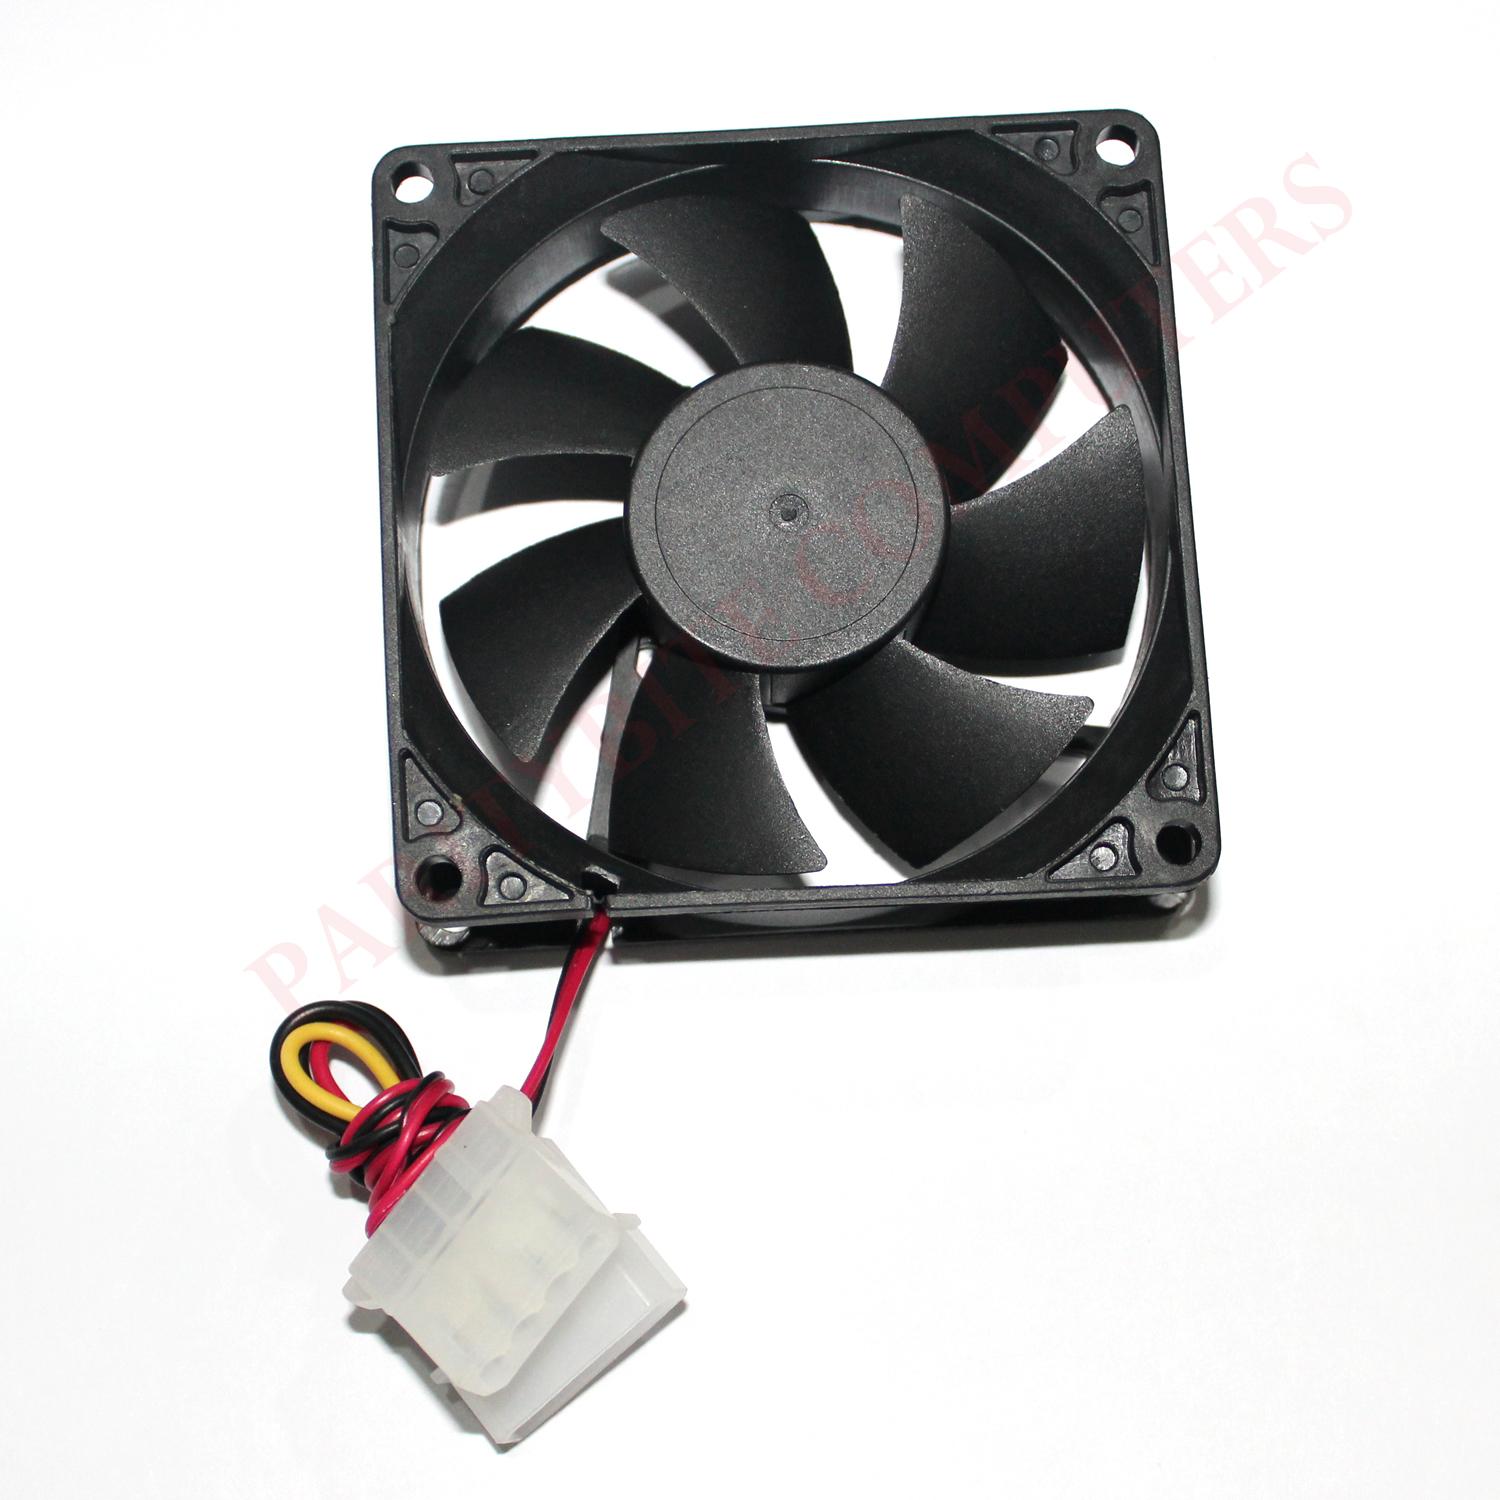
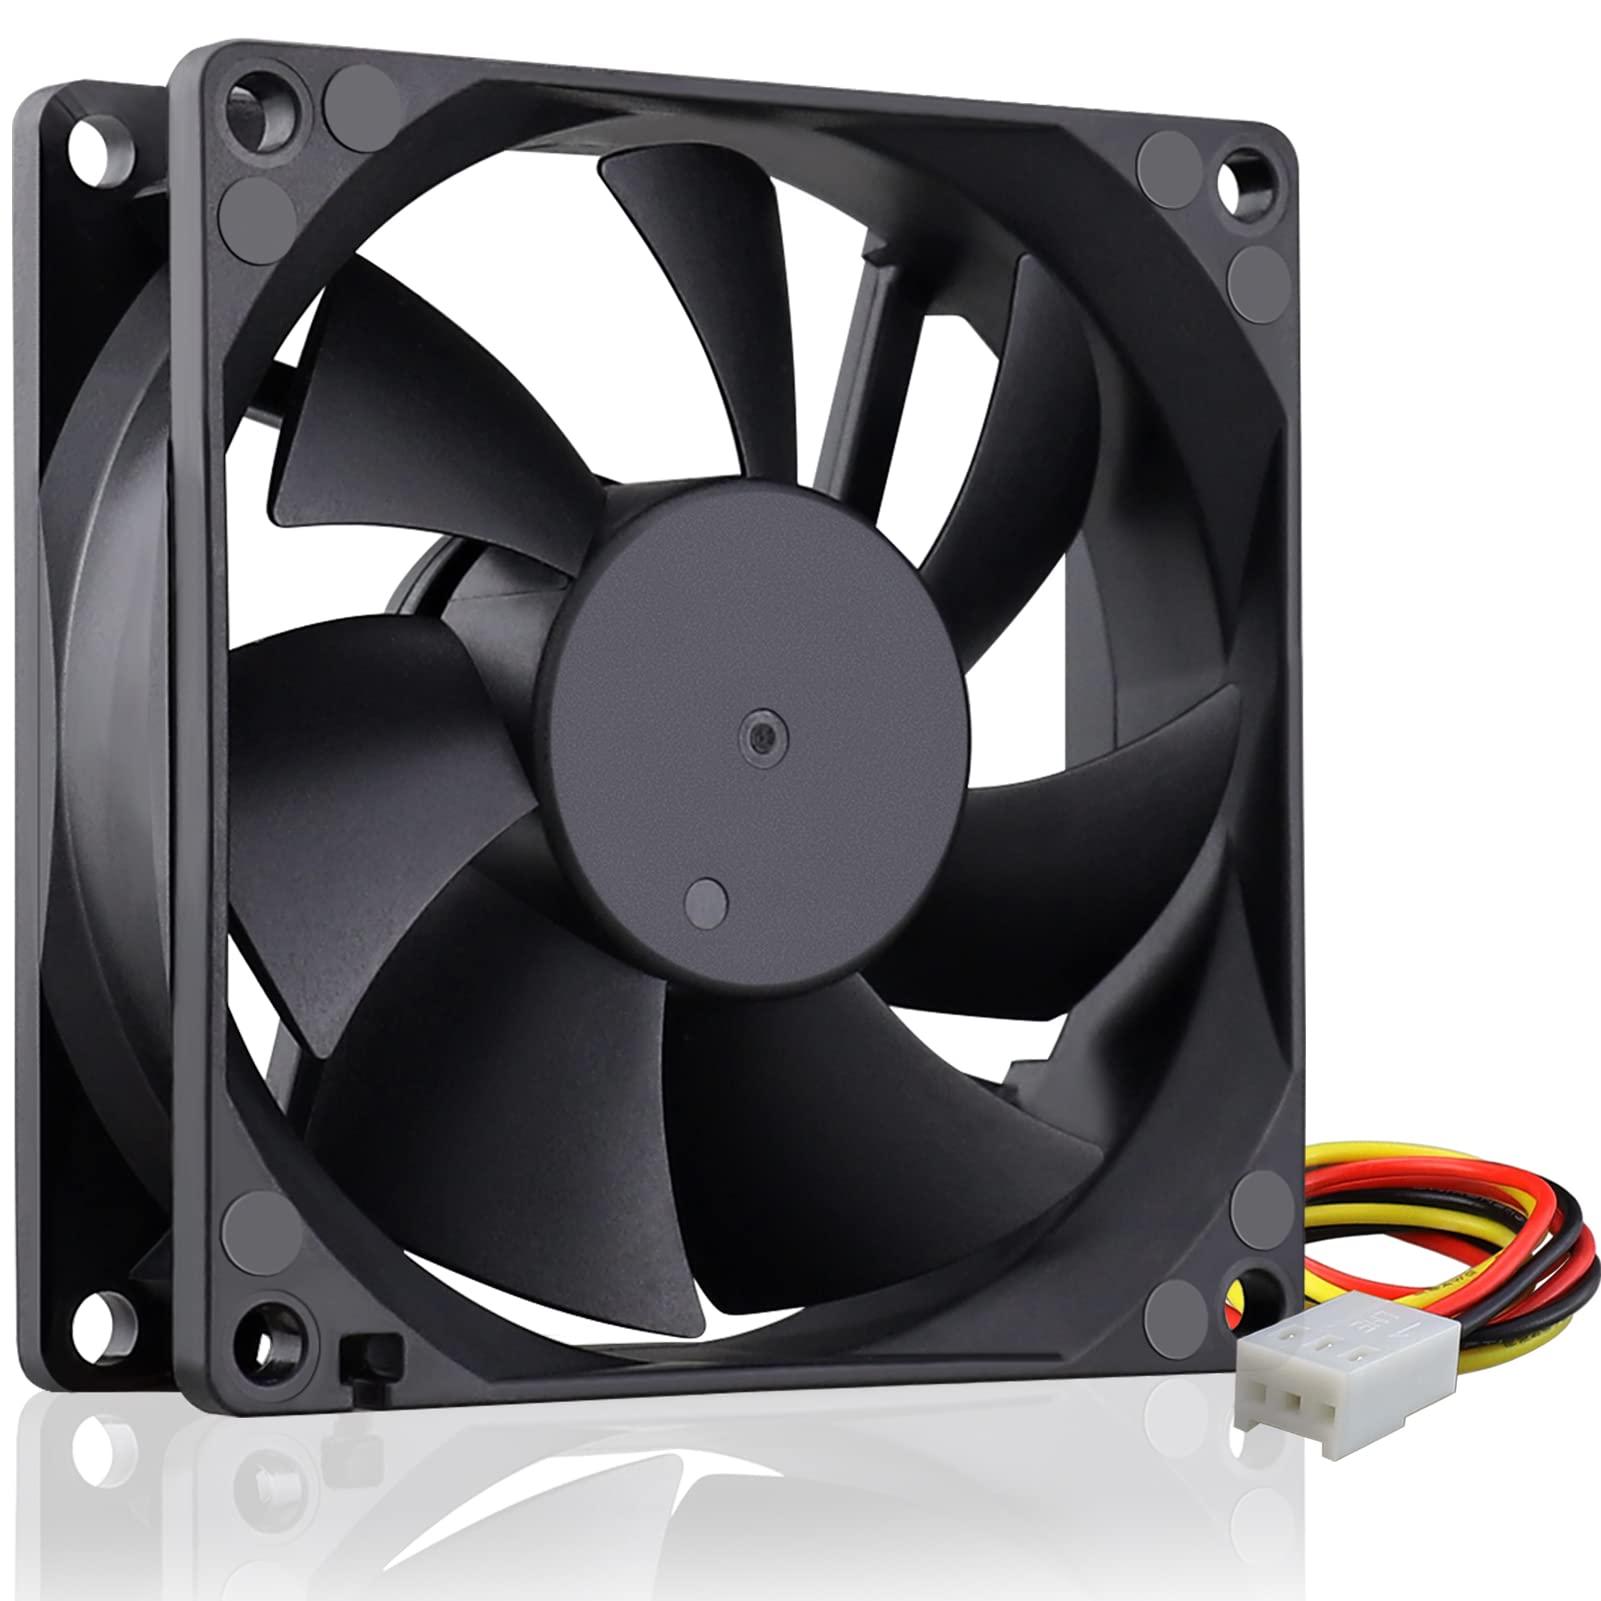
- 80mm PC case fans: Make sure to check the specifications of your computer case for compatibility.
- Thermal paste (optional): While not required, using thermal paste can help improve heat transfer between the CPU and the fan.
By having these tools and materials ready, you’ll be well-equipped to proceed with the installation process smoothly and efficiently. The Phillips screwdriver is a must-have, as it will be used to remove the screws securing the side panel of your PC case, as well as the screws needed to mount the 80mm PC case fans. Make sure you have the correct size screwdriver for the screws on your case.
Choosing the right 80mm PC case fans is also important. Check your computer case specifications to ensure compatibility with 80mm fans. Consider factors such as airflow, noise level, and RPM (revolutions per minute) when selecting the fans. You can often find this information on the packaging or the manufacturer’s website. Selecting high-quality fans can contribute to better cooling performance and reduced noise levels.
While not necessary, using thermal paste can help improve the transfer of heat between the CPU and the fan. Thermal paste is a compound that fills tiny gaps and imperfections between the CPU and the fan, allowing for better heat conductivity. If you decide to use thermal paste, make sure to apply a small amount (about the size of a grain of rice) on the center of the CPU before securing the fan in place.
Having these tools and materials ready will make the installation process much easier. Now that you’re equipped with everything you need, let’s move on to the step-by-step instructions for installing 80mm PC case fans in your computer system.
Step 1: Preparation
Before you begin the installation process, it’s important to take a few moments to prepare your workspace and ensure your safety. Follow these preparation steps:
- Make sure your computer is powered off: Shut down your computer and disconnect it from the power source. This will prevent any potential electrical mishaps during the installation process.
- Find a clear workspace: Choose a well-lit and spacious area to work on your computer. Clear any clutter and ensure you have enough room to maneuver around the computer case.
- Ground yourself: Electrostatic discharge (ESD) can damage sensitive computer components. To prevent this, touch a grounded metal object, such as a doorknob or a metal part of your computer case, to discharge any static electricity before handling the components.
Preparing your workspace and taking precautions like grounding yourself will help protect your computer components and ensure a smooth installation process. By shutting down your computer and disconnecting it from the power source, you eliminate the risk of accidental damage due to electrical currents. Additionally, having a clear workspace will minimize the chances of misplacing screws or other small parts.
Grounding yourself is essential to prevent static electricity from damaging sensitive components. When you touch a grounded metal object, any built-up static electricity is discharged harmlessly. This step is particularly important when handling the 80mm PC case fans, as they can be sensitive to static electricity. By grounding yourself, you reduce the risk of damaging the fans or other internal components of your computer.
Now that you’ve completed the preparation steps, you’re ready to move on to the next step: locating the ideal installation location for the 80mm PC case fans. Stay tuned for Step 2: Locate fan installation location.
Step 2: Locate fan installation location
Locating the right installation location for your 80mm PC case fans is crucial for optimal airflow and effective cooling. Here’s how to find the ideal placement for your fans:
- Refer to your computer case manual: Consult the manual or manufacturer’s website of your computer case to determine the recommended fan installation spots. Some cases come with pre-designated fan mounts to ensure proper ventilation.
- Consider the airflow direction: It’s important to understand the airflow dynamics inside your computer case. Most cases have one or more intake areas in the front and exhaust areas in the rear. Installing the fans in these areas will help facilitate a smooth flow of fresh air into the case and the expulsion of hot air.
- Identify areas with poor airflow: If your case doesn’t have pre-designated fan mounts or if you want to improve existing airflow, identify areas with poor ventilation. Look for spaces where heat tends to build up, such as around the CPU, graphics card, or hard drives.
Referencing your computer case manual is crucial because every case is designed differently, and the optimal fan installation locations can vary. The manual will provide detailed information on the specific spots where fans can be mounted and the best configurations for airflow.
Considering the airflow direction is also important. By placing intake fans in areas where fresh air can easily enter the case and exhaust fans in areas where hot air can easily escape, you can create an efficient cooling system. This will help prevent the accumulation of heat in critical components, leading to better performance and thermal management.
Identifying areas with poor airflow can be done by observing where heat tends to accumulate. Components like the CPU, graphics card, and hard drives generate a significant amount of heat, and ensuring proper ventilation around them is essential. Installing additional fans in these areas can help dissipate the heat more effectively, reducing the risk of overheating and potential performance issues.
Taking the time to locate the ideal placement for your 80mm PC case fans will ensure efficient airflow and effective cooling for your computer system. Once you have determined the installation spots, you can proceed to the next step: removing the side panel of your PC case.
Step 3: Remove the side panel of your PC case
Removing the side panel of your PC case is the next step in installing your 80mm PC case fans. This will give you access to the internal components of your computer and allow for easy installation. Follow these instructions to remove the side panel:
- Power off your computer: Ensure your computer is shut down and disconnected from the power source. This is vital for your safety and to prevent any potential damage to your hardware.
- Locate the screws securing the side panel: Depending on your computer case, the screws may be located on the back or side of the case. Use a Phillips screwdriver to carefully remove these screws. Set the screws aside in a safe place as you will need them later.
- Slide or lift off the side panel: Once the screws are removed, gently slide or lift off the side panel from the chassis. Some cases may have a latch or locking mechanism that needs to be released prior to removing the panel.
Removing the side panel of your PC case provides easy access to the internal components, allowing for a seamless installation process. It’s important to power off your computer and disconnect it from the power source before proceeding. This ensures your safety and prevents any potential damage due to electrical currents.
Locate the screws holding the side panel in place. These screws may be located at the back of the case or on the side. Carefully remove them using a Phillips screwdriver. Be sure to keep track of the screws as you will need them later to secure the side panel back in place.
Once the screws are removed, you can either slide or lift off the side panel from the chassis. Some cases may have a latch or locking mechanism that needs to be released before the panel can be removed. Take your time and handle the panel with care to avoid any accidental damage.
With the side panel removed, you now have easy access to the interior of your computer case. This allows you to proceed to the next step: identifying the mounting holes for your 80mm PC case fans.
Step 4: Identify the mounting holes
Identifying the mounting holes is a crucial step in the installation process of your 80mm PC case fans. These holes will provide a secure and stable attachment point for the fans. Follow these steps to identify the mounting holes:
- Examine your computer case: Carefully inspect the interior of your computer case to locate the designated mounting holes for the fans. These holes are usually located at the front, rear, or side panels of the case.
- Refer to your computer case manual: If you are having trouble locating the mounting holes, refer to the manual or visit the manufacturer’s website for specific instructions. Every case is designed differently, and the locations of the mounting holes can vary.
- Count the number of mounting holes: Once you have found the mounting holes, count the number of holes available. This will determine the number of fans you can install and the configuration you can achieve.
Carefully examine your computer case to locate the designated mounting holes for the fans. These holes are usually strategically placed to ensure proper airflow and cooling. Common locations include the front panel, rear panel, and side panel. Take your time and ensure you have a clear view of the interior to identify these holes.
If you are having difficulty finding the mounting holes, consult your computer case manual or visit the manufacturer’s website for detailed instructions. Every case has its own unique design, and the locations of the mounting holes can vary. The manual or online resources will provide you with the specific information you need to locate these holes correctly.
Once you have located the mounting holes, count the number of holes available. This will help you determine the number of fans you can install and the configuration options you have. Keep in mind that the number of mounting holes may vary depending on the size and design of your computer case. It’s important to plan accordingly and ensure you have the correct number of fans for your desired cooling setup.
By identifying the mounting holes, you are one step closer to installing your 80mm PC case fans. These holes will serve as the anchor points for the fans, providing a secure and stable attachment. Now that you have located the mounting holes, it’s time to move on to the next step: aligning the fan with the mounting holes.
Step 5: Align the fan with the mounting holes
Aligning the fan with the mounting holes is a crucial step in the installation process of your 80mm PC case fans. Proper alignment ensures a secure and stable attachment, allowing for efficient airflow and cooling. Follow these steps to align the fan with the mounting holes:
- Hold the fan in the desired position: Take the 80mm PC case fan and hold it in the location where you want to install it. Visualize how the fan will align with the mounting holes and consider the direction of airflow.
- Ensure proper orientation: Pay attention to the orientation of the fan. Most PC case fans have an arrow or label indicating the direction of airflow. Make sure this aligns with the desired airflow direction in your computer case.
- Align the screw holes of the fan with the mounting holes: Carefully align the screw holes on the fan frame with the corresponding mounting holes in your computer case. Take your time to ensure a precise alignment to ensure a secure fit.
Hold the 80mm PC case fan in the desired position within your computer case. Consider the location where you want to install the fan and visualize how it will align with the mounting holes. This will help you ensure optimal airflow and cooling. Take note of any other components, such as cables or heat sinks, that could interfere with the fan’s placement. Adjust the fan’s position accordingly if needed.
As you position the fan, pay attention to its orientation. Most PC case fans have an arrow or label indicating the direction of airflow. This is crucial to ensure that the fan is blowing air in the desired direction within your computer case. Align the fan in a way that the airflow aligns with the overall ventilation system of your case.
Once you have determined the desired position and orientation, carefully align the screw holes on the fan frame with the corresponding mounting holes in your computer case. Take your time to ensure a precise alignment, as this will ensure a secure fit. Patience is key in this step, as accurate alignment will ensure that the fan is properly attached and will function optimally.
By aligning the fan with the mounting holes, you are on your way to completing the installation process of your 80mm PC case fans. The next step is to secure the fan in place by using screws.
Step 6: Secure the fan with screws
Securing the fan with screws is an essential step in the installation process of your 80mm PC case fans. Properly securing the fan ensures stability and prevents any unwanted movement or vibrations that could negatively impact its performance. Follow these steps to secure the fan with screws:
- Take the appropriate screws: Refer to your computer case or fan manual to determine the type and size of screws required for mounting the fan. Typically, PC case fans use coarse-threaded screws, which are designed specifically for securing fans.
- Insert the screws: Insert the screws through the fan screw holes and align them with the corresponding mounting holes in your computer case. Ensure that they are properly aligned and seated in the holes.
- Tighten the screws: Use a Phillips screwdriver to tighten the screws until they are snugly in place, but avoid over-tightening, as this could damage the fan or the computer case. A firm and secure fit is sufficient to keep the fan properly attached.
First, determine the type and size of screws required for mounting the fan. Refer to the instructions provided with your computer case or fan, or consult the manufacturer’s website for this information. Coarse-threaded screws are typically used for attaching fans, as they provide a secure grip and prevent the fan from coming loose.
Once you have the appropriate screws, insert them through the screw holes on the fan. Align the screws with the corresponding mounting holes in your computer case, ensuring a proper fit. Take your time to ensure that they are aligned correctly and fully inserted into the holes.
Using a Phillips screwdriver, tighten the screws until they are snugly in place. Be cautious not to over-tighten, as this could potentially damage the fan or the computer case. Tightening them just enough to create a secure and stable attachment is sufficient. Verify that the fan is firmly attached and does not move or wobble excessively.
By securing the fan with screws, you have successfully completed the installation of your 80mm PC case fan. It’s now time to move on to the next step: connecting the fan to the motherboard to ensure it receives power and can operate effectively.
Step 7: Connect the fan to the motherboard
Connecting the fan to the motherboard is a crucial step in the installation process of your 80mm PC case fan. This step ensures that the fan receives power and can operate effectively. Follow these steps to connect the fan to the motherboard:
- Locate the fan header on the motherboard: Refer to your motherboard manual or manufacturer’s website to identify the specific fan header where you need to connect your fan. The fan header is typically labeled as “SYS_FAN” or “CHA_FAN”.
- Check the fan connector: Examine the connector on the fan cable. It should have three or four pins, depending on the fan type. Match the connector with the corresponding pins on the fan header.
- Connect the fan cable to the fan header: Align the pins on the fan connector with the corresponding holes on the fan header. Make sure the alignment is correct, and gently push the connector into place. Apply slight pressure to ensure a secure and snug connection.
Start by identifying the fan header on your motherboard where you need to connect the fan. Consult the motherboard manual or the manufacturer’s website for specific instructions. The fan header is typically labeled, and there may be multiple headers available for connecting additional fans.
Examine the connector on the fan cable. It should have three or four pins, depending on the fan type. Match the pins on the connector with the corresponding pins on the fan header. Ensure that the alignment is correct before proceeding to the next step.
Gently connect the fan cable to the fan header on the motherboard. Align the pins on the fan connector with the corresponding holes on the fan header. Apply slight pressure to insert the connector, ensuring a secure and snug connection. Take care not to force the connection or bend any pins.
Once the fan is connected to the motherboard, it will receive power and be able to function. The motherboard controls the fan speed based on temperature and system requirements. Make sure to double-check the connection to ensure it is secure and properly seated.
By connecting the fan to the motherboard, you have successfully integrated it into your computer system. The next step is to replace the side panel on your PC case to finalize the installation process.
Step 8: Replace the side panel of your PC case
Replacing the side panel of your PC case is the final step in the installation process of your 80mm PC case fan. This step ensures that your computer system is enclosed and that the fan operates efficiently within its designated space. Follow these steps to replace the side panel:
- Align the side panel with the case: Carefully align the side panel with the corresponding edges of your PC case. Ensure that it fits snugly and that there are no gaps or misalignments.
- Slide or press the side panel into place: Depending on your PC case design, you may need to slide the side panel into place or press it firmly against the chassis until it locks into position.
- Secure the side panel with screws: Once the side panel is aligned and fully inserted, use the Phillips screwdriver to tighten the screws that were removed in Step 3. Ensure that the screws are securely fastened, but avoid over-tightening to prevent damage to the case threads.
Begin by aligning the side panel with the corresponding edges of your PC case. Take your time to ensure a proper fit, making sure that the panel matches the shape and contours of the case. There should be no gaps or misalignments between the panel and the case.
Depending on your PC case design, you may need to slide the side panel into place or press it firmly against the chassis until it locks into position. Follow the specific instructions provided by your case manufacturer to ensure a proper and secure fit.
Once the side panel is in the correct position, use the Phillips screwdriver to tighten the screws that were removed in Step 3. Start with one screw and proceed to tighten the others, ensuring that they are securely fastened. Be careful not to over-tighten the screws, as this could damage the case threads or strip the screws. Aim for a firm and secure fit without excessive force.
With the side panel securely in place, the installation of your 80mm PC case fan is complete. The fan is now properly installed and integrated into your computer system, providing improved airflow and effective cooling.
Congratulations! You have successfully installed your 80mm PC case fan. The final step is to test the fan to ensure it operates smoothly and provides the desired cooling performance.
Step 9: Test the fan
Testing the fan is the last step in the installation process of your 80mm PC case fan. It allows you to ensure that the fan is functioning correctly and providing the desired cooling performance. Follow these steps to test the fan:
- Power on your computer: Plug in your computer and turn on the power. Allow your system to boot up and reach the desktop or operating system.
- Monitor the fan operation: Keep an eye on the fan to observe its performance. Check if it starts spinning after powering on your computer. You should be able to see and hear the fan running.
- Check the speed and noise level: Use software utilities or BIOS settings to monitor and adjust the fan speed if necessary. Ensure that the fan is spinning at an appropriate speed that balances cooling performance and noise levels.
- Monitor the temperatures: Use monitoring software or BIOS settings to keep track of your system temperatures. Verify that the fan is effectively cooling the components inside your computer case by maintaining stable and safe temperature levels.
Once your computer is powered on, pay attention to the fan’s operation. Observe if it starts spinning promptly and smoothly after turning on your computer. You should be able to visually confirm its movement and hear the sound of the fan running.
Next, check the fan speed and noise level. You can use software utilities or access the BIOS settings to monitor and adjust the fan speed if necessary. Ensure that the fan is spinning at an appropriate speed that maintains optimal cooling performance while keeping noise levels within acceptable limits.
Monitor the temperatures of your computer system. Use monitoring software or access the BIOS settings to keep track of the temperatures of various components. Verify that the fan is effectively cooling these components by maintaining stable and safe temperature levels. Lower temperatures indicate that the fan is functioning correctly and effectively dissipating heat.
By testing the fan, you ensure that it is operating smoothly and efficiently, providing the desired cooling performance. If you notice any issues with the fan’s operation, such as abnormal noise or inadequate cooling, double-check the installation and consult the manufacturer’s instructions or support for troubleshooting guidance.
Congratulations! You have successfully installed and tested your 80mm PC case fan. Your computer system now benefits from improved airflow and effective cooling, reducing the risk of overheating and enhancing overall performance.
Conclusion
Installing 80mm PC case fans is a valuable and straightforward process that can greatly enhance the cooling performance of your computer system. By following the step-by-step instructions outlined in this guide, you have successfully installed the fans, ensuring optimal airflow and effective cooling for your hardware components.
Proper cooling is essential for maintaining the longevity and performance of your computer. Overheating can lead to system instability, reduced lifespan of components, and even permanent damage. By installing 80mm PC case fans, you have created a more efficient cooling system that helps dissipate heat and keeps temperatures at safe levels.
Throughout the installation process, we covered essential steps such as preparation, locating fan installation locations, removing the side panel, identifying the mounting holes, aligning the fan, securing it with screws, connecting the fan to the motherboard, replacing the side panel, and testing the fan’s performance. Following each step ensures a smooth and successful installation.
Regularly monitoring the fan’s operation, adjusting fan speeds, and keeping an eye on system temperatures are ongoing tasks that can help you maintain an optimal cooling setup. Should you encounter any issues with the fan’s performance, refer to the manufacturer’s instructions or reach out to their support for troubleshooting and guidance.
By investing a little time and effort into installing 80mm PC case fans, you have taken a positive step towards keeping your computer system running cool and efficiently. Enjoy the benefits of improved cooling performance, reduced noise levels, and increased longevity of your hardware components.
Thank you for following this installation guide, and remember to always prioritize proper cooling to safeguard your computer system. Happy computing!