Introduction
Welcome to the world of PC building! Whether you’re a seasoned pro or a novice enthusiast, one aspect that should never be overlooked is the fan layout in your PC case. Properly arranging and positioning fans within your case is crucial for maintaining optimal airflow and temperature management, which ultimately leads to improved performance and longevity of your components.
In this article, we will explore the importance of fan layout, the factors to consider when deciding on the placement of fans, and how to optimize cooling efficiency. By the end, you will have a clear understanding of how to lay out fans in your PC case to maximize airflow, minimize heat buildup, and create an overall better user experience.
Before we dive into the nitty-gritty details, it’s important to note that the fan layout will vary depending on the specific case model, motherboard form factor, and component configuration. It’s always recommended to consult your PC case and component manuals for any manufacturer-specific guidelines.
With that said, let’s delve into the world of fan layout and discover how you can keep your PC running cool and quiet!
Importance of Fan Layout
The fan layout in your PC case plays a critical role in maintaining proper airflow and temperature regulation, ultimately impacting the performance and longevity of your components. Proper fan placement can prevent heat buildup, reduce the risk of thermal throttling, and ensure stable operation even under heavy workloads.
Without a well-designed fan layout, the internal components of your PC can become susceptible to overheating, which can lead to decreased performance, system instability, and even permanent damage. Inadequate airflow can also result in increased noise levels due to fans running at higher speeds to compensate for inefficient cooling.
Efficient fan placement ensures a steady flow of fresh cool air into the case, while expelling hot air out of the system. This circulation prevents stagnant pockets of warm or hot air, promoting uniform cooling across all components. By maintaining optimal temperatures, you can expect better CPU and GPU performance, reduced risk of hardware failure, and extended lifespan of your computer.
Another important aspect is dust management. Proper fan layout, combined with the use of dust filters, can significantly reduce dust accumulation inside the case. This reduces the need for frequent cleaning and prevents dust from clogging up the heatsinks and fans, which can lead to poor cooling performance.
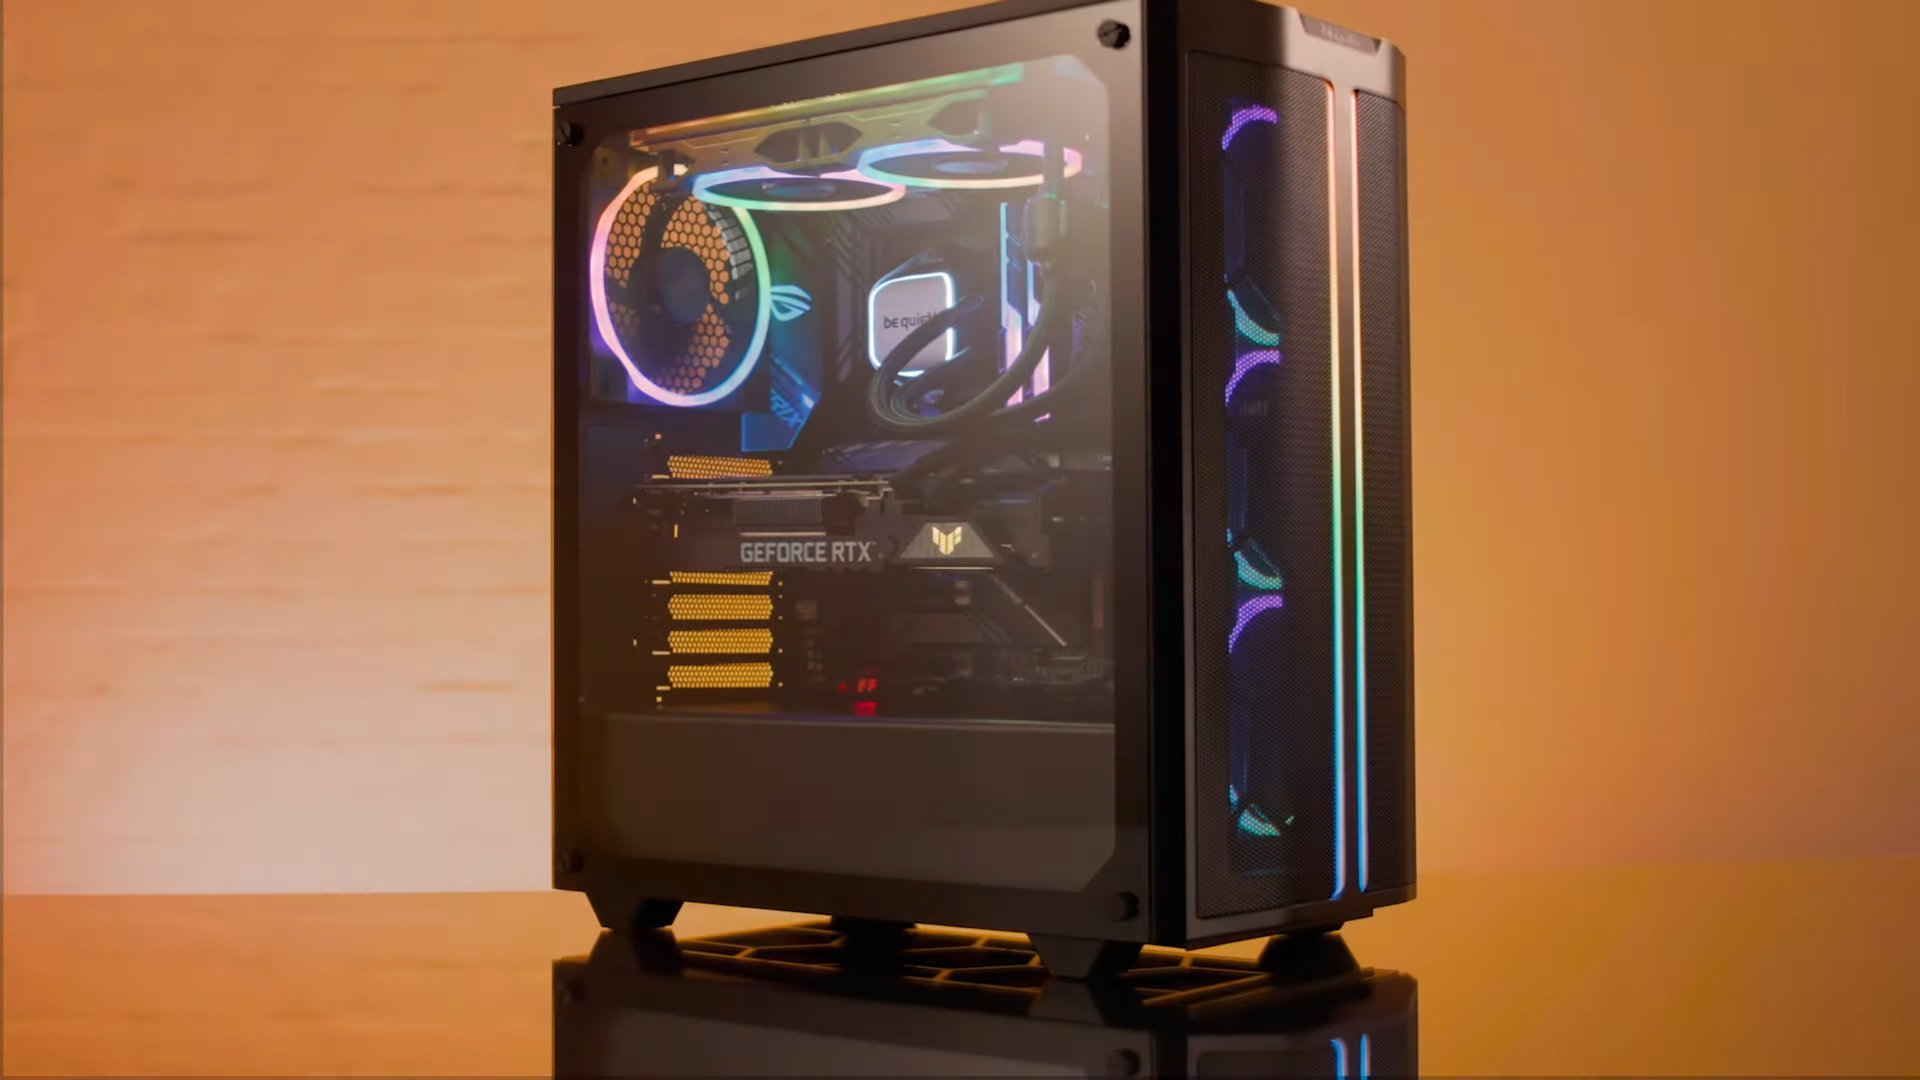
Additionally, a well thought out fan layout can contribute to the overall aesthetics of your PC. Many modern cases feature transparent side panels, allowing you to showcase your components and RGB lighting effects. A strategically placed fan layout not only provides optimal cooling but also enhances the visual appeal of your system.
Considering these factors, it’s clear that the fan layout in your PC case should not be taken for granted. Investing time in planning and implementing an effective layout pays off in terms of improved performance, enhanced component lifespan, reduced noise levels, and overall user satisfaction.
Factors to Consider
When deciding on the fan layout for your PC case, there are several crucial factors to take into consideration. These factors will help you determine the optimal placement and configuration of fans, ensuring efficient cooling and optimal performance for your system.
- Case Design: The design and size of your case play a significant role in determining the potential fan placements and configurations. Some cases come with pre-installed fans in specific locations, while others provide more flexibility for customization. Take note of the available fan mounting points and the compatibility of your case with various fan sizes.
- Airflow Direction: Understanding the natural airflow direction within your case is essential. Typically, cool air is drawn in from the front or bottom and expelled out from the top or rear. This natural airflow pattern should guide you in determining the placement of intake and exhaust fans to facilitate proper heat dissipation.
- Component Heat Output: Different components in your system generate varying amounts of heat. CPUs, GPUs, and power supplies are typically the primary heat sources. Consider the thermal characteristics of your components when deciding on the number and placement of fans. Components with higher heat outputs may require more targeted cooling solutions, such as additional fans or liquid cooling.
- Compatibility with CPU Cooler and GPU: If you are using an aftermarket CPU cooler or a bulky high-end GPU with its own cooling solution, ensure that the chosen fan layout does not interfere with these components. This may involve making adjustments in fan placement or considering alternative cooling options.
- Noise Level: Fans can produce varying levels of noise depending on their size, RPM (revolutions per minute), and design. Consider fan noise levels in relation to your desired system environment. Opt for fans that offer a good balance between cooling performance and noise output, or explore options like low-noise adapters or fan speed control to further customize noise levels.
- Cable Management: Proper cable management is not only aesthetically appealing but also allows for unimpeded airflow within the case. Ensure that fan cables and other power cables are neatly organized and do not obstruct the path of airflow. Use zip ties, cable routing channels, or Velcro straps to keep cables tidy and away from fans.
- Budget: The number and type of fans you can incorporate into your fan layout will vary depending on your budget. Assess your budget constraints and prioritize spending on high-quality fans where they will have the most impact on cooling performance.
By considering these factors, you can make informed decisions about the fan layout in your PC case, ensuring optimal cooling performance and a well-managed system environment.
Front Intake Fans
Front intake fans are crucial for bringing in fresh, cool air into the PC case. They are typically positioned at the front of the case, directly in front of the hard drive bays or behind a removable front panel.
The number of front intake fans will depend on the available fan mounting points in your case and the desired level of cooling. Most cases have provisions for two or three front intake fans, but some high-end cases can accommodate even more.
To ensure an efficient airflow path, it’s important to mount front intake fans close to the bottom of the case, drawing in cool air from outside. This allows the cool air to pass over the hard drives, the power supply, and other components in the lower section of the case before rising to cool the CPU and GPU. Additionally, consider the use of dust filters on the front intake fans to prevent dust accumulation on the components.
Airflow obstruction is a common concern with front intake fans. Make sure there is adequate clearance between the front panel and the fans to allow for unrestricted airflow. Additionally, if your case has a solid front panel, consider opting for a case that features a mesh or perforated front panel design to allow for maximum air intake.
When it comes to fan size, 120mm and 140mm fans are the most common options for front intake fans. Both offer a good balance between airflow and noise levels. Consider the dimensions of your case and the available mounting options to determine the appropriate fan size.
In terms of fan configuration, you have the option of using two or three front intake fans in either a parallel or series configuration. Parallel configuration involves evenly spacing the fans across the front panel to ensure even distribution of airflow, while series configuration involves setting up the fans in a daisy chain fashion.
Overall, front intake fans play a crucial role in supplying cool air to the components within your PC case. By positioning them properly and ensuring unobstructed airflow, you can lay the foundation for efficient cooling and optimal performance.
Top Exhaust Fans
Top exhaust fans are responsible for expelling hot air from your PC case. They are typically positioned at the top of the case, near the rear end. The main function of these fans is to facilitate the upward flow of hot air, promoting natural convection and preventing heat buildup.
The number of top exhaust fans will depend on the available fan mounting points in your case and the level of heat generated by your components. Most cases have provisions for one or two top exhaust fans, while some high-end models can accommodate even more.
When positioning top exhaust fans, it’s crucial to consider the overall airflow direction inside the case. Hot air naturally rises, so placing these fans at the highest point allows them to efficiently remove the hot air produced by the components, such as the CPU and GPU.
Size-wise, 120mm and 140mm fans are commonly used for top exhaust fans. Both sizes offer a good balance between airflow and noise levels. Consider the dimensions of your case and the available mounting options to determine the appropriate fan size.
Regarding fan configuration, you have the choice of using one or two top exhaust fans. If using two fans, it is recommended to position them slightly apart from each other to cover a wider area and ensure effective heat dissipation.
Keep in mind that the use of top exhaust fans can create negative air pressure inside the case, which may lead to more dust accumulation. To minimize this, consider using dust filters on the top exhaust fans to prevent dust particles from entering the case.
Lastly, it’s worth noting that some PC cases come with a pre-installed top exhaust fan. In such cases, it’s important to assess whether adding an additional fan will provide a significant improvement in cooling performance or if the pre-installed fan is sufficient.
Overall, top exhaust fans play a crucial role in maintaining a balanced airflow inside the PC case, expelling hot air and preventing heat buildup. By positioning them properly and considering the overall case airflow, you can effectively manage the temperature inside your system and ensure optimal performance.
Rear Exhaust Fans
Rear exhaust fans are essential components of a well-designed cooling system in a PC case. Positioned at the rear end of the case, they work in conjunction with other fans to expel hot air generated by components and facilitate efficient heat dissipation.
The primary function of rear exhaust fans is to draw in cool air from the front and side intake fans and expel it out of the case. This creates a continuous flow of air, promoting proper ventilation and preventing heat buildup.
In terms of fan placement, rear exhaust fans are typically located near the upper section of the rear panel, close to the CPU and GPU. This position ensures that hot air from these components is effectively exhausted, preventing them from overheating and maintaining stable performance.
The most commonly used fan sizes for rear exhaust fans are 80mm, 92mm, 120mm, and 140mm. The appropriate fan size will depend on the available mounting options in your case and the desired airflow capacity. Larger fan sizes generally provide better airflow but may also produce more noise.
When installing rear exhaust fans, it’s important to ensure that they are properly aligned with ventilation grilles or fan mounts on the rear panel. This allows for smooth airflow and prevents any restriction or turbulence. Additionally, consider utilizing dust filters on the rear exhaust fans to minimize dust accumulation inside the case.
As for fan configuration, a single rear exhaust fan is typically sufficient for most PC configurations. However, if you have a high-performance system or a case with multiple fan mounting points, you may opt for dual rear exhaust fans for enhanced heat dissipation.
When selecting rear exhaust fans, pay attention to the noise levels and consider fans with lower RPM ratings for quieter operation. Additionally, choose fans with good airflow-to-noise ratio to strike a balance between cooling performance and noise output.
Overall, rear exhaust fans play a critical role in maintaining proper ventilation and preventing heat buildup in your PC case. By positioning them strategically and selecting the appropriate fan size and configuration, you can ensure optimal cooling performance and prolong the lifespan of your components.
Side Panel Fans
Side panel fans can be a valuable addition to your PC’s cooling system, providing targeted cooling for specific components and assisting in overall heat dissipation. These fans are typically mounted on the side panel of the case, directly adjacent to the CPU and GPU.
The primary purpose of side panel fans is to provide additional airflow to components that may be prone to overheating, such as the CPU and GPU. By blowing cool air directly onto these components, side panel fans can help lower their temperatures, improving performance and stability.
When considering side panel fans, it’s important to assess the available fan mounting options on your case. Some cases have specific side panel fan mounts, while others may offer the option of removing a section of the side panel to install a fan. Ensure that your case has provisions for side panel fan installation before proceeding.
When it comes to fan size, 120mm and 140mm fans are commonly used for side panel cooling. These sizes strike a good balance between airflow and noise levels. Consider the dimensions of your case and the available mounting options to determine the appropriate fan size.
In terms of fan placement, side panel fans are typically positioned in close proximity to the CPU and GPU. This allows for direct airflow to these components, helping to dissipate heat more effectively. Additionally, consider using dust filters on side panel fans to prevent dust accumulation and maintain the cleanliness of the components.
The number of side panel fans will depend on the available fan mounting options and the level of cooling required for your system. In most cases, a single side panel fan is sufficient to provide targeted cooling. However, if you have a high-performance system or experience particularly high temperatures, you may choose to install multiple side panel fans.
It’s worth noting that side panel fans can be more effective in certain PC configurations than others. For systems with adequate space between the CPU and side panel, the direct cooling effect of side panel fans can be more pronounced. However, in cases where components are tightly packed or the CPU cooler is already in direct contact with the side panel, side panel fans may have less impact.
Overall, side panel fans can be a valuable addition to your PC cooling setup, providing targeted cooling to key components and assisting in overall heat dissipation. By positioning them properly and considering the airflow dynamics of your case, you can effectively optimize the cooling performance and stability of your system.
Bottom Intake Fans
Bottom intake fans can be a valuable addition to your PC cooling setup, particularly if your case has a dedicated space for them. These fans are typically positioned at the bottom of the case, drawing in cool air from outside or from the space beneath the case.
The main function of bottom intake fans is to provide a fresh supply of cool air to the components within the PC case. By drawing cool air from the bottom, they help prevent heat buildup and promote better overall airflow.
When considering bottom intake fans, it’s important to assess the available mounting options in your case. Some cases are specifically designed with bottom fan mounts, while others may require modification or the use of a separate fan bracket.
Fan size is another factor to consider when choosing bottom intake fans. Common options include 120mm and 140mm fans, which strike a good balance between airflow and noise levels. The appropriate fan size will depend on the available space and compatibility with the case’s mounting options.
One important consideration when using bottom intake fans is the clearance between the case and the surface it is resting on. Ensure that there is sufficient space for the fans to draw in air without obstruction. Some cases also come with dust filters for the bottom intake fans, which help prevent dust from entering the case through this opening.
The number of bottom intake fans will depend on the available fan mounting options and the level of cooling required for your system. In most cases, one or two bottom intake fans are sufficient to provide a fresh supply of cool air. However, if you have a high-performance system or experience particularly high temperatures, you may choose to install more bottom intake fans.
It’s worth noting that the use of bottom intake fans may not always be suitable for all PC case configurations. If your case is placed on a carpeted surface or has limited clearance, the effectiveness of bottom intake fans may be reduced. In such instances, it’s important to consider alternative cooling solutions or prioritize other fan placements.
Overall, bottom intake fans can be a valuable addition to your PC cooling setup, helping to ensure a steady flow of cool air into the case. By positioning them properly and considering the specific airflow dynamics of your case, you can improve overall cooling performance and maintain optimal temperatures for your components.
GPU Fans
GPU fans play a crucial role in cooling the graphics card, which is one of the most heat-intensive components in a PC. These fans are built directly into the GPU itself and are responsible for dissipating heat generated during intensive graphics processing.
The primary function of GPU fans is to draw in cool air and push it across the heatsink, which helps to dissipate the heat generated by the GPU cores. The airflow produced by these fans ensures that the GPU remains within safe operating temperatures, preventing thermal throttling and maintaining optimal performance.
The design and configuration of GPU fans can vary depending on the specific graphics card model and manufacturer. Some GPUs feature a single fan, while others may have multiple fans in a dual or triple fan configuration. The number and size of the fans can have an impact on cooling efficiency and noise levels.
When it comes to GPU fan control, modern graphics cards often include software or firmware that automatically adjusts the fan speed based on the GPU’s thermal requirements. This ensures that the fans operate efficiently under varying load conditions and helps to maintain a balance between cooling performance and noise output.
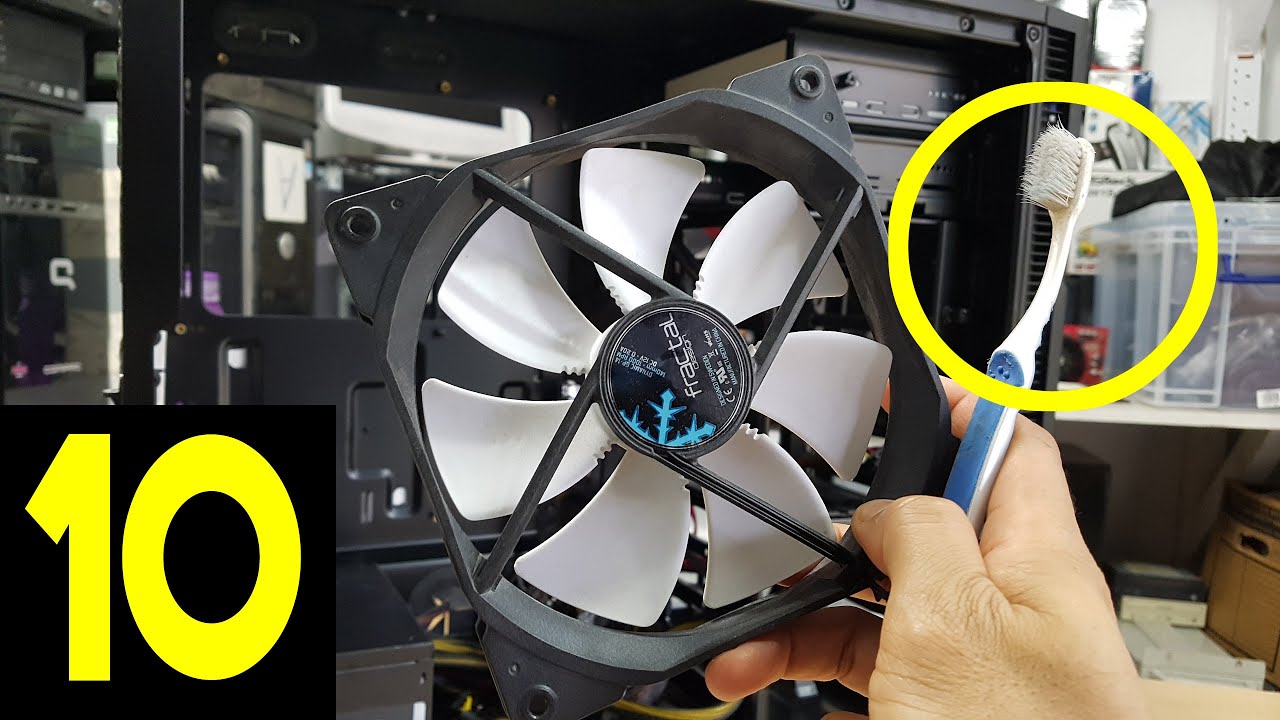
It’s important to keep GPU fans clean and free from excessive dust accumulation. Over time, dust can clog the fan blades and hinder airflow, reducing cooling efficiency. Regularly cleaning the GPU fans using compressed air or a soft brush can help to remove any dust buildup and maintain optimal cooling performance.
In some cases, users may choose to manually adjust the fan speed of their GPU using third-party software. This approach allows for more granular control over cooling performance and noise levels. However, it’s important to strike a balance between cooling and noise, as increasing fan speed can significantly increase noise output.
Additionally, in high-end gaming systems or in situations where GPUs are subjected to heavy workloads, alternative cooling methods such as liquid cooling solutions or aftermarket GPU coolers may be considered. These cooling solutions provide more extensive cooling for the GPU, allowing for lower operating temperatures and potentially improved overclocking capabilities.
Overall, GPU fans are vital components for cooling the graphics card and ensuring optimal performance. By maintaining the cleanliness of these fans, understanding the fan control options provided by your GPU, and considering alternative cooling methods when necessary, you can effectively manage the temperatures of your GPU and prolong its lifespan.
CPU Cooler Fans
CPU cooler fans are essential for maintaining optimal temperatures and ensuring the longevity of your processor. These fans are typically part of a CPU cooler, which consists of a heatsink and a fan or fans designed to dissipate heat from the CPU.
The primary function of CPU cooler fans is to draw in cool air and direct it across the heatsink, which helps to remove heat from the CPU. The airflow created by these fans facilitates efficient heat dissipation and prevents the CPU from overheating.
The design and configuration of CPU cooler fans can vary depending on the cooling solution chosen. Air-based CPU coolers feature a heatsink with one or more fans, while liquid cooling solutions may utilize a combination of radiator fans and water pumps.
The size and number of CPU cooler fans can impact cooling performance. Fans are typically available in sizes of 80mm, 92mm, 120mm, and 140mm. Larger fans tend to provide better airflow at lower noise levels, but compatibility with your CPU cooler and case mounting options should be considered when selecting the appropriate fan size.
Fan speed control is an important aspect to consider when it comes to CPU cooler fans. Many CPU coolers come with PWM (Pulse Width Modulation) fans that allow for automatic adjustment of fan speed based on CPU temperatures. This helps to maintain a balance between cooling performance and noise levels, as the fan speed increases as the CPU temperature rises.
In some situations, users may opt for aftermarket CPU coolers to achieve better cooling performance, especially for overclocking or high-performance systems. These coolers often feature larger heatsinks and more efficient fans, providing improved heat dissipation and lower CPU temperatures.
Maintaining the cleanliness of CPU cooler fans is crucial to ensure their optimal performance. Dust accumulation on fan blades and heatsinks can hinder airflow, leading to reduced cooling efficiency. Regularly cleaning the CPU cooler fans, either by using compressed air or a soft brush, helps to remove the dust and maintain consistent cooling performance.
It’s important to note that the noise levels produced by CPU cooler fans can vary depending on the fan model and speed. If noise is a concern, fans with lower noise levels or additional noise dampening features may be considered. Additionally, aftermarket CPU coolers often come with fans designed specifically for reduced noise output.
Overall, CPU cooler fans play a vital role in maintaining optimal temperatures for your processor. By selecting the appropriate fan size, optimizing fan speed control, considering aftermarket cooling options when necessary, and keeping the fans clean, you can effectively manage CPU temperatures and ensure stable performance.
Radiator Fans
Radiator fans are a critical component of liquid cooling systems and play a crucial role in dissipating heat from the CPU or other components. These fans are typically mounted on the radiator, which is connected to a water block that transfers heat away from the CPU or GPU.
The primary function of radiator fans is to pull or push air through the radiator, facilitating the transfer of heat from the liquid coolant inside. This process helps to cool down the liquid as it passes through the radiator, allowing it to absorb more heat from the CPU or GPU.
When it comes to radiator fan configuration, you have two options: push or pull. Push configuration involves mounting the fans on one side of the radiator, pushing air through the radiator and out of the case. Pull configuration, on the other hand, positions the fans on the other side of the radiator, pulling air through and exhausting it from the case. Push-pull configurations combine both methods for maximum cooling efficiency.
The size of radiator fans can vary, with common options including 120mm, 140mm, and even larger sizes. The appropriate fan size will depend on the compatibility with your radiator and the available mounting options in your case.
When selecting radiator fans, consider the static pressure rating of the fans. Radiators have dense fins for optimal heat transfer, which can create airflow resistance. Fans with high static pressure are designed to overcome this resistance, ensuring efficient airflow through the radiator and maximizing overall cooling performance.
Optimal fan speed control is crucial for radiator fans to achieve the desired balance between cooling performance and noise levels. Many liquid cooling systems come with built-in fan controllers or software that allows you to set custom fan curves based on temperature thresholds. This allows for precise control over the speed of the radiator fans, ensuring optimal cooling performance under different load conditions.
It’s important to note that radiator fans can be louder compared to other case fans, especially at higher speeds. If noise is a concern, consider fans specifically designed for reduced noise output or utilize fan speed control to strike the right balance between cooling and noise levels.
Maintaining the cleanliness of radiator fans is crucial to ensure optimal cooling performance. Dust accumulation on fan blades and radiator fins can hinder airflow and reduce cooling efficiency. Regularly cleaning radiator fans with compressed air or a soft brush helps to remove dust and maintain consistent cooling performance.
In summary, radiator fans are an integral part of liquid cooling systems, playing a vital role in dissipating heat from the CPU or GPU. By considering the appropriate fan size, static pressure, fan speed control, and cleanliness, you can effectively maximize cooling efficiency and maintain optimal temperatures for your components.
Cable Management
Cable management is an often overlooked aspect of PC building, but it plays a significant role in maintaining optimal airflow and aesthetics within your system. Proper cable management involves organizing and securing cables to ensure unobstructed airflow and accessibility to components.
Effective cable management benefits your PC in several ways. First and foremost, it promotes better airflow within the case. When cables are neatly routed and secured, they are less likely to block the path of airflow from fans, ensuring that cool air can reach vital components and hot air can be efficiently expelled.
Cable management also makes it easier to access and work on your PC. Neatly organized cables allow for clear visibility of components, making it simpler to upgrade or troubleshoot your system. It also reduces the risk of inadvertently damaging cables or components when making adjustments or adding new hardware.
There are several techniques you can employ to achieve effective cable management:
- Plan before installation: Before building your PC, plan the route for each cable to minimize clutter and ensure they reach their appropriate connections without strain or interference.
- Use cable ties and Velcro straps: These simple accessories can be used to bundle cables together and secure them to the case, keeping them organized and preventing them from obstructing airflow.
- Use cable routing channels and grommets: Many modern cases come equipped with channels and grommets designed to guide cables and keep them hidden, providing a cleaner appearance and improving airflow.
- Invest in cable extensions or custom-length cables: If necessary, consider using cable extensions or custom-length cables to minimize excess cable length, reducing cable clutter and improving overall cable management.
- Consider a modular power supply: Modular power supplies allow you to detach cables that aren’t needed, reducing cable clutter within the case.
When routing cables, it’s important to consider the specific needs of your components. Pay attention to the lengths and orientations of cables, ensuring they do not interfere with fans, obstruct access to components, or impede the installation of hardware.
Not only does proper cable management improve airflow and accessibility, but it also enhances the overall aesthetics of your PC. A clean and organized interior showcases your components and the care you put into the building process. It can also make it easier to show off RGB lighting effects or any custom modifications you’ve made to your system.
By investing time in effective cable management, you can optimize airflow, simplify maintenance, and create a visually appealing PC that you can be proud of.
Noise Reduction
Noise can be a nuisance when it comes to PC usage, especially if your system is located in a quiet environment or if you prioritize a peaceful computing experience. However, with proper attention to noise reduction techniques, you can significantly minimize the noise generated by your PC.
There are various factors that contribute to PC noise, including fans, hard drives, power supplies, and other moving components. Here are some effective strategies to help reduce noise:
- Choose silent components: When selecting components for your PC, look for options that are specifically designed to be quiet. For example, opt for CPU coolers, power supplies, and fans that are marketed as “silent” or have low noise ratings.
- Replace stock fans: Stock fans that come with cases or components are often designed to prioritize cost and performance over noise levels. Consider replacing these fans with quieter alternatives from reputable brands that offer improved noise reduction without compromising on cooling performance.
- Utilize low-noise adapters or fan speed control: Many fans come with accessories such as low-noise adapters or fan speed control options. These allow you to reduce the fan speed, minimizing noise output while still maintaining adequate cooling. However, be cautious not to reduce airflow to the point of compromising component temperatures.
- Consider liquid cooling: Liquid cooling solutions, such as all-in-one (AIO) liquid coolers or custom loops, can offer superior cooling performance while generating less noise compared to air-based cooling systems. The elimination of bulky air coolers and the use of larger, slower-spinning fans can help reduce noise levels in your system.
- Optimize fan placement: Proper fan placement and airflow management can contribute to noise reduction. Consider the orientation and positioning of fans to minimize air turbulence, which can cause increased noise levels. Additionally, avoid placing fans close to surfaces or components that can amplify noise vibrations.
- Use vibration dampening materials: Vibrations from fans, hard drives, and other components can contribute to overall system noise. Consider using vibration dampening materials, such as rubber grommets, washers, or anti-vibration mounts, to minimize vibrations transferred to the case and reduce noise levels.
- Opt for solid-state drives (SSDs): Traditional hard disk drives (HDDs) generate noise due to their mechanical spinning nature. By replacing HDDs with SSDs, which have no moving parts, you eliminate the noise generated by spinning platters.
- Ensure proper cable management: Improperly routed cables can obstruct airflow and cause turbulence, leading to increased noise from fans working harder to maintain cooling. Effective cable management can improve airflow, reduce fan speeds, and subsequently lower noise levels.
By implementing these noise reduction strategies and ensuring proper maintenance of your PC, you can achieve a quieter computing experience without sacrificing performance or cooling efficiency.
Conclusion
Proper fan layout and management are essential for maintaining optimal temperatures, maximizing performance, and prolonging the lifespan of your PC components. We’ve explored various factors to consider when laying out fans in your PC case, including front intake fans, top exhaust fans, rear exhaust fans, side panel fans, bottom intake fans, GPU fans, CPU cooler fans, radiator fans, cable management, and noise reduction techniques.
By carefully considering these factors, you can achieve efficient cooling, prevent heat buildup, and promote a quiet computing environment. Whether you’re a seasoned PC builder or a novice enthusiast, understanding the importance of well-placed fans and implementing appropriate fan layouts can lead to a smoother and more enjoyable user experience.
Remember to assess the design and limitations of your case, consider the specific cooling requirements of your components, and prioritize proper cable management and noise reduction techniques. By taking these steps, you can optimize airflow, minimize noise, and ensure the longevity of your PC.
Happy building, and may your PC run cool and quiet!