Introduction
With the growing reliance on technology and the need for a stable and fast internet connection, Ethernet cables have become an essential part of our homes and offices. However, the sight of long and tangled cables can be an eyesore and disrupt the aesthetic appeal of a space. Fortunately, there are various techniques and solutions available to hide Ethernet cables and maintain a neat and organized environment.
In this article, we will explore ten effective methods to conceal those unsightly Ethernet cables and create a clutter-free space. Whether you are a tech enthusiast, a professional working from home, or simply someone who wants to maintain a clean and visually appealing environment, these techniques will surely come in handy.
From concealing cables along baseboards to routing them through walls, we will cover a range of options to suit different situations and preferences. Additionally, we will discuss DIY tricks and clever ways of camouflaging Ethernet cables using existing furniture or innovative cable management solutions.
By implementing these methods, you can not only enjoy a clean and organized space but also minimize the risk of tripping over cables and damaging them. Let’s dive into the various techniques and solutions to hide those long Ethernet cables that can sometimes be a source of frustration.
Concealing Ethernet Cable along Baseboards
One of the simplest and most common methods to hide Ethernet cables is by running them along the baseboards of a room. This technique is especially useful if you don’t want to make any permanent changes to your space.
To start, measure the length of the cable you need and ensure you have enough cable to reach the target destination. Next, use adhesive cable clips or adhesive cable raceways to secure the Ethernet cable to the baseboard. These clips or raceways are designed to stick firmly to surfaces, providing a clean and discrete pathway for your cables.
If you want an even more seamless look, you can paint the cables and the clips or raceways the same color as your baseboards. This will make them blend in with the wall and go unnoticed. Additionally, make sure to use clips or raceways that are wide enough to accommodate the Ethernet cable along with any other cables you may need to hide.
Another option is to use cable covers specifically designed for baseboards. These covers are installed directly onto the baseboard, providing a dedicated space to run your Ethernet cable. They often come in different lengths and colors, allowing you to choose a cover that matches your baseboard seamlessly.
When running the cable along the baseboard, take care to keep it as close to the wall as possible to minimize the risk of tripping over it. You can also strategically place furniture or decorative items to further conceal the cable and create a visually appealing space.
Concealing Ethernet cables along baseboards is a cost-effective and easy-to-implement solution that provides a neat and organized appearance without the need for drilling or complex installations.
Hiding Ethernet Cable in Cable Raceways
If you prefer a more professional and streamlined look for hiding Ethernet cables, cable raceways can be a great option. Cable raceways are specially designed channels that can be mounted on walls or baseboards to conceal multiple cables, including Ethernet cables, in a single organized pathway.
To use cable raceways, start by measuring the length of the Ethernet cable you want to hide. Next, select a raceway that is wide enough to accommodate your cable along with any other cables you may have. Cable raceways typically come in different sizes and styles, so choose one that complements the aesthetics of your space.
Before installing the raceway, make sure to clean the surface where it will be applied to ensure a secure bond. Many cable raceways come with adhesive backing, making installation quick and easy. Simply peel off the backing and carefully stick the raceway to the desired location, ensuring it is level and straight.
Once the raceway is in place, carefully insert the Ethernet cable inside the channel, ensuring it is securely held in position. You can use small hooks or adhesive clips inside the raceway to further secure the cable and prevent it from slipping out.
After successfully hiding the Ethernet cable in the raceway, you can paint the raceway the same color as your walls to make it blend seamlessly. This will create a clean and cohesive look, ensuring that the cable remains inconspicuous.
Cable raceways not only provide a professional and organized appearance but also help in protecting the cables from potential damage. They are particularly useful in offices, gaming setups, or any other area where multiple cables need to be hidden and organized.
Routing Ethernet Cable through Walls
If you’re looking for a clean and permanent solution to hide Ethernet cables, routing them through walls can be a great option. This method involves concealing the cables behind the walls, ensuring a completely seamless and clutter-free appearance.
Before proceeding with this method, it’s important to note that routing Ethernet cables through walls may require drilling and should be done with caution. Make sure you have the necessary tools and knowledge to safely handle electrical installations. If you’re not comfortable with DIY electrical work, it’s best to hire a professional to assist you.
To route the Ethernet cable through the wall, you’ll need to identify an entry point and an exit point. The entry point is where the cable will enter the wall, typically near the router or modem, while the exit point is where the cable will emerge at the desired location. Common exit points include wall sockets, outlets, or wall plates.
Once you have identified the entry and exit points, you’ll need to create a pathway within the wall. This can be done by drilling a small hole at the entry point and another hole at the exit point. It’s crucial to measure and plan the placement of these holes accurately to ensure a clean and efficient installation.
After creating the holes, you can thread the Ethernet cable through the wall by carefully inserting it in the entry hole and guiding it towards the exit hole. A helpful tip is to use a long, flexible wire or fish tape to assist in pulling the cable through the wall, especially if you’re working with longer distances or complicated pathways.
Once the cable is successfully routed through the wall, you can secure it using wall clips or adhesive cable holders inside the wall. These will keep the cable in place and prevent it from sagging or getting tangled within the wall cavity.
Finally, connect the Ethernet cable to the appropriate devices at both ends, ensuring a strong and reliable internet connection. Patching up the holes and painting them to match the surrounding wall will provide a seamless finish.
Routing Ethernet cables through walls offers a truly discreet and visually pleasing solution, eliminating any visible traces of the cables while maintaining a high-quality internet connection.
Utilizing Cable Clips to Secure Ethernet Cable
If you’re looking for a quick and easy way to hide Ethernet cables without making major changes to your space, cable clips can be a convenient solution. Cable clips are small plastic or metal clips that are designed to hold and organize cables in place.
To utilize cable clips for securing Ethernet cables, start by determining the desired pathway for the cable. This may be along a wall, underneath a desk, or any other discreet location. Measure the length of the cable and plan the placement of the clips accordingly.
Next, clean the surface where you will be attaching the cable clips to ensure a strong and secure bond. Adhesive cable clips are commonly used and can be easily attached to various surfaces, such as walls, desks, or baseboards. Simply peel off the backing of the adhesive and firmly press the clip onto the surface.
Once the clips are in place, carefully insert the Ethernet cable into the clip’s channel and snap it shut. The cable clip will hold the cable securely in place, preventing it from tangling or becoming an eyesore.
When positioning the cable clips, it’s important to maintain a neat and organized appearance. Space them out evenly along the pathway and align them in a straight line to create a cohesive look.
If you prefer a more discreet approach, you can opt for color-matching cable clips. These clips blend in with the color of the surface they are attached to, making them less noticeable and preserving the aesthetics of your space.
Cable clips not only provide a simple and cost-effective solution for hiding Ethernet cables but also offer the flexibility to adjust and reposition the cables whenever needed. They are particularly useful for temporary installations or situations where you may frequently add or remove cables.
By utilizing cable clips to secure Ethernet cables, you can maintain a clean and clutter-free environment while ensuring the cables are organized and protected.
Using Floor Cord Covers to Hide Ethernet Cable
If you have Ethernet cables running across the floor, using floor cord covers can be an effective method to hide and protect them. Floor cord covers are long, flexible channels that are designed to conceal and organize cables that cross high-traffic areas.
To use floor cord covers for hiding Ethernet cables, start by measuring the length of the cable and identifying the areas where it needs to be covered. Choose a floor cord cover that is wide enough to accommodate the Ethernet cable along with any other cables that may need to be hidden.
Clean the floor surface where the cord cover will be placed to ensure a secure attachment. Most floor cord covers have a non-slip bottom surface or adhesive backing to prevent them from moving or being a tripping hazard. Peel off the backing and lay the cord cover flat on the floor, positioning it over the Ethernet cable.
Press down firmly to ensure the cord cover adheres securely to the floor and stays in place. Make sure the cord cover lies flat and smooth to prevent any obstacles or tripping hazards.
If the Ethernet cable needs to be accessed or replaced, you can easily remove the cord cover without causing damage to the floor or the cable itself. Most floor cord covers are designed for easy installation and removal.
To maintain a cohesive look, consider selecting a floor cord cover that matches the color or finish of your flooring. This will help the cord cover blend seamlessly with the surrounding environment and minimize its visibility.
Using floor cord covers not only conceals Ethernet cables but also reduces the risk of tripping accidents and potential damage to the cables. They are particularly useful in high-traffic areas, such as offices, conference rooms, or entertainment setups.
By utilizing floor cord covers to hide Ethernet cables, you can maintain a clean and organized space while ensuring the safety of those who occupy it.
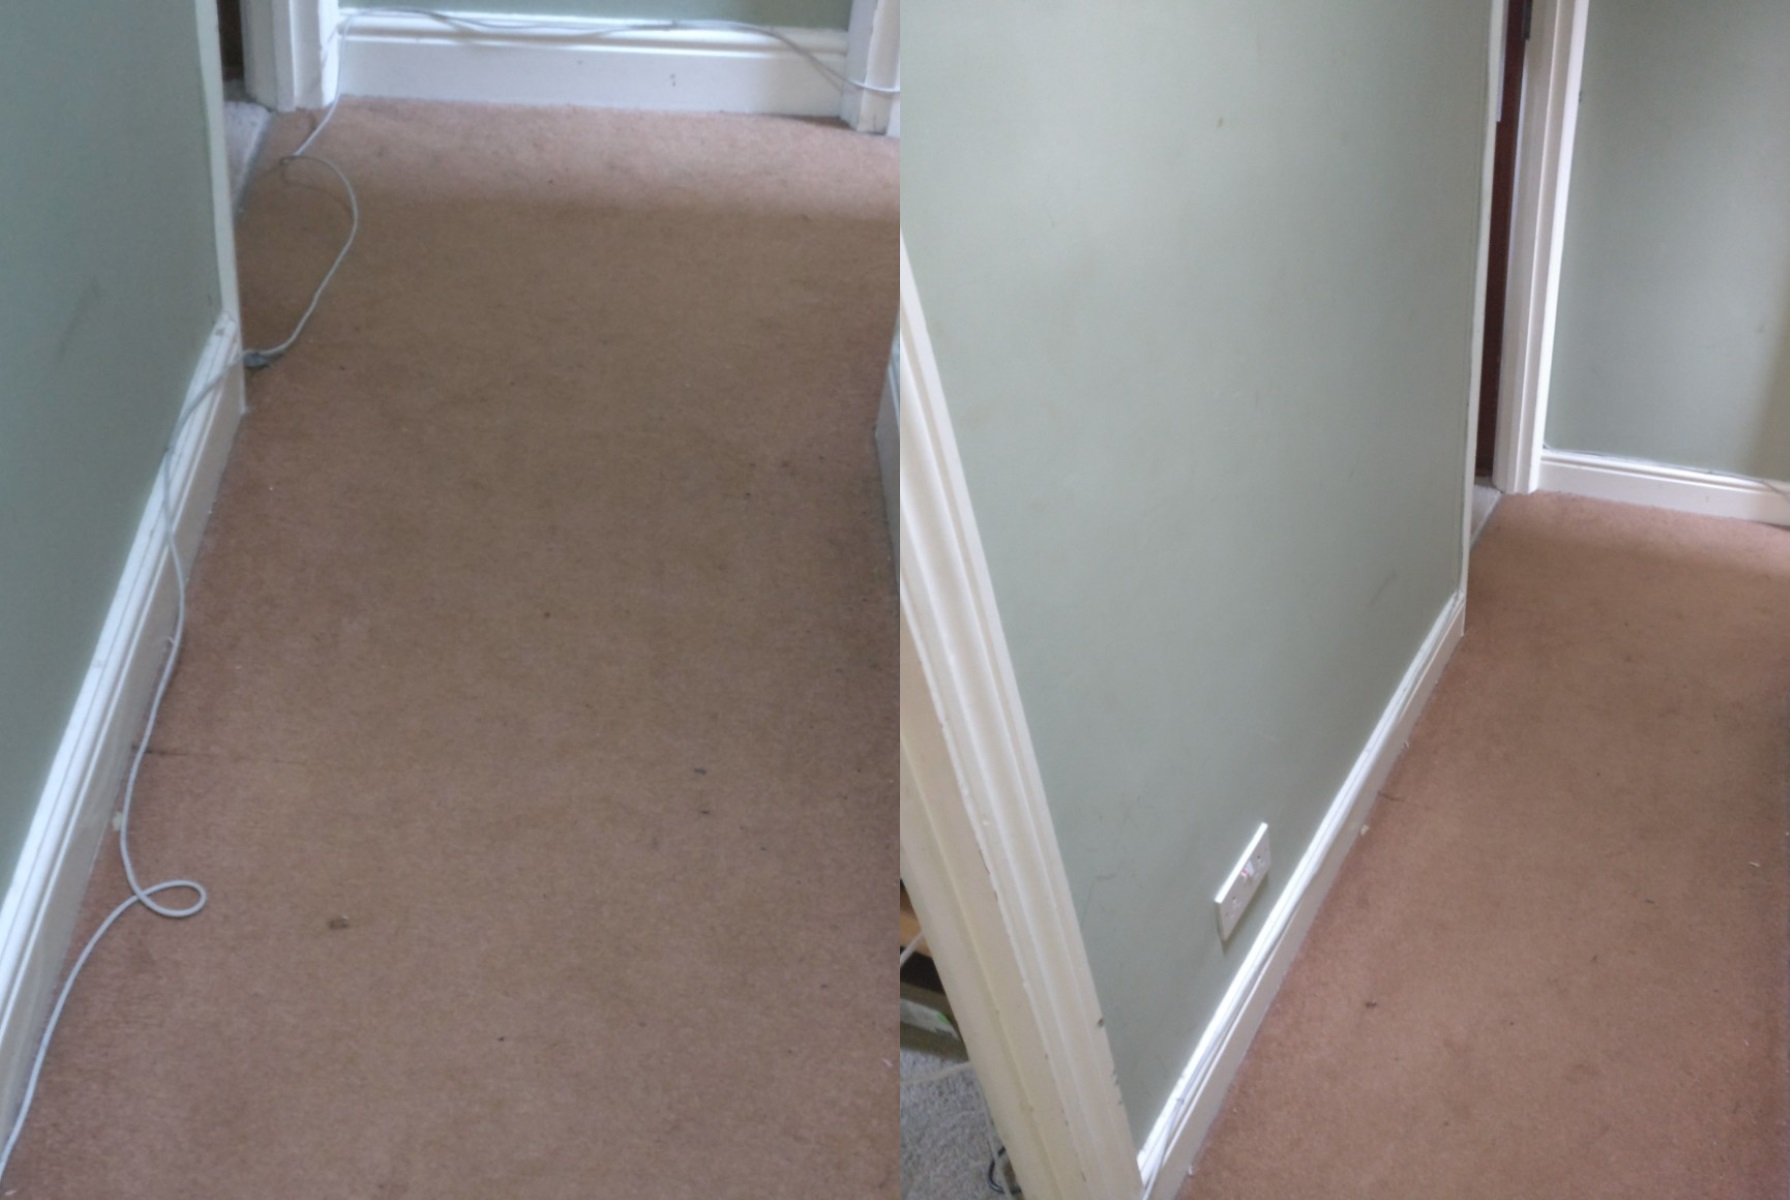
Concealing Ethernet Cable under Carpets or Rugs
If you want to hide Ethernet cables in a way that is virtually invisible, concealing them under carpets or rugs can be an effective and seamless solution. This method allows you to keep the cables out of sight while maintaining the aesthetic appeal of your space.
To conceal Ethernet cables under carpets or rugs, start by measuring the length of the cable and ensuring it reaches the desired location. It’s important to use flat Ethernet cables or low-profile cables for this method, as thicker or rigid cables may create visible bumps or unevenness under the carpet.
Next, gently lift the edge of the carpet or rug near the starting point of the cable. Create a small slit or opening in the carpet using a utility knife or any other sharp tool. Be cautious not to cut too deeply or damage the carpet fibers.
Insert the Ethernet cable through the slit or opening, ensuring it is flat and lies along the edge of the carpet. Press the carpet down to secure it in place and hide the cable. As you move along the desired pathway, repeat this process, creating small slits or openings where necessary.
It’s essential to be mindful of the position of the cable to prevent any potential damage or interference with the carpet. Avoid placing the cable near areas where heavy foot traffic or furniture might cause it to get pinched or crushed.
If the carpet or rug doesn’t have a suitable edge to conceal the cable, you can use double-sided carpet tape or adhesive-backed cable clips to secure the cable in place. Stick one side of the tape or the clip on the floor and the other side on the cable, ensuring it is firmly attached.
To create an even more polished look, you can use a carpet rake or a similar tool to fluff and blend the carpet fibers over the concealed cable, ensuring it remains out of sight.
Concealing Ethernet cables under carpets or rugs provides a seamless and minimalistic approach to cable management. It not only keeps the cables hidden but also eliminates the need for additional installation or modifications to your space.
However, it’s important to note that while this method is suitable for temporary or low-traffic areas, it may not be ideal for high-traffic areas or areas where the carpet is frequently moved or cleaned.
Employing Cord Hiders for Neat Cable Management
To achieve a professional and organized look for cable management, employing cord hiders can be a valuable solution. Cord hiders are specially designed channels or covers that help conceal and protect multiple cables, including Ethernet cables, while maintaining a neat and clutter-free appearance.
To utilize cord hiders for neat cable management, start by assessing the number of cables you need to hide and their respective lengths. Choose a cord hider that offers enough space to accommodate all the cables comfortably.
There are various types of cord hiders available, including wall-mounted cord hiders and floor cord hiders. Wall-mounted cord hiders are installed directly onto the wall, providing a discreet pathway for the cables. Floor cord hiders, on the other hand, can be placed on the floor and provide accessibility while keeping the cables hidden.
Before installing the cord hiders, make sure to clean the surface where they will be placed to ensure a secure bond. Some cord hiders come with adhesive backing, while others may require screws or brackets for installation. Follow the manufacturer’s instructions for the specific cord hider you are using.
Once the cord hiders are securely in place, neatly arrange the Ethernet cables inside the channel or cover of the hider. Make sure to organize and separate the cables to prevent tangling or interference with each other.
To maintain a clean and professional appearance, use cable ties or Velcro straps to bundle and secure the cables within the cord hider. This will help prevent cables from slipping out or becoming tangled.
Depending on the design of the cord hider, you may have the option to paint or decorate it to match the surrounding environment. This will help it blend seamlessly with the walls or other elements in the room.
Employing cord hiders for neat cable management not only hides and protects Ethernet cables but also minimizes the risk of tripping over loose cables and creates a more visually appealing space. They are especially beneficial in offices, home entertainment setups, or any area with multiple cables.
By utilizing cord hiders, you can maintain a tidy and organized appearance while ensuring easy access to your Ethernet cables when needed.
Incorporating Furniture as Camouflage for Ethernet Cable
One creative and practical way to hide Ethernet cables is by incorporating furniture as camouflage. This method allows you to seamlessly blend the cables into the design and layout of your space, making them virtually invisible to the eye.
When strategically arranging furniture, consider the placement of your Ethernet cables and the pathways they need to follow. Choose furniture pieces that can serve as natural barriers or can conceal the cables within their structure or design.
For example, desks with built-in cable management systems or cable routing holes can be highly effective in hiding Ethernet cables. These desks provide designated spaces where the cables can be neatly organized and hidden from view.
You can also utilize bookshelves, entertainment centers, or TV stands to conceal Ethernet cables. Arrange your books, decorations, or electronic equipment in a way that strategically hides the cables, ensuring they are not visible from common viewing angles.
If your furniture does not have built-in cable management features, you can use adhesive clips or cable sleeves to secure the Ethernet cables along the underside or back of the furniture. Make sure to choose clips or sleeves that match the furniture’s color or finish, creating a seamless integration.
When positioning the furniture, be mindful of creating clear pathways for the cables to connect the devices. Consider the length of the cables and the reach required to connect them to their respective devices without causing strain or tension.
Additionally, you can use decorative elements such as curtains, rugs, or floor plants to further conceal any visible portions of the cables. Strategically placing these elements around the furniture can help create a visually pleasing environment while keeping the cables out of sight.
Incorporating furniture as camouflage for Ethernet cables not only hides unsightly wires but also enhances the overall aesthetics and functionality of your space. It creates a more cohesive and organized look, minimizing visual distractions.
Remember to periodically check and adjust the cables as needed to ensure they remain hidden and properly connected. With a little creativity, you can seamlessly integrate Ethernet cables into your furniture arrangement, achieving a clean and clutter-free space.
Installing Ceiling-Mounted Cable Management Systems
When it comes to hiding Ethernet cables in a discreet and efficient manner, installing ceiling-mounted cable management systems can be a highly effective solution. This method allows you to route the cables along the ceiling, keeping them out of sight and creating a clean and professional look.
Before proceeding with the installation, assess the layout of the room and plan the pathway for the Ethernet cables along the ceiling. Determine the entry and exit points, as well as any additional support or junction boxes that may be required.
Start by identifying the type of ceiling-mounted cable management system that suits your needs. Options range from simple adhesive or magnetic-based channels to more robust track systems that support various cables and accessories.
Measure and cut the cable management channels to the appropriate length, ensuring they align with the planned pathway along the ceiling. Consider the number and size of the Ethernet cables that will be hidden within the system.
Carefully attach the cable management channels to the ceiling using adhesive, screws, or other mounting hardware provided with the system. Follow the manufacturer’s instructions for the specific system you are using, ensuring the channels are securely attached and aligned.
Once the cable management system is installed, route the Ethernet cables through the channels, ensuring they remain neatly organized and hidden. Consider using cable ties or Velcro straps to bundle and secure the cables within the channels, preventing them from shifting or becoming tangled.
Depending on the design of the cable management system, you may have the option to customize the appearance by painting the channels to match the surrounding ceiling or incorporating decorative elements to further blend them into the space.
Installing ceiling-mounted cable management systems not only hides Ethernet cables but also offers the freedom to run additional cables for other purposes, such as lighting or audio systems. This creates a streamlined and clutter-free environment.
Keep in mind that installation of ceiling-mounted cable management systems may require professional assistance or electrical knowledge, especially if the cables are being connected to power sources or other electrical components.
By utilizing ceiling-mounted cable management systems, you can effectively hide Ethernet cables overhead, maintaining a clean and visually appealing space while preserving the functionality of your network connection.
DIY Tricks for Discreetly Hiding Ethernet Cable
If you’re looking for budget-friendly and creative solutions to hide Ethernet cables, there are several DIY tricks that can help you achieve a discreet and polished look. These tricks utilize everyday items and require minimal time and effort to implement.
1. Binder Clips: Attach binder clips to the edge of your desk or any other furniture, and use them to guide and secure Ethernet cables along the underside of the surface. This method keeps the cables hidden and prevents them from dangling or tangling.
2. Cable Sleeves: Utilize cable sleeves, which are flexible tubes that can encase multiple Ethernet cables. Simply place the cables inside the sleeve and position it along the baseboard or behind furniture for a streamlined appearance.
3. Wiremold: Wiremold is a type of surface-mounted conduit system that can be easily installed along walls or baseboards. It provides a visually appealing way to hide Ethernet cables by routing them within the conduit, keeping them organized and out of sight.
4. Decorative Boxes: Use decorative storage boxes or bins to conceal and organize Ethernet cables. Simply place the cables inside the box and position it behind furniture or in an inconspicuous corner, allowing the box to act as a camouflage for the cables.
5. Cable Tunnels: Create cable tunnels by using PVC pipes or decorative covers. Cut the PVC pipe to the desired length, split it along the length, and insert the Ethernet cables. Then, mount the pipe along the baseboard or wall, ensuring the split side faces the wall for a seamless and hidden appearance.
6. Painting/Wallpapering: If the Ethernet cables run along the wall, you can camouflage them by painting or wallpapering the wall in a color or pattern that matches or complements the cable. This technique helps the cables blend into the background and go unnoticed.
7. Cable Clips: Attach adhesive cable clips to walls, baseboards, or furniture to secure Ethernet cables and keep them out of sight. These clips provide a clean and organized pathway for the cables, preventing them from becoming a visual distraction.
8. Cable Wraps: Use cable wraps, such as hook and loop fastener straps, to bundle and hide Ethernet cables neatly. These wraps secure the cables together, allowing you to tuck them behind furniture or along the baseboard, creating a streamlined look.
9. Cable Management Boxes: Invest in cable management boxes that provide a designated space to hide and organize Ethernet cables. These boxes have multiple openings for cables to enter and exit, keeping them concealed and maintaining a clutter-free appearance.
10. Concealment Furniture: Consider investing in furniture pieces specifically designed for cable management. These pieces have built-in compartments and channels to hide and organize cables, providing a seamless integration while maintaining a clean and modern look.
With these DIY tricks, you can discreetly hide Ethernet cables and enhance the overall appearance of your space at a minimal cost. Get creative and find innovative ways to keep your cables organized and out of sight.
Conclusion
Hiding Ethernet cables doesn’t have to be a daunting task. With the variety of techniques and solutions available, you can achieve a clean and organized space while keeping those unsightly cables out of sight. Whether you choose to conceal the cables along baseboards, use cable raceways, route them through walls, or incorporate furniture as camouflage, there’s a method to suit every preference and situation.
By implementing these methods, you not only enhance the visual appeal of your space but also minimize tripping hazards and protect the cables from damage. The key is to strike a balance between practicality and aesthetics, ensuring that the cables are hidden while maintaining a seamless and functional setup.
Remember to consider factors such as cable length, pathway visibility, and the overall layout of your space when deciding which method to utilize. Whether you opt for do-it-yourself tricks or invest in specialized cable management products, the goal is to create a clutter-free environment that promotes productivity, safety, and a sense of calm.
Take the time to plan and execute these techniques with care, paying attention to details such as color coordination, securing the cables properly, and keeping the pathways organized. Regularly inspect and adjust the hidden cables as needed to ensure they remain concealed and maintain a steady and reliable internet connection.
With a little creativity and effort, you can transform your space into a visually appealing and functional area, free from the eyesore of visible Ethernet cables. Say goodbye to tangled wires and hello to a clean and inviting environment where you can work, relax, and enjoy a seamless internet experience.