Introduction
Welcome to the world of digital art! If you’ve recently acquired a drawing tablet, congratulations! You’re about to embark on a journey that offers endless artistic possibilities. While using a drawing tablet may seem intimidating at first, with a little practice and patience, you’ll quickly become familiar with its features and benefits.
In this article, we’ll guide you through the process of getting used to a drawing tablet. We’ll cover everything from understanding the device and customizing its settings to mastering hand-eye coordination and different drawing techniques. By the end, you’ll be well-equipped to make the most of your digital drawing experience.
Whether you’re a seasoned artist transitioning from traditional mediums or a newcomer to the art world, learning how to use a drawing tablet can be a rewarding experience. It allows you to create stunning digital artworks, offers greater flexibility, and provides advanced tools and features that traditional methods may lack.
While it may take some adjustment to get used to the digital workflow, the benefits are well worth it. Drawing tablets not only offer a more efficient and streamlined approach to creating art but also open up a world of possibilities for experimentation and exploration. With practice, you’ll be able to seamlessly transition between traditional and digital methods, expanding your artistic abilities.
So, let’s dive into the world of drawing tablets and help you become a pro at using this versatile tool! In the following sections, we’ll cover the essential aspects of getting used to a drawing tablet, starting with getting to know your device and customizing its settings.
Getting to Know Your Drawing Tablet
Before you can start creating masterpieces on your drawing tablet, it’s crucial to familiarize yourself with the device itself. Each drawing tablet varies in terms of features and functionality, so take some time to explore the specific capabilities of your model.
First and foremost, identify the different parts of your drawing tablet. This typically includes the drawing surface, also known as the active area, where you’ll be creating your digital art. Some tablets also have buttons, dials, or touch-sensitive strips that can be customized for various shortcuts and functions.
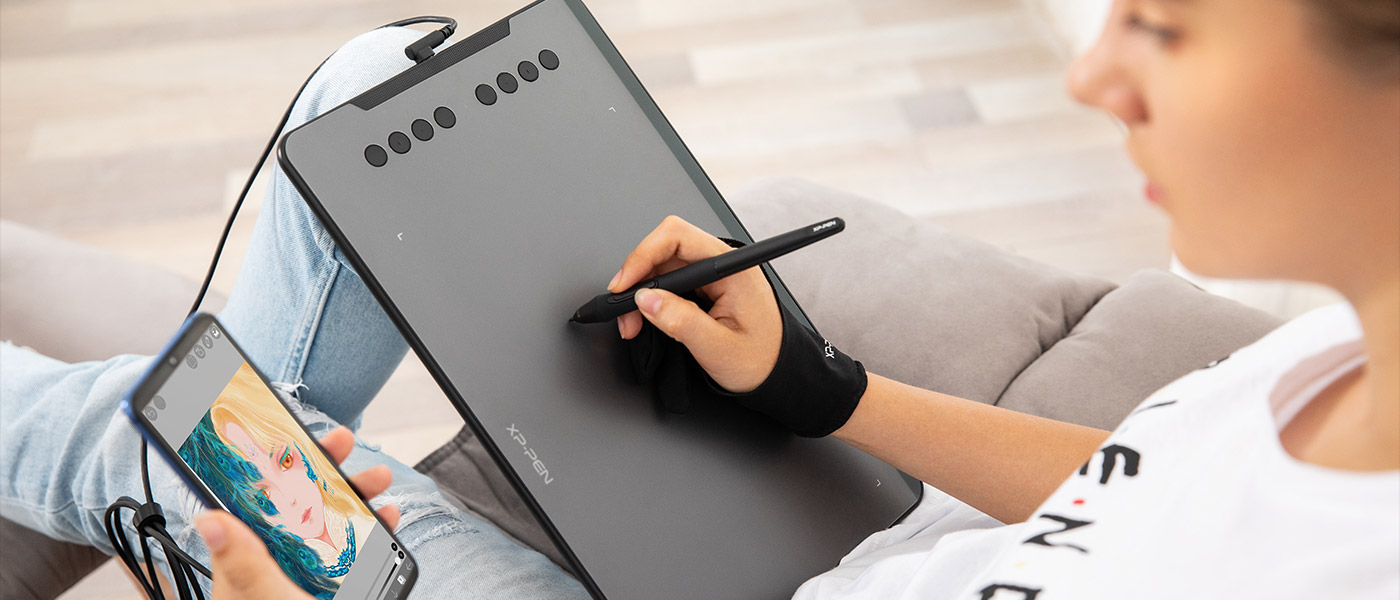
Next, make sure your drawing tablet is properly connected to your computer. Most drawing tablets require a USB connection, while some newer models offer wireless connectivity. Ensure that the drivers and software for your tablet are installed correctly, as these are essential for optimal performance. Check the manufacturer’s website for any available updates.
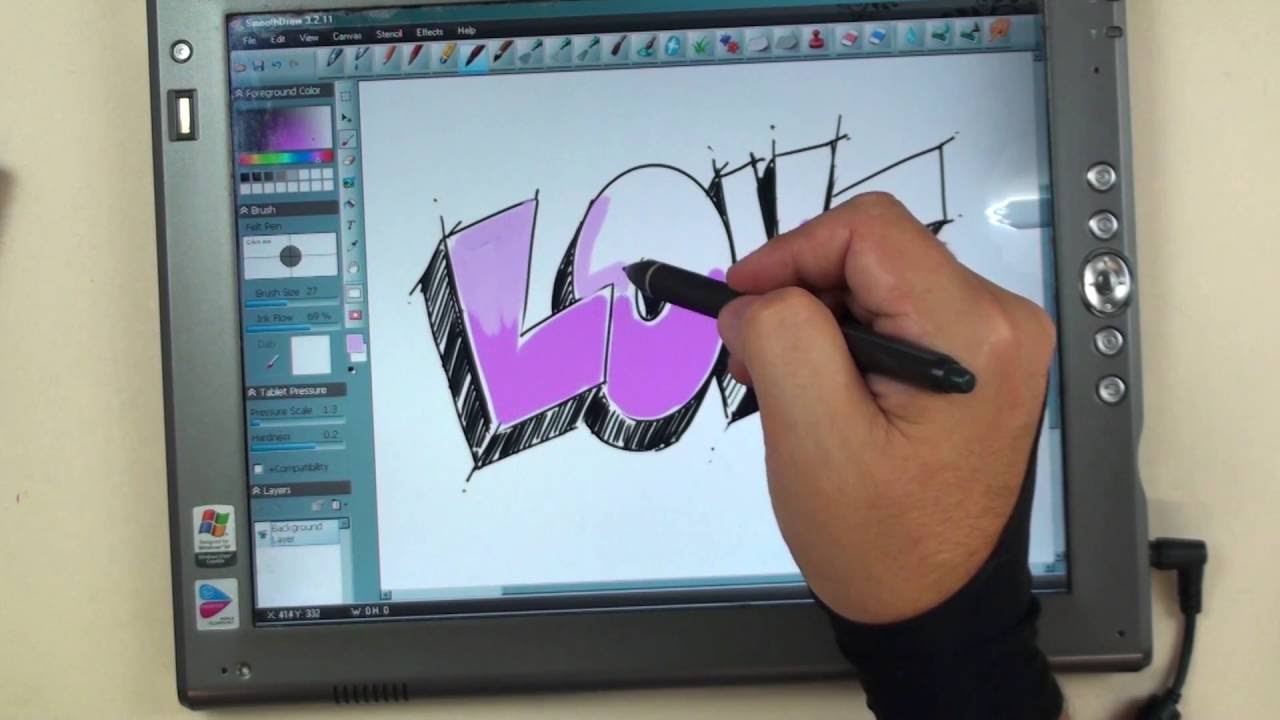
Once everything is set up, it’s time to experiment with the functionalities of your drawing tablet. Use the stylus provided with the tablet and familiarize yourself with its buttons and features. Test out the pressure sensitivity, which allows you to control the thickness and opacity of your digital strokes. Take note of the display areas on the tablet where your strokes will appear on-screen.
Additionally, familiarize yourself with the various input methods. Most tablets offer pen input, but you may also have the option to use touch gestures or multi-touch capabilities. Experiment with these different input methods to see which ones work best for you.
Lastly, take some time to explore the software that comes with your drawing tablet. Popular drawing software options include Adobe Photoshop, Corel Painter, and Procreate, among many others. Learn the basic functions and tools in the software and start experimenting with them to get a feel for the digital drawing process.
By taking the time to get to know your drawing tablet and its features, you’ll be better equipped to make the most of its capabilities. Once you’re comfortable with the basics, it’s time to move on to customizing the settings and making the tablet truly your own.
Customizing Your Drawing Tablet Settings
One of the great advantages of a drawing tablet is the ability to customize its settings to suit your personal preferences and artistic workflow. By adjusting the settings, you can create a more intuitive and efficient drawing experience. Here are some key settings to consider:
1. Pressure Sensitivity: Most drawing tablets offer pressure sensitivity, allowing you to control the thickness and opacity of your strokes based on how hard you press the pen against the tablet. Experiment with different pressure levels to find what feels most natural to you. Adjusting the sensitivity can make your strokes more responsive and accurate.
2. ExpressKeys: Many drawing tablets come with programmable buttons, such as Wacom’s ExpressKeys. These buttons can be customized to perform various functions and shortcuts, saving you time and effort. Consider mapping frequently-used commands like undo, brush size adjustment, or switching between layers to these ExpressKeys for easy access while drawing.
3. Pen Tilt: Some drawing tablets support pen tilt functionality, allowing you to create dynamic brush strokes based on the angle at which you hold the pen. Check if your tablet offers this feature and experiment with different brush settings to capitalize on this expressive technique.
4. Screen Mapping: If your drawing tablet has a display screen, you may need to adjust the screen mapping. This ensures that the pen coordinates accurately with the cursor on the screen. Use the software provided with your tablet to calibrate and fine-tune the mapping for precise pen control.
5. Brush Settings: Within your drawing software, explore the brush settings to create custom brushes that suit your artistic style. Adjust parameters like size, flow, opacity, and hardness to achieve the desired effect. Personalizing the brush presets can greatly enhance the versatility and creativity of your artwork.
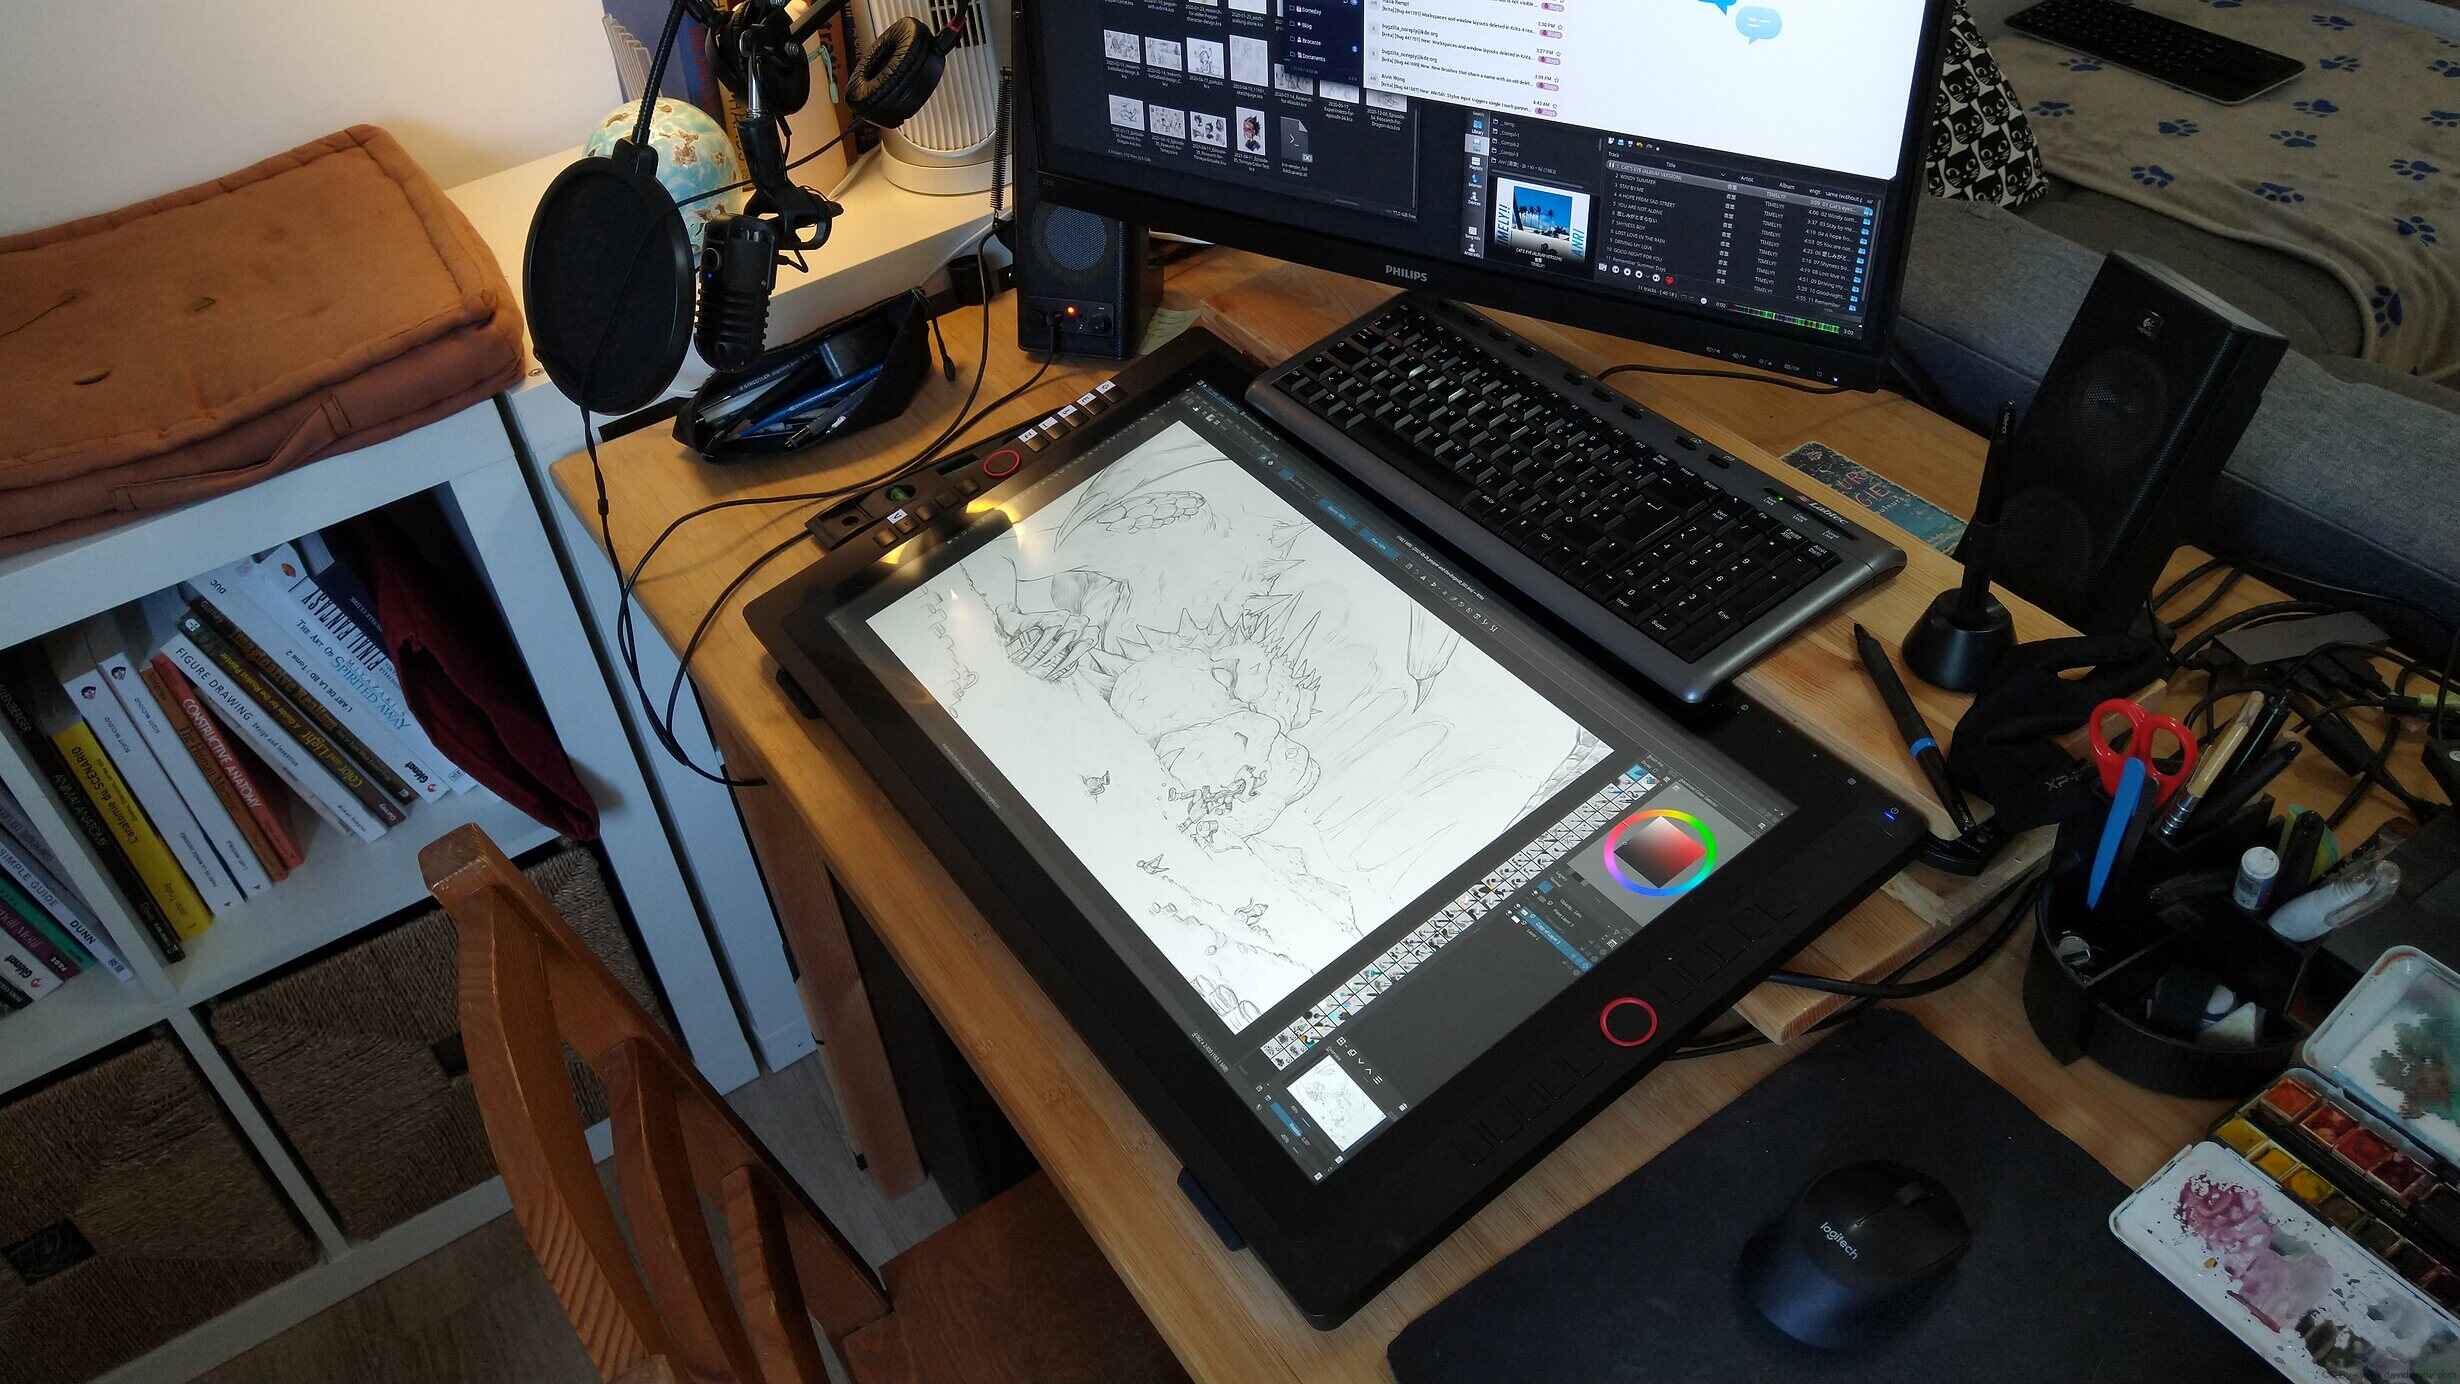
6. Workspace Setup: Organize your digital workspace to optimize your efficiency. Arrange your drawing software and additional reference materials on the computer screen in a way that feels comfortable and intuitive. Customizing your workspace helps reduce distractions and allows you to focus solely on your artwork.
Remember, these settings are not set in stone. As you gain more experience and your artistic style evolves, don’t hesitate to readjust and refine these settings to accommodate your needs. The beauty of customization is that it puts you in control of your drawing tablet, enabling you to create a personalized and seamless digital drawing experience.
Practicing Hand-eye Coordination
As with any form of art, developing good hand-eye coordination is essential for creating precise and fluid strokes on your drawing tablet. While it may feel different from traditional mediums like pencil and paper, practicing hand-eye coordination can help you become more proficient at digital drawing. Here are some exercises to improve your hand-eye coordination:
1. Tracing Exercises: Tracing is a great way to familiarize yourself with the hand movements required for digital drawing. Find images or line drawings that appeal to you and trace them using your drawing tablet. This exercise helps your hand adapt to the new interface and improves your control over the pen.
2. Drawing Basic Shapes: Start by drawing simple shapes like circles, squares, and triangles. Focus on making clean, smooth lines and try to maintain consistent proportions. This exercise helps you develop accuracy in your hand movements and trains your hand-eye coordination.
3. Continuous Line Drawing: Practice creating continuous line drawings without lifting your pen from the tablet surface. This exercise improves the fluidity of your strokes and forces you to think more about the overall composition rather than individual lines.
4. Hand-eye Drills: Set up specific drills to challenge your hand-eye coordination. For example, draw a series of dots or small targets on the screen and try to connect them with straight or curved lines as accurately as possible. Gradually increase the complexity of the patterns to further enhance your coordination skills.
5. Copying Artwork: Find digital artwork or illustrations that inspire you and try to reproduce them on your drawing tablet. This exercise helps you understand the techniques used by other artists and allows you to practice replicating their style and details.
6. Use Gesture Drawing: Gesture drawing involves capturing the essence and movement of a subject quickly. Practice drawing dynamic poses or objects with quick, loose strokes. This exercise trains your hand to make bold and confident strokes, which can be useful in creating expressive digital artwork.
Remember, improving hand-eye coordination takes time and practice. Be patient with yourself and don’t get discouraged if you don’t see immediate results. Consistency and perseverance will help you develop smoother strokes and greater control over your drawing tablet.
By incorporating these exercises into your regular practice routine, you’ll gradually build the muscle memory and coordination necessary to create stunning digital art. So, grab your pen and tablet, and get ready to enhance your hand-eye coordination on your journey to becoming a skilled digital artist!
Understanding Pressure Sensitivity
One of the most significant advantages of using a drawing tablet is its pressure sensitivity feature. Pressure sensitivity allows the tablet to recognize how hard or soft you press the pen against the surface, resulting in different line thicknesses and opacities. Understanding and harnessing the power of pressure sensitivity can greatly enhance your digital artwork. Here’s what you need to know:
1. Pressure Levels: Drawing tablets come with different levels of pressure sensitivity, usually ranging from 256 to 8192 levels. The higher the number of pressure levels, the more precise control you’ll have over the thickness and opacity of your strokes. Experiment with different pressure settings to find the level that feels most comfortable and responsive to your touch.
2. Thin and Thick Lines: With pressure sensitivity, you can create lines that vary in thickness and weight. Apply more pressure to the pen for thicker lines and less pressure for thinner lines. This mimics the effect of using different pencil or brush sizes in traditional art mediums, allowing for greater artistic flexibility.
3. Opacity Control: Pressure sensitivity also affects the opacity or transparency of your strokes. By adjusting the pressure, you can create lighter, more transparent strokes or darker, more opaque strokes. This is particularly useful when adding shading or creating textured effects in your artwork.
4. Layering Effects: Understanding pressure sensitivity allows you to layer multiple strokes on top of each other, creating a sense of depth and dimension in your artwork. By exerting varying amounts of pressure, you can build up layers of lines or shading, which adds richness and complexity to your digital drawings.
5. Emulating Traditional Tools: Pressure sensitivity in drawing tablets aims to replicate the tactile experience of traditional art mediums. By providing a range of pressure levels, tablets allow you to imitate the effects of using different pencil grades or brush types. This provides an intuitive and familiar drawing experience for artists transitioning from traditional to digital art.
6. Customizing Pressure Settings: Most drawing software allows you to customize pressure sensitivity settings based on your preferences. You can adjust the sensitivity curve to make it more gradual or more sensitive, depending on your desired comfort level. Play around with the settings to find the sweet spot that feels most natural and responsive to your touch.
Remember, pressure sensitivity is a powerful tool, but it takes practice to fully utilize it in your artwork. Experiment with different pressures, stroke thicknesses, and opacities to develop a sense of control and precision. Over time, you’ll become more proficient at incorporating pressure sensitivity into your digital creations, adding depth and expression to your artwork.
Now that you have a solid understanding of pressure sensitivity, let’s explore different drawing techniques to further enhance your digital drawing skills!
Learning Different Drawing Techniques
Mastering various drawing techniques is crucial for creating diverse and captivating digital art. While the principles of art remain the same, adapting them to the digital medium requires some adjustment. In this section, we’ll explore different drawing techniques and how to apply them effectively on your drawing tablet:
1. Line Work: The foundation of many digital artworks, line work involves creating clean and precise lines. Use varying pressure and stroke widths to add depth and dimension. Experiment with different brush settings and line weights to achieve the desired effect. Practice drawing confident and fluid lines to enhance the overall quality of your artwork.
2. Shading and Lighting: Just like in traditional art, shading and lighting play a crucial role in digital drawing. Utilize pressure sensitivity to create gradual shading and blending effects. Experiment with different brushes and opacity settings to achieve realistic lighting and shadowing. Pay attention to the direction of light sources and the reflections and highlights they create to add depth and realism to your artwork.
3. Textures and Patterns: Digital art allows for endless possibilities when it comes to creating textures and patterns. Experiment with brush settings and layering techniques to achieve various textures like fur, fabric, or rough surfaces. Use reference images or observe real-life objects to understand how different textures appear and apply those observations to your digital work.
4. Color Blending and Gradient: Drawing tablets offer convenient and precise color blending options. Take advantage of this feature to create smooth gradients and transitions between different shades and colors. Experiment with different brush settings, blending modes, and layering techniques to achieve realistic or stylized color effects in your artwork.
5. Layer Management: Understanding how to effectively use layers is essential for digital art. Utilize layers to separate different elements of your artwork, making it easier to edit and modify individual parts. Experiment with layer opacity, blending modes, and layer masks to achieve desired effects. This will give you greater control and flexibility throughout your creative process.
6. Experimental Techniques: Don’t be afraid to experiment and try new techniques with your drawing tablet. Use filters, distortions, and special effects to add unique and artistic touches to your artwork. Combine different techniques to create your own signature style and push the boundaries of digital art.
Practice and experimentation are key to mastering these drawing techniques. Take the time to explore and try different approaches, and don’t be afraid to make mistakes. Remember that learning is a continual process, and the more you create, the more you will refine your skills.
Now that you’ve learned about various drawing techniques, let’s delve into adjusting to the digital drawing workflow to further enhance your digital artistry.
Adjusting to the Digital Drawing Workflow
Transitioning from traditional art to the digital world requires some adjustments to your workflow. While the underlying principles of creating art remain the same, adapting to the digital drawing process can take time. To help you navigate this transition smoothly, here are some tips for adjusting to the digital drawing workflow:
1. Sketching Digitally: Start by sketching directly on your drawing tablet. Embrace the freedom to easily undo and make revisions. Use layers to separate your sketch from the final artwork, allowing you to refine and modify your initial ideas without affecting the rest of the composition.
2. Using Selection and Transform Tools: Digital art tools offer the ability to select and manipulate specific parts of your artwork. Take advantage of the selection tools to move, resize, and rotate elements of your artwork effortlessly. This saves time and allows for precise adjustments.
3. Utilizing Keyboard Shortcuts: Familiarize yourself with common keyboard shortcuts in your drawing software. These shortcuts can significantly speed up your workflow, allowing you to access tools, change brush settings, and perform various functions more efficiently. Practice incorporating keyboard shortcuts into your drawing process, and eventually, they’ll become second nature.
4. Exploring Digital Brushes: Digital drawing software offers a vast array of brush options to explore. Experiment with different brushes to achieve various textures, effects, and styles. Customizing and saving your favorite brushes can help you establish a consistent and personalized artistic expression.
5. Using Layers Effectively: Layers are a powerful tool in digital art. Familiarize yourself with layer management, including creating, organizing, and adjusting opacity and blending modes. Effectively utilizing layers allows for non-destructive editing and provides a greater level of control over your artwork.
6. Backing Up Your Work: Digital files are susceptible to data loss, so it’s important to establish a backup routine for your artwork. Regularly save your work, create backup copies on external drives or cloud storage, and consider implementing version control to keep track of different iterations of your artwork.
7. Seeking Community and Feedback: Connect with other digital artists online through forums, social media groups, or art communities. Engaging with a supportive community can provide inspiration, helpful tips, and constructive feedback on your artwork, accelerating your growth as a digital artist.
Keep in mind that adjusting to the digital drawing workflow is a personal journey that takes time and practice. Embrace the advantages and capabilities that digital art offers while still maintaining your unique artistic style. As you become more comfortable with the digital medium, you’ll develop your own efficient and effective workflow that suits your needs.
Now that you’re adjusting to the digital drawing workflow, let’s address common challenges you might encounter and how to overcome them.
Overcoming Common Challenges
While digital drawing has its advantages, it also presents some unique challenges. Understanding and addressing these challenges can help you navigate the digital art world more effectively. Here are some common challenges that artists face when transitioning to digital drawing and how to overcome them:
1. Hand-eye Coordination: Adjusting to the hand-eye coordination required for drawing on a tablet screen can be challenging at first. Practice regularly to familiarize yourself with the disconnect between where you draw and where the lines appear on the screen. Over time, your hand-eye coordination will improve, and your strokes will become more precise and controlled.
2. Pressure Sensitivity Control: Mastering pressure sensitivity takes time and practice. Experiment with different brush settings, pressure levels, and stroke techniques to find the right balance for your desired effect. Take advantage of tutorials and resources available online that can guide you in honing your pressure sensitivity control.
3. Digital Art Software Learning Curve: Transitioning to new software can be daunting. Take the time to familiarize yourself with the digital art software you’re using. Explore tutorials, forums, and online resources to learn tips and tricks from experienced artists. Gradually integrate new techniques and tools into your workflow to optimize your digital drawing process.
4. Replicating Traditional Techniques Digitally: Recreating the same feel and texture as traditional art techniques can be challenging in the digital realm. Experiment with different brush settings, textures, and layering techniques to mimic the effects of traditional mediums. Practice and explore various digital brushes designed to replicate the look of traditional materials like charcoal, watercolor, or oil paint.
5. File Organization and Storage: Managing digital art files can become overwhelming if not properly organized. Establish a systematic file naming and folder structure to ensure easy access and retrieval of your artwork. Regularly back up your files to prevent potential loss. Utilize cloud storage or external hard drives as secure backup options.
6. Overcoming the “Undo” Mentality: Digital art provides the luxury of easily undoing mistakes, which can inadvertently lead to a habit of excessive revisions. Embrace the freedom to experiment but aim for a balance between exploration and committing to artistic decisions. Trust your creative instincts and remember that imperfections can bring character to your artwork.
7. Struggles with Workflow and Productivity: Mastering workflow and productivity in the digital realm takes time and discipline. Establish a routine that suits your creative process and helps you stay focused. Set goals and deadlines to maintain a sense of structure. Experiment with software features and shortcuts to streamline your workflow and increase efficiency.
Remember, challenges are an inherent part of any artistic journey. Embrace them as opportunities to grow and improve your skills. Seek support from the digital art community, attend workshops, and participate in critiques, as these experiences can provide valuable insights and guidance.
By acknowledging and actively working to overcome these common challenges, you’ll become better equipped to leverage the advantages of digital drawing and unleash your creative potential.
Conclusion
Congratulations on taking the first steps towards mastering the art of digital drawing! Throughout this article, we’ve explored various aspects of getting used to a drawing tablet, from familiarizing yourself with the device and customizing its settings to practicing hand-eye coordination and learning different drawing techniques. We’ve also discussed adjusting to the digital drawing workflow and overcoming common challenges.
While the transition to digital drawing may present some initial challenges, with practice and perseverance, you’ll soon feel comfortable and confident in your abilities. Embrace the advantages that digital art offers, such as flexibility, endless possibilities, and ease of editing, while staying true to your artistic style and creativity.
Remember, becoming proficient in digital drawing takes time, patience, and a willingness to continually learn and explore. Regular practice, experimentation with different tools and techniques, and seeking feedback from the art community will accelerate your progress and help you develop your unique artistic voice.
As you continue on your digital art journey, don’t forget to enjoy the process. Embrace the freedom and versatility that digital drawing provides, allowing your creativity to flourish. Whether you’re creating realistic illustrations, stylized designs, or imaginative concepts, the possibilities are truly endless.
So, embrace your drawing tablet, unleash your creativity, and let your digital artistry soar to new heights. With dedication and passion, you can create stunning and captivating artwork that showcases your unique style and vision. Happy drawing!