Introduction
Welcome to our guide on how to get a Slack Channel webhook URL. Slack is a popular communication tool used by teams to collaborate, share information, and stay connected. One useful feature of Slack is the ability to send messages or notifications to channels using webhooks. Webhooks allow you to automate processes, integrate with external services, and keep your team updated in real-time.
In this step-by-step tutorial, we will walk you through the process of creating a Slack app, enabling incoming webhooks, and configuring them to send messages to a specific channel. By the end of this guide, you will have your very own webhook URL that you can use to send customized messages to your Slack channels.
Whether you want to automate notifications from your favorite app, receive updates from your website, or create custom integrations, setting up a webhook in Slack is a straightforward process. So, let’s dive in and get started on setting up your Slack Channel webhook URL.
Note: To follow along with this tutorial, you will need access to your Slack workspace and administrative privileges to create and configure apps.
Step 1: Create a Slack App
The first step in obtaining a Slack Channel webhook URL is to create a Slack app. A Slack app acts as a container for different features and functionalities that you want to add to your workspace. By creating a Slack app, you’ll be able to configure webhooks and define their behavior.
Follow these steps to create a Slack app:
- Go to the Slack API website and sign in to your Slack workspace.
- Click on the “Create New App” button to start creating a new app.
- Choose a name for your app. This is the name that will appear in your Slack workspace.
- Select the Slack workspace where you want to install the app.
- Click on the “Create App” button to create your app.
Once you’ve completed these steps, Slack will create your app and redirect you to the app’s settings page. On this page, you can configure various settings for your app, including adding features and functionalities, such as webhooks.
Now that we have our Slack app set up, let’s move on to enabling and configuring incoming webhooks in the next step.
Step 2: Enable Incoming Webhooks
In order to send messages or notifications to a specific channel, we need to enable incoming webhooks for our Slack app. Incoming webhooks allow external services or applications to send messages to Slack on behalf of a user or an app.
Follow these steps to enable incoming webhooks:
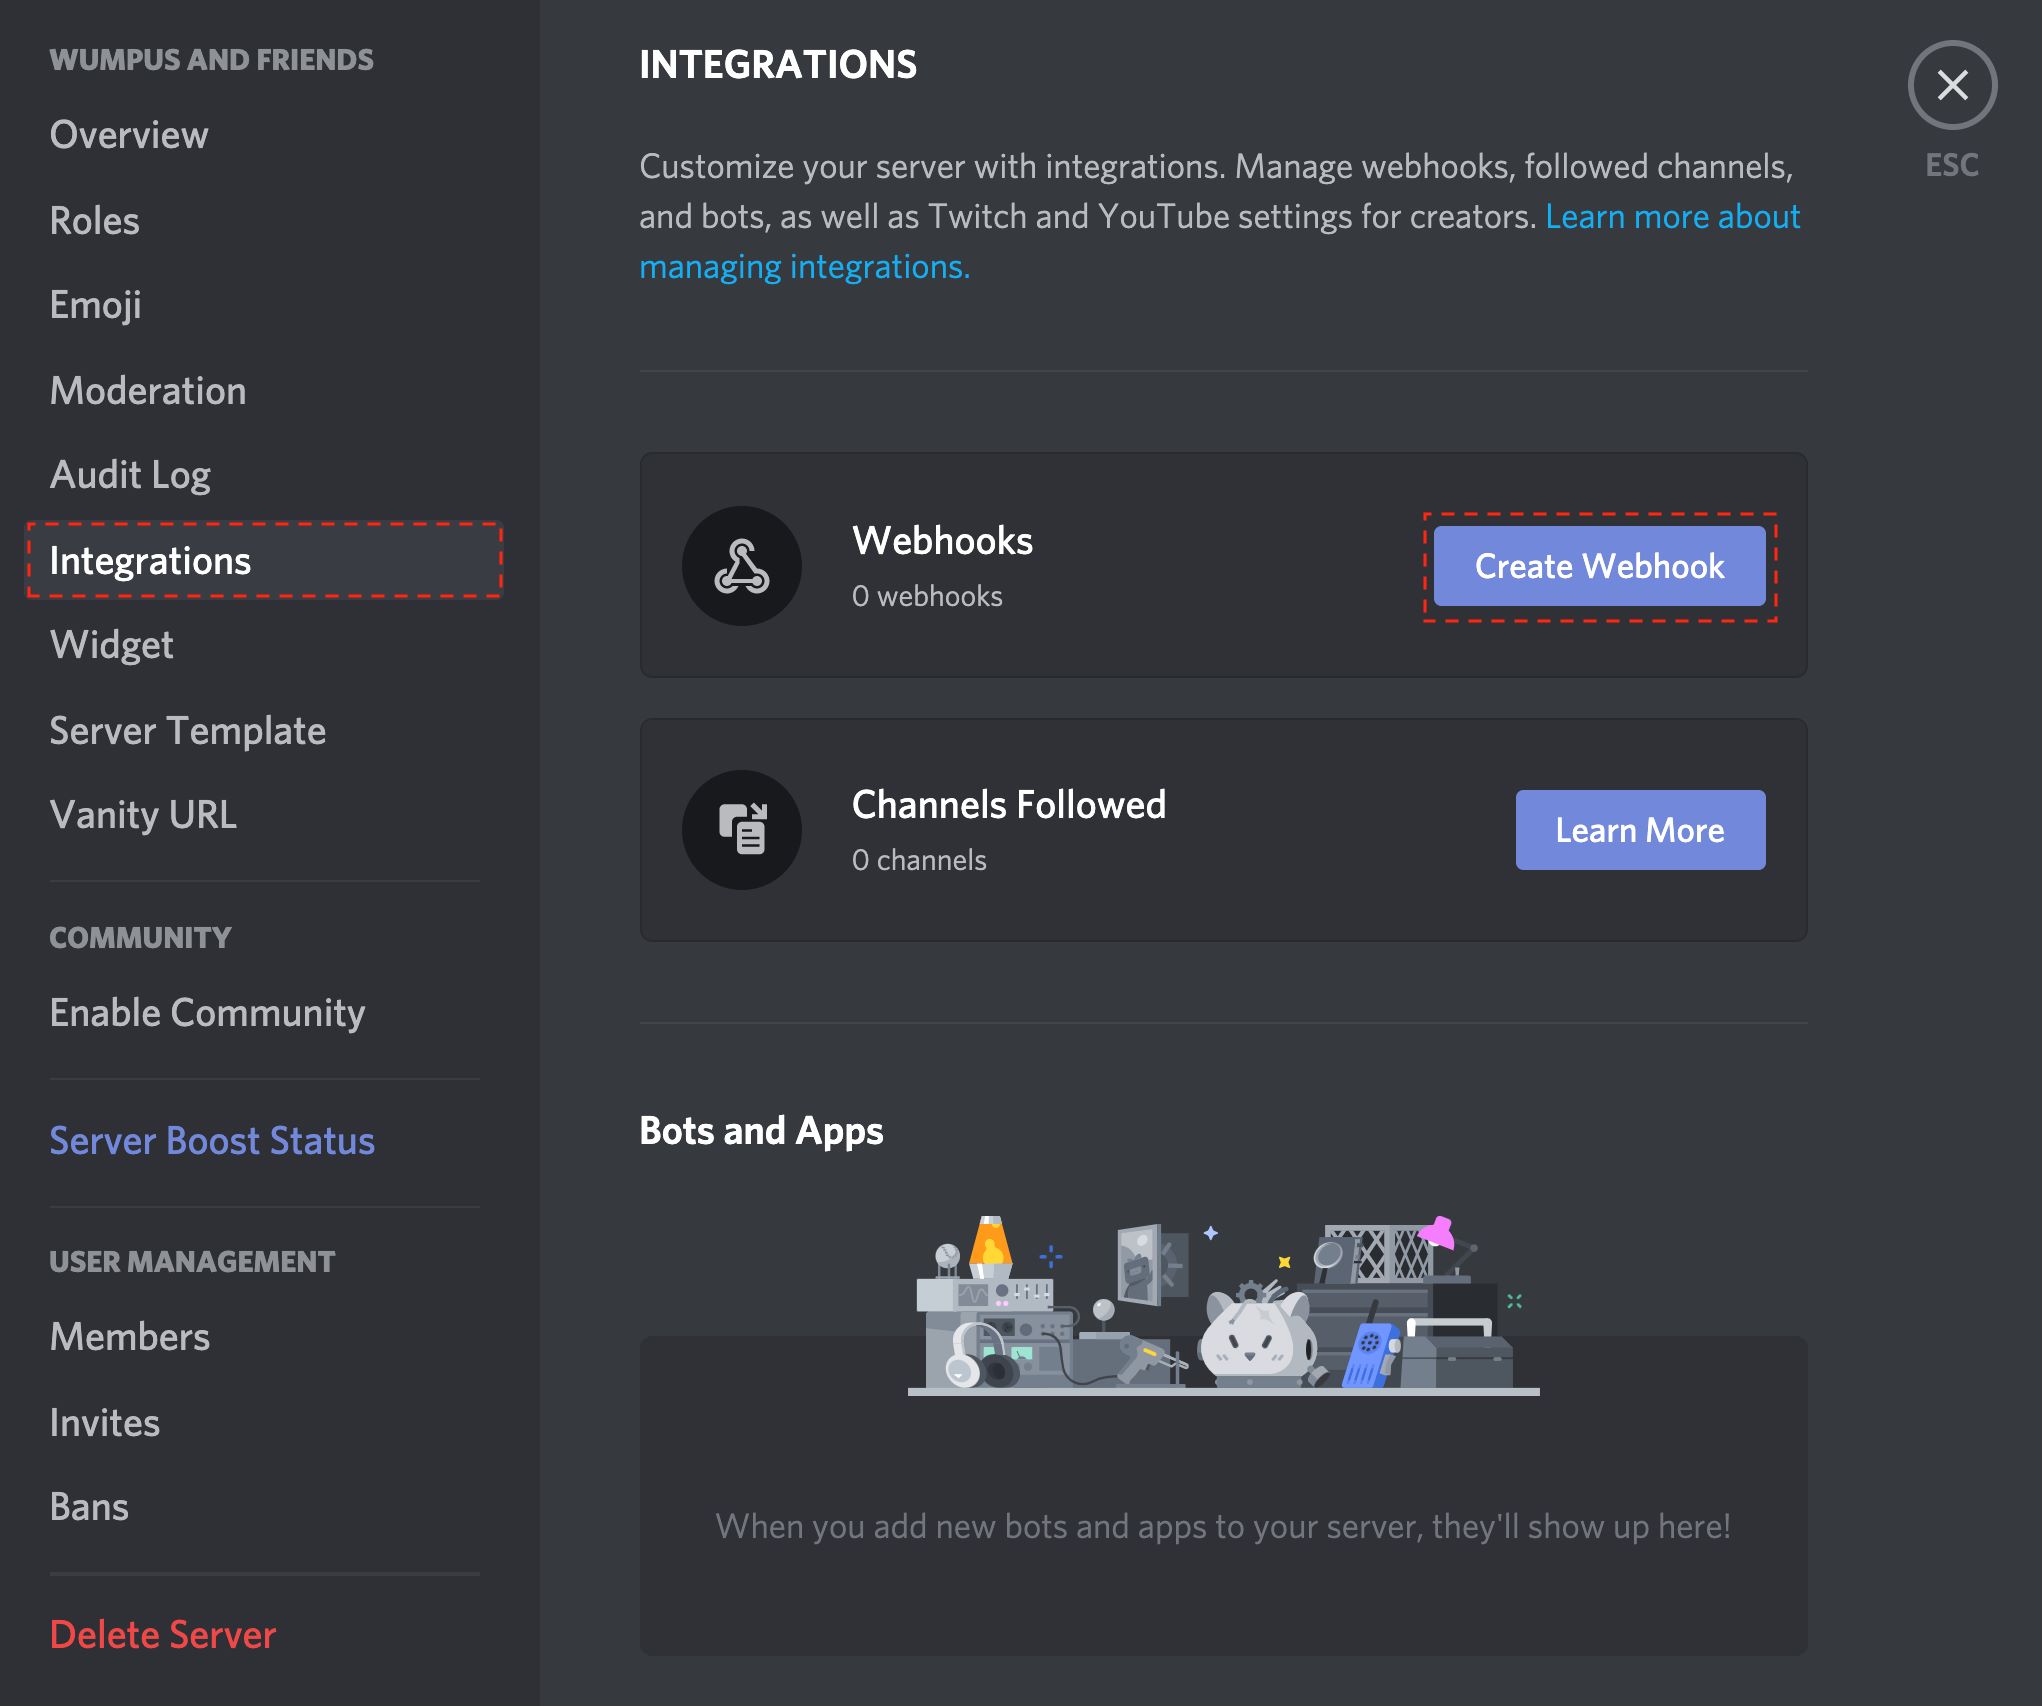
- On your Slack app settings page, navigate to the “Incoming Webhooks” section.
- Toggle the switch to enable incoming webhooks.
- Click on the “Add New Webhook to Workspace” button.
- Choose the channel where you want the webhook messages to be sent to.
- Click on the “Authorize” button to add the webhook to your workspace.
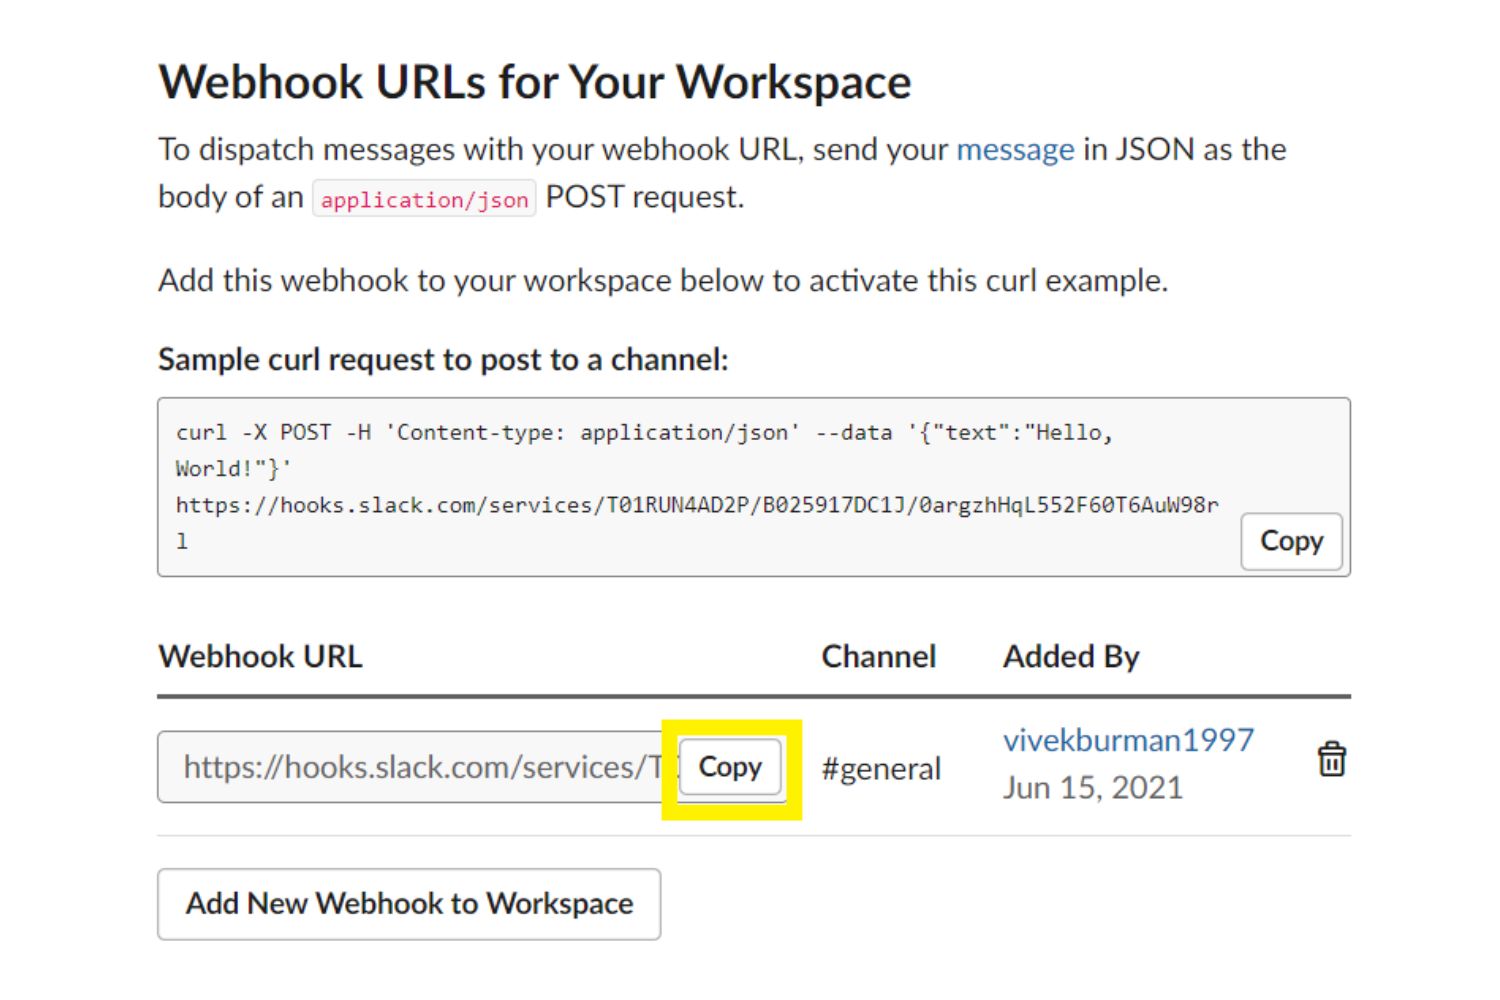
Once you’ve completed these steps, Slack will generate a unique webhook URL for your app. This URL is specific to the channel you selected and can be used to send messages and notifications to that channel.
It’s important to note that you can create multiple incoming webhooks for different channels within the same Slack app. This gives you the flexibility to send messages to different channels using different webhooks.
Now that we have enabled incoming webhooks, let’s proceed to the next step to configure the incoming webhook settings.
Step 3: Configure Incoming Webhooks
After enabling incoming webhooks for your Slack app, it’s time to configure the settings for the webhook. This includes customizing the name and icon of the sender, as well as adding additional information like URLs and attachments to your messages.
Here’s how to configure your incoming webhook:
- On the incoming webhooks settings page in your Slack app, you will see the newly generated webhook URL. This is the URL you will use to send messages to your selected channel.
- Scroll down to the “Integration Settings” section.
- Customize the “Name” field to give a specific name to the sender of your messages. This could be the name of your app or any other desired name.
- If you want to change the icon of the sender, you can upload a custom image or select an emoji from the available options.
- You can add additional information to your messages by including URLs, attachments, or other relevant data using the “Message Attachments” section. This allows you to send rich and interactive messages to your channel.
Once you have configured the settings to your liking, make sure to save the changes. These settings will be applied to all messages sent through the webhook URL.
With the incoming webhook now fully configured, it’s time to move on to the next step and add the webhook URL to a specific channel.
Step 4: Add an Incoming Webhook to a Channel
Now that you have your incoming webhook URL and it’s configured to your requirements, it’s time to add the webhook to a specific channel in your Slack workspace. By doing this, all messages sent through the webhook will be directed to that channel.
Follow these steps to add an incoming webhook to a channel:
- Copy the generated webhook URL from the incoming webhooks settings page of your Slack app.
- Open your Slack workspace and navigate to the channel where you want to receive the webhook messages.
- Click on the channel name to open the channel settings.
- Select “Add an app or integration” option from the channel settings.
- Search for your Slack app by name or browse through the list of available apps.
- Select your app from the list and confirm the action.
Once you’ve completed these steps, your incoming webhook will be added to the selected channel. All messages sent through the webhook URL will now appear in that channel for your team members to see and interact with.
It’s important to note that you can add the same incoming webhook to multiple channels if needed, allowing you to send messages to different channels using the same webhook URL.
Now that you have successfully added the incoming webhook to a channel, you’re all set to start sending messages and notifications using your Slack Channel webhook URL!
Conclusion
Congratulations! You have successfully learned how to obtain a Slack Channel webhook URL and configure it to send messages and notifications to specific channels in your Slack workspace. By following the steps outlined in this guide, you have enabled incoming webhooks, configured their settings, and added them to the desired channels.
Webhooks provide a powerful and flexible way to automate processes, integrate external services, and keep your team updated in real-time. With the ability to customize the sender’s name, icon, and message content, you can create personalized and informative messages that cater to your team’s communication needs.
Remember to treat your webhook URL with care, as it grants access to send messages to your Slack channels. Ensure that you only share it with trusted services or individuals to maintain the security and integrity of your Slack workspace.
Now that you have mastered the process of getting a Slack Channel webhook URL, you can explore further possibilities. Consider integrating your webhook with external systems, creating custom notifications, or automating tasks to streamline your team’s communication and collaboration.
Thank you for following along with this guide. We hope you found it informative and useful in enhancing your Slack experience. Happy messaging!