Introduction
Welcome to this comprehensive guide on creating a Slack app! Slack has become one of the most popular communication and collaboration platforms for teams around the world. With its powerful features and integrations, Slack offers a flexible and efficient workspace for businesses of all sizes.
Whether you are looking to automate tasks, extend the functionality of Slack, or enhance team productivity, creating a custom Slack app can be the perfect solution. In this guide, we will walk you through the process of creating a Slack app from start to finish, providing step-by-step instructions along the way.
To create a Slack app, you don’t need to be an experienced developer. Slack offers a user-friendly interface and extensive documentation that makes it accessible to users with various levels of technical expertise. If you have a basic understanding of HTML, you’re already off to a great start.
In this guide, we will cover everything you need to know to get started with creating a Slack app. We will begin by giving you an overview of what Slack apps are and how they can benefit your team. Then, we will guide you through the prerequisites and show you how to set up a Slack workspace.
Once your workspace is up and running, we will dive into the process of creating a new Slack app. You will learn how to configure app settings, add bot users, define app permissions, and set up event subscriptions. We will also cover how to handle events and send messages using your Slack app.
Throughout this guide, we will provide clear instructions and tips to help you along the way. Additionally, we will highlight best practices and share valuable insights to ensure that your Slack app is secure, efficient, and user-friendly.
By the end of this guide, you will be equipped with the knowledge and skills to create your own custom Slack app. So, let’s get started and unlock the potential of Slack for your team!
What is a Slack App?
A Slack app is an integration or software application that extends the functionality of Slack. It allows you to automate tasks, interact with external systems, and customize your Slack workspace according to your team’s specific needs. With Slack apps, you can streamline workflows, enhance collaboration, and boost productivity.
Slack apps are built using Slack’s APIs (Application Programming Interfaces) and can be created by developers or even non-technical users using Slack’s app development tools. These apps can be used to perform a wide range of functions, such as sending automated notifications, aggregating data from external sources, creating custom commands, and much more.
There are two main types of Slack apps: bot apps and interactive apps. Bot apps are programmed to perform tasks on behalf of a user or a team, and they can participate in conversations, post messages, and respond to specific triggers. Interactive apps, on the other hand, enable users to interact with external services directly within Slack, allowing for seamless integrations and real-time data exchange.
One of the key benefits of using Slack apps is that they allow you to centralize your team’s workflows and access external tools and services without leaving the Slack environment. This eliminates the need to switch between different applications, saving time and improving efficiency.
Slack apps can be customized to meet the unique requirements of your team. You can add your own functionality, integrate with existing tools and services, and personalize the user experience. This level of customization ensures that your team has a tailored and optimized workspace that fits your specific needs.
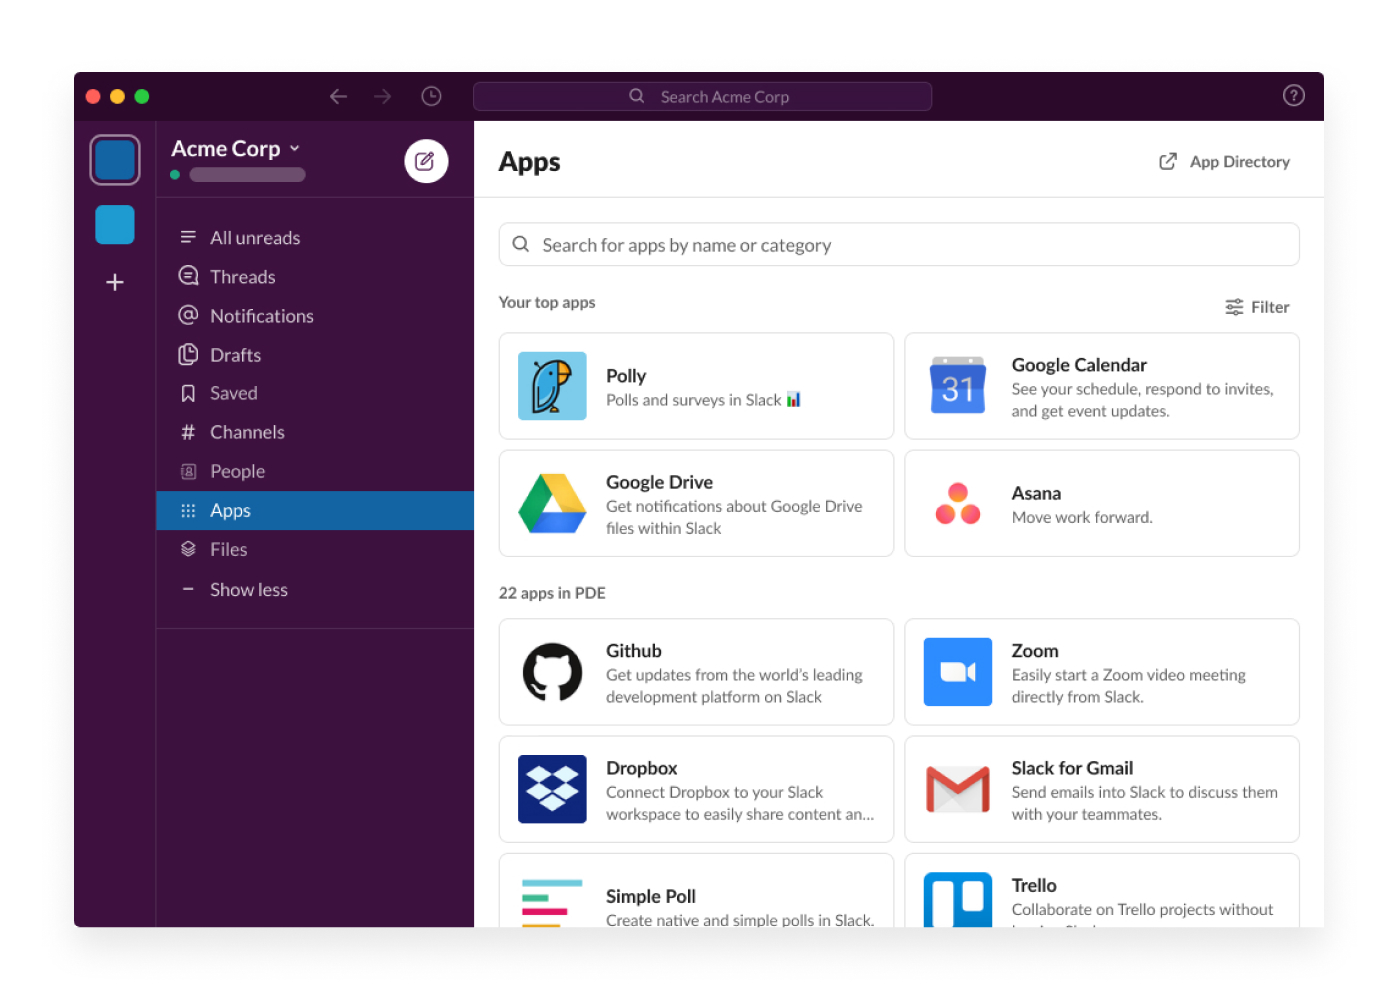
Additionally, Slack provides a comprehensive app directory where you can discover and install pre-built apps that have been developed by other users or app developers. This directory offers a vast range of apps for various purposes, from project management and file sharing to advanced analytics and customer support.
By leveraging the power of Slack apps, you can enhance team collaboration, automate repetitive tasks, and bring all your tools and services together in one place. The flexibility and extensibility of Slack apps make them a valuable addition to any team looking to maximize productivity and streamline their workflows.
Prerequisites
Before you start creating a Slack app, there are a few prerequisites that you should have in place:
- Slack Workspace: You need to have a Slack workspace where you have the necessary permissions to create and install apps. If you don’t have a workspace, you can create one for free by visiting the Slack website and signing up.
- Slack Account: You need to have a Slack account that is associated with the workspace where you will be creating the app. If you don’t have a Slack account, you can sign up for one using your email address.
- Basic HTML Knowledge: Although you don’t need to be a professional developer, having a basic understanding of HTML will be helpful when creating and customizing your Slack app.
- Access to Developer Tools: To create a Slack app, you will need access to Slack’s developer tools, which include the App Dashboard and the API documentation. These tools are available to all users who have a Slack account.
- Authorization: Depending on the features and functionality you want to implement in your Slack app, you may need authorization or access tokens from external services or APIs. Make sure you have the necessary credentials and permissions to interact with these services.
It’s important to note that while you can create a Slack app without any programming knowledge using Slack’s app development tools, having a basic understanding of programming concepts and web technologies can greatly enhance your app-building experience.
Additionally, it’s helpful to have a clear understanding of the requirements and objectives of your app before you start building it. Knowing what you want to achieve with your app will guide your decision-making process as you configure settings, add features, and customize the app to meet your team’s needs.
Now that you have the necessary prerequisites in place, you’re ready to start creating your Slack app. In the following sections, we will guide you through the step-by-step process of setting up a Slack workspace, creating a new Slack app, and configuring its settings.
Setting up a Slack Workspace
To create a Slack app, you need to have a Slack workspace where you can configure and test your app. If you already have a Slack workspace, you can skip this section and move on to the next step. If not, here’s how you can set up a workspace:
- Visit the Slack Website: Go to the official Slack website at slack.com and click on the “Get Started for Free” button.
- Create a Workspace: Enter your email address and create a password to sign up for Slack. You’ll then be prompted to provide a name for your workspace. Choose a name that reflects your team or organization, as this will be the primary identifier for your Slack workspace.
- Invite Team Members: After creating a workspace, Slack will ask you to invite team members. You can enter their email addresses or skip this step for now and invite them later. Inviting team members will allow them to join the workspace and collaborate with you.
- Explore Slack Features: Once your workspace is set up, take some time to explore the different features and functionalities that Slack offers. Familiarize yourself with channels, direct messages, file sharing, and other core features that will be used in your app.
Setting up a Slack workspace is quick and straightforward. Once your workspace is created, you will have access to all the tools and settings necessary for building your Slack app. Make sure to familiarize yourself with the Slack interface and navigation so that you can efficiently manage your Slack workspace and app.
In the next section, we will dive into the process of creating a new Slack app and configuring its settings, so you can begin customizing your workspace and adding functionality to enhance your team’s productivity.
Creating a New Slack App
Now that you have your Slack workspace set up, it’s time to create a new Slack app. Follow the steps below to get started:
- Access the App Dashboard: Go to the Slack website and log in to your workspace. Once logged in, click on your workspace name in the top left corner and choose “Administration” from the dropdown menu. From the Administration page, select “Manage apps” to access the App Dashboard.
- Create a New App: In the App Dashboard, click on the “Create New App” button to start creating your Slack app.
- Enter App Information: In the App creation wizard, you’ll be prompted to enter basic information about your app, including the name, description, and icon. Be sure to choose a name and description that accurately reflect the purpose and functionality of your app.
- Select Features: Next, you’ll need to select the features you want to enable for your app. This can include capabilities like messaging, bot users, slash commands, and more. Choose the features that align with your app’s objectives and requirements.
- Configure Settings: Once you’ve selected the features, you’ll be taken to the App Dashboard, where you can configure various settings for your app. This includes adding permissions, setting up event subscriptions, and customizing the behavior of your app.
Creating a new Slack app is a straightforward process with Slack’s user-friendly interface and intuitive app creation wizard. Take your time to fill in the necessary information and configure the settings according to the goals of your app.
After creating your app, you can continue to customize it by adding bot users, defining app permissions, setting up event subscriptions, and handling events. These steps will be covered in the following sections of this guide.
Now that you have created a new Slack app and configured its basic settings, you’re ready to move forward with customizing the app and adding more functionality. In the next sections, we will guide you through the process of adding bot users, defining app permissions, and setting up event subscriptions.
Configuring App Settings
After creating a new Slack app, the next step is to configure the settings to customize and fine-tune its behavior. Let’s explore the different settings you can configure:
- Basic Information: In the App Dashboard, you can update the basic information about your app such as its name, description, and icon. It’s important to provide clear and accurate information to help users understand the purpose and functionality of your app.
- Interactive Components: Slack apps can have interactive components like buttons, menus, and forms that allow users to interact with your app directly within Slack. In this setting, you can configure the actions that your app can perform when users interact with these components. You can define URLs for the actions, set up message responses, and customize the behavior of your app’s interactive elements.
- Slash Commands: Slash commands are shortcuts that users can type into Slack to trigger specific actions or functionalities provided by your app. In this setting, you can define the slash commands that your app supports and specify the endpoints that will handle the command requests from Slack.
- Event Subscriptions: Event subscriptions allow your app to receive real-time notifications about activities happening within Slack. You can configure event subscriptions to listen to specific events such as message updates, channel creation, user joining, and much more. This setting enables your app to react and respond to these events programmatically.
- OAuth & Permissions: OAuth allows users to authorize your app to access their Slack workspace and perform actions on their behalf. In the OAuth & Permissions setting, you can configure the scopes and permissions that your app requires to function properly. Slack provides a granular set of scopes that control what your app can access and modify within a user’s workspace.
Configuring these app settings is crucial to ensure that your Slack app behaves as intended and has the necessary permissions to perform its tasks. Take the time to review and adjust the settings according to the specific requirements of your app.
Once you have configured the app settings, you can proceed to add bot users, define permissions, set up event subscriptions, and handle events. These steps will be covered in the following sections.
Now that you have configured the basic settings of your Slack app, you’re ready to move forward and add bot users to your app. Keep reading to learn more about the process of adding bot users and how they can enhance the functionality of your app.
Adding Bot Users
Bot users are a key component of Slack apps as they enable your app to interact with users and channels in Slack. Bot users can participate in conversations, send messages, and perform actions on behalf of the app. Here’s how you can add bot users to your Slack app:
- Access the App Dashboard: Log in to your Slack workspace and navigate to the App Dashboard. Select your app from the list of installed apps.
- Navigate to Bot Users: In the left-hand sidebar of the App Dashboard, click on “Bot Users” under the Features section.
- Add a Bot User: Click on the “Add a Bot User” button to start creating a new bot user for your app. Provide a unique username for the bot and click on “Add Bot User” to finalize the creation process.
- Configure Bot User Settings: After adding a bot user, you can configure its settings. You can provide a name for display purposes, set a profile picture, define its default channel, and more. These settings will customize the appearance and behavior of the bot user in Slack.
- Token Generation: In the “Bot Tokens” section, Slack generates a unique bot token for your app. This token will be required for your app to authenticate and communicate with the Slack API on behalf of the bot user.
Adding bot users to your Slack app allows you to extend its capabilities and interact seamlessly with users within Slack. Bot users can be used to automate tasks, provide information, and enhance team collaboration.
Once you have added a bot user, you can use the generated bot token to control and communicate with the bot through the Slack API. This token will be needed when setting up event subscriptions, sending messages, and performing other actions on behalf of the bot user.
Now that you have added a bot user to your Slack app, you can proceed to define app permissions, set up event subscriptions, and handle events. These steps will be covered in the following sections.
Keep reading to learn more about defining app permissions and ensuring that your app has the necessary access to perform its functions within Slack.
Defining App Permissions
Defining app permissions is an important step in configuring your Slack app. Permissions determine what actions and data your app can access within a Slack workspace. By defining the appropriate permissions, you can ensure that your app has the necessary access to perform its intended functions. Here’s how you can define app permissions:
- Access the App Dashboard: Log in to your Slack workspace and navigate to the App Dashboard. Select your app from the list of installed apps.
- Navigate to OAuth & Permissions: In the left-hand sidebar of the App Dashboard, click on “OAuth & Permissions” under the Features section.
- Set Scopes: In the “Scopes” section, Slack provides a list of available scopes that you can add to your app. Scopes define what actions and data your app can access. Choose the appropriate scopes for your app based on its functionality and requirements. Slack provides a range of scopes, including read and write access to channels, users, conversations, files, and more.
- Save Changes: Once you have selected the desired scopes, click on the “Save Changes” button to apply the permissions to your app.
- Requesting User Authorization: When users install your app, they will be presented with a request for authorization. This request will outline the permissions your app requires. Users can then choose to grant or deny access. It’s important to clearly communicate the purposes and benefits of granting access to encourage users to authorize your app.
Setting appropriate app permissions is crucial to ensure that your app functions properly and adheres to the data security and privacy requirements of Slack workspaces. It’s important to carefully consider the permissions your app needs and avoid requesting unnecessary access.
Remember that user trust is important in building successful Slack apps, so make sure to provide clear and transparent information about what data your app will access and how it will be used.
With the defined app permissions, you can create more robust and powerful integrations with Slack. Your app will be able to interact with channels, users, messages, files, and other resources in a controlled and secure manner.
Now that you have defined app permissions, you can proceed to set up event subscriptions and handle events. These steps will be covered in the following sections.
Next, we will explore how to set up event subscriptions and receive real-time notifications about activities happening within Slack.
Setting Up Event Subscriptions
Event subscriptions allow your Slack app to receive real-time notifications about activities happening within a Slack workspace. By setting up event subscriptions, you can react and respond programmatically to events such as messages being posted, users joining or leaving channels, and much more. Here’s how you can set up event subscriptions:
- Access the App Dashboard: Log in to your Slack workspace and navigate to the App Dashboard. Select your app from the list of installed apps.
- Navigate to Event Subscriptions: In the left-hand sidebar of the App Dashboard, click on “Event Subscriptions” under the Features section.
- Enable Events: Toggle the “Enable Events” switch to turn on event subscriptions for your app.
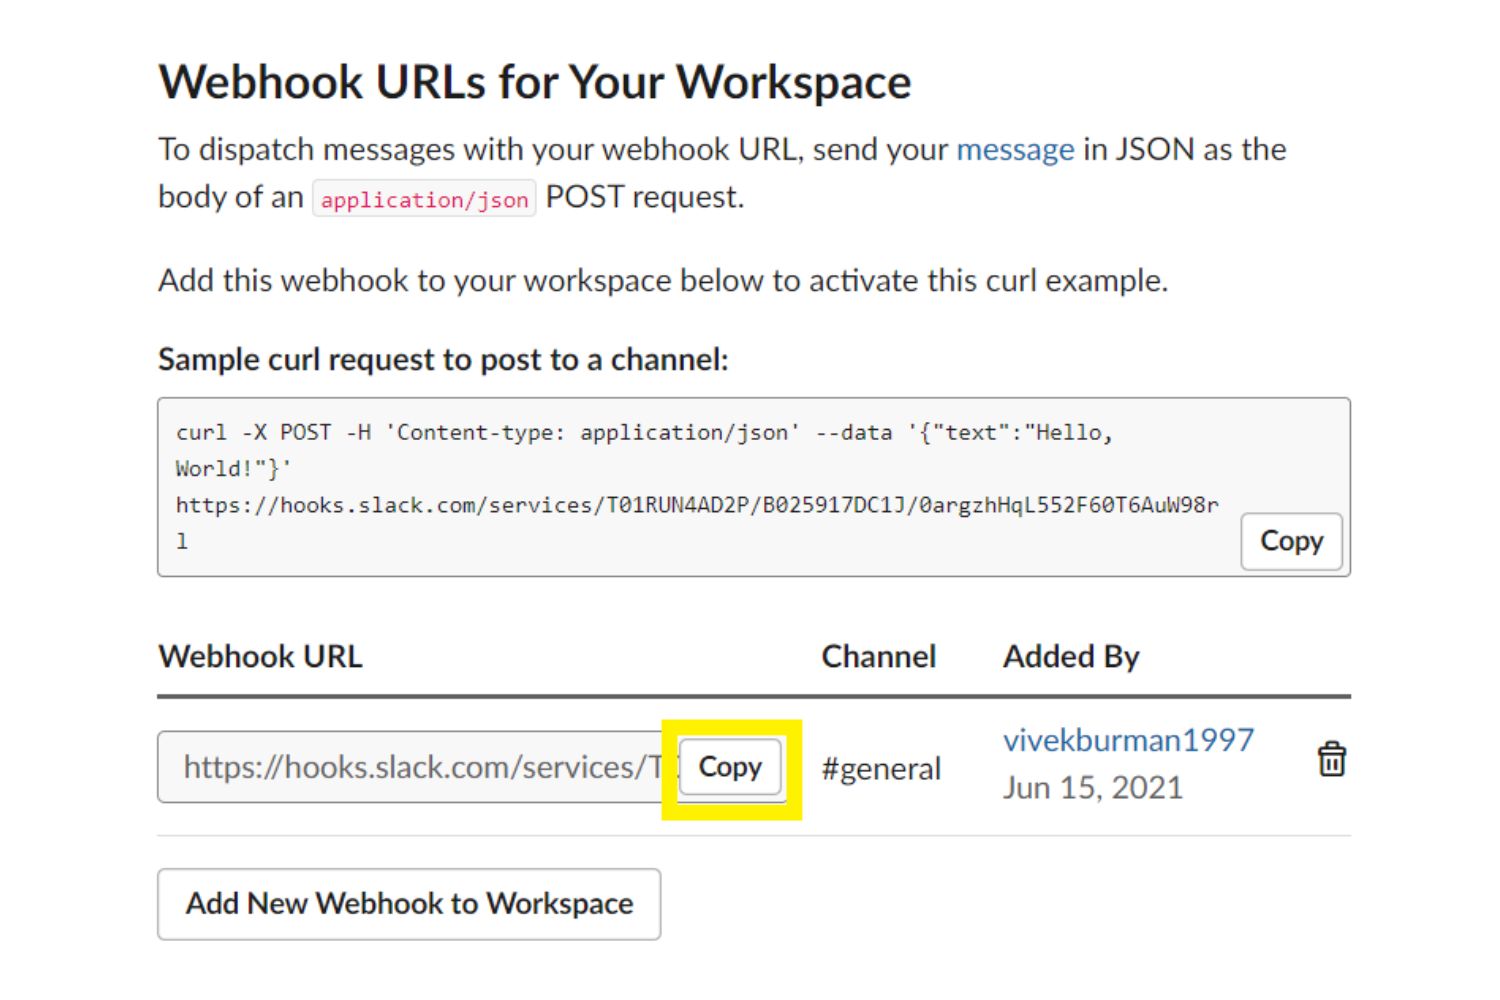
- Request URL: In the “Request URL” field, enter the URL where your app will receive event notifications. This URL should be accessible over the internet and capable of handling HTTP requests.
- Subscribe to Events: In the “Subscribe to Bot Events” section, select the specific events you want your app to receive notifications for. You can choose events such as message events, channel events, user events, and much more. Select the events that are relevant to the functionality of your app.
- Save Changes: Once you have configured the event subscriptions, click on the “Save Changes” button to apply the settings to your app.
- Verify URL: To ensure that your app’s Request URL is valid and capable of receiving event notifications, Slack will send a verification request to your app. You need to handle this request and respond with a 200 OK status code and the challenge value provided in the verification request.
Setting up event subscriptions allows your app to listen and react to events happening in real-time within a Slack workspace. With event notifications, you can build powerful and interactive features that respond to user actions or automate specific processes based on certain triggers.
Make sure your app’s Request URL is reliable and capable of handling incoming notifications. You may need to update and reconfigure your app’s event subscription settings if the URL changes in the future.
Now that you have set up event subscriptions, your app will start receiving real-time notifications when the subscribed events occur. In the next sections, we will explore how to handle events and respond programmatically.
Continue reading to learn how to handle events and take actions based on the received event notifications.
Handling Events
Once you have set up event subscriptions for your Slack app, it’s time to handle the received events and take actions based on them. Handling events allows your app to react programmatically to specific activities happening within a Slack workspace. Here’s how you can handle events:
- Receive Event Notifications: When an event occurs in the workspace, Slack will send a POST request to the Request URL you configured for your app’s event subscriptions. Your app needs to listen for these requests and handle them appropriately.
- Validate and Verify Requests: Upon receiving an event notification, you should validate the request to ensure it came from Slack. Validate the request’s signature using the signing secret provided by Slack to verify its authenticity.
- Extract Event Data: Extract the relevant information from the event notification to determine the type of event that occurred and the associated data. Slack provides detailed documentation on the structure and properties of each event type.
- Perform Actions: Based on the type of event and the associated data, perform actions within your app or communicate back to Slack. This could involve posting a message or performing a specific task based on the event that occurred.
- Respond to Slack: After handling the event, you may need to respond to Slack with an acknowledgment. For example, you can send a 200 OK response to confirm that your app received and processed the event successfully.
- Error Handling: Implement error handling mechanisms to address any exceptions or issues that may occur while handling events. Log errors, provide appropriate responses, and ensure that your app can handle unexpected scenarios gracefully.
Handling events allows your Slack app to listen and respond to user actions, messages, and other activities in real-time. By taking actions based on events, your app can automate tasks, provide instant notifications, or perform any other functionality you desire.
It’s important to understand the event types and their associated data structures provided by Slack’s API documentation. This will help you determine the relevant information for each event and enable you to respond appropriately.
Now that you know how to handle events, you can start building dynamic and responsive features within your Slack app. In the next sections, we will explore how to send messages and install your app to your Slack workspace.
Continue reading to learn how to send messages using your Slack app and communicate with users in a seamless manner.
Sending Messages
One of the key functionalities of a Slack app is the ability to send messages to users and channels. Sending messages allows your app to provide information, notifications, or interact with users within a Slack workspace. Here’s how you can send messages using your Slack app:
- Access the Slack API: To send messages, your app needs to make HTTP requests to the Slack API. You can use a programming language or a tool like cURL to make these requests.
- Construct your Message: Before sending a message, define the content and format of the message. This can include text, interactive buttons, attachments, and more. Slack provides a rich set of formatting options that allow you to create visually appealing and interactive messages.
- Choose your Target: Determine the user or channel ID that you want to send the message to. You can send messages to specific users, channels, or even yourself depending on the context and purpose of your app.
- Compose the API Request: Build the appropriate API request to send the message. Include the target user or channel ID, the message content, and any additional parameters required by the API.
- Send the Message: Issue the API request to send the message using the appropriate endpoint. The Slack API will process your request and deliver the message to the designated recipient in the Slack workspace.
- Handle Response: Upon sending the message, you may receive a response from the Slack API indicating the success or failure of the request. Handle the response appropriately and implement error handling to address any issues that may occur.
Sending messages allows your Slack app to proactively communicate with users, provide updates, and automate notifications. With well-crafted messages, you can enhance team collaboration and streamline workflows within the Slack workspace.
When constructing and sending messages, make sure to follow best practices and consider the user experience. Use concise and clear language, include relevant information, and provide a user-friendly interface for interacting with any interactive components of the message.
Now that you know how to send messages using your Slack app, you can start creating dynamic and interactive experiences for users within the Slack workspace. In the next section, we will explore how to install your app to your Slack workspace and test its functionality.
Continue reading to learn how to install your app and begin testing its features.
Installing the App to Your Workspace
Installing your Slack app to your workspace allows you to test its functionality and make it available to your team members. Once installed, your app will be accessible from the Slack interface, and users can interact with its features. Here’s how you can install your app to your Slack workspace:
- Access App Settings: Open the App Dashboard for your Slack app.
- Click on “Install App to Workspace”: In the left-hand sidebar of the App Dashboard, click on “Basic Information.” Scroll down to the “Additional Information” section and click on the “Install App to Workspace” button.
- Authorize the App: Slack will prompt you to authorize the app installation. Review the permissions requested by the app and click on “Authorize” to install the app to your workspace.
- Confirmation and Settings: Once the installation is complete, Slack will provide a confirmation message. You can review and adjust the settings as needed.
- Verify App Functionality: With the app installed, you can now proceed to test its functionality. Access the app within the Slack interface, interact with its features, and verify its behavior.
- Communicate with Team Members: Let your team members know about the new app and its functionality. Provide them with instructions on how to access and use the app within the Slack workspace.
Installing your app to your Slack workspace is an important step in the app development process. It allows you to test the functionality of your app in a real-world setting and gather feedback from your team members.
During the testing phase, make sure to thoroughly explore all the features of your app, check for any bugs or issues, and gather feedback from users. This will help you refine your app and ensure that it meets the needs of your team.
Now that you have installed your Slack app to your workspace, you can start testing its features and gathering feedback. In the next section, we will conclude the guide and summarize the key points discussed in this tutorial.
Continue reading to review the key takeaways from this guide and conclude your Slack app creation journey.
Testing the App
After installing your Slack app to your workspace, it’s time to thoroughly test its functionality and ensure it meets your team’s needs. Testing allows you to identify any bugs, usability issues, or areas for improvement before deploying the app to a wider audience. Here are some key steps to consider when testing your Slack app:
- Test App Features: Go through each feature of your app and test its functionality. Ensure that all intended actions, such as sending messages, responding to events, and executing commands, work as expected.
- Verify App Permissions: Check that the app has the necessary permissions to access and modify the required information. Test different scenarios to confirm that the app can perform actions based on its defined permissions.
- Test Error Handling: Intentionally trigger errors or exceptional scenarios to see how your app handles them. Make sure appropriate error messages are displayed, and the app gracefully recovers from errors without compromising the user experience.
- Test Compatibility: Ensure your app works seamlessly across different platforms and devices. Test it on various web browsers, mobile devices, and operating systems to ensure compatibility and responsiveness.
- Solicit Feedback: Share your app with a select group of team members or beta testers and gather their feedback. Encourage them to report any issues, provide suggestions for improvements, and share their overall experience with using the app.
- Iterate and Refine: Based on the feedback received, iterate on your app and make necessary improvements. Address any identified issues, add requested features, and continue to refine the user experience.
Thoroughly testing your Slack app is crucial to ensure its stability, functionality, and usability. By identifying and resolving any issues before deploying the app to a wider audience, you can create a more reliable and user-friendly experience for your team.
During the testing phase, document any bugs, fixes, or changes made to the app. This will help in troubleshooting and maintaining the app in the future.
Once you have thoroughly tested your app and addressed any issues, you can move forward with deploying it to your entire team or an audience of end-users.
Congratulations! You have successfully tested your Slack app and are now ready to unleash its potential within your Slack workspace. In the concluding section, we will summarize the key points discussed in this guide.
Conclusion
Congratulations on completing this comprehensive guide on creating a Slack app! You have learned the step-by-step process of creating a Slack app, configuring its settings, adding functionality, and testing its features. Let’s summarize the key points discussed in this guide:
– Slack apps are integrations or software applications that extend the functionality of Slack, allowing you to automate tasks, interact with external systems, and customize your workspace.
– Before starting, ensure you have a Slack workspace, a Slack account, basic HTML knowledge, access to Slack’s developer tools, and any necessary authorization credentials.
– Setting up a Slack workspace involves signing up for Slack, creating a workspace, and inviting team members.
– Creating a new Slack app includes accessing the App Dashboard, entering app information, selecting features, and configuring app settings.
– App settings include basic information like app name and description, interactive components, slash commands, event subscriptions, and OAuth permissions.
– Adding bot users enables your app to interact with Slack users and channels, and you can define their behavior and obtain a bot token for your app.
– Defining app permissions involves selecting the appropriate scopes to determine what actions and data your app can access within a Slack workspace.
– Setting up event subscriptions allows your app to receive real-time notifications about activities happening in Slack. You can handle these events and programmatically react to them.
– Sending messages using your Slack app allows you to proactively communicate with users, provide updates, and automate notifications.
– Installing your app to your workspace is essential for testing its functionality and making it available to your team members.
– Testing your Slack app involves thoroughly testing its features, verifying app permissions, testing error handling, ensuring compatibility, soliciting feedback, and iterating on improvements.
By following this guide, you have gained the knowledge and skills to create your own custom Slack app, tailored to the unique needs of your team. Remember to continuously iterate and improve your app based on user feedback and evolving requirements. Slack provides extensive documentation and resources to help you further enhance your app’s functionality and take advantage of more advanced features.
So, go ahead, unleash the power of Slack, and create a custom app that maximizes team productivity and collaboration within your workspace!