Introduction
Slack is a popular platform that provides teams with a convenient way to communicate and collaborate. One of the many powerful features of Slack is its ability to integrate with other tools and services through the use of bots. Slack bots can automate tasks, provide information, and even facilitate interactions within channels.
In this article, we will explore how to create a Slack bot from scratch. We will guide you through the process of setting up a Slack workspace, creating a new Slack app, obtaining the necessary API keys, and setting up a Python environment to write the code for the bot. Additionally, we will cover how to install the required dependencies, write the bot code, test it, and finally deploy it.
Whether you want to automate repetitive tasks, streamline workflows, or add custom functionality to your Slack workspace, creating a bot can help you achieve your goals. You don’t need to be an expert programmer to get started with Slack bot development. By following the steps outlined in this article, you will be well on your way to building your very own bot.
Throughout this guide, we will provide detailed instructions and examples to ensure that you have a clear understanding of each step. So, whether you are a beginner or have some coding experience, this article will serve as a comprehensive resource to help you create a powerful Slack bot that fits your needs.
Are you ready to take your Slack experience to the next level? Let’s dive in and get started with building your own Slack bot!
Getting Started
Before we begin creating a Slack bot, there are a few prerequisites you need to have in place. First and foremost, you’ll need a Slack workspace where you have administrative privileges. If you don’t have a workspace yet, you can create one for free on the Slack website.
Once you have your Slack workspace set up, you’ll need to create a new Slack app. The app will serve as the foundation for your bot and provide it with the necessary permissions to interact with users and channels. To create a new app, visit the Slack API website and navigate to the “Create New App” section.
After creating the app, you will need to obtain API keys that will allow your bot to authenticate and communicate with the Slack platform. These keys are vital for integrating your bot with Slack’s API and should be kept secure. Make sure to note down these keys as you will need them later in the development process.
Next, you’ll need to set up a Python environment on your machine. Python is a widely-used programming language for web development and provides excellent libraries and tools for building Slack bots. You can download and install the latest version of Python from the official Python website.
Once your Python environment is set up, you’ll need to install the necessary dependencies for building your Slack bot. The main library we’ll be using is called “slackclient,” which provides a convenient interface for interacting with Slack’s API. You can install it via pip, the Python package installer, using the command: `pip install slackclient`.
With the Slack app created, API keys obtained, and Python environment set up, you’re now ready to start writing the code for your bot. In the next section, we’ll guide you through the process of building an interactive Slack bot using Python. So roll up your sleeves, sharpen your coding skills, and let’s get started on creating a functional and useful Slack bot!
Setting Up the Slack Workspace
To create and configure a Slack bot, you first need to have a Slack workspace. If you don’t have a workspace already, you can easily create one by visiting the Slack website and signing up for a free account. Once you have signed up, you will be guided through the process of setting up your workspace.
When setting up your workspace, you will need to choose a name for your workspace and provide an email address. Make sure to choose a name that is relevant to the purpose of your bot or the team that will be using it. Additionally, think about the email address you use, as it will be the primary point of contact for workspace-related notifications.
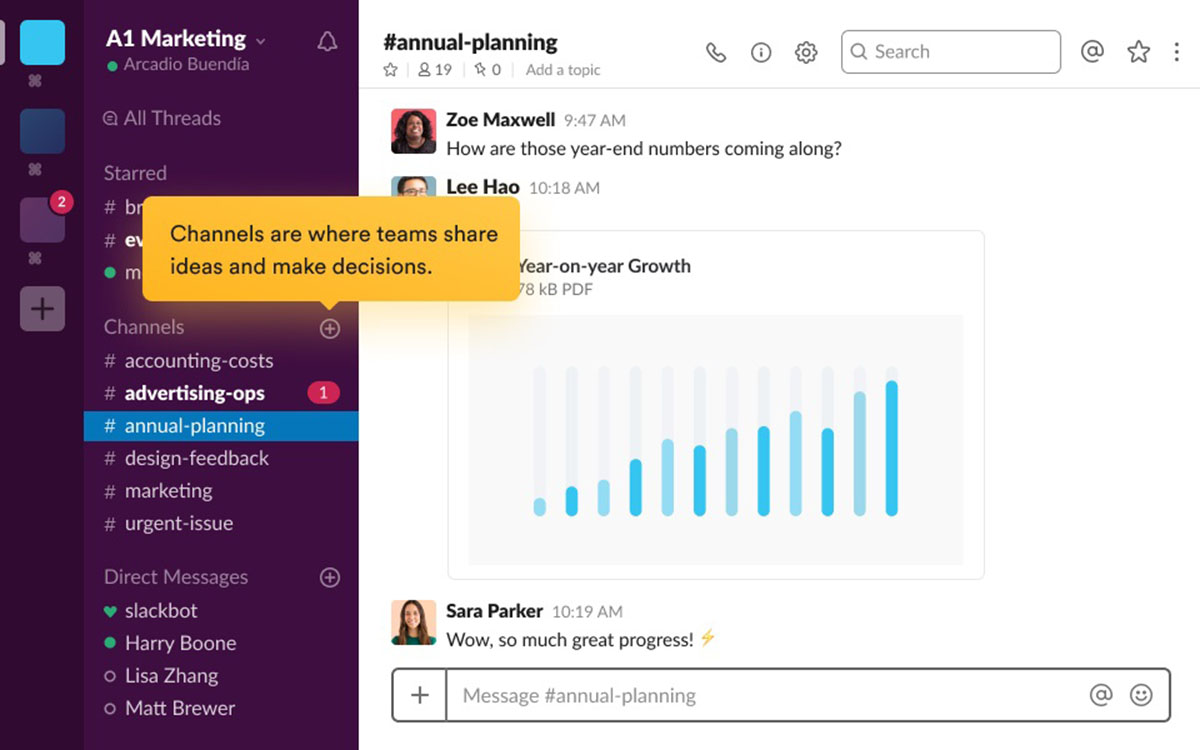
After setting up your workspace, you can begin customizing it to suit your needs. Slack allows you to create different channels for different topics or teams within your workspace. Channels can be public, where anyone in your workspace can join, or private, where only invited members can access the channel. Consider the structure and organization of your workspace and create channels accordingly.
Customizing your workspace further, Slack offers various options to manage user access and permissions. As the workspace owner or an administrator, you have control over who can join your workspace and what actions members can perform. Take some time to review and configure these settings to align with your team’s collaboration requirements.
Lastly, explore the different integrations and apps available in the Slack App Directory. Slack offers a wide range of third-party apps and integrations that can enhance your workspace’s functionality. From project management tools to polling apps and beyond, you’ll find plenty of options to cater to your team’s specific needs.
Setting up your Slack workspace is the foundation for creating and managing your Slack bot. Ensure that your workspace is well-organized, with channels, user access, and integrations properly configured. Once you have your workspace in order, you can move on to creating a Slack app and setting up your bot to begin integrating it with your workspace.
Creating a New Slack App
To get started with building a Slack bot, you’ll need to create a new Slack app. The app will serve as the foundation for your bot and provide it with the necessary permissions to interact with users and channels within your Slack workspace.
To create a new Slack app, visit the Slack API website and navigate to the “Create New App” section. Provide a name for your app, which should be unique and descriptive. This name will be visible to users when they interact with your bot, so choose something that aligns with your bot’s purpose or functionality.
Next, you’ll need to associate the app with your Slack workspace. Select the workspace where you want your bot to operate, and the app will be linked to that workspace. This step allows your bot to access the necessary data and communicate with users and channels within the chosen workspace.
After linking the app to your workspace, you can start configuring its features and capabilities. Slack provides a wide range of options for customizing your app’s behavior. You can define slash commands, which allow users to interact with your bot by typing a specific command in Slack. You can also set up event subscriptions to receive real-time notifications for specific events, such as messages being posted in channels or users joining or leaving your workspace.
Additionally, you can create interactive components, such as buttons and menus, to enable users to interact with your bot in a more intuitive and user-friendly way. This allows for richer and more interactive conversations with your bot, providing a better user experience overall.
As you customize your app, Slack provides a variety of settings and options to fine-tune its behavior. For example, you can define default replies, enable app-wide thread creation, and configure the app’s visibility and distribution.
Once you have configured your app to your satisfaction, make sure to save your changes. Slack will generate API keys for your app, which you will need to interact with Slack’s API from your bot code. These API keys authenticate your bot and allow it to access the necessary data and perform actions within your Slack workspace.
Creating a new Slack app is an essential step in building your own Slack bot. It allows you to define the behavior, permissions, and capabilities of your bot within your workspace. With your app set up, you can move on to obtaining the necessary API keys and setting up a Python environment to start writing the code for your bot.
Obtaining API Keys
To integrate your Slack bot with the Slack API, you’ll need to obtain API keys that authenticate your bot and allow it to communicate with the Slack platform. These API keys are essential for establishing a secure and authorized connection between your bot and your Slack workspace.
To obtain the API keys for your Slack app, you’ll need to visit the Slack API website and navigate to your app’s settings. Under the “Basic Information” section, you’ll find the “App Credentials” tab, which contains the API keys you need. These keys include the “Client ID,” “Client Secret,” and “Signing Secret.”
The “Client ID” is a unique identifier for your app and is used to identify it when making API requests. The “Client Secret” is a confidential key that should be kept secure and should not be shared publicly. It is used for authenticating your app and ensuring that only authorized requests can access your bot’s functionality.
The “Signing Secret” is another confidential key that is used to verify the integrity of the requests made to your app. It helps ensure that the requests received by your bot are legitimate and have not been tampered with. It is also used for verifying the authenticity of any messages or events sent to your bot.
Once you have obtained your API keys, it is crucial to store them securely. Avoid hard-coding the keys directly into your code or exposing them publicly. Instead, consider using environment variables or a secure configuration file to store and access the keys. This helps protect the confidentiality of your keys and prevents unauthorized access.
With your API keys in hand, you can now proceed to the next step of setting up your Python environment. By securely obtaining and storing your API keys, you ensure that your bot can authenticate with the Slack API and access the necessary data to perform its intended functionalities within your Slack workspace.
Setting Up a Python Environment
Before you can start writing the code for your Slack bot, you’ll need to set up a Python environment on your machine. A Python environment provides the necessary tools and libraries for developing and running Python applications.
To begin, you’ll need to download and install Python, which you can find at the official Python website. Make sure to choose the appropriate version based on your operating system. The installation process is straightforward and typically involves running the installer and following the prompts.
Once Python is installed, you can verify the installation by opening a terminal or command prompt and running the command `python –version`. This should display the installed version of Python.
To manage your Python packages and dependencies, we recommend using a package manager called pip. Pip is installed automatically with Python and allows you to easily install, upgrade, and remove Python packages.
To upgrade pip to the latest version, you can run the command `pip install –upgrade pip`. This ensures that you have the most up-to-date version of pip installed.
In addition to pip, we recommend using virtual environments to isolate your Python projects. Virtual environments allow you to create separate environments for different projects, helping to manage dependencies and avoid conflicts between packages.
To create a virtual environment, navigate to your project’s directory in the terminal or command prompt and run the command `python -m venv env`. This will create a new virtual environment named “env” in your project’s directory.
To activate the virtual environment, run the appropriate command based on your operating system:
- For Windows: `.\env\Scripts\activate`
- For macOS and Linux: `source env/bin/activate`
You should now see the name of your virtual environment at the beginning of the command prompt, indicating that it is active. Any packages you install while the virtual environment is active will be isolated within that environment.
With your Python environment set up and your virtual environment activated, you’re now ready to install the necessary dependencies for your Slack bot. In the next section, we’ll cover the installation process and the required packages you’ll need to get started with building your bot.
Installing Dependencies
To build your Slack bot, you’ll need to install certain dependencies and packages that will enable your bot to interact with the Slack platform. These dependencies will provide the necessary tools and libraries to make requests to the Slack API, handle responses, and perform various actions within your Slack workspace.
Before installing the dependencies, make sure your Python environment and virtual environment (if you’re using one) are properly set up and activated.
The primary dependency you’ll need is the “slackclient” library, which provides a convenient interface for interacting with the Slack API. To install it, open your terminal or command prompt and run the command `pip install slackclient`.
Additionally, you may want to install other dependencies based on the specific functionality you want to add to your Slack bot. For example, if you aim to integrate with external APIs or perform natural language processing, you may need to install additional libraries such as “requests” or “nltk”.
To install other dependencies, simply run the command `pip install
Once you have installed the necessary dependencies, make sure to update the requirements file for your project. This file should list all the dependencies and their specific versions to ensure consistent execution across different environments. To generate a requirements file, you can use the command `pip freeze > requirements.txt`. This will create a `requirements.txt` file containing a list of all installed packages and their versions.
Remember to include the requirements file in your project repository so that others can easily replicate your environment and install the necessary dependencies by running `pip install -r requirements.txt`.
With the dependencies installed, you’re now ready to start writing the code for your Slack bot. In the next section, we’ll guide you through the process of writing the code and building the functionality of your bot using the “slackclient” library and other necessary dependencies.
Writing the Bot Code
Now that you have your Python environment set up and the necessary dependencies installed, it’s time to start writing the code for your Slack bot. The code will define the behavior and functionality of your bot, allowing it to interact with users, respond to messages, and perform actions within your Slack workspace.
To interact with the Slack API and receive events from your workspace, you’ll need to use the “slackclient” library. Import the necessary modules and instantiate a SlackClient object, passing in your Slack API token as a parameter. This token, also known as the bot token, authenticates your bot and allows it to interact with the Slack platform.
Once you have a SlackClient object, you can use its methods to perform various actions. For example, the “api_call” method allows you to make API requests to the Slack API, such as sending messages, retrieving user information, or accessing channel details.
To handle incoming events from your Slack workspace, you can use the “events” module provided by the “slackclient” library. You can define event handlers that respond to specific events, such as message events or user join events. These handlers can process the event data and perform actions based on the event type and content.
To send messages from your bot, use the “chat.postMessage” API method. This method allows you to send structured messages to channels or individual users. You can customize the message text, formatting, attachments, and other properties to deliver rich and interactive messages.
In addition to sending messages, you can listen for user interactions with your bot using interactive components. These components can include buttons, menus, and dialogs that allow users to interact with your bot and trigger specific actions.
Throughout the development process, it’s important to handle errors gracefully and include proper exception handling to ensure your bot functions reliably. Consider edge cases, handle unexpected user input, and provide meaningful error messages to guide users when errors occur.
As you write the code for your Slack bot, remember to follow best practices in terms of code organization, readability, and maintainability. Use clear variable and function names, add comments where necessary, and structure your code logically using functions and classes.
By writing well-structured and efficient code, you’ll be able to create a robust and responsive Slack bot that meets your specific requirements. In the next section, we’ll cover how to test your bot to ensure it functions as intended and behaves appropriately in different scenarios.
Building the Slack Bot
Now that you have written the code for your Slack bot, it’s time to build and integrate it into your Slack workspace. This process involves setting up event subscriptions, configuring the bot’s permissions, and deploying the bot so that it can start interacting with users and channels.
To start, you’ll need to configure event subscriptions for your Slack app. Event subscriptions allow your bot to receive real-time notifications for specific events that occur within your Slack workspace. These events can include messages being posted, users joining or leaving channels, or any other events you have subscribed to.
Configure the event subscriptions by providing a request URL where Slack can send the event notifications. This URL should point to a server or hosting platform that can handle incoming HTTP requests. You can set up a development server locally or use a cloud-based hosting service, such as Heroku or AWS, to ensure that your bot is always available.
Next, make sure to specify the event types you want to receive and handle in the code. For example, if you want to handle message events, include the “message” event type in your subscription configuration. This will ensure that your code is triggered whenever a message is sent in your Slack workspace.
Additionally, configure your bot’s permissions to determine the actions it can perform within your Slack workspace. Specify the desired scope and permissions your bot requires, such as reading and writing messages, accessing user information, or managing channels. These permissions should align with the functionality and purpose of your bot.
Once your event subscriptions and permissions are set up, deploy your bot to make it available within your Slack workspace. If you’re hosting your bot on a server, ensure that the server is running and accessible. If you’re using a cloud-based hosting service, follow their deployment guidelines to make your bot accessible to Slack.
With the bot deployed and integrated into your Slack workspace, you can start testing it in real-world scenarios and observe how it responds to various events and user interactions. Monitor the bot’s behavior and make any necessary adjustments or enhancements to ensure it delivers the expected functionality.
Remember to continue iterating and refining your bot based on user feedback and evolving requirements. Slack provides tools and features for monitoring and managing your bot’s performance, such as logging and analytics. Utilize these resources to gather insights and continuously improve your bot’s user experience.
By building and integrating your Slack bot effectively, you can enhance collaboration and automate processes within your Slack workspace. In the next section, we’ll cover how to test your bot to ensure it functions correctly and responds appropriately to user interactions.
Testing the Bot
Testing is a crucial step in the development process of your Slack bot. Proper testing ensures that your bot functions correctly and delivers the expected behavior in various scenarios. By thoroughly testing your bot, you can identify and fix any bugs or issues early on, resulting in a reliable and robust bot.
Start by defining a comprehensive test plan that covers different aspects of your bot’s functionality. Consider testing various scenarios, such as sending different types of messages, interacting with interactive components, and handling different event types. Your test plan should focus on both positive and negative test cases to ensure that your bot behaves gracefully and handles errors appropriately.
To test your bot, create test cases that simulate user interactions and expected outcomes. For example, you can simulate sending messages to your bot and verify that it responds correctly. You can also simulate events, such as users joining or leaving channels, and ensure that your bot reacts as expected.
Automated testing can be beneficial in ensuring the reliability and scalability of your bot. Consider using testing frameworks, such as unittest or pytest, to automate the execution of your test cases. This allows you to easily run your tests and check for any regressions or unexpected behavior as you make changes to your bot’s code.
In addition to automated testing, manual testing is essential to evaluate the user experience and usability of your bot. Put yourself in the shoes of your users and interact with your bot in various scenarios. Pay attention to the bot’s responses, error handling, and overall conversational flow. This manual testing can help identify any usability issues or areas for improvement.
Don’t neglect performance testing, especially if your bot is expected to handle a large number of concurrent users or process complex actions. Load testing tools, such as JMeter or Locust, can help simulate high traffic and measure the performance of your bot in different scenarios. This helps ensure that your bot can handle the expected load without any degradation in performance.
Iterate and refine your bot based on the feedback and issues discovered during testing. Fix any bugs, address usability concerns, and fine-tune the bot’s behavior to provide a seamless and enjoyable user experience.
By thoroughly testing your bot, you can ensure that it meets the desired functionality, performs reliably, and delivers a smooth user experience. In the next section, we’ll cover how to deploy your bot and make it accessible to your Slack workspace.
Deploying the Bot
Once you have designed, developed, and tested your Slack bot, it’s time to deploy it and make it accessible to your Slack workspace. Deploying your bot involves making it available on a server or hosting platform so that it can run continuously and interact with users and channels in real-time.
There are several options available for deploying your Slack bot. If your bot is relatively simple and lightweight, you can choose to deploy it on a cloud-based platform like Heroku or AWS Elastic Beanstalk. These platforms provide straightforward deployment processes and offer scalability and reliability.
To deploy your bot on a cloud platform, you typically need to create an account, set up your project, and follow the platform’s deployment guidelines. These guidelines will vary depending on the platform, but generally involve configuring the environment, specifying the deployment method, and linking your project to a version control repository.
If you prefer to deploy your bot on a dedicated server or hosting provider, you will need to set up the necessary environment, either manually or through automated scripts. This option provides more flexibility and control over the deployment process but may require more technical expertise to manage and maintain the server.
As you deploy your bot, make sure to secure your server or hosting environment properly. Implement security measures such as encryption protocols, firewalls, and access controls to protect sensitive data and prevent unauthorized access to your bot and server.
Once your bot is deployed, monitor its performance and behavior in your Slack workspace. Keep an eye out for any errors, unexpected behavior, or performance issues. Monitor the server logs and use monitoring tools to identify and address any issues promptly.
Continuously update and improve your bot based on user feedback and evolving requirements. Maintain a feedback loop with users and regularly release new updates to enhance your bot’s functionality and user experience.
Deploying your bot successfully allows it to actively participate in your Slack workspace, automate tasks, and assist users in their workflows. With your bot up and running, you’ve brought your vision to life, and your Slack workspace will benefit from the added automation and efficiency it provides.
Conclusion
Building a Slack bot offers an exciting opportunity to enhance team collaboration, automate tasks, and provide instant access to information within your Slack workspace. Through this guide, you have learned the essential steps to create and deploy a Slack bot, from setting up the Slack workspace to writing code, testing, and finally deploying the bot.
Setting up a Slack workspace provides the foundation for your bot and allows you to customize channels, user access, and integrations to fit your team’s specific needs. Creating a new Slack app grants your bot the necessary permissions and API keys to interact with the Slack platform.
Setting up a Python environment and installing dependencies are crucial for writing the code that will define your bot’s behavior. By utilizing the “slackclient” library and other related dependencies, you can interact with the Slack API, handle events, and send messages to channels and users.
Testing your bot thoroughly is essential to ensure it functions correctly, handles errors gracefully, and provides a seamless and user-friendly experience. By creating test cases, both automated and manual, you can verify that your bot behaves as expected in various scenarios.
Finally, deploying your bot allows it to run continuously and interact with users and channels in real-time. Whether you choose to deploy on a cloud platform or on a dedicated server, it’s essential to securely configure your environment and regularly monitor and update your bot.
By following the steps outlined in this guide, you now have the knowledge and tools to create your own powerful Slack bot. The possibilities are limitless, from automating routine tasks to providing valuable information and streamlining team collaboration. Continue refining and expanding your bot’s capabilities to truly enhance your Slack experience and maximize team productivity.
Remember, building a successful Slack bot is an iterative process, and feedback from your users is invaluable. Listen to their needs and continually improve your bot to meet their requirements. Embrace the power of automation and customization that a Slack bot provides, and watch your team’s productivity soar.