Introduction
Welcome to the world of Slack! Whether you’re a small team or a large organization, Slack is a powerful and popular tool that brings people together, streamlines communication, and enhances collaboration. In this article, we will guide you through the process of creating a Slack account so you can get started in no time.
Slack is a cloud-based messaging platform that allows teams to communicate and collaborate in real-time. With features like channels, direct messaging, file sharing, and integrations with other tools, Slack makes it easy to stay connected and organized.
Creating a Slack account is quick and simple. In just a few steps, you’ll be on your way to enjoying the benefits of seamless communication and increased productivity. Whether you’re setting up a workspace for your business, a community, or a personal project, the process is the same.
In this article, we will walk you through each step of the process, from visiting the Slack website to exploring the various features and settings. By the end of this article, you’ll have a fully set up Slack account and be ready to start collaborating with your team or community.
Before we get started, make sure you have a stable internet connection and a device that can access the internet. It could be your computer, laptop, or mobile device. Additionally, have in mind the name and purpose of your workspace, as well as the team members you want to invite.
Now that you’re ready, let’s dive into the step-by-step process of creating your Slack account and setting up your workspace.
Step 1: Go to the Slack website
The first step to creating a Slack account is to visit the official Slack website. Open your preferred web browser and type in slack.com in the address bar. Press Enter or Return to access the website.
Once you’ve reached the Slack homepage, you’ll be greeted with an inviting and user-friendly interface. The Slack website provides a wealth of information about the platform’s features, pricing, and community. Take a moment to explore the resources available, but when you’re ready to create your account, look for the “Get started for free” button on the homepage.
Clicking on the “Get started for free” button will redirect you to the account creation page. Here, you can begin the process of setting up your Slack workspace. If you prefer, you can also sign up using your Google account or Apple ID by clicking on the corresponding buttons provided.
Signing up with a Google account or Apple ID can expedite the process by prefilling some of the required information. However, if you’d rather create a new account from scratch, the traditional method will work just as effectively.
By clicking on “Sign up manually”, you’ll be prompted to enter your email address. Make sure to use a valid email address that you have access to, as this will be used for account verification and future communications from Slack.
Once you’ve entered your email address, click on “Next” to proceed to the next step. You’ll be directed to a page where you’ll need to create a new password for your Slack account. Choose a strong and secure password, ensuring it is unique and not used for any other accounts.
After creating your password, click on “Next” to continue. Slack might ask you to confirm that you’re not a robot by completing a simple captcha challenge or verifying your email address by clicking on a link sent to you. Follow the instructions provided to complete the verification process.
Once your email has been verified, congratulations! You have successfully completed Step 1. Now, it’s time to move on to the next step and start customizing your workspace.
Step 2: Click on “Create a new workspace”
Now that you have successfully created your Slack account, it’s time to create a new workspace. A workspace is where you and your team will collaborate and communicate. The workspace can be for your company, a specific project, or even a personal community.
To create a new workspace, navigate to the Slack homepage and sign in using the email address and password you just created. Once you’re logged in, you’ll be taken to the Slack workspace directory.
In the directory, you’ll find a list of workspaces to which you have access, if any. To create a new workspace, look for the “Create a new workspace” button. This button is usually located at the bottom of the workspace directory page.
Clicking on the “Create a new workspace” button will take you to the workspace creation page. Here, you’ll need to provide some basic information to set up your workspace.
Start by entering the name of your workspace. Choose a name that reflects the purpose or nature of the workspace, making it easy for team members to identify and connect with. It could be the name of your company or project, or something unique to your team.
Next, choose your workspace URL. The workspace URL is the web address that members of your team will use to access the workspace. Ideally, it should be concise, memorable, and related to your workspace name. The URL will typically be in the format of “https://your-workspace-url.slack.com”.
Once you’ve entered the workspace name and URL, click on “Next” to proceed. You’ll then be asked to select the type of organization your workspace represents.
If your workspace is for a business or professional organization, select the “Business” option. This will provide you with access to additional features and settings to better manage your team’s communication and collaboration.
If your workspace is for a non-profit organization, education, or any other non-commercial purposes, you can select the “Non-commercial” option. This option allows you to still benefit from most of Slack’s features while demonstrating your eligibility for specific discounts or waivers.
After selecting the organization type, click on “Next” to proceed. You may be prompted to answer a few additional questions related to your organization before continuing.
Once you’ve completed the necessary steps, you’ll be taken to the workspace setup page. Congratulations! You have successfully completed Step 2. Now, let’s move on to customizing your newly created workspace.
Step 3: Fill in the required information
After successfully creating your new workspace, it’s time to fill in the required information to customize your workspace further. This step will help you set up your workspace’s profile and provide essential details about your team or project.
Once you’ve reached the workspace setup page, you’ll notice several fields that require your attention. Let’s go through each of them:
- Company or team name: Enter the name of your company, team, or project. This will be displayed as the workspace’s title. Make sure it accurately represents your team and is easily recognizable.
- Team member role: Select the role that best describes your position within the team. You can choose options such as “Owner,” “Admin,” or “Member.” The role you select will determine the level of access and permissions you have within the workspace.
- Team member name: Enter your name or the name you’d like to be identified by within the workspace. This will be displayed to other team members when you interact with them.
- Team member photo: Upload a profile picture that represents you or your team. Adding a photo adds a personal touch and makes it easier for team members to recognize and connect with you.
- Workspace description: Provide a brief description of your workspace. This description will help team members understand the purpose, goals, or nature of the workspace.
- Email preferences: Choose your email preference settings. You can select options to receive email notifications for various activities in the workspace, such as mentions, direct messages, and channel activity.
Ensure that you fill in all the required fields accurately and provide relevant information that aligns with your workspace’s objectives. These details will help shape the identity and functionality of your workspace.
Once you’ve completed filling in the required information, click on the “Next” or “Continue” button to proceed to the next step. You’re one step closer to fully customizing your Slack workspace!
Now that the required information is filled in, you’re ready to move on to the next step and set up your workspace’s name and URL.
Step 4: Set up your workspace name and URL
Now that you have filled in the required information, it’s time to set up the name and URL for your Slack workspace. This step allows you to customize the appearance and address of your workspace, making it unique and easily identifiable.
On the setup page, you’ll find options to edit your workspace name and URL. Let’s go through each of these customization options:
- Workspace name: The workspace name should represent the purpose or nature of your workspace. It could be the name of your company, project, or a specific team within your organization. Make sure the name accurately reflects what the workspace is about and is easily understandable for all team members.
- Workspace URL: The workspace URL is the web address that team members will use to access the workspace. It should be concise, memorable, and related to your workspace name. The URL will typically follow the format “https://your-workspace-url.slack.com”.
When choosing your workspace name and URL, keep in mind the audience and purpose of your workspace. It’s important to create a name and URL that are professional, descriptive, and easy to remember. Avoid using any special characters or spaces in the URL, as it should be easily accessible and shareable.
Once you’ve finalized your workspace name and URL, click on the “Next” or “Continue” button to proceed to the next step. Slack will verify the availability of the chosen URL and inform you if any changes are required.
Remember that the workspace name and URL can be edited later, so if you’re unsure or want to make changes in the future, you can always come back and update them accordingly.
By setting up your workspace name and URL, you’re one step closer to creating a personalized and organized collaboration hub for your team. The chosen name and URL will reflect the identity and purpose of your workspace.
Now, let’s move on to the next step and explore how you can further customize your Slack workspace.
Step 5: Customize your workspace
Now that you have set up your workspace name and URL, it’s time to customize your Slack workspace to make it visually appealing and tailored to your team’s needs. Customization allows you to create a space that reflects your team’s identity and enhances collaboration.
Slack offers a range of customization options that let you personalize your workspace. Let’s explore some of the key customization features:
- Choose a theme: Slack provides a variety of themes to choose from, allowing you to change the overall look and feel of your workspace. You can select a pre-designed theme or create a custom one by choosing your own colors.
- Add a logo or custom icon: Upload your team’s logo or a custom icon to display on the workspace’s home screen. This adds a professional touch and helps team members easily identify the workspace.
- Create and organize channels: Channels in Slack are dedicated spaces for specific topics, projects, or teams. Customize your workspace by creating channels that align with your team’s structure and goals. Organize them logically, using descriptive names and purposes.
- Set up notifications: Customize your notification settings to ensure you receive alerts and updates for important messages and activities. You can choose to receive notifications through email, desktop notifications, or mobile push notifications.
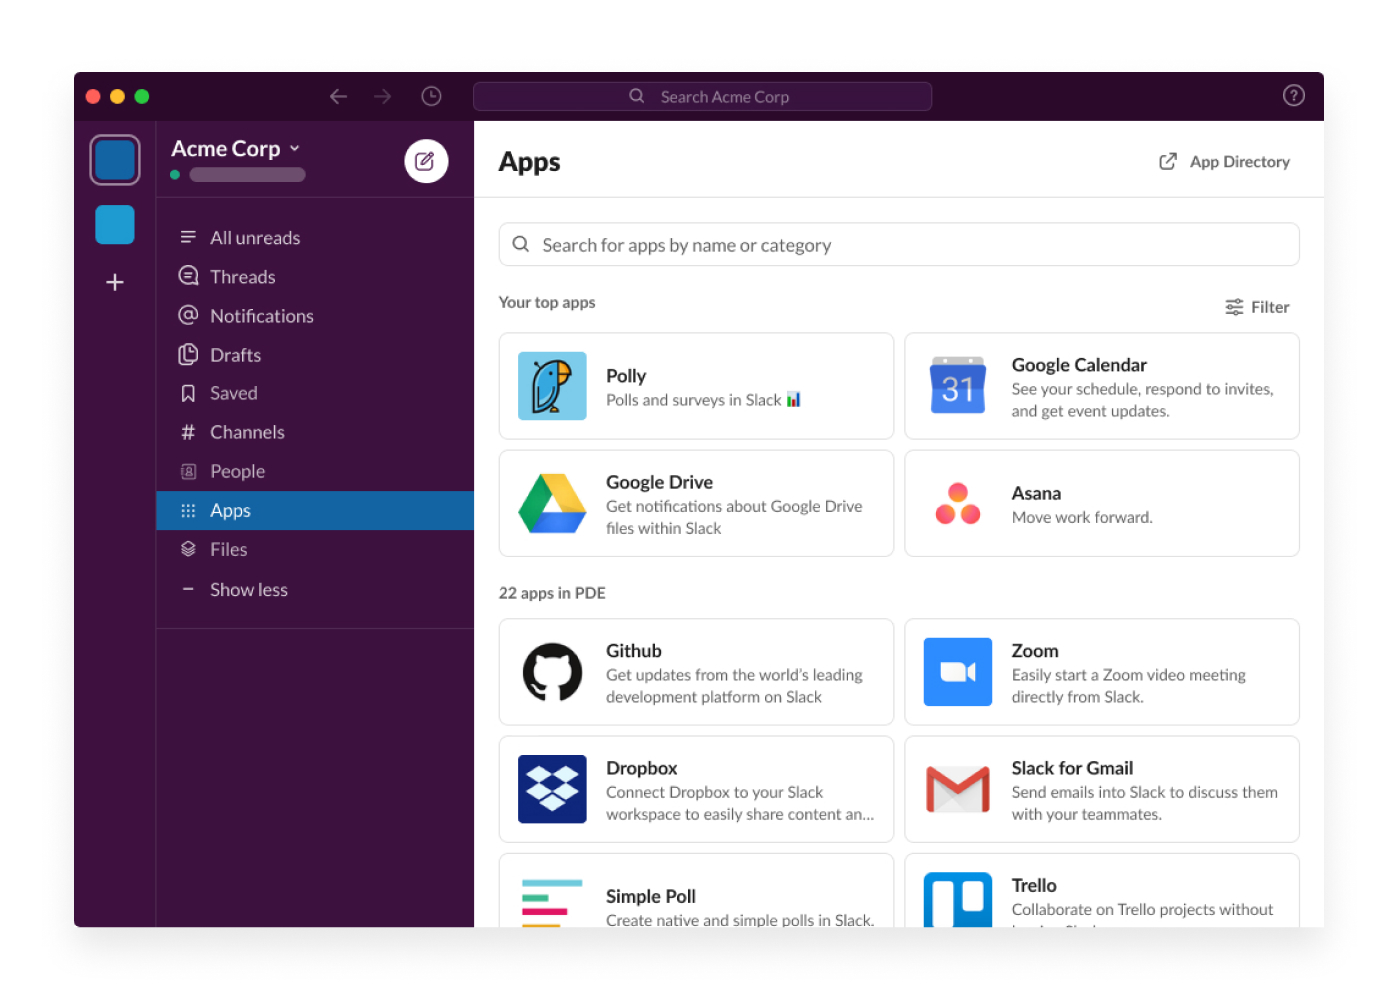
- Integrate apps and tools: Slack offers a wide range of integrations with popular apps and tools. Enhance your workspace’s functionality by connecting essential tools like Google Drive, Trello, or Asana. These integrations streamline workflows and ensure seamless collaboration.
- Enable and configure permissions: As an administrator or owner of the workspace, customize user permissions to control who can access certain channels, perform specific actions, or modify settings. This ensures that privacy and security are maintained within your workspace.
Feel free to take the time to explore and experiment with the customization options available in Slack. Experimenting with different themes, icons, and settings will help you find the perfect combination that suits your team’s preferences and working style.
Remember that customization is an ongoing process. As your team evolves and your workspace’s needs change, you can always revisit the customization settings and make adjustments accordingly.
By customizing your workspace, you create an environment that fosters collaboration, creativity, and productivity. Now that your workspace is personalized, let’s move on to the next step and invite team members to join.
Step 6: Invite team members
Now that you have customized your Slack workspace, it’s time to invite team members to join and start collaborating. Inviting team members ensures that everyone has access to the workspace and can actively participate in discussions and projects.
Here’s how you can invite team members to your Slack workspace:
- Invite by email: The most common way to invite team members is by email. Slack allows you to send email invitations directly from the workspace. Enter the email addresses of the team members you want to invite, personalize the invitation message if desired, and click on the send button. Each invited team member will receive an email with a link to join the workspace.
- Share an invite link: Slack also provides the option to generate an invite link that you can share with team members. This link allows them to join the workspace directly without requiring individual email invitations. This method is useful if you have a large group of team members to invite or if you want to share the link through other communication channels.
- Invite through a domain: If you have a specific domain name associated with your organization, you can invite team members by allowing anyone with an email address from that domain to join the workspace automatically. This streamlines the invitation process and ensures that all relevant team members can join easily.
As the workspace owner or administrator, you can manage team member invitations and permissions. You have control over who can invite others to join the workspace and what level of access each team member has.
After sending the invitations, encourage team members to check their email and follow the provided instructions to join the workspace. They may be required to set up their own Slack accounts if they don’t already have one.
As team members join, make sure to provide them with an overview of the workspace’s purpose, channels, and best practices. This will help them quickly get acclimated and start participating in the discussions and collaboration within the workspace.
Remember to periodically review your team member list and remove any inactive or former members to keep your workspace organized and up to date.
By inviting team members, you foster a sense of community and facilitate effective communication and collaboration within your Slack workspace. Now that your team members are on board, let’s move on to exploring the various features and settings in Slack.
Step 7: Explore Slack features and settings
Now that you and your team members have joined the Slack workspace, it’s time to explore the various features and settings that Slack has to offer. Understanding these features will help you maximize productivity, streamline communication, and optimize your collaboration efforts.
Here are some key features and settings worth exploring:
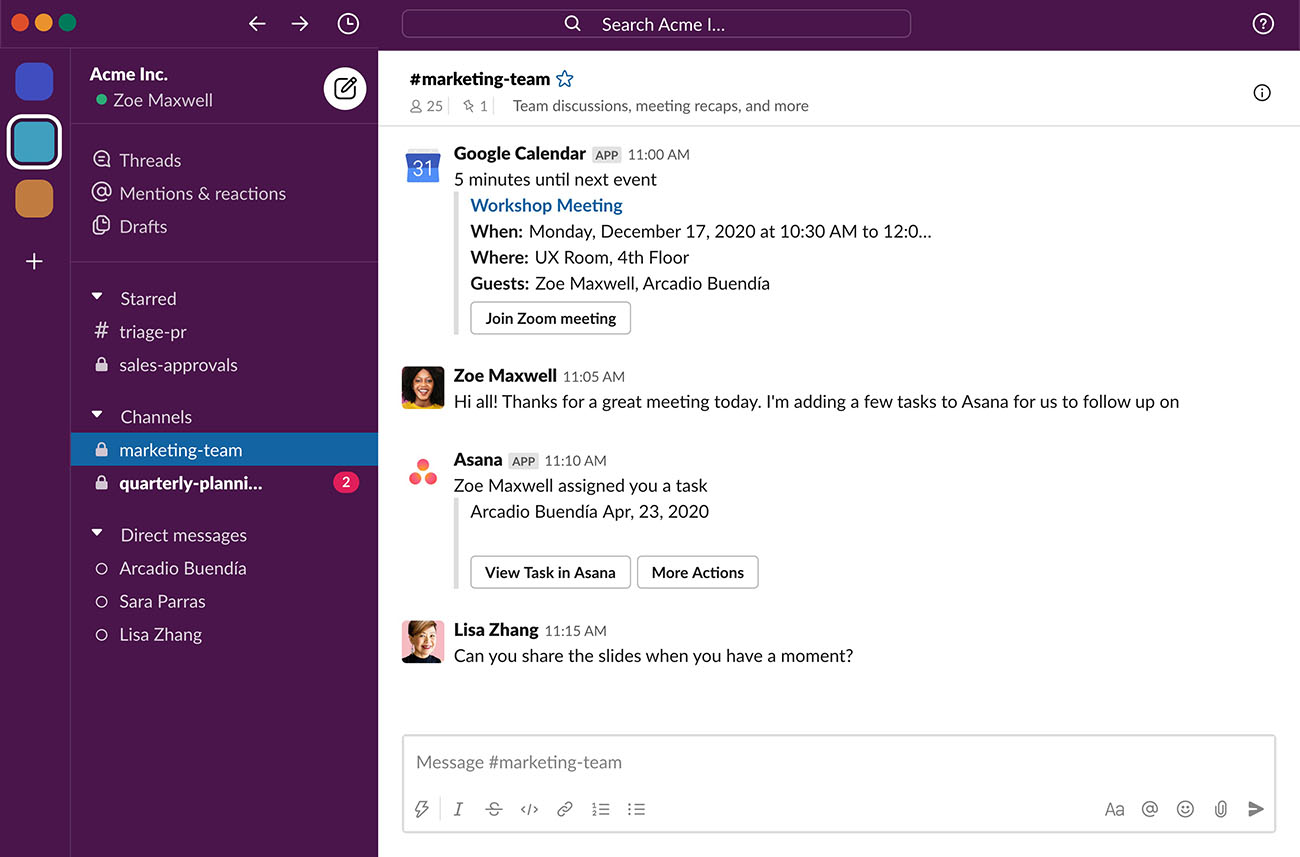
- Channels: Slack’s channels are spaces dedicated to specific topics, projects, or teams. Explore the different channels in your workspace and join the ones that are relevant to you. This allows you to stay informed and participate in discussions that align with your interests and responsibilities.
- Direct messages: In addition to channels, you can also have one-on-one and group direct messages with team members. Use direct messages to have private conversations, share files, or collaborate on specific tasks.
- File sharing and collaboration: Slack makes it easy to share files and collaborate on them. You can upload and share documents, images, videos, and other files directly in Slack. Additionally, you can collaborate on files in real-time using Slack’s integration with Google Drive, Dropbox, and other popular file storage platforms.
- Notifications: Customize your notification settings to ensure you receive alerts for important messages and activities. You can choose how and when you receive notifications, whether it’s through email, desktop notifications, or mobile push notifications.
- App integrations: Explore the wide range of app integrations available in Slack. From project management tools like Trello and Asana to team collaboration apps like Zoom and Microsoft Teams, integrations enhance your workflow and make it easier to access and share information across platforms.
- Search functionality: Slack’s powerful search functionality allows you to quickly find messages, files, and channels. Utilize search filters and keywords to locate specific information and references, saving time and effort.
- Customization options: Take advantage of Slack’s customization options to personalize your workspace further. This includes choosing themes, setting up unique emojis, customizing your sidebar, and organizing your channels and apps to suit your preferences and working style.
- Security and privacy: Familiarize yourself with Slack’s security features and privacy settings. You can enable two-factor authentication, set up data retention policies, manage app permissions, and control access to sensitive information within your workspace.
Take some time to explore these features and settings at your own pace. Experiment with different functionalities and find the ones that work best for you and your team. Don’t hesitate to consult Slack’s documentation and resources for more detailed instructions on specific features.
Remember, Slack is a dynamic platform, and new features and updates are regularly introduced. Stay up to date with Slack’s announcements and release notes to make the most of the platform’s capabilities.
By exploring and utilizing the various features and settings in Slack, you can optimize your team’s collaboration efforts and streamline your communication to achieve greater productivity and success.
Conclusion
Congratulations! You have successfully created a Slack account and set up your workspace. Through this step-by-step guide, we’ve walked you through each stage of the process, from visiting the Slack website to exploring the various features and settings.
Slack is a powerful tool that brings teams together and enhances collaboration by providing real-time messaging, file sharing, and integration with other productivity tools. By creating a Slack workspace, you have taken a significant step towards improving communication and productivity within your team or community.
Throughout this guide, we’ve covered important steps such as going to the Slack website, creating a new workspace, filling in the required information, setting up your workspace name and URL, customizing your workspace, inviting team members, and exploring the various features and settings in Slack.
Remember, Slack is a versatile platform with numerous features and options to suit your team’s unique needs. Take the time to delve further into the settings and capabilities of Slack. Experiment with different customization options, explore integrations with other apps, and encourage your team members to utilize Slack’s collaboration features to their fullest.
As you and your team continue to use Slack, don’t hesitate to explore additional resources, such as Slack’s official documentation and community forums, to further enhance your experience and optimize your workflows. Regularly assessing and adapting your workspace settings and communication strategies will help you make the most of Slack’s potential.
Thank you for following this guide on how to create a Slack account. We hope that Slack brings you and your team closer together, fosters seamless collaboration, and helps you achieve your goals more efficiently.
Happy Slacking!