Introduction
Welcome to the digital age, where technology continues to make our lives easier and more convenient. One such innovation that has captured our attention is Airpods, Apple’s wireless earbuds. These nifty gadgets not only provide an immersive audio experience but also offer a range of impressive features that enhance our everyday activities.
One such feature is the ability to have your Airpods read out your texts, keeping you informed even while you’re on the go. Imagine being able to multitask effortlessly, with your Airpods reading your incoming messages to you while you’re running, driving, or simply taking a walk.
Whether you’re someone who receives a lot of text messages or you just want a hands-free and efficient way of staying connected, this guide will walk you through the steps to get your Airpods to read texts. So, sit back, put on your Airpods, and let’s dive into the world of hands-free texting with Airpods!
Prerequisites
Before we start setting up your Airpods to read texts, there are a few things you’ll need:
- An iPhone with iOS 13 or later: The text-reading feature we’ll be using requires a compatible iPhone running iOS 13 or a newer version of the operating system. Make sure your iPhone is up to date before proceeding.
- A pair of Airpods: To enjoy the hands-free text reading feature, you’ll need a pair of Airpods or Airpods Pro. These wireless earbuds are designed to seamlessly integrate with your Apple devices.
- Siri enabled on your iPhone and Airpods: We’ll be using Siri, Apple’s virtual assistant, to enable and control the text-reading feature. Ensure Siri is activated on both your iPhone and Airpods.
Once you have these prerequisites in place, you’re ready to set up your Airpods for text reading. If you meet these requirements, let’s move on to the next steps and get your Airpods ready to read texts!
Step 1: Enable Siri on your Airpods
The first step to getting your Airpods to read texts is to ensure that Siri is enabled on your Airpods. Siri is the virtual assistant that powers many of the hands-free functionalities on Apple devices.
To enable Siri on your Airpods, follow these steps:
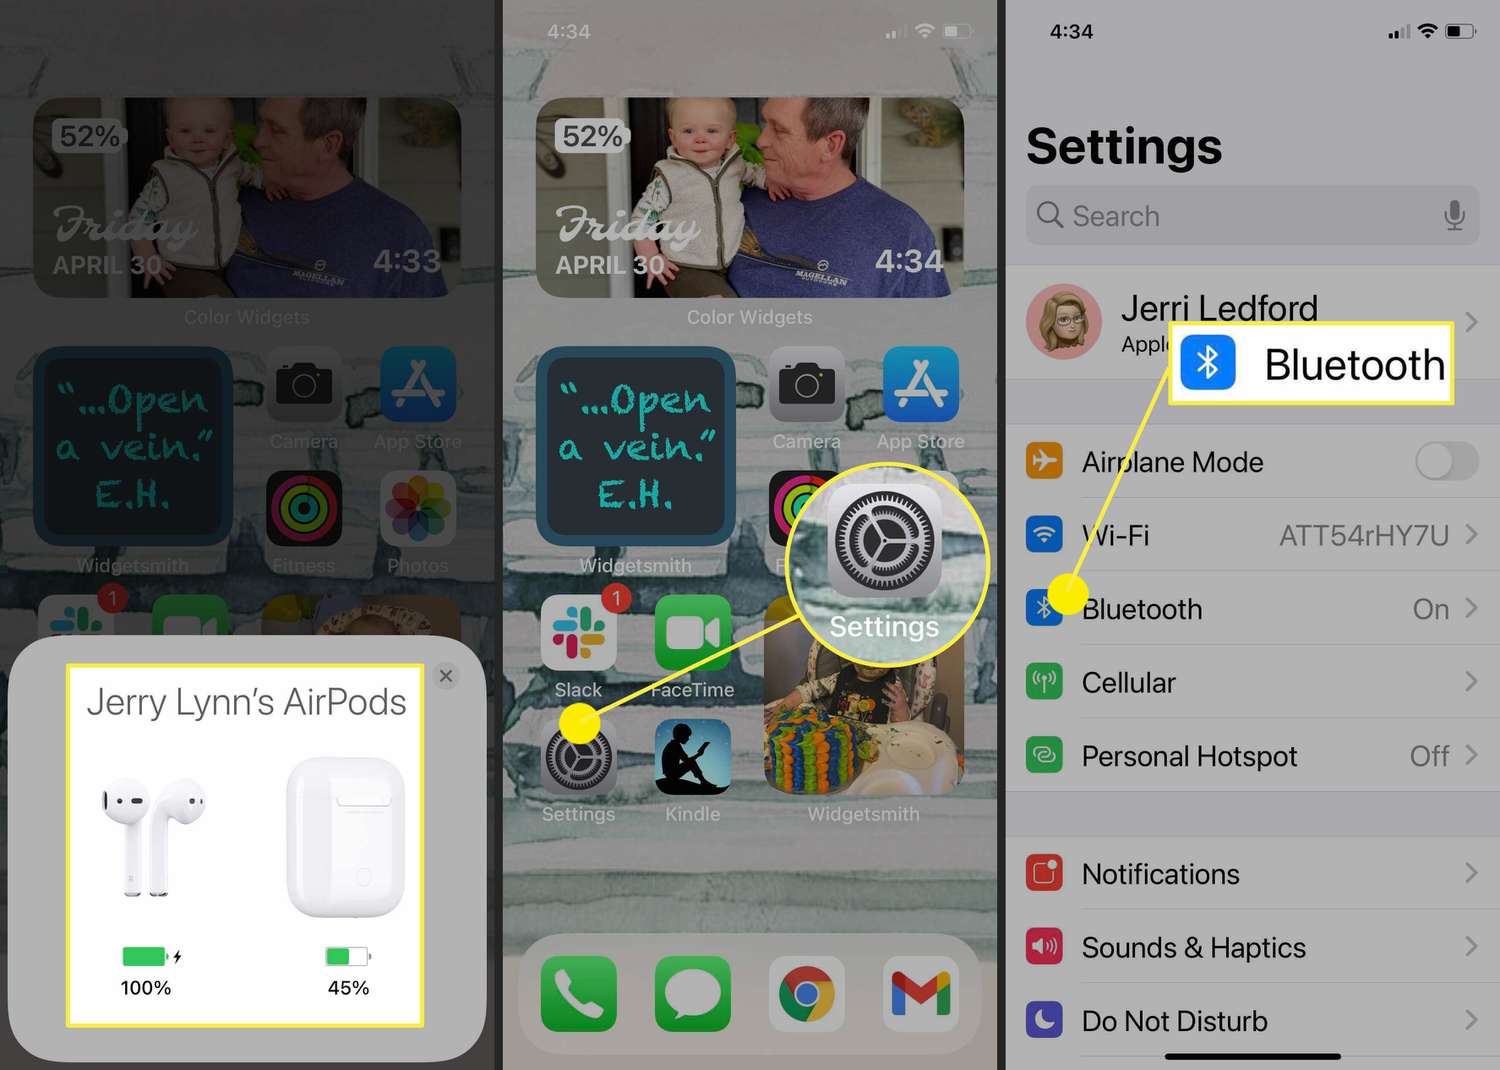
- Open the Settings app on your iPhone.
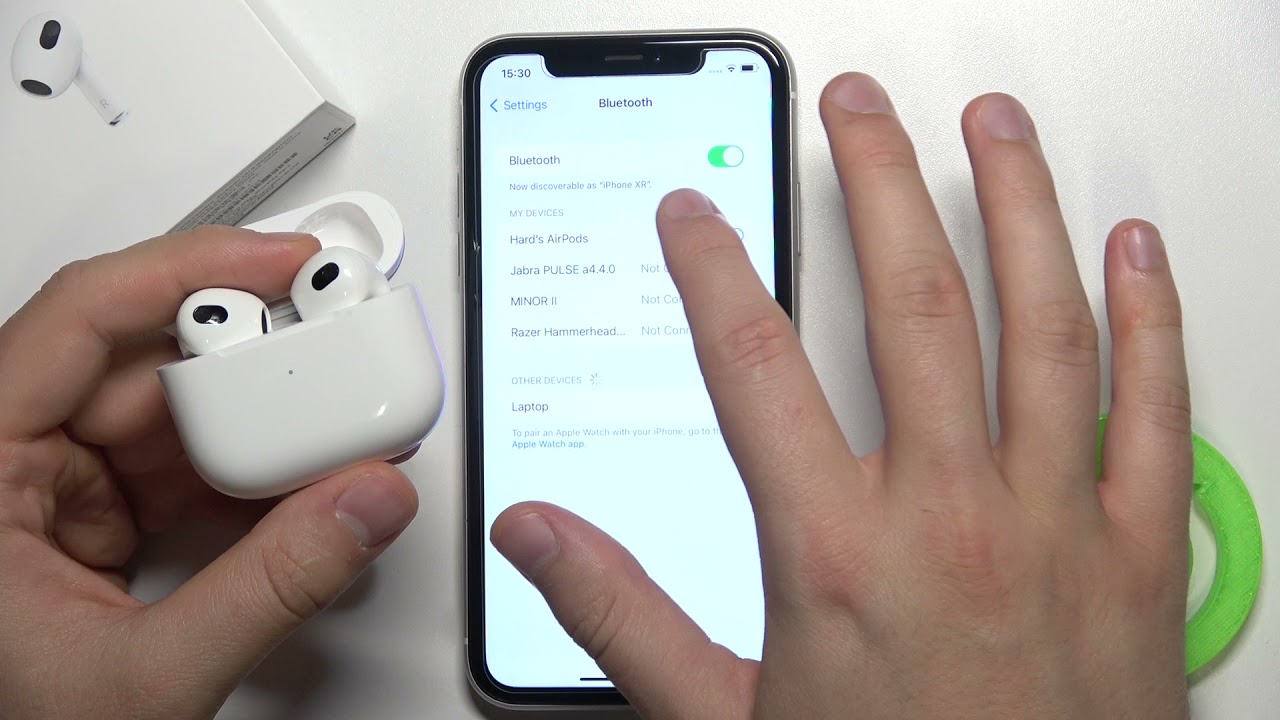
- Scroll down and tap on “Bluetooth.”
- Find your Airpods in the list of connected devices and tap on the “i” icon next to them.
- In the Airpods settings, make sure that the option for “Siri” is toggled on.
Enabling Siri on your Airpods allows you to utilize voice commands to control various functions, including reading texts. By having Siri enabled, you can easily instruct your Airpods to read incoming messages aloud without needing to touch your iPhone.
Once you have enabled Siri on your Airpods, you’re ready to move on to the next step and connect your Airpods to your iPhone.
Step 2: Connect your Airpods to your iPhone
Before you can start using your Airpods to read texts, you need to ensure that they are properly connected to your iPhone. The process of connecting your Airpods to your iPhone is quick and straightforward.
To connect your Airpods to your iPhone, follow these steps:
- Open the case of your Airpods and make sure they are charged.
- On your iPhone, go to the home screen and open the lid of the Airpods case.
- A popup should appear on your iPhone screen, showing the Airpods connection status. Tap on the “Connect” button.
- Once connected, you will see a confirmation message on your iPhone, indicating that your Airpods are now paired with your device.
Once your Airpods are successfully connected to your iPhone, you can start using them to read texts. The seamless integration between your Airpods and iPhone allows you to enjoy the convenience of getting your messages read aloud with just a few taps.
Now that your Airpods are connected, let’s move on to the next step and enable the feature that allows your Airpods to announce messages with Siri.
Step 3: Enable Announce Messages with Siri
To enable your Airpods to read out your texts, you’ll need to activate a feature called “Announce Messages with Siri.” This feature allows Siri to automatically announce incoming messages through your Airpods, making it convenient for you to stay updated without needing to check your phone.
Here are the steps to enable Announce Messages with Siri:
- Open the Settings app on your iPhone.
- Scroll down and tap on “Notifications.”
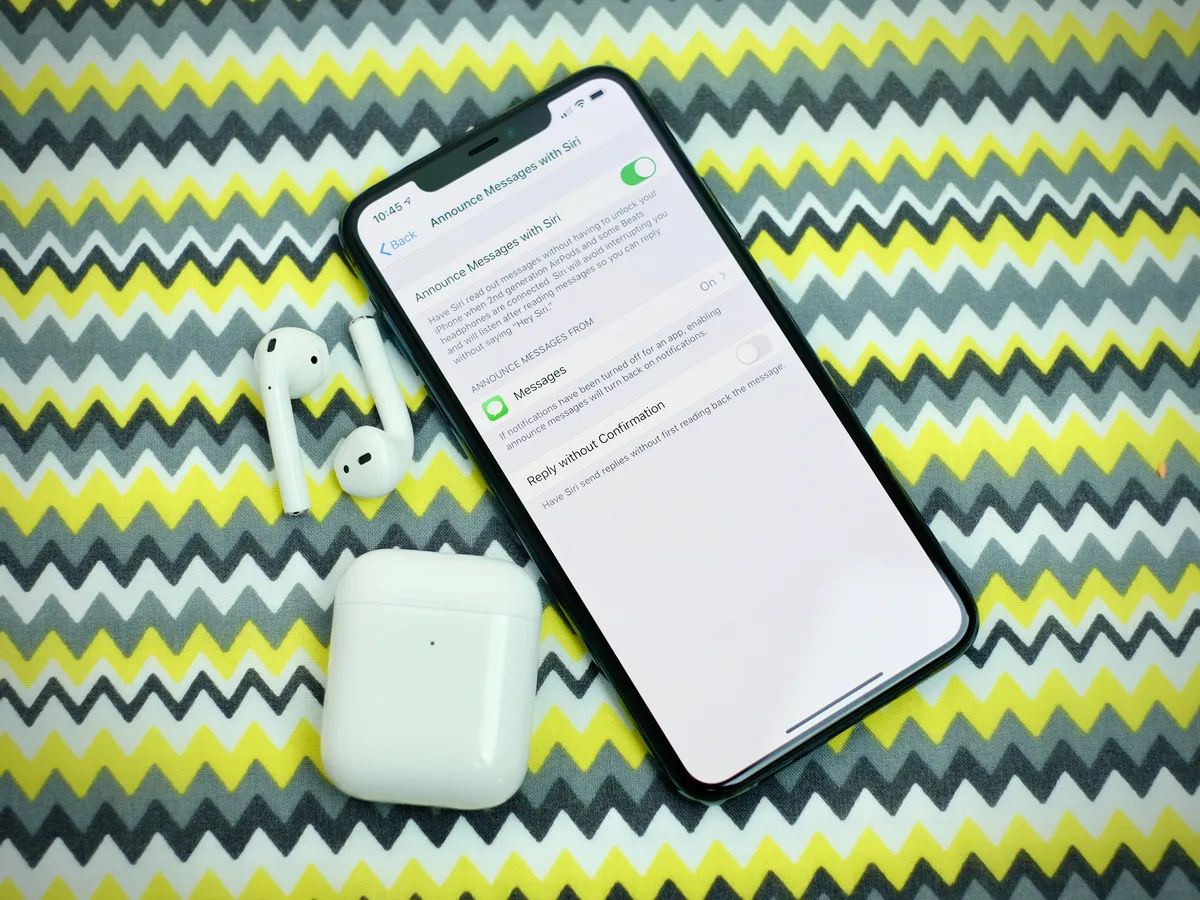
- Scroll down again and select “Announce Messages with Siri.”
- Toggle the switch to the “On” position.
Once you have enabled Announce Messages with Siri, your Airpods will start reading out incoming messages automatically. Siri will announce the sender’s name and read the message aloud, allowing you to hear and quickly respond to messages without taking out your phone.
Note that to protect your privacy, Siri will only announce messages from selected apps, such as the Messages app. Other notifications and messages from unsupported apps will not be read aloud by Siri.
With Announce Messages with Siri enabled, you’re one step closer to enjoying the convenience of hands-free text reading. Now, let’s move on to customizing the Announce Messages settings to suit your preferences.
Step 4: Customize Announce Messages settings
After enabling Announce Messages with Siri, you have the option to customize the settings to tailor the text-reading experience to your liking. Customization allows you to choose when and how messages are announced through your Airpods.
Follow these steps to customize the Announce Messages settings:
- Open the Settings app on your iPhone.
- Scroll down and tap on “Notifications.”
- Scroll down again and select “Announce Messages with Siri.”
- Here, you can make adjustments to the following settings:
- On/Off: Toggle the switch to turn the feature on or off entirely.
- Messages: Choose whether you want Siri to announce messages from everyone or only from your contacts.
- Headphones Only: Enable this option if you want Siri to announce messages exclusively when using headphones or specifically your Airpods. This way, you won’t be interrupted when your iPhone is not connected to your Airpods.
- Always Announce: By default, Siri will announce messages through your Airpods when they are connected and in use. However, you can enable the “Always Announce” option if you want Siri to announce messages even when your Airpods are not in your ears.
By customizing these settings, you can make the text-reading feature work best for your preferences and needs. Whether you want to limit announcements to specific contacts or fine-tune when messages are announced, the options are available for you to personalize your text-reading experience.
Now that you’ve customized the Announce Messages settings, you’re all set to start using your Airpods to read texts. Let’s move on to the next step, where we explore how you can utilize Siri to reply to messages hands-free.
Step 5: Reply to messages with Siri
Now that you have set up your Airpods to read texts, you can take it a step further by using Siri to reply to messages hands-free. With Siri’s voice recognition capabilities, you can compose and send messages without ever needing to touch your phone or Airpods.
Here’s how to reply to messages using Siri:
- When you receive a message notification, Siri will automatically announce the sender’s name and read the message aloud through your Airpods.
- Once the message has been read, Siri will prompt you to reply. Simply say “Hey Siri” to activate Siri’s listening mode.
- Compose your reply by dictating the text to Siri. For example, say “Reply,” followed by your message content.
- Siri will confirm your message and ask for confirmation to send it. You can say “Send” to send the message or “Change it” to modify your response.
With Siri’s help, replying to messages becomes effortless and efficient. Whether you’re busy with your hands full or in a situation where it’s not safe to use your phone, Siri and your Airpods offer a hands-free alternative to stay connected and respond to messages seamlessly.
Remember that Siri’s voice recognition is advanced and can accurately transcribe your speech into text messages. However, it’s essential to enunciate clearly and speak at a natural pace to ensure accurate transcription.
Congratulations! You have successfully set up your Airpods to read texts and reply with Siri. Enjoy the convenience of staying connected without missing a beat!
Conclusion
Congratulations on setting up your Airpods to read texts and reply with Siri! With this feature, you can enjoy the convenience of staying connected and multitasking effortlessly while on the go. Whether you’re out for a jog, driving, or simply want a hands-free solution, your Airpods and Siri make it easy to keep up with your messages.
In this guide, we walked through the step-by-step process of enabling Siri on your Airpods, connecting them to your iPhone, and enabling the Announce Messages with Siri feature. We also covered how to customize the Announce Messages settings to suit your preferences and how to reply to messages using Siri’s voice recognition capabilities.
By following these steps, you have unlocked a new level of convenience and productivity. Your Airpods will now announce incoming messages, allowing you to stay informed without needing to check your phone constantly. And with Siri’s help, you can effortlessly reply to messages using just your voice.
Now, go ahead and enjoy the hands-free texting experience with your Airpods. Embrace the freedom of staying connected while on the move and let Siri be your virtual assistant as you manage your messages with ease.
Thank you for choosing this guide, and we hope it has been helpful in setting up your Airpods to read texts. Stay connected, stay productive, and enjoy the benefits of modern technology!