Introduction
Welcome to our guide on how to turn off Siri reading texts on AirPods! When using AirPods, Siri can announce incoming messages, making it convenient to stay connected without having to pull out your iPhone. However, if you prefer privacy or simply find the feature distracting, you have the option to disable Siri’s text reading capability. In this article, we will walk you through the steps to turn off this feature and regain control over your AirPods.
AirPods are Apple’s wildly popular wireless earbuds, offering seamless connectivity and excellent sound quality. With Siri integration, AirPods allow you to use voice commands to access various features on your iPhone or iPad. While many users appreciate the convenience of having Siri read out their incoming messages, there are times when you may want to disable this feature. For example, if you’re in a crowded area or simply want to enjoy uninterrupted audio without any interruptions, turning off Siri’s text reading capability can be beneficial.
By following the simple steps outlined in this guide, you’ll be able to control when Siri announces your messages through your AirPods, giving you the flexibility to choose when and where you want to hear them. Whether you want to focus on a task, enjoy your favorite music, or simply maintain privacy, disabling Siri’s text reading feature on AirPods is quick and easy.
In the following sections, we will take you through the step-by-step process of turning off Siri’s text reading on AirPods. The instructions provided in this guide are applicable to iPhone and iPad devices running iOS 14 or later. So, let’s get started and take control of Siri’s message announcements on your AirPods.
Step 1: Open the Settings app on your iPhone or iPad
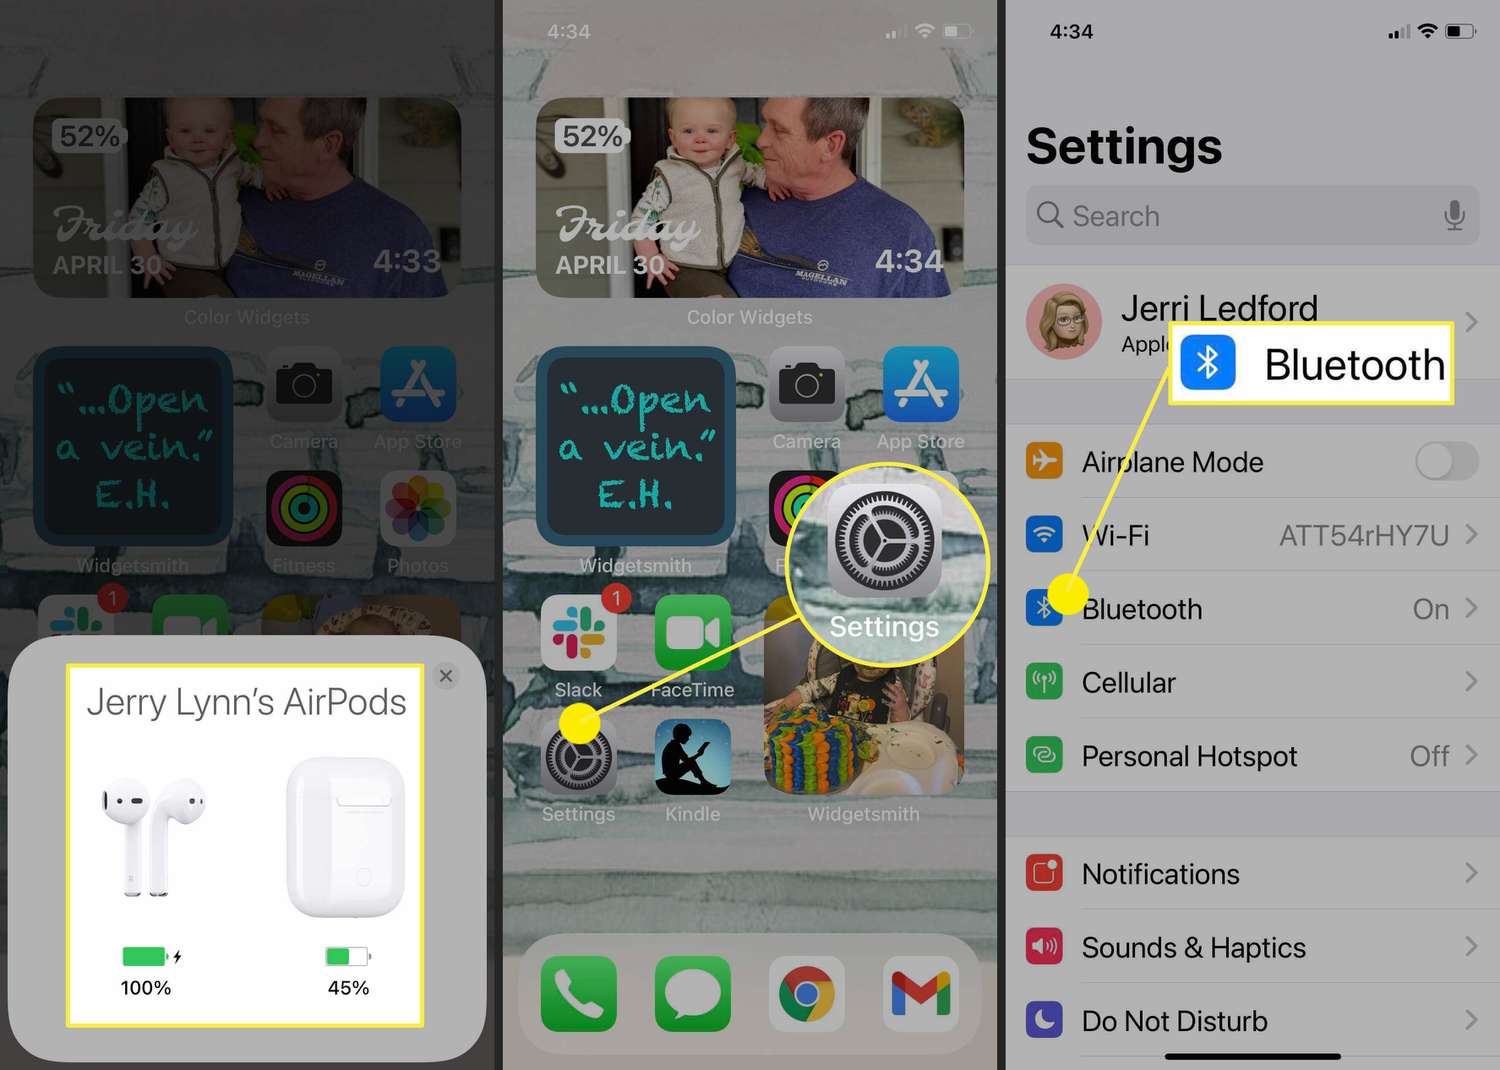
The first step in disabling Siri’s text reading on AirPods is to open the Settings app on your iPhone or iPad. The Settings app is where you can modify various settings and preferences for your device.
To access the Settings app, locate the app icon on your home screen. It is represented by a gray gear icon and can usually be found on the first page of your apps. Once you have located the Settings app icon, tap on it to open the app.
Alternatively, you can swipe down on your home screen and type “Settings” in the search bar at the top of the screen. This will bring up the Settings app as a search result, allowing you to open it directly.
Once you have successfully opened the Settings app, you are ready to proceed to the next step in disabling Siri’s text reading on your AirPods. Ensure that you have a stable internet connection, as some of the subsequent steps may require data synchronization or online access.
It’s important to note that the process of disabling Siri’s text reading on AirPods may vary slightly depending on the version of iOS you are running. However, the general steps outlined in this guide should be applicable to most recent versions. Now that you have opened the Settings app, let’s move on to the next step.
Step 2: Tap on Siri & Search
After opening the Settings app on your iPhone or iPad, the next step is to navigate to the “Siri & Search” settings. This is where you can customize Siri’s behavior, including the option to disable the reading of messages on your AirPods.
Scroll through the list of settings options on the main page of the Settings app until you locate “Siri & Search.” It is usually located below the Bluetooth and Wi-Fi settings and represented by a purple icon with the word “Siri” written underneath.
Once you have located the “Siri & Search” option, tap on it to access the Siri and Search settings screen. This screen provides you with various settings that allow you to configure Siri according to your preferences.
On the Siri and Search screen, you can customize Siri’s behavior, including enabling or disabling voice activation, choosing the language and voice you prefer, and managing Siri suggestions. However, for our purpose of turning off Siri reading texts on AirPods, we need to focus on a specific option within the Siri and Search settings.
Keep in mind that the layout and organization of the Siri and Search settings may vary slightly depending on your iOS version. However, the general steps provided in this guide should help you locate the necessary settings section.
Now that you have successfully accessed the Siri and Search settings screen, let’s move on to the next step to continue the process of turning off Siri’s text reading on AirPods.
Step 3: Scroll down and select Announce Messages
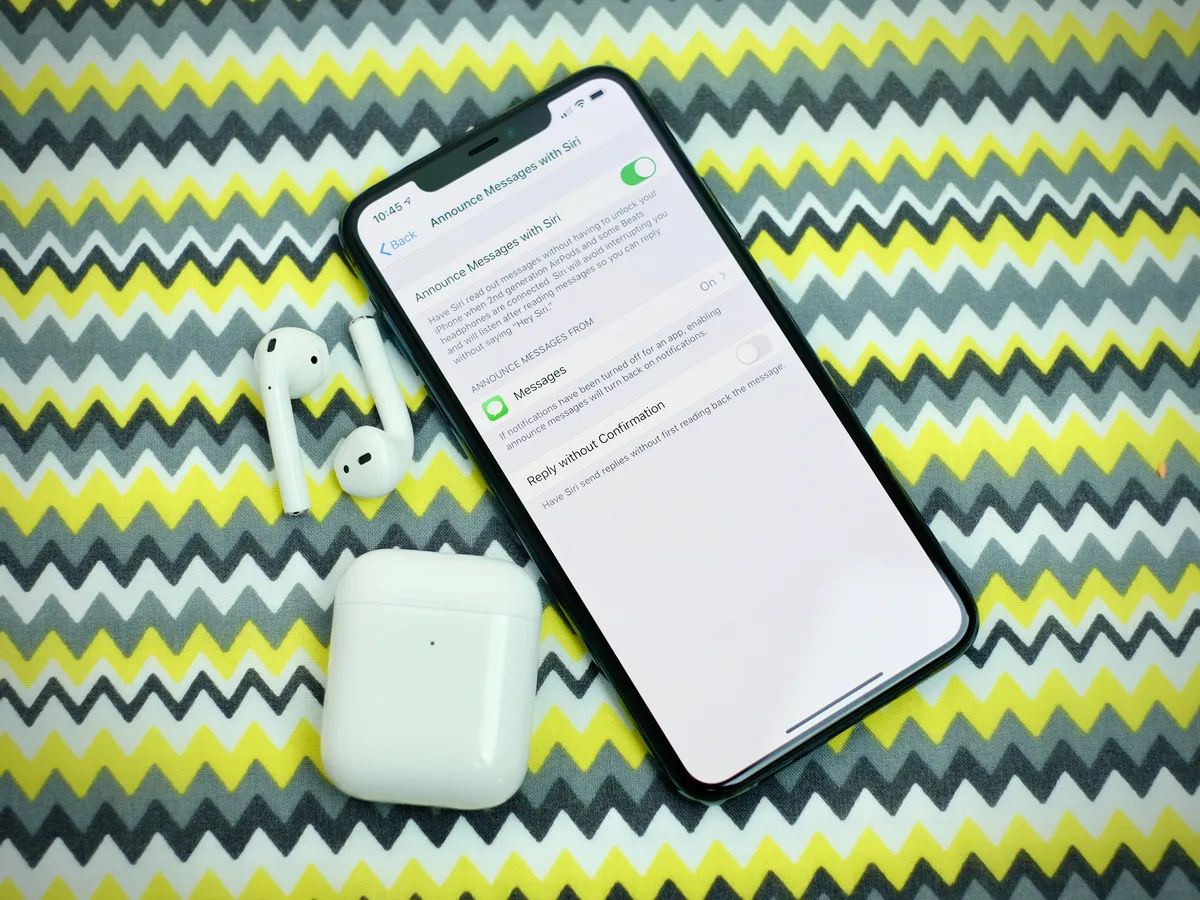
Now that you are on the Siri and Search settings screen, the next step is to scroll down until you find the “Announce Messages” option. This is the specific setting that controls whether Siri reads out your messages on your AirPods.
As you scroll through the Siri and Search settings screen, you will come across various options such as App Suggestions, Lock Screen, Banners, and more. Keep scrolling until you see the “Announce Messages” option.
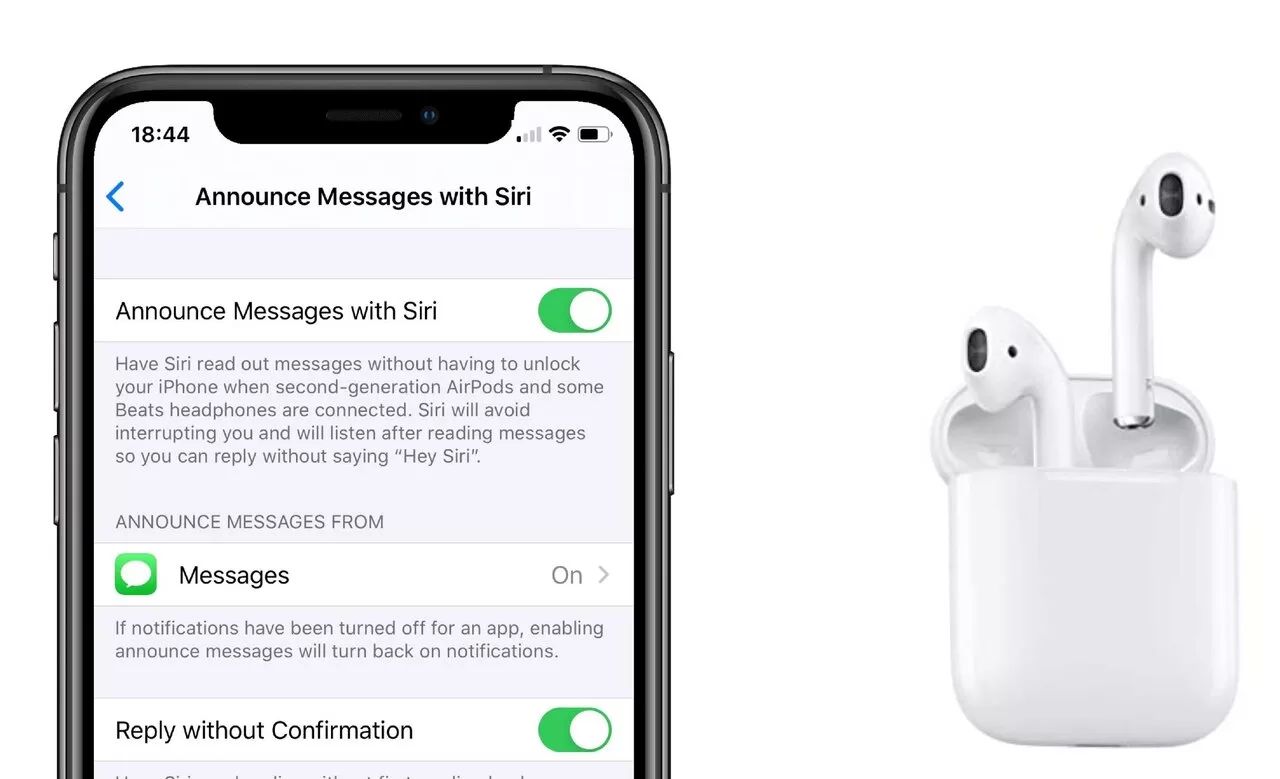
The “Announce Messages” feature allows you to choose when Siri announces incoming messages through your AirPods. By default, this feature is set to “Always” on most devices. When set to “Always,” Siri will read out your messages as they arrive, even when your AirPods are connected.
To disable Siri’s text reading on AirPods, you need to select a different option from the “Announce Messages” setting. Depending on your preferences, you have three options to choose from:
- Always: Siri will always read out messages through your AirPods.
- Headphones & Car: Siri will only announce messages when your AirPods are connected or when your device is connected to a CarPlay system.
- Never: Siri will never announce messages, regardless of your AirPods’ connection status.
After you have found the “Announce Messages” option on the Siri and Search settings screen and selected your preferred option, you are ready to proceed to the next step and turn off Siri’s text reading on AirPods.
Step 4: Choose whether you want Siri to Always, Headphones & Car, or Never announce messages
Now that you have located the “Announce Messages” option in the Siri and Search settings, it’s time to choose the appropriate setting that suits your preferences. This step will determine whether Siri will always, only with headphones and car, or never announce messages through your AirPods.
Once you have selected the “Announce Messages” option, you will be presented with the three choices: “Always,” “Headphones & Car,” and “Never.” Let’s take a closer look at each option:
- Always: With this setting, Siri will read out your incoming messages through your AirPods, regardless of their connection status. Whether your AirPods are connected or not, Siri will announce the arrival of new messages audibly.
- Headphones & Car: If you choose this setting, Siri will only announce messages when your AirPods or other headphones are connected to your device or when your device is connected to a CarPlay system. This ensures that you receive message announcements only when you are actively using headphones or driving.
- Never: Selecting this option will completely disable Siri’s text reading feature on your AirPods. Siri will no longer announce incoming messages and you can enjoy uninterrupted audio without any interruptions from Siri.
Select the option that best aligns with your preferences and needs. If you want to disable Siri’s text reading on AirPods, choose either the “Headphones & Car” or “Never” option. Once you have made your selection, you are ready to move on to the next step and confirm your choice.
Step 5: Turn Off the Announce Messages feature
After choosing your preferred setting in the “Announce Messages” option, it’s time to turn off the feature and disable Siri’s text reading on your AirPods. This step will allow you to enjoy privacy and uninterrupted audio without message announcements.
To turn off the Announce Messages feature, simply toggle the switch to the “off” position. The switch is located next to the “Announce Messages” option on the Siri and Search settings screen.
By turning off the Announce Messages feature, you are telling Siri to no longer read out incoming messages through your AirPods. This means that you will receive messages silently, without any interruptions or audible announcements.
It’s important to note that if you chose the “Always” option in the previous step, turning off the Announce Messages feature will disable Siri’s text reading on AirPods altogether. On the other hand, if you selected the “Headphones & Car” option, Siri will still announce messages when your AirPods or headphones are connected, but not when they are disconnected.
Once you have successfully turned off the Announce Messages feature, you have effectively disabled Siri’s text reading on your AirPods and can proceed to the next step to confirm your choice.
Step 6: Confirm your choice
After turning off the Announce Messages feature, it’s important to confirm your choice to ensure that Siri no longer reads out your messages on your AirPods. Confirming your choice will give you peace of mind knowing that your preference has been successfully applied.
To confirm your choice, exit the Siri and Search settings screen by tapping the back arrow at the top left corner of the screen. This will take you back to the main settings screen.
From the main settings screen, you can navigate to other settings or simply exit the Settings app. It’s a good idea to double-check the Announce Messages setting one more time before leaving the app to ensure that your selected option is still in effect.
If you see that the switch in the Announce Messages setting remains in the “off” position, congratulations! Your choice to disable Siri’s text reading on AirPods has been confirmed. You can now enjoy a more private and uninterrupted listening experience with your AirPods.
However, if you notice that the switch has moved back to the “on” position, simply repeat the steps outlined in this guide from Step 4 to Step 6 to turn off the Announce Messages feature again. It’s important to ensure that the setting remains disabled to prevent Siri from reading out your messages on your AirPods.
With your choice confirmed, you have successfully disabled Siri’s text reading on AirPods. You can now use your AirPods without any interruptions from Siri announcing incoming messages. In the next step, we will conclude the process, ensuring that Siri will no longer read your texts through AirPods.
Step 7: Siri will no longer read your texts through AirPods
Congratulations! By following the previous steps, you have successfully disabled Siri’s text reading on your AirPods. From now on, Siri will no longer read your texts aloud, allowing you to enjoy your music, podcasts, or audio content without any interruptions.
With Siri’s text reading feature turned off, you can now use your AirPods with peace of mind, knowing that your incoming messages will not be announced audibly. This provides you with a more private and uninterrupted listening experience, whether you’re working, exercising, or simply enjoying your favorite content.
Remember that you still have full access to Siri on your iPhone or iPad. You can use Siri to send messages, make phone calls, set reminders, and perform various other tasks. However, Siri will no longer read incoming messages out loud through your AirPods.
If you ever change your mind and wish to enable Siri’s text reading feature again, you can simply follow the same steps outlined in this guide and choose the appropriate setting in the “Announce Messages” option. This will allow Siri to announce your messages through your AirPods based on your chosen preference.
Enjoy your newfound control over Siri’s text reading on AirPods. Whether you prefer silence or simply want to maintain your privacy while using your AirPods, the option to disable Siri’s text reading gives you the freedom to customize your listening experience.
Now that you have successfully completed all the steps, you can fully enjoy your AirPods without any interruptions from Siri reading your texts. Happy listening!