Introduction
Formatting an SD card is a crucial step that ensures optimal performance and compatibility with your Sony A7III camera. Whether you’re using a brand new SD card or you want to clear the contents of an existing one, formatting is essential to prepare it for use.
In this guide, we will walk you through the step-by-step process of formatting an SD card on your Sony A7III camera. By following these instructions, you’ll be able to safely and effectively format your SD card, ensuring it is ready to capture stunning photos and videos.
Before we delve into the details, it’s important to note that formatting an SD card erases all data stored on it. Therefore, it’s crucial to back up any important files or images before proceeding with the formatting process.
Additionally, it’s worth mentioning that the procedures outlined in this guide specifically pertain to the Sony A7III camera model. If you’re using a different Sony camera model, the steps may vary slightly. It’s always a good idea to consult your camera’s user manual for device-specific instructions.
Now that you understand the importance of formatting and the necessary precautions, let’s jump right into the steps for formatting an SD card on your Sony A7III camera.
Step 1: Verify that the SD Card is Compatible
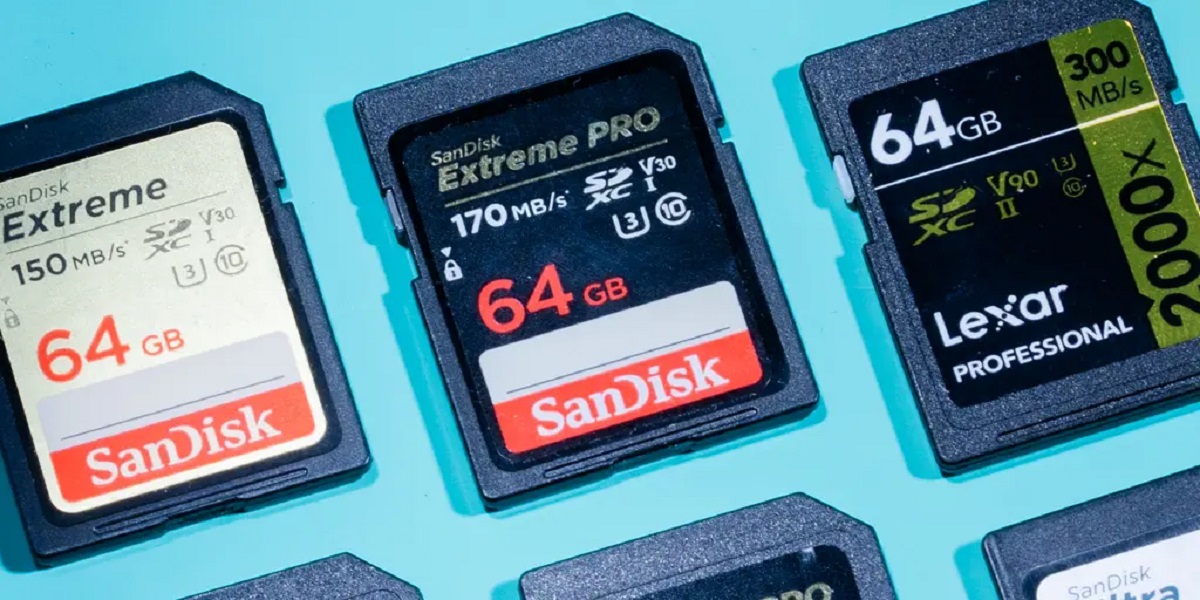
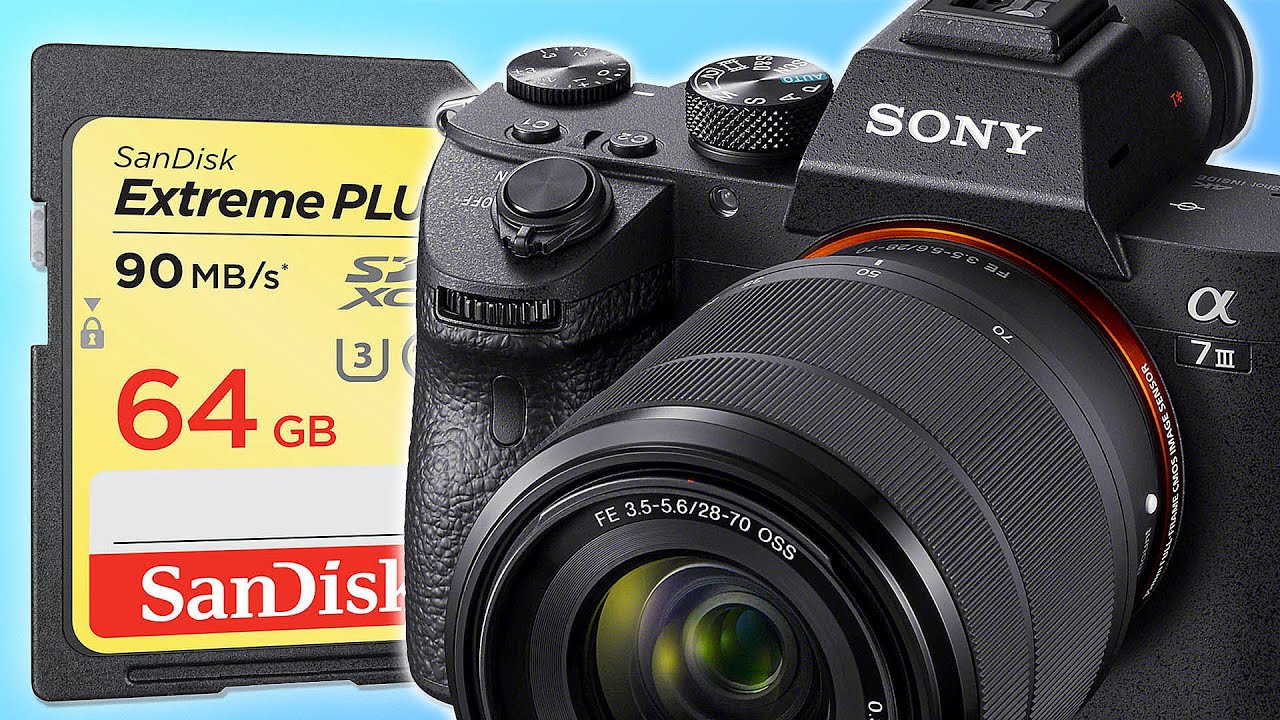
Before proceeding with the formatting process, it’s essential to ensure that the SD card you’re using is compatible with your Sony A7III camera. Sony A7III cameras support SD, SDHC, and SDXC memory card types.
To verify the compatibility, follow these steps:
- Power off your Sony A7III camera to avoid any potential damage to the SD card or the camera itself.
- Locate the SD card slot. On the Sony A7III camera, it is typically located on the side or bottom of the device, depending on the model.
- Remove any existing SD card from the slot, if present.
- Inspect the SD card for its storage capacity. Sony A7III cameras can support SD cards with capacities ranging from 2GB to 128GB.
- Check the SD card type. Ensure that it is an SD, SDHC, or SDXC card. Sony A7III cameras do not support other memory card types such as CompactFlash or Memory Stick.
If your SD card meets the requirements mentioned above, it is compatible with your Sony A7III camera, and you can proceed to the next step. However, if your SD card does not meet these specifications, you may need to purchase a new compatible SD card before proceeding with the formatting process.
Remember, using incompatible SD cards can cause errors, formatting issues, or even potential damage to your camera. It’s important to verify compatibility to ensure a seamless formatting process and a reliable performance from the SD card.
Step 2: Insert the SD Card
With a compatible SD card in hand, it’s time to insert it into your Sony A7III camera. Follow these simple steps:
- Ensure that your camera is powered off to prevent any potential damage to the SD card or the camera itself.
- Locate the SD card slot on your Sony A7III camera. Typically, it can be found on the side or bottom of the device, depending on the model.
- Gently push the SD card into the slot, making sure it is inserted in the correct orientation. Check the card for the engraved arrow symbol, which should align with the indicated direction on the slot.
- Apply slight pressure to ensure that the SD card is securely inserted into the slot. You should feel a click or a small resistance when the card is properly seated.
- Double-check to ensure that the SD card is fully inserted and not protruding from the slot. This ensures a proper connection and prevents accidental dislodging during use.
Once you have successfully inserted the SD card, you are now ready to proceed to the next step in the formatting process. It’s worth noting that you should avoid removing the SD card while your camera is turned on or during data transfer, as this may result in data loss or card corruption.
Now that your SD card is securely inserted, let’s move on to accessing the format menu in the next step.
Step 3: Access the Format Menu
Once you have inserted the SD card into your Sony A7III camera, you need to access the format menu to initiate the formatting process. Follow these steps:
- Power on your Sony A7III camera by pressing the power button.
- Ensure that the camera is in either the shooting mode or playback mode, depending on your camera’s settings.
- Locate the menu button on your camera. It is typically labeled “Menu” and is represented by an icon consisting of three horizontal lines.
- Press the menu button to access the camera’s menu system.
- Navigate through the menu using the arrow keys or the scroll wheel on your camera. Look for the “Setup” or “Settings” section in the menu.
- Within the “Setup” or “Settings” section, search for an option related to “Format” or “Memory Card.”
- Highlight and select the “Format” or “Memory Card” option.
By accessing the format menu, you are one step closer to formatting your SD card. However, it’s important to note that the menu navigation may vary slightly depending on your camera model. Refer to your camera’s user manual for specific instructions if you encounter any difficulties locating the format menu.
Once you have successfully accessed the format menu, you are ready to proceed to the next step, where you will select the format option and begin the formatting process.
Step 4: Select Format
After accessing the format menu on your Sony A7III camera, it’s time to select the format option to initiate the formatting process. Follow these straightforward steps:
- Within the format menu, you will typically see a list of available options related to memory card management.
- Look for the specific option that allows you to format the SD card. It is commonly labeled as “Format,” “Format Card,” or “Format Memory Card.”
- Highlight and select the format option using the arrow keys or the navigation controls on your camera.
- Before proceeding with the formatting process, your camera may display a warning message indicating that all data on the SD card will be erased. Take a moment to confirm that you have backed up any valuable files and then proceed to the next step.
By selecting the format option, you have confirmed your intention to format the SD card. This step ensures that the card’s file system is prepared for optimal performance and compatibility with your Sony A7III camera.
It’s important to note that the exact wording and location of the format option may differ slightly depending on your camera model. If you’re having trouble finding the format option, consult your camera’s user manual for specific instructions.
With the format option successfully selected, it’s time to move on to the next step, where you will confirm the formatting process.
Step 5: Confirm Formatting
After selecting the format option on your Sony A7III camera, you will be prompted to confirm the formatting process. This crucial step ensures that you intentionally proceed with formatting the SD card and understand that all data will be permanently erased. Follow these steps to confirm the formatting:
- Upon selecting the format option, a confirmation message will typically appear on your camera’s display screen.
- Read the confirmation message carefully to ensure that you understand the consequences of formatting. It will inform you that all data on the SD card will be deleted and cannot be recovered.
- Use the arrow keys or the navigation controls on your camera to select the “Yes” or “OK” option to confirm the formatting process.
Confirming the formatting process is an important step in ensuring that you have full control over erasing all data on the SD card. It’s crucial to double-check that you have backed up any necessary files or images before proceeding with the confirmation.
Keep in mind that the wording or appearance of the confirmation message may vary slightly depending on your camera model. If you encounter any confusion or difficulty in confirming the formatting, refer to your camera’s user manual for specific instructions.
Once you have successfully confirmed the formatting, you are ready to move on to the next step, where you will wait for the formatting process to complete.
Step 6: Wait for Formatting to Complete
After confirming the formatting process on your Sony A7III camera, you will need to wait for the formatting to complete. Formatting an SD card involves reorganizing the file system structure and preparing it for use with your camera. The time required for formatting will vary depending on the size and speed of your SD card. Follow these steps to wait for the formatting to complete:
- After confirming the formatting, your camera will begin the process and display a progress indicator on the screen.
- Do not interrupt or remove the SD card while formatting is in progress. Doing so may result in data corruption or incomplete formatting.
- During the formatting process, you may notice a blinking icon or progress bar on your camera’s display, indicating that the formatting is in progress.
- Be patient and wait for the formatting to complete. You may use this time to explore other settings or prepare your camera for shooting.
- Once the formatting process is complete, your Sony A7III camera may display a message indicating that formatting was successful.
It’s crucial to emphasize that you should not interrupt the process by removing the SD card or turning off the camera. Interrupting formatting can result in a corrupted SD card or potential malfunctions in your camera’s file system.
Once the formatting process is completed and you receive a success message, you can move on to the final step, where you will learn how to safely eject the SD card from your Sony A7III camera.
Step 7: Eject the SD Card Properly
After the formatting process is complete, it’s important to eject the SD card properly from your Sony A7III camera to avoid any potential data loss or damage. Follow these simple steps to safely eject the SD card:
- Ensure that your camera is turned off before ejecting the SD card. This will prevent any accidental removal while the camera is still powered on or during data transfer.
- Locate the SD card slot on your Sony A7III camera. Depending on the model, it is typically located on the side or bottom of the device.
- Gently push the SD card inward until you hear a click or feel slight resistance. This will release the card from the slot.
- Once the SD card has been released, carefully pull it out of the slot, making sure not to force or bend it in the process.
It’s important to handle the SD card with care to prevent any physical damage or accidental data loss. Avoid touching the metal contacts on the card, as fingerprints or dirt can hinder proper functionality.
After properly ejecting the SD card, it’s recommended to store it in a protective case or sleeve to ensure its safety when not in use. Additionally, remember to store the SD card in a cool, dry place away from extreme temperatures, humidity, or magnetic fields.
Congratulations! You have successfully formatted and ejected the SD card from your Sony A7III camera. You are now ready to use the formatted SD card to capture stunning photos and videos.
Conclusion
Formatting an SD card is a vital process to ensure optimal performance and compatibility with your Sony A7III camera. By following the step-by-step instructions outlined in this guide, you can safely and effectively format your SD card, preparing it for use with your camera.
Remember, before formatting, it is always crucial to back up any important files or images stored on the SD card. This will prevent any potential data loss during the formatting process.
Throughout the formatting process, we covered the following steps:
- Verify that the SD card is compatible with the Sony A7III camera.
- Insert the SD card securely into the designated slot.
- Access the format menu on your camera.
- Select the format option to begin the formatting process.
- Confirm the formatting to proceed with the erasure of all data on the SD card.
- Wait for the formatting to complete, ensuring not to interrupt the process.
- Eject the SD card properly from your camera to avoid any potential damage.
By following these steps, you can ensure a smooth and successful formatting process for your SD card, enabling it to perform optimally in your Sony A7III camera.
Remember that formatting an SD card erases all data stored on it, so it’s essential to have proper backups in place. Additionally, it’s crucial to verify compatibility with your specific camera model to avoid any complications or issues during the formatting process.
Now that you have the knowledge and understanding of how to format an SD card on your Sony A7III camera, you can confidently begin capturing beautiful photos and videos with a properly prepared memory card.