Introduction
When it comes to managing your Wi-Fi connections, there may be times when you need to forget a network. This could be due to a variety of reasons, such as changing your network settings, improving security, or simply removing clutter from your list of saved networks.
Forgetting a Wi-Fi network is a straightforward process that can be done on your computer or mobile device. By forgetting a network, you are essentially removing it from your saved networks list, allowing you to start fresh with a new connection or reconnect with the network if needed.
In this article, we will guide you through the step-by-step process of forgetting a Wi-Fi network. Whether you are using a Windows computer, a Mac, or a mobile device, following these instructions will help you easily remove unwanted networks from your list and keep your Wi-Fi connections organized.
So, if you’re ready to learn how to forget a Wi-Fi network, grab your device and let’s get started!
Step 1: Go to Network and Sharing Center
The first step in forgetting a Wi-Fi network is to access the Network and Sharing Center on your computer. This is a centralized location where you can manage various network settings and connections.
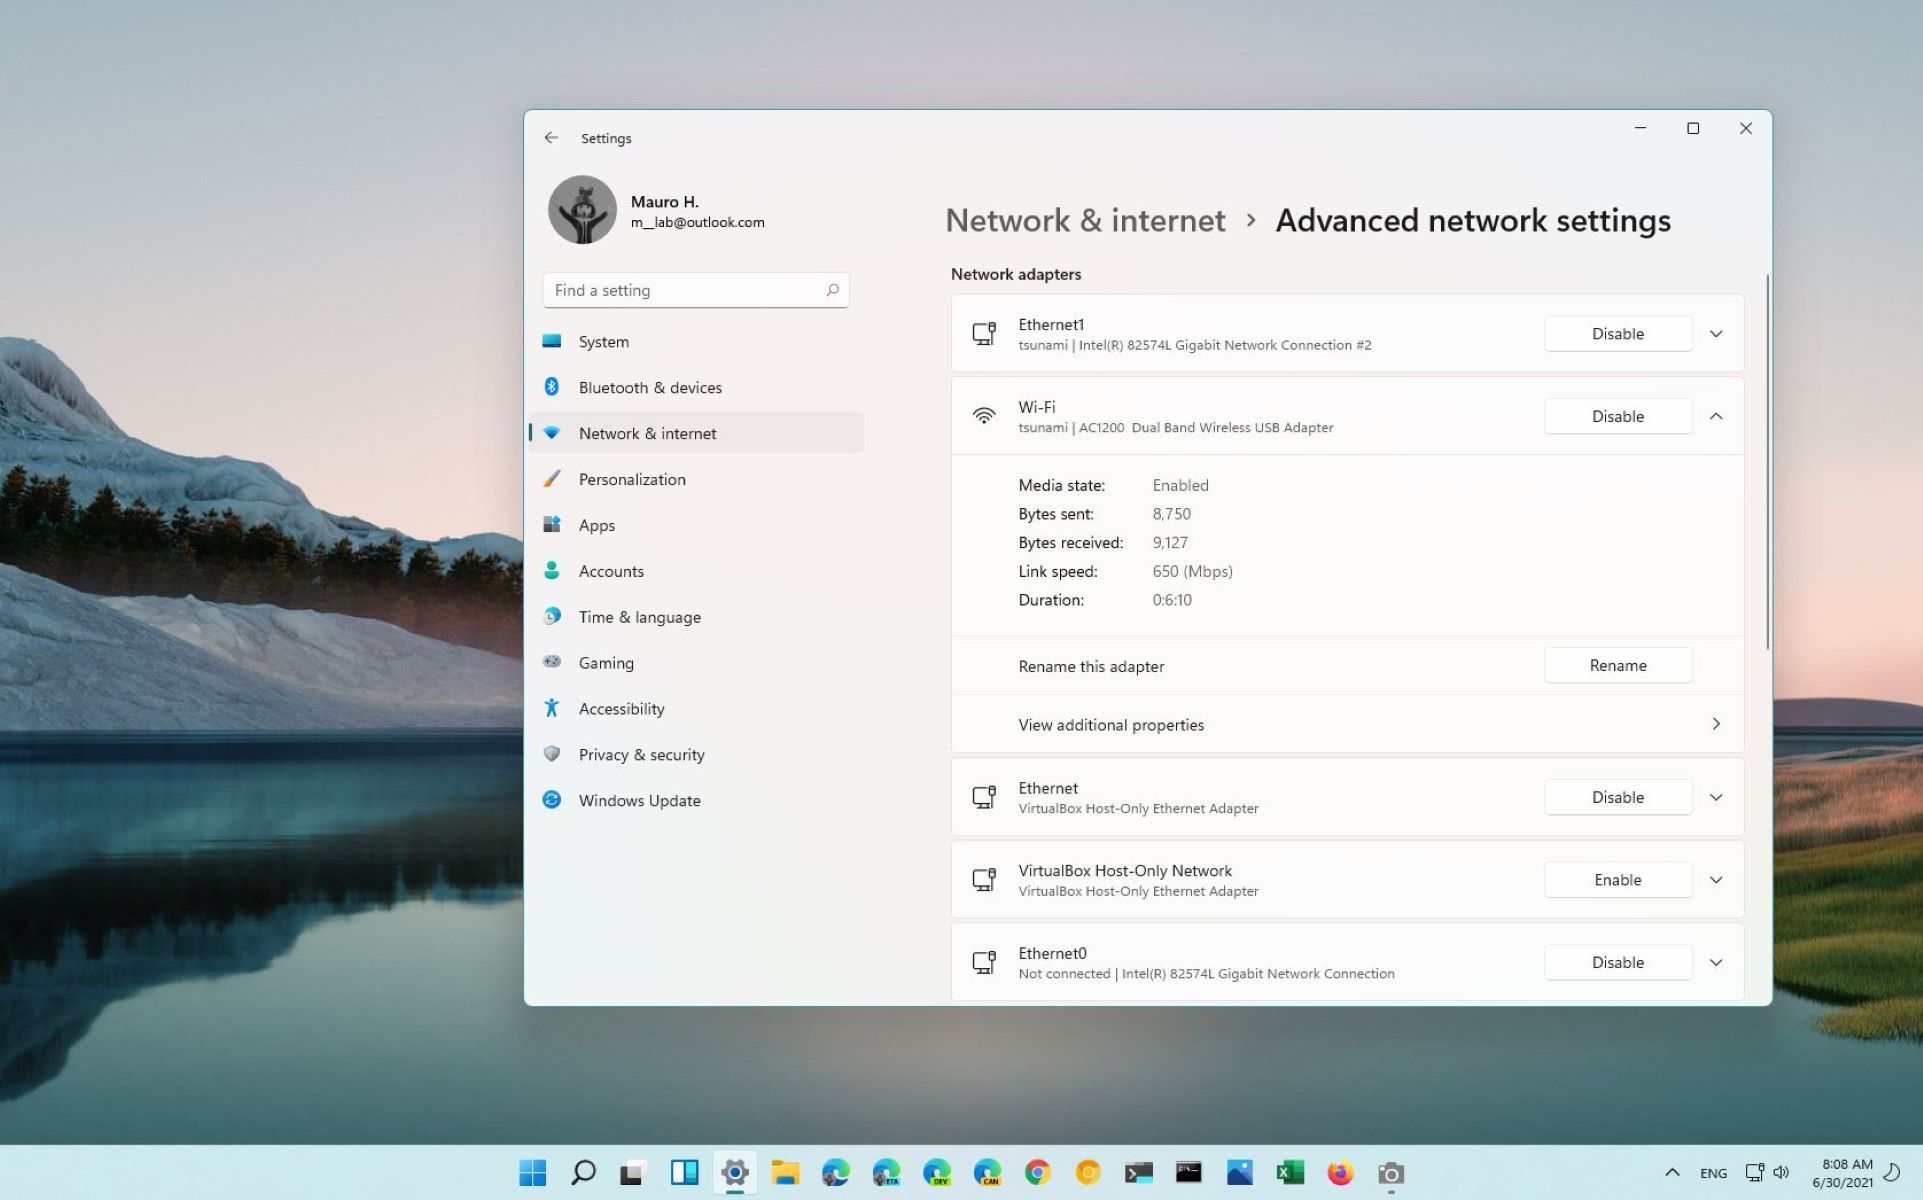
On a Windows computer, you can open the Network and Sharing Center by following these simple steps:
- Click on the network icon in the taskbar, usually located in the bottom right corner of the screen. The icon may look like a Wi-Fi signal or a series of bars.
- In the network menu that appears, select “Open Network & Internet settings.” This will open the settings window for your network connections.
- In the Network & Internet settings window, click on the “Change adapter options” link. This will take you to the Network Connections window.
- Within the Network Connections window, locate the Wi-Fi network that you want to forget. It will be listed as a wireless network connection.
- Right-click on the Wi-Fi network and select “Forget” from the dropdown menu. This will remove the network from your saved networks list.
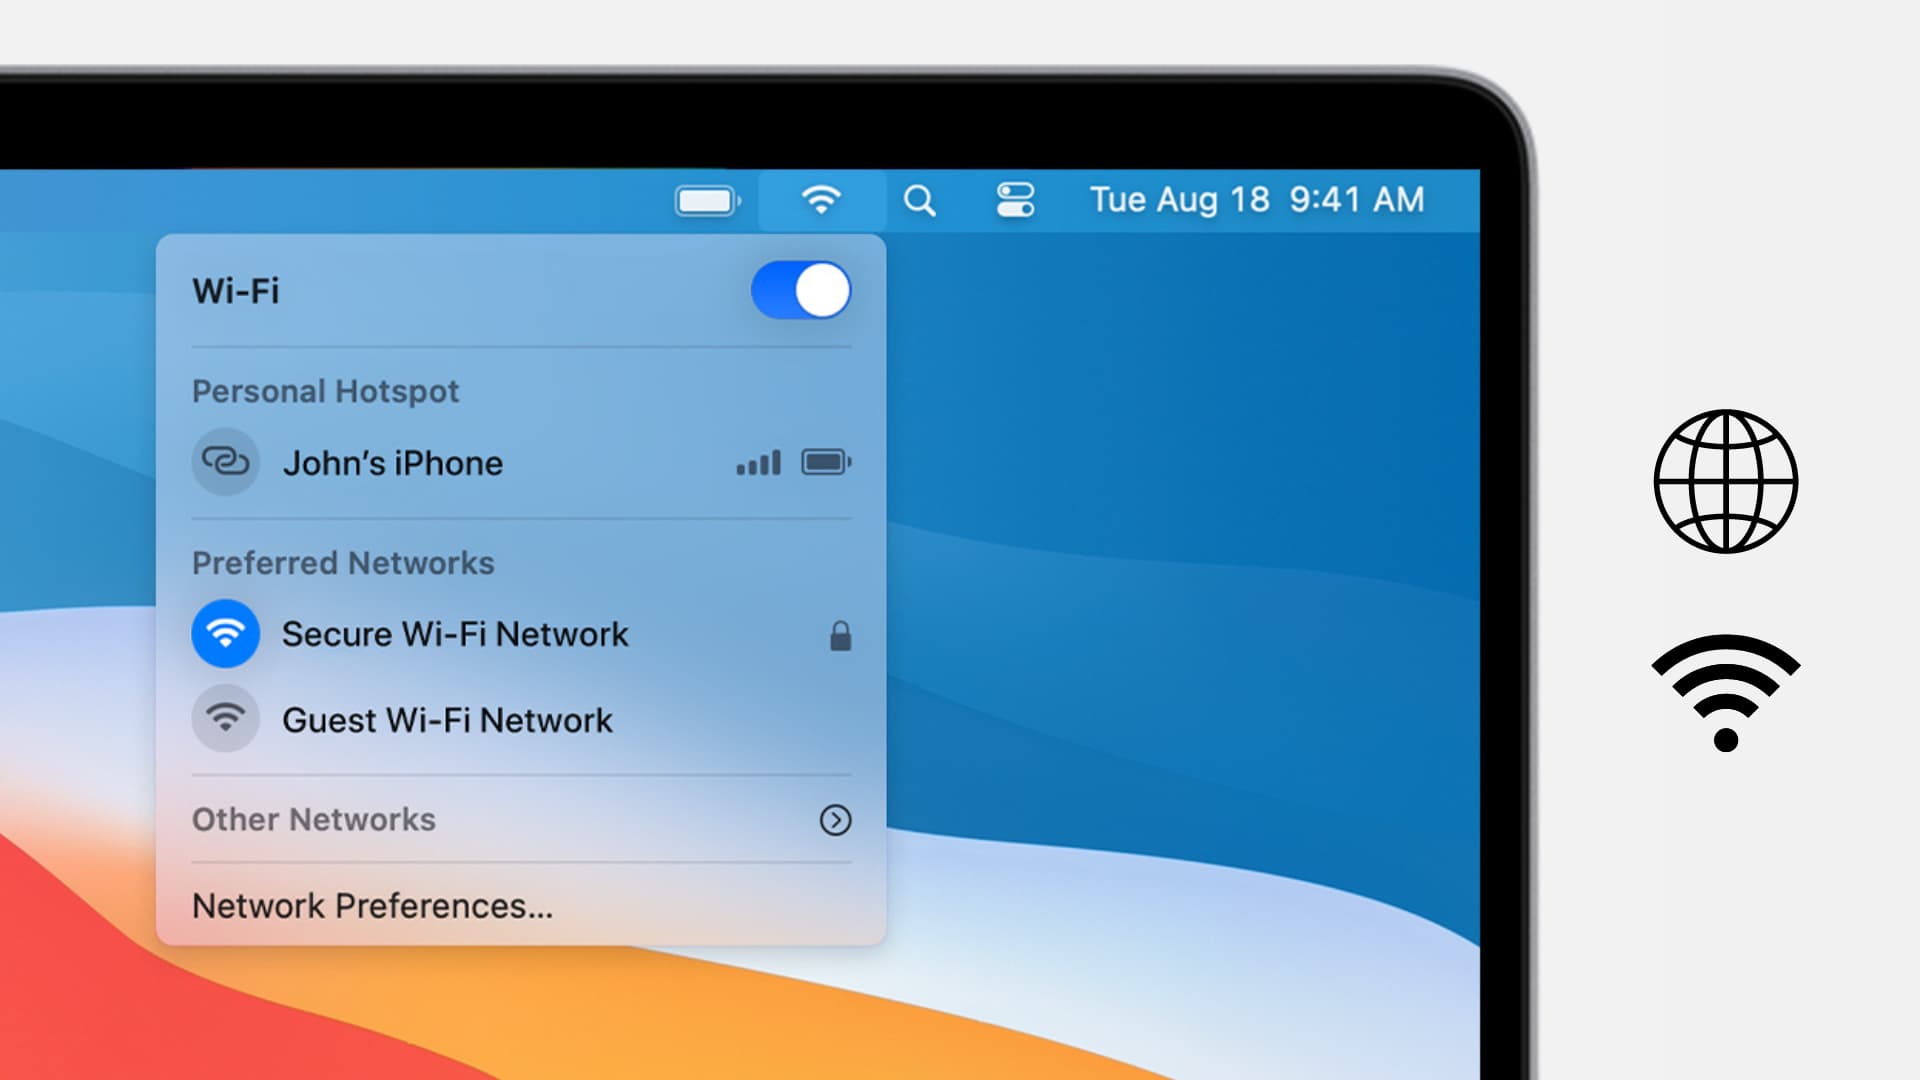
If you are using a Mac computer, the process to access the Network and Sharing Center is slightly different:
- In the top menu bar, click on the Wi-Fi icon. This will display a dropdown menu of available Wi-Fi networks.
- At the bottom of the dropdown menu, click on “Open Network Preferences.” This will open the Network Preferences window.
- Within the Network Preferences window, select the Wi-Fi network that you want to forget.
- Click on the “-” (minus) button located at the bottom of the list. This will remove the network from your saved networks.
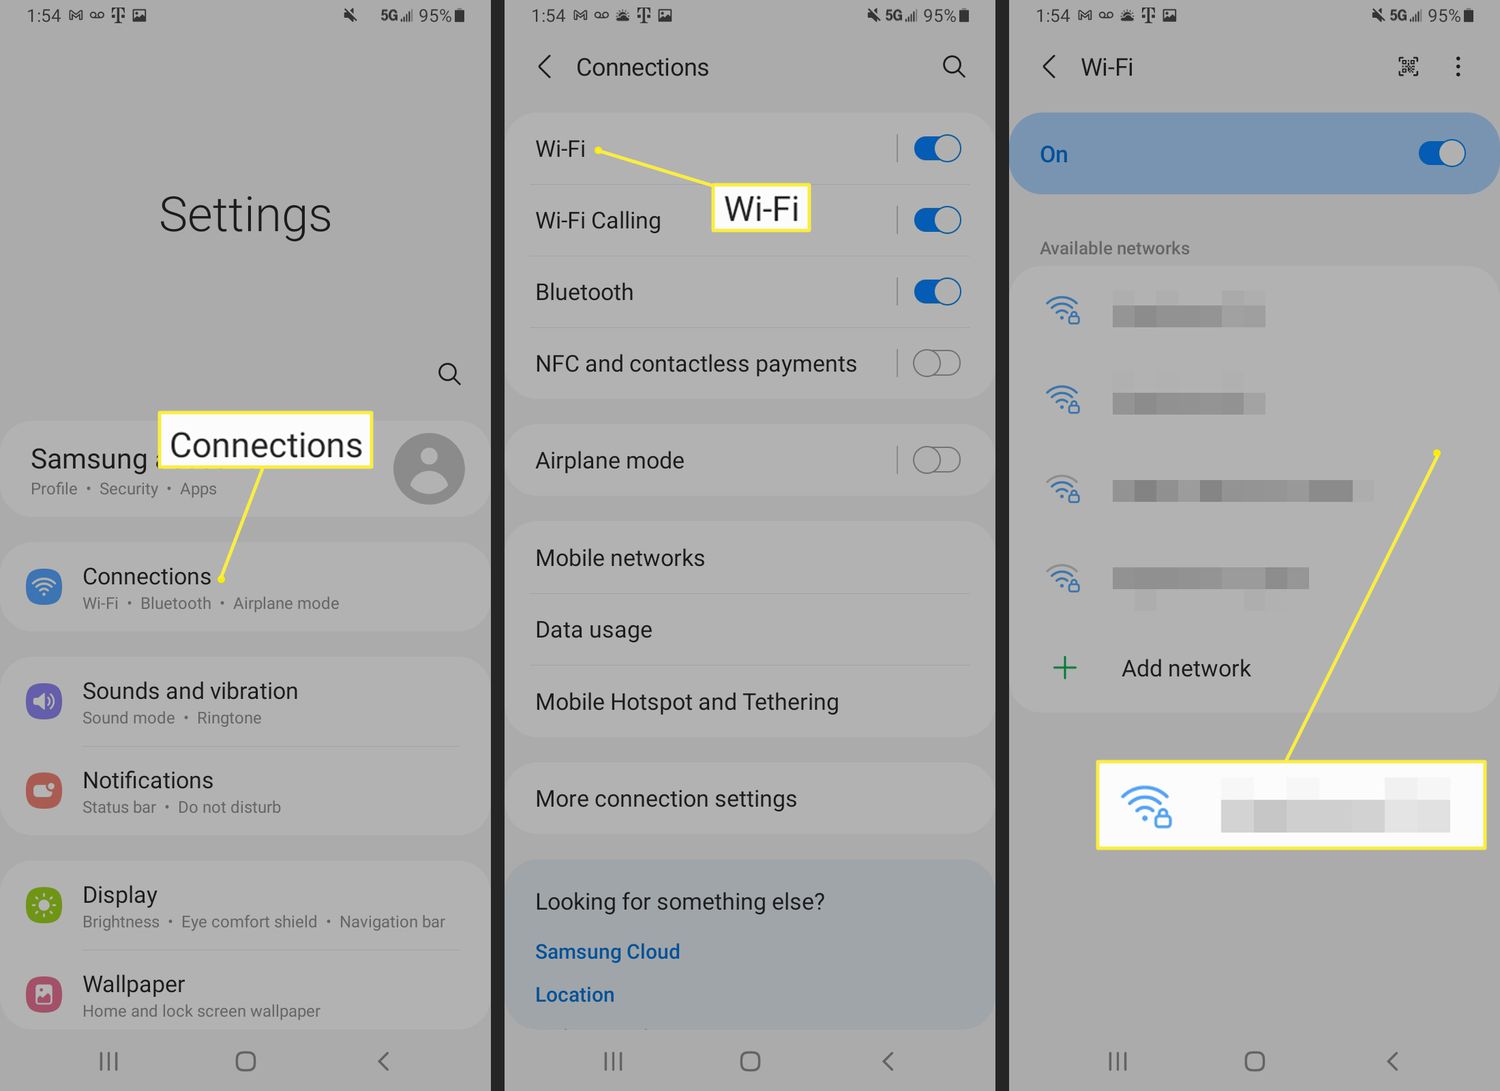
Forgetting a network on your mobile device follows a similar process:
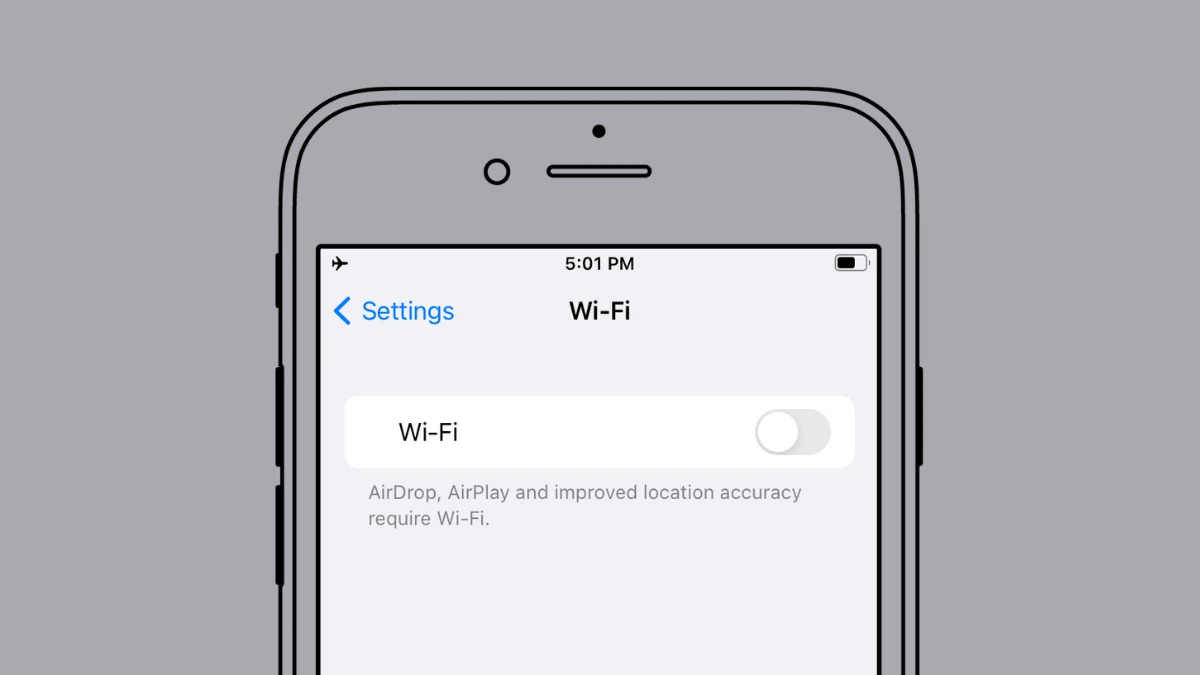
- Open the Settings app on your device. This can typically be found on your home screen.
- Scroll down and select “Wi-Fi” or “Network & Internet” options, depending on your device.
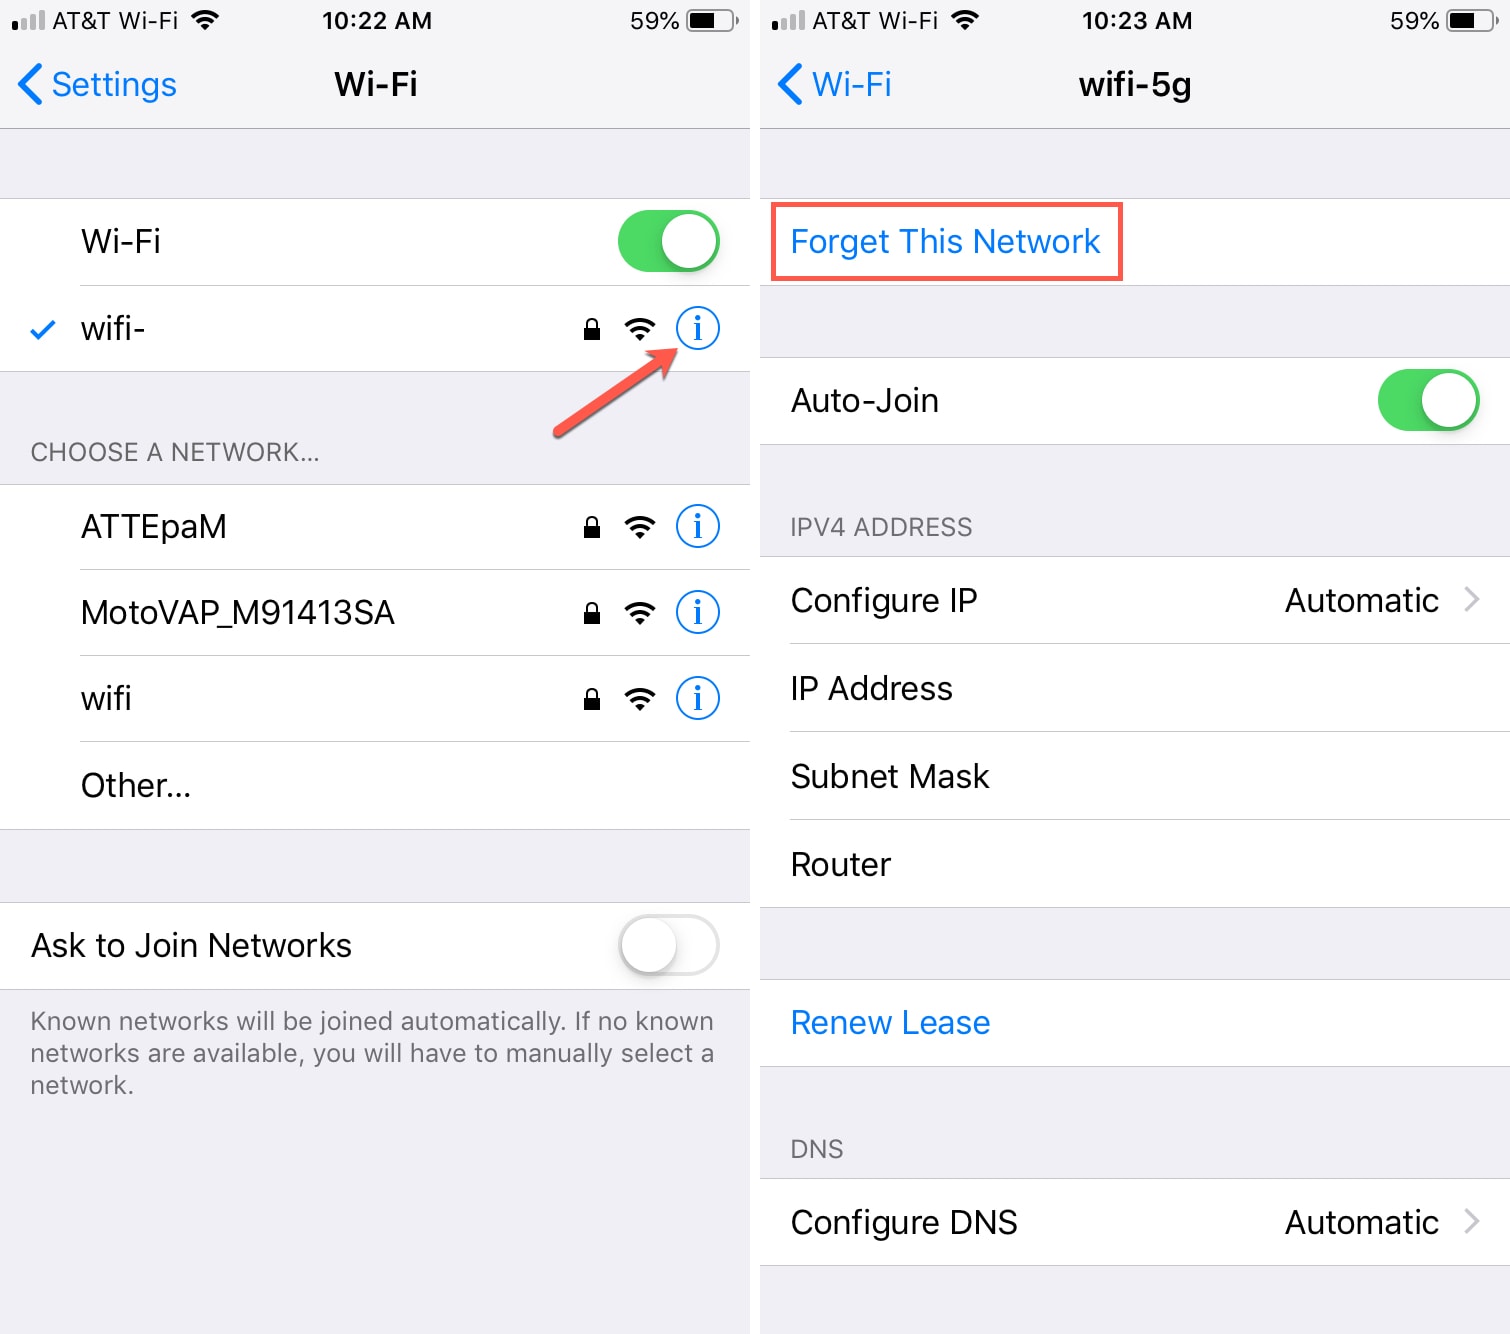
- Select the Wi-Fi network that you want to forget from the list.
- Tap on the “Forget” or “Disconnect” option next to the network. This will remove it from your saved networks.
By following these steps, you will be able to access the Network and Sharing Center on your computer or the network settings on your mobile device to start the process of forgetting a Wi-Fi network.
Step 2: Select Manage Wireless Networks
Once you’ve accessed the Network and Sharing Center on your computer, the next step is to navigate to the “Manage Wireless Networks” section. This is where you can view and manage all the Wi-Fi networks that you have connected to in the past.
On a Windows computer, follow these steps to select “Manage Wireless Networks”:
- In the Network and Sharing Center, look for the navigation panel on the left side of the window. Click on the option that says “Change adapter settings.”
- This will open the Network Connections window, where you will find a list of all your network connections. On the top menu, click on “Advanced.”
- A dropdown menu will appear. Select “Manage Wireless Networks.” This will bring up the list of all the Wi-Fi networks that your computer has previously connected to.
If you are using a Mac computer, there is no specific “Manage Wireless Networks” section. The Wi-Fi networks that your Mac has connected to will be automatically saved and can be accessed directly from the Wi-Fi preferences window.
On a mobile device, there is usually no separate “Manage Wireless Networks” option. Instead, the saved Wi-Fi networks can be accessed and managed directly from the Wi-Fi settings menu.
Once you have located the “Manage Wireless Networks” section on your computer or navigated to the appropriate Wi-Fi settings on your mobile device, you can proceed to the next step to find the specific network that you want to forget.
Step 3: Find the Network to Forget
After opening the “Manage Wireless Networks” section, the next step is to locate the specific Wi-Fi network that you want to forget. This is the network that you no longer wish to have saved on your device.
On a Windows computer, you will see a list of all the Wi-Fi networks that your computer has connected to in the past. This list may include networks from your home, workplace, or other locations you have visited.
Scroll through the list and look for the name of the network that you want to forget. The network names are usually displayed with their SSID (Service Set Identifier), which is the unique identifier for each Wi-Fi network.
If you have trouble identifying the network you want to forget, you can look at the “Security” or “Authentication” columns in the list. These columns may include additional details about the network’s security type or authentication method.
On a Mac computer, the process is similar. Open the Wi-Fi preferences window and look for the list of previously connected networks. Scroll through the list and find the Wi-Fi network that you want to forget.
On a mobile device, you will also see a list of saved Wi-Fi networks. This list may contain networks from your home, workplace, or places you have visited. Scroll through the list and find the network that you want to forget.
When identifying the network to forget, take your time to ensure that you are selecting the correct one. Double-check the name or any other identifying information to avoid accidentally forgetting the wrong network.
Once you have found the network you wish to forget, you can proceed to the next step and remove it from your saved networks list.
Step 4: Select Forget Network
Now that you have identified the Wi-Fi network that you want to forget, it’s time to remove it from your device’s saved networks list. This will prevent your device from automatically connecting to the network in the future.
On a Windows computer, follow these steps to forget a network:
- Right-click on the Wi-Fi network that you want to forget from the “Manage Wireless Networks” list.
- A dropdown menu will appear. Select the option that says “Forget this network.” This will remove the network from your saved networks.
On a Mac computer, the process is slightly different:
- In the Wi-Fi preferences window, select the Wi-Fi network that you wish to forget.
- Click on the “-” (minus) button located at the bottom of the list. This will remove the network from your saved networks.
On a mobile device, the steps to forget a network can vary depending on the operating system. Here are some general instructions:
- Open the Wi-Fi settings on your device.
- Find the Wi-Fi network that you want to forget and tap on it.
- Look for an option that says “Forget,” “Disconnect,” or a similar term. Tap on it to remove the network from your saved networks.
After selecting the option to forget the network, your device will no longer automatically connect to that Wi-Fi network. This is useful if you are experiencing connectivity issues, if you no longer have access to that network, or if you simply want to clean up your list of saved networks.
Remember that forgetting a network will not delete or affect the network itself. It only removes the saved credentials from your device so that it does not attempt to connect to that network without your permission.
Once you have successfully forgotten the network, you can proceed to the next step, which involves confirming the removal.
Step 5: Confirm Forgetting the Network
After selecting the option to forget a network, your device may ask you to confirm the action. This is a precautionary step to ensure that you intentionally want to remove the network from your saved networks list.
On a Windows computer, when you right-click on the Wi-Fi network and select “Forget this network,” a confirmation prompt may appear. Click on the “Yes” or “OK” button to confirm that you want to forget the network.
On a Mac computer, when you click on the “-” (minus) button next to the Wi-Fi network, a confirmation dialog may appear. Click on the “Remove” or “Forget” button to confirm the removal of the network.
On a mobile device, after tapping on the option to forget or disconnect from a network, you may be asked to confirm the action. Tap on the “Confirm,” “OK,” or similar button to proceed with forgetting the network.
Confirming the removal of the network ensures that you are intentional about removing it from your saved networks list. It helps prevent accidental removals and gives you an opportunity to double-check your actions before finalizing the process.
Once you have confirmed the removal, the Wi-Fi network will be removed from your device’s saved networks list. You will no longer see it in the available networks list, and your device will not automatically connect to it.
Now that you have successfully forgotten the network, you may want to disconnect and reconnect to Wi-Fi if needed. This can help ensure a fresh connection and prevent any potential issues that may arise from the network removal.
Proceed to the next step to learn how to disconnect and reconnect to a Wi-Fi network, if necessary.
Step 6: Disconnect and Reconnect if Needed
After forgetting a Wi-Fi network, you may need to disconnect and reconnect to Wi-Fi if you still want to use a wireless internet connection. This step ensures that your device establishes a fresh connection and allows you to connect to a different network if desired.
To disconnect and reconnect on a Windows computer, follow these steps:
- Click on the network icon in the taskbar. The icon may appear as a Wi-Fi signal or a series of bars.
- In the network menu, click on the option that says “Disconnect” to disconnect from the current Wi-Fi network.
- Once disconnected, you can click on the network icon again and select a new Wi-Fi network from the available networks list to reconnect.
On a Mac computer, disconnecting and reconnecting to Wi-Fi can be done as follows:
- Click on the Wi-Fi icon in the top menu bar and select the option to “Turn Wi-Fi Off.”
- Wait a few seconds, and then click on the Wi-Fi icon again and choose “Turn Wi-Fi On.”
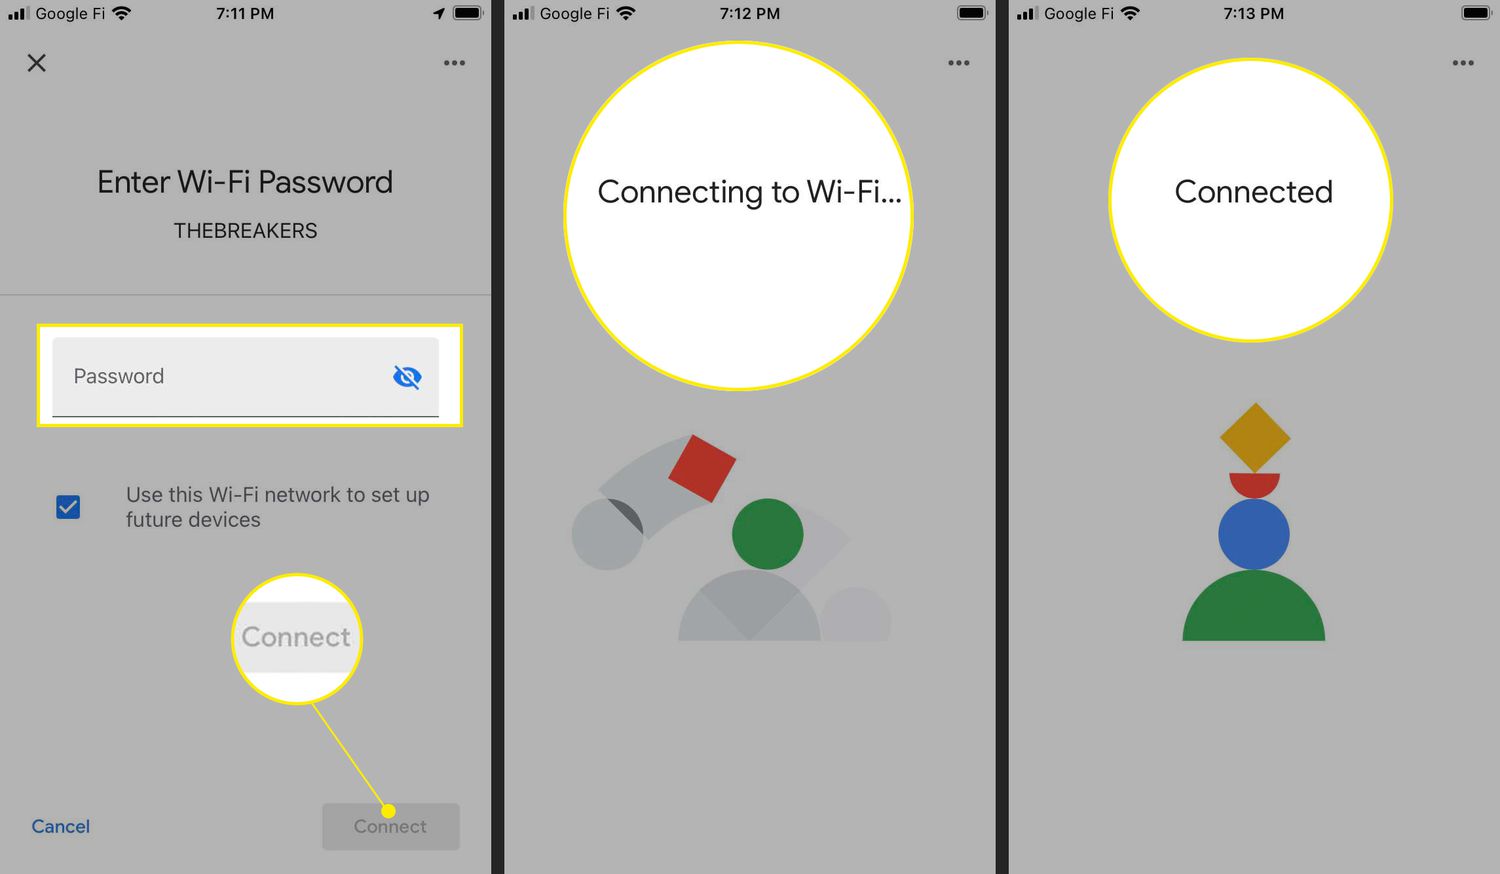
- From the displayed list of available Wi-Fi networks, select the network you want to connect to and enter the required credentials if prompted.
On a mobile device, the process to disconnect and reconnect varies depending on the operating system. Generally, you can follow these steps:
- Open the Wi-Fi settings on your device.
- Toggle the Wi-Fi switch to turn it off.
- Wait a moment, and then toggle the Wi-Fi switch back on to reconnect.
- Select a Wi-Fi network from the list of available networks and enter any necessary credentials to connect.
By disconnecting and reconnecting to Wi-Fi after forgetting a network, you ensure a fresh connection and give yourself the opportunity to connect to a different network if needed. This step is particularly useful when you want to switch between networks or troubleshoot any connectivity issues that may have arisen from the network removal.
With the final step completed, you have successfully forgotten a Wi-Fi network and, if necessary, reestablished a connection to Wi-Fi on your device.
Conclusion
Forgetting a Wi-Fi network is a simple yet essential task that allows you to manage your network connections effectively. Whether you want to remove clutter from your saved networks list, improve security, or troubleshoot connectivity issues, following the step-by-step process outlined in this guide will help you accomplish your goal.
Beginning by accessing the Network and Sharing Center or Wi-Fi preferences on your device, you can navigate to the “Manage Wireless Networks” section. From there, you can identify the specific network you wish to forget and proceed to remove it from your saved networks.
Confirming the removal ensures that you intentionally want to forget the network and prevents accidental removals. After successfully forgetting the network, you may need to disconnect and reconnect to Wi-Fi to establish a fresh connection.
By following these steps on your Windows computer, Mac, or mobile device, you can easily forget a Wi-Fi network and maintain a clean and organized list of saved networks.
Remember, forgetting a network does not affect the network itself, but only removes the saved credentials from your device. If you wish to reconnect to the network in the future, you will need to enter the necessary credentials again.
Now that you have the knowledge and tools to forget a Wi-Fi network, you can confidently manage your network connections and optimize your wireless experience. Whether you’re at home, at work, or on the go, you have the power to control which networks your device connects to, ensuring a seamless and secure internet connection.
So go ahead, take charge of your Wi-Fi connections, and say goodbye to unnecessary networks that no longer serve your needs.