Introduction
Having trouble connecting your Mac to a Wi-Fi network can be frustrating, especially when you rely on a stable internet connection for work, entertainment, or other online activities. It can disrupt your workflow, prevent you from accessing important websites, and limit your ability to stay connected with friends and family. However, before you start to worry, it’s important to remember that Wi-Fi connection issues are relatively common and can often be resolved with a few simple troubleshooting steps. In this article, we’ll explore some of the common reasons why your Mac may be having difficulty connecting to Wi-Fi and provide you with the necessary steps to resolve these issues.
Whether you’re experiencing sporadic drops in connection, unable to connect to a specific network, or encountering slow internet speeds, there are several factors that could be contributing to the problem. It could be an issue with your Wi-Fi router, a misconfiguration in your Mac’s network settings, outdated firmware, or even interference from other electronic devices.
But fret not! In the following sections, we’ll walk you through each step of the troubleshooting process to help you identify and resolve the source of the issue. By following these steps, you’ll be back online and enjoying a seamless Wi-Fi experience on your Mac in no time.
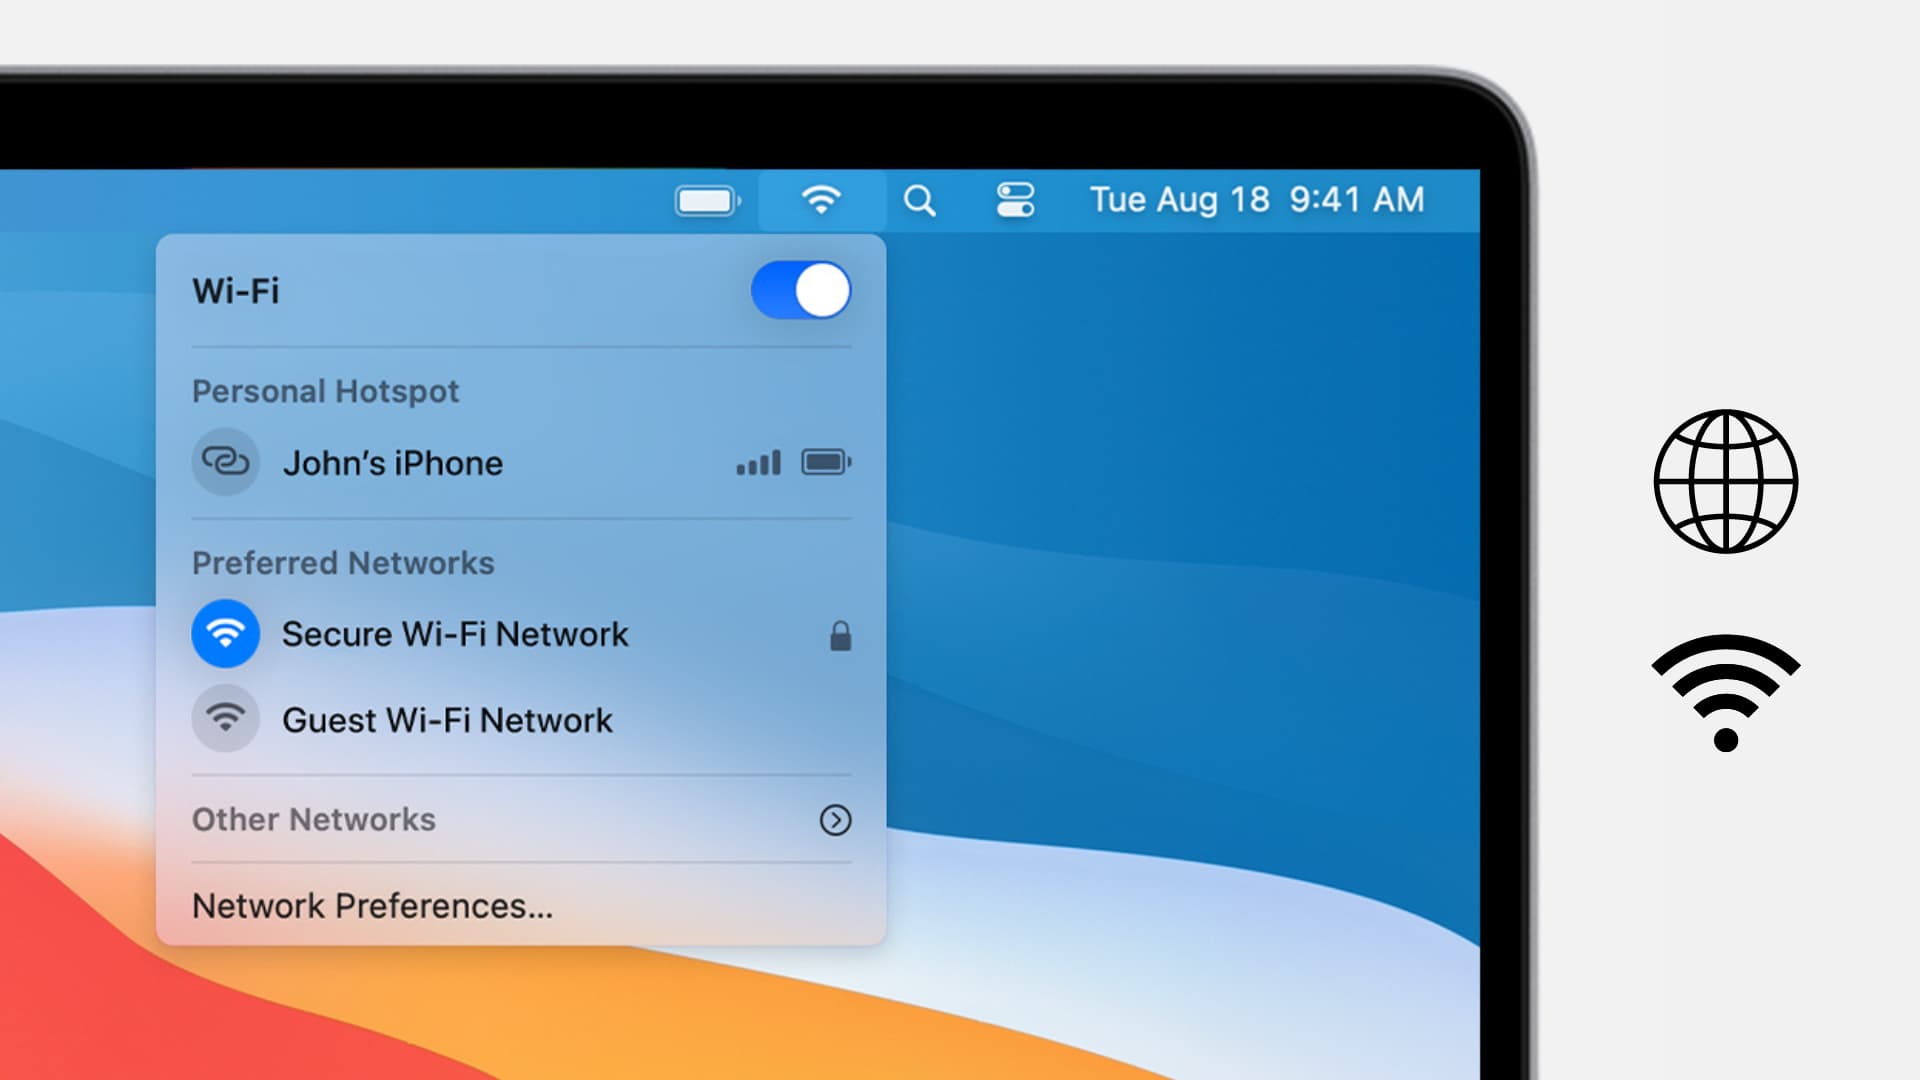
Common WiFi Connection Issues on Macs
When it comes to Wi-Fi connection issues on Macs, there are a few common problems that users often encounter. Understanding these issues can help you pinpoint the underlying cause and take appropriate steps to resolve them. Let’s take a look at some of the most frequent WiFi connection issues on Macs:
- Intermittent connection: One of the frustrating issues you may encounter is an intermittent or unstable Wi-Fi connection. This means that your Mac is unable to maintain a consistent connection to the Wi-Fi network, causing frequent drops and interruptions in your internet access.
- No WiFi networks detected: Another common problem is when your Mac fails to detect any available Wi-Fi networks. This can occur even when you’re in range of a known network and other devices can connect without any issues.
- Unable to connect to a specific network: Sometimes, you may be unable to connect to a specific Wi-Fi network while your Mac can connect to other networks without any problems. This issue usually arises when there’s a misconfiguration or compatibility issue between your Mac and the network in question.
- Slow internet speeds: Slow Wi-Fi speeds can severely hinder your online experience. If you notice that your internet is crawling on your Mac while other devices on the same network are performing well, it could be indicative of a problem with your Mac’s Wi-Fi connection.
It’s worth noting that these issues can be caused by various factors, ranging from hardware and software problems to network configuration issues. Understanding the specific problem you’re facing will help you narrow down the troubleshooting steps and find a solution that’s tailored to your situation.
Troubleshooting Steps
If you’re experiencing any of the common Wi-Fi connection issues mentioned earlier, don’t worry! There are several troubleshooting steps you can take to resolve the problem. Follow these steps, starting from the beginning, until you find a solution that works for you:
Step 1: Check Wi-Fi Connection
Start by checking if the Wi-Fi network is functioning properly. Make sure that other devices in your home or office can connect to the network without any issues. If they can’t, the problem may lie with the network itself, and you may need to contact your internet service provider for assistance.
Step 2: Restart your Mac
Sometimes, a simple restart can fix temporary software glitches that may be causing Wi-Fi connectivity problems. Restart your Mac and try connecting to the Wi-Fi network again.
Step 3: Reset Network Settings
Resetting your Mac’s network settings can often resolve Wi-Fi connection issues. To do this, go to “System Preferences” > “Network” and click on the Wi-Fi connection. Then, click on the minus (-) button to remove the Wi-Fi connection. Restart your Mac and add the Wi-Fi network again to see if the issue is resolved.
Step 4: Update Wi-Fi Router Firmware
Outdated firmware on your Wi-Fi router can contribute to connectivity issues. Check the manufacturer’s website for any available firmware updates and follow their instructions to update the router’s firmware.
Step 5: Forget and Rejoin Wi-Fi Network
Forgetting and rejoining the Wi-Fi network can help refresh the connection settings on your Mac. To do this, go to “System Preferences” > “Network” and click on the Wi-Fi connection. Then, click on the minus (-) button to remove the Wi-Fi connection. Restart your Mac, reconnect to the Wi-Fi network, and enter the correct password to rejoin the network.
Step 6: Create a New Network Location
Creating a new network location can resolve network configuration issues that may be causing Wi-Fi connection problems. Go to “System Preferences” > “Network” and click on the Wi-Fi connection. Then, click on the gear icon at the bottom of the network connections list and select “Duplicate Location.” Rename the new location and try connecting to the Wi-Fi network again.
Step 7: Check for Software Updates
Make sure your Mac’s operating system is up to date by checking for software updates. Go to the Apple menu and select “Software Update.” If there are any available updates, follow the prompts to install them and restart your Mac if necessary.
Step 8: Reset PRAM and SMC
Resetting the PRAM (Parameter Random Access Memory) and SMC (System Management Controller) on your Mac can help resolve hardware-related issues that may interfere with Wi-Fi connectivity. Instructions on how to reset these components can vary depending on your Mac model, so consult Apple’s support website for specific instructions for your Mac.
Step 9: Contact Your Internet Service Provider
If none of the above steps resolved the issue, it may be time to contact your internet service provider. Explain the problem in detail and follow their guidance to troubleshoot any potential issues on their end.
By following these troubleshooting steps, you should be able to resolve most Wi-Fi connection issues on your Mac. However, if the problem persists, it may be worth seeking professional assistance from an Apple Support representative or a certified technician.
Step 1: Check WiFi Connection
The first step in troubleshooting WiFi connection issues on your Mac is to check the status of the WiFi connection itself. This will help determine if the problem lies with the network or with your Mac. Here’s how you can do it:
- Check other devices: Start by checking if other devices in your home or office are able to connect to the WiFi network without any issues. If other devices can successfully connect, then the problem may be specific to your Mac.
- Signal strength: Ensure that your Mac is within range of the WiFi router and that the signal strength is strong. If you’re far away from the router or if there are physical obstructions like walls or other devices blocking the signal, it may cause connectivity problems.
- Restart router: Sometimes, the WiFi router itself may be the culprit. Try restarting the router by unplugging it from the power source, waiting for a few seconds, and then plugging it back in. This can help resolve temporary issues with the router’s functionality.
- Verify network name and password: Check that you’re connecting to the correct WiFi network and that you’re entering the correct password. It’s not uncommon to accidentally connect to a neighboring network or mistype the password.
- Temporary network issues: WiFi networks can experience intermittent outages or temporary issues. Wait for a few minutes and try connecting again to see if the problem resolves on its own.
By checking the WiFi connection and ensuring that the network is functioning properly, you can determine if the issue lies with the network or with your Mac. If other devices can connect without any issues and the WiFi signal is strong, it’s likely that the problem is specific to your Mac and further troubleshooting steps will be necessary. However, if other devices are also experiencing connectivity problems, it may indicate an issue with the router or the network itself, in which case you may need to contact your internet service provider for assistance.
Remember, troubleshooting WiFi connection issues involves a process of elimination. By going through each step carefully and ruling out possible causes, you’ll be able to narrow down the source of the problem and find a solution that works for you.
Step 2: Restart your Mac
If you’re experiencing WiFi connection issues on your Mac, a simple but effective troubleshooting step is to restart your Mac. Restarting your device can help resolve temporary software glitches or conflicts that may be affecting the WiFi connectivity. Here’s how you can do it:
- Save your work: Before restarting your Mac, make sure to save any open documents or files to prevent data loss.
- Close applications: Close any open applications and ensure that there are no ongoing tasks or processes that could be interfering with the restart process.
- Click on the Apple menu: Located on the top-left corner of the screen, click on the Apple logo.
- Select Restart: From the drop-down menu, select Restart.
- Wait for the restart process: Allow your Mac to complete the restart process, which may take a few moments.
- Reconnect to WiFi network: After your Mac has restarted, navigate to the WiFi icon in the menu bar and select your desired WiFi network to reconnect.
- Enter password if required: If prompted, enter the password for the WiFi network to establish the connection.
Restarting your Mac can help clear the system’s memory and reset network settings, which can potentially resolve any software-related issues that were impacting the WiFi connectivity. It is a simple and quick step that often proves to be effective in resolving minor connectivity problems.
After restarting your Mac, check if the WiFi connection is stable and functional. If the issue persists, you can proceed to the next troubleshooting step. However, in many cases, a simple restart can resolve temporary glitches and restore the WiFi connection on your Mac.
Remember to utilize this step as a part of your troubleshooting process, but also consider other potential issues that may require further attention. Restarting your Mac should be one of the initial steps in troubleshooting WiFi connection issues, but it may not be the sole solution in more complex scenarios.
Step 3: Reset Network Settings
If restarting your Mac did not resolve the WiFi connection issue, the next troubleshooting step is to reset the network settings on your Mac. Resetting the network settings can help resolve conflicts or misconfigurations that may be preventing your Mac from connecting to the WiFi network. Here’s how you can do it:
- Go to System Preferences: Click on the Apple menu located on the top-left corner of the screen, and select “System Preferences” from the drop-down menu.
- Open Network settings: In the System Preferences window, click on the “Network” icon.
- Select WiFi connection: From the list of available network connections on the left-hand side of the window, select the WiFi connection that you’re having trouble with.
- Remove current WiFi connection: Click on the “-” button located below the list of network connections to remove the current WiFi connection from your Mac.
- Restart your Mac: Once you’ve removed the WiFi connection, restart your Mac to ensure that the changes take effect.
- Add WiFi connection again: After your Mac has restarted, go back to the Network settings in System Preferences, click on the “+” button located below the list of network connections, and select “WiFi” to add the WiFi connection again.
- Enter WiFi network information: Enter the correct network name (SSID) and password for the WiFi network you want to connect to.
- Apply changes: Click on the “Apply” button to save the network settings and establish a connection to the WiFi network.
By resetting the network settings on your Mac, you effectively clear any saved configurations or preferences related to the WiFi connection that may have been causing the connectivity issues. After adding the WiFi connection again and entering the correct network information, your Mac will attempt to establish a fresh connection to the WiFi network.
It’s important to note that resetting network settings will remove all saved WiFi passwords and configurations, so you may need to re-enter passwords for other networks you previously connected to. Make sure you have the necessary information on hand before proceeding with this step.
Once you’ve reset the network settings and reconnected to the WiFi network, check if the connectivity issue is resolved. If the problem persists, you can proceed to the next troubleshooting step. Resetting network settings is a valuable step in resolving WiFi connection issues and can often help overcome any software-related conflicts or misconfigurations that were affecting your Mac’s ability to connect to the WiFi network.
Step 4: Update WiFi Router Firmware
If you’re still experiencing WiFi connection issues on your Mac after resetting the network settings, it’s time to focus on your WiFi router. Outdated firmware on your router can cause compatibility issues and impact the performance of your WiFi network. Updating the WiFi router firmware can help resolve these issues. Here’s how you can update the firmware:
- Identify router model: Locate the model and make of your WiFi router. This information is usually mentioned on the router itself or in the documentation that came with it.
- Access router settings: Open a web browser on your Mac and enter your router’s IP address in the address bar. This IP address is typically provided in the router’s documentation or marked on the router itself.
- Enter credentials: If prompted, enter the username and password to log in to your router’s settings page. These credentials are usually set to the default values mentioned in the router’s documentation. If you’ve changed them before, use the updated credentials.
- Find firmware update section: Once inside the router’s settings page, navigate to the section that allows you to update the firmware. This section may be labeled as “Firmware Update,” “Software Update,” or something similar.
- Check for firmware updates: Click on the “Check for Updates” or “Check Firmware” button. The router will then check for available firmware updates.
- If an update is available, download and install it: If your router detects an available firmware update, follow the on-screen instructions to download and install the update. This process may take a few minutes, and it’s crucial not to interrupt it.
- Restart the router: After the firmware update is complete, restart your WiFi router. This step ensures that the new firmware is applied properly and that any existing software glitches are resolved.
Updating the WiFi router firmware can significantly improve compatibility and performance. By installing the latest firmware, you ensure that your router is equipped with the most up-to-date features and bug fixes. This can potentially resolve WiFi connectivity issues on your Mac.
It’s worth mentioning that the process of updating firmware may vary slightly depending on the make and model of your router. Some routers may offer an automatic update feature, while others may require you to manually download and install the firmware from the manufacturer’s website. Consult the documentation provided by your router’s manufacturer for specific instructions on updating the firmware.
After updating the WiFi router firmware and restarting the router, check if the WiFi connection issue on your Mac is resolved. If the problem persists, you can proceed to the next troubleshooting step. Updating the router firmware is an essential step in troubleshooting WiFi connection issues and ensures that your network is utilizing the latest software improvements and optimizations.
Step 5: Forget and Rejoin WiFi Network
If you’re still facing WiFi connection issues on your Mac, the next step is to forget and rejoin the WiFi network. This process helps refresh the network connection settings and can resolve any misconfigurations that may be hindering your Mac’s ability to connect successfully. Here’s how you can forget and rejoin the WiFi network:
- Go to System Preferences: Click on the Apple menu located on the top-left corner of your screen and select “System Preferences” from the drop-down menu.
- Open Network settings: In the System Preferences window, click on the “Network” icon.
- Select WiFi connection: From the list of available network connections on the left-hand side of the window, select the WiFi connection that you want to forget and rejoin.
- Remove WiFi connection: Click on the “-” button located below the list of network connections to remove the selected WiFi connection from your Mac.
- Confirm removal: A pop-up dialogue box will appear asking you to confirm the removal. Click on the “Remove” button to proceed.
- Restart your Mac: Once you’ve removed the WiFi connection, restart your Mac to ensure that the changes take effect.
- Rejoin WiFi network: After your Mac has restarted, navigate back to the Network settings in System Preferences. Click on the “+” button located below the list of network connections and select “WiFi” to add the WiFi connection again.
- Enter WiFi network information: Enter the correct network name (SSID) and password for the WiFi network that you want to rejoin.
- Apply changes: Click on the “Apply” button to save the new network settings and establish a fresh connection to the WiFi network.
Forgetting and rejoining the WiFi network can help clear any stored settings or configurations that may have been causing connectivity issues. By reestablishing the connection from scratch, you eliminate any potential misconfigurations that might be preventing your Mac from connecting successfully to the WiFi network.
It’s important to ensure that you have the correct network name and password before rejoining the WiFi network. Double-check the network information to avoid typographical errors or other mistakes that could hinder the reconnection process.
After rejoining the WiFi network, check if the connectivity issue on your Mac is resolved. If the problem persists, you can proceed to the next troubleshooting step. Forgetting and rejoining the WiFi network is a simple yet effective step in resolving WiFi connection issues, and it often helps refresh the connection and resolve any configuration-related problems.
Step 6: Create a New Network Location
If you’re still encountering WiFi connection issues on your Mac, creating a new network location can help resolve configuration problems that may be affecting the connection. A network location is a collection of settings related to your network connections, and creating a new one can essentially provide a fresh start. Here’s how you can create a new network location:
- Go to System Preferences: Click on the Apple menu located on the top-left corner of your screen and select “System Preferences” from the drop-down menu.
- Open Network settings: In the System Preferences window, click on the “Network” icon.
- Select WiFi connection: From the list of available network connections on the left-hand side of the window, select the WiFi connection that you’re having trouble with.
- Click on the gear icon: At the bottom of the network connections list, click on the gear icon and select “Duplicate Location.”
- Rename the new location: Right-click on the duplicated network location (it will have “Copy” appended to the original name) and select “Rename.” Give the new location a descriptive name that helps you identify it later.
- Apply the changes: Click on the “Apply” button to save the new network location.
- Configure network connections: Switch back to the WiFi connection in the network connections list and ensure that all the necessary settings, such as IPv4 and IPv6 configurations, are correctly configured for the new network location.
Creating a new network location essentially provides a fresh set of network settings for your Mac, which can help resolve any configuration conflicts or misconfigurations that may be affecting the WiFi connection. By duplicating the existing network location and configuring the WiFi connection settings for the new location, you establish a fresh network environment for troubleshooting purposes.
After creating a new network location and ensuring that the WiFi connection is properly configured, check if the WiFi connection issue on your Mac is resolved. If the problem persists, you can proceed to the next troubleshooting step. Creating a new network location is a useful step in resolving WiFi connection issues, as it helps rule out potential configuration-related problems and ensures that your Mac is utilizing a clean set of network settings.
Step 7: Check for Software Updates
If you’re still facing WiFi connection issues on your Mac, it’s important to ensure that your operating system is up to date. Software updates often include bug fixes, security patches, and improvements to the overall stability and performance of your device, which can potentially resolve WiFi connectivity problems. Here’s how you can check for software updates:
- Click on the Apple menu: Located on the top-left corner of your screen, click on the Apple logo.
- Select “System Preferences”: From the drop-down menu, select “System Preferences.”
- Open “Software Update”: In the System Preferences window, click on “Software Update.”
- Check for updates: Your Mac will automatically check for available software updates. If any updates are available, you’ll see a list of them along with brief descriptions.
- Select updates to install: Review the available updates and select the ones you want to install. Click on the “Install” button to proceed.
- Enter your credentials: If prompted, enter your administrator username and password to authorize the installation of the updates.
- Wait for the updates to install: The software update process may take some time, depending on the size and number of updates. Ensure that your Mac remains connected to a power source and stable WiFi connection while the updates are being installed.
- Restart your Mac if necessary: After the updates are installed, you may be prompted to restart your Mac. It’s important to follow these instructions and restart your Mac to complete the update process.
By checking for and installing software updates, you ensure that your Mac’s operating system is equipped with the latest features, bug fixes, and security patches. These updates can include improvements to the WiFi connectivity and stability, which may resolve any issues you’re experiencing.
After installing the software updates and restarting your Mac if necessary, check if the WiFi connection issue is resolved. If the problem persists, you can proceed to the next troubleshooting step. Checking for software updates is an integral part of maintaining the overall performance and functionality of your Mac, and it can often help resolve WiFi connectivity issues by addressing any software-related bugs or glitches.
Step 8: Reset PRAM and SMC
If you’re still experiencing WiFi connection issues on your Mac, resetting the PRAM (Parameter Random Access Memory) and SMC (System Management Controller) may help resolve hardware-related problems that could be affecting the WiFi connectivity. Resetting PRAM and SMC can clear certain settings and configurations that may be causing issues with your Mac’s hardware and peripherals. Here’s how you can reset the PRAM and SMC:
Reset PRAM:
- Shut down your Mac: Click on the Apple menu located on the top-left corner of your screen, and select “Shut Down” from the drop-down menu.
- Turn on your Mac: Press the power button to turn on your Mac and immediately press and hold the Option-Command-P-R keys on the keyboard.
- Keep holding the keys: Continue holding the keys until you hear the startup sound for the second time. This usually takes about 20 seconds.
- Release the keys: After you hear the second startup sound, release the Option-Command-P-R keys.
Reset SMC:
- Shut down your Mac: Click on the Apple menu located on the top-left corner of your screen, and select “Shut Down” from the drop-down menu.
- Disconnect power source: If your Mac is a laptop, disconnect the power adapter. If it’s a desktop, unplug the power cord from the electrical outlet.
- Wait for a few seconds: Allow your Mac to remain without power for approximately 15 seconds.
- Reconnect power source: Reconnect the power adapter or plug the power cord back into the electrical outlet.
- Turn on your Mac: Press the power button to turn on your Mac.
Resetting the PRAM and SMC can help resolve a variety of hardware-related issues that may be impacting the WiFi connectivity on your Mac. By performing these resets, you essentially clear certain settings and configurations that can disrupt the normal functioning of your Mac’s hardware components, including the WiFi module.
After resetting the PRAM and SMC, check if the WiFi connection issue on your Mac is resolved. If the problem persists, you can proceed to the next troubleshooting step. Resetting the PRAM and SMC is an advanced troubleshooting step and should be approached with caution. If you’re unsure about performing these resets, it’s best to seek assistance from an Apple Support representative or a certified technician.
Step 9: Contact Your Internet Service Provider
If you’ve followed all the previous troubleshooting steps and you’re still experiencing WiFi connection issues on your Mac, it’s time to reach out to your internet service provider (ISP) for assistance. At this point, the problem may be related to your ISP’s network or the internet connection itself. Here’s what you can do:
- Collect necessary information: Before contacting your ISP, gather all the relevant information about the issues you’re facing. Note the exact error messages, the steps you’ve already taken to troubleshoot, and any other details that can help your ISP understand the problem.
- Check ISP support channels: Visit your ISP’s website or consult the documentation provided by your ISP to find the appropriate support channels. This may include a support hotline, online chat, or a dedicated support portal.
- Contact your ISP: Reach out to your ISP using the available support channels. Explain the WiFi connection issues you’re experiencing in detail, providing the information you gathered in the previous step.
- Follow their guidance: Your ISP may guide you through additional troubleshooting steps specific to their network or may escalate the issue to their technical team if necessary. Follow their instructions and provide any requested information or access to your Mac if required.
- Ask about infrastructure issues: Inquire if there are any known infrastructure issues in your area that could be affecting your WiFi connectivity. Your ISP may be able to provide you with updates or estimated restoration times if there are any ongoing network outages or maintenance activities.
- Seek onsite support: If the WiFi connection issue persists and cannot be resolved remotely, inquire about the possibility of receiving onsite support from your ISP. They may schedule a visit from a technician to diagnose and resolve the problem directly at your location.
Contacting your internet service provider allows you to tap into their expertise and specialized support resources. They have the necessary knowledge and tools to troubleshoot and resolve issues that are specific to their network or service. By communicating with your ISP, you can ensure that all possible angles of resolution are explored.
Remember, your ISP has a vested interest in ensuring that you have a stable and reliable internet connection. They will work with you to resolve the WiFi connection issues and get you back online as quickly as possible.
In some cases, the WiFi connectivity issues may be related to factors beyond your ISP’s control. However, by contacting them and notifying them of the problem, they can investigate and take appropriate actions to address any network-related issues that may be affecting your WiFi connection.
Conclusion
Experiencing WiFi connection issues on your Mac can be frustrating, but with the right troubleshooting steps, you can often resolve these problems and get back online quickly. Throughout this guide, we have covered various troubleshooting steps to help identify and resolve common WiFi connection issues on Macs.
We started by checking the WiFi connection itself and verifying the signal strength, followed by restarting the Mac to resolve temporary software glitches. If the issue persisted, we reset the network settings to clear any misconfigurations. Updating the WiFi router firmware helped address compatibility issues, while forgetting and rejoining the WiFi network refreshed the connection settings. Creating a new network location provided a fresh environment for troubleshooting, and checking for software updates ensured that the operating system had the most recent bug fixes and improvements. We also explored resetting the PRAM and SMC as a solution for hardware-related issues. Finally, if all else failed, contacting your internet service provider allowed you to seek assistance specific to your network.
It’s important to remember that WiFi connection issues can have various causes, and the resolution may vary from case to case. The key is to follow the troubleshooting steps systematically, ruling out potential problems and finding the most suitable solution for your situation. It may take a combination of several steps to fully resolve the issue.
Ultimately, by being proactive and applying the troubleshooting steps outlined in this guide, you can significantly increase the chances of resolving WiFi connection issues on your Mac. Don’t hesitate to seek professional assistance if needed, as both Apple Support and your internet service provider have resources available to help you resolve complex or persistent problems.
Stay connected and enjoy the seamless WiFi experience on your Mac!