Introduction
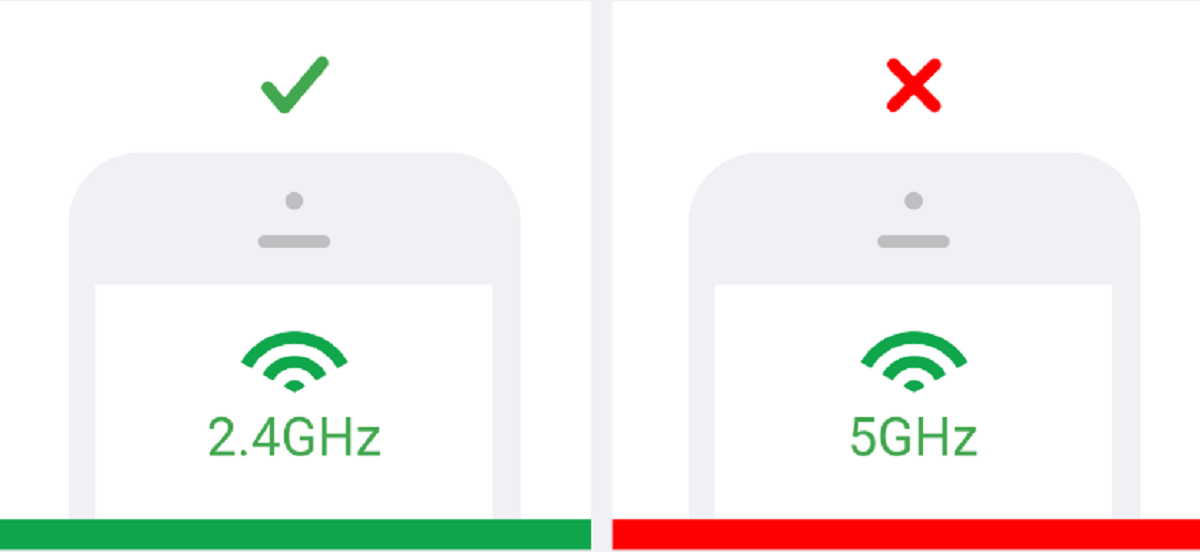
When connecting to a WiFi network, you may come across the option to connect to either a 2.4 GHz or 5 GHz frequency. While both options provide wireless connectivity, there are certain advantages to connecting to a 2.4 GHz WiFi network. In this guide, we will explore why you might want to connect to a 2.4 GHz WiFi network and how to do so on various devices.
First, it’s important to understand the difference between the 2.4 GHz and 5 GHz frequencies. The 2.4 GHz WiFi frequency has been around for many years and is widely supported by most devices. It offers a longer range and better penetration through walls and obstacles. On the other hand, the 5 GHz frequency provides faster speeds but has a shorter range and may struggle to penetrate obstacles.
So, why would you want to connect to a 2.4 GHz WiFi network? The main reason is the extended coverage provided by the lower frequency. If you have a large home or office space with multiple floors or areas far from the router, the 2.4 GHz frequency can ensure a stable connection throughout. Additionally, certain devices, such as smart home devices or older devices, may only support the 2.4 GHz frequency, making it essential to connect to this network to utilize their functionality.
In this guide, we will walk you through the process of checking if your device supports the 2.4 GHz WiFi frequency and how to switch to it on various operating systems, including Windows, Mac, Android, and iOS. By the end of this guide, you’ll have the knowledge to connect to a 2.4 GHz WiFi network and enjoy extended coverage and compatibility with a wide range of devices.
Why Connect to 2.4 GHz WiFi?
Connecting to a 2.4 GHz WiFi network offers several benefits that make it a preferred choice for many users. Here are some reasons why you might want to connect to a 2.4 GHz WiFi network:
Extended Coverage: One of the primary advantages of the 2.4 GHz frequency is its ability to provide a wider coverage area. Due to its longer wavelength, it can easily penetrate solid objects like walls, furniture, and floors. This makes it ideal for large homes, apartments, or office spaces where the router may be placed far from the devices. By connecting to a 2.4 GHz network, you can ensure a stable connection throughout your entire space.
Compatibility: While newer devices often support both 2.4 GHz and 5 GHz frequencies, older devices or certain smart home devices may only support the 2.4 GHz frequency. If you have devices that fall into this category, connecting to a 2.4 GHz network becomes essential to ensure their functionality. By connecting to this frequency, you can easily control your smart devices, stream media, and carry out other tasks without any compatibility issues.
Signal Strength: In some cases, despite the availability of both 2.4 GHz and 5 GHz frequencies, the 2.4 GHz frequency may offer a stronger signal in certain areas of your home or office. This can be especially true if you have thick walls, interference from other electronic devices, or if you are located far away from the router. By connecting to the 2.4 GHz network instead of the 5 GHz network, you can ensure a more reliable and stable connection.
Interference Reduction: Since the 2.4 GHz frequency is widely used by various household devices such as microwaves, cordless phones, and Bluetooth devices, there may be instances where the 5 GHz frequency experiences more interference. By connecting to the 2.4 GHz network, you can avoid these potential interferences and enjoy a smoother and uninterrupted WiFi experience.
Device Battery Life: Some devices, particularly older smartphones or tablets, may experience better battery life when connected to a 2.4 GHz WiFi network. This is because the 2.4 GHz frequency requires less power compared to the higher frequency bands, which can help conserve battery life in portable devices.
By understanding these advantages, you can make an informed decision when choosing which WiFi frequency to connect to. Whether you need extended coverage, compatibility with older devices, or simply want to reduce interference, connecting to a 2.4 GHz WiFi network can be an advantageous choice.
How to Check if Your Device Supports 2.4 GHz WiFi
Before you can connect to a 2.4 GHz WiFi network, it is important to ensure that your device supports this frequency. Here are the steps to check if your device is compatible with the 2.4 GHz WiFi:
- Windows: On your Windows computer, click on the Network icon in the system tray. Select the WiFi network you are currently connected to and click on “Properties.” Look for the “Frequency band” or “Wireless mode” section. If you see “2.4 GHz” mentioned, then your device supports the 2.4 GHz WiFi frequency.
- Mac: On your Mac, click on the Apple menu and select “System Preferences.” Then, click on “Network” and select your WiFi network. Click on the “Advanced” button and navigate to the “WiFi” or “Wireless” tab. Look for the “Supported PHY Modes” or “Channel” section. If you see “802.11b/g/n” or “2.4 GHz” mentioned, then your device supports the 2.4 GHz WiFi frequency.
- Android: Open the “Settings” app on your Android device. Depending on your device model and Android version, the exact steps may vary. Look for the “Connections” or “WiFi” option and select it. Find your WiFi network in the list of available networks and tap on it. Look for the “Frequency” or “Band” section. If it mentions “2.4 GHz,” then your device supports the 2.4 GHz WiFi frequency.
- iOS: Open the “Settings” app on your iPhone or iPad. Tap on “WiFi” and find your WiFi network in the list. Tap the “i” icon next to the network name. Look for the “Frequency” or “Channel” section. If it mentions “2.4 GHz,” then your device supports the 2.4 GHz WiFi frequency.
By following these steps, you can easily determine if your device is compatible with the 2.4 GHz WiFi frequency. If your device supports this frequency, you can proceed to switch to the 2.4 GHz WiFi network and enjoy its benefits. However, if your device does not support the 2.4 GHz frequency, you may need to consider alternative options or upgrade your device to take advantage of the extended coverage and compatibility provided by this WiFi frequency.
Accessing Router Settings
In order to switch to a 2.4 GHz WiFi network, you will need to access your router’s settings. Here is how you can do it:
- Find the Router’s IP Address: On your computer or mobile device, open the command prompt or terminal and type “ipconfig” (Windows) or “ifconfig” (Mac/Linux). Look for the “Default Gateway” or “Router” entry. The value displayed next to it is the IP address of your router.
- Open a Web Browser: Once you have the router’s IP address, open a web browser (such as Chrome, Firefox, or Safari) on a device connected to the same network as your router. Type the router’s IP address into the address bar and press Enter.
- Enter Router Login Credentials: You will be prompted to enter your router’s login credentials. The default username and password are often “admin” or “admin” for many routers, but they can vary depending on the manufacturer. If you do not know the login credentials, you can usually find them on the router itself or by referring to the router’s manual.
- Access Router Settings: After entering the login credentials, you will be granted access to the router’s settings interface. The layout and design of the interface may vary depending on the router model and manufacturer. Look for the WiFi or Wireless settings section within the interface.
- Switch to 2.4 GHz WiFi: Once located, within the WiFi settings, you will find options to change the frequency band. Look for an option that allows you to switch between 2.4 GHz and 5 GHz frequencies. Select the 2.4 GHz option and save the changes.
It’s worth noting that the router settings interface can differ from one router to another. If you are having trouble finding the WiFi settings or switching the frequency band, consult your router’s manual or search for instructions specific to your router model online.
By following these steps, you will be able to access your router’s settings and switch to the 2.4 GHz WiFi network. Once you have made the switch, make sure to reconnect your devices to the newly configured 2.4 GHz network to enjoy the extended coverage and compatibility it offers.
Switching to 2.4 GHz WiFi on Windows
If you’re using a Windows computer, here’s how you can switch to a 2.4 GHz WiFi network:
- Click on the Network icon: Locate the network icon, usually found in the system tray at the bottom right corner of the screen. Click on it to open the network menu.
- Select your WiFi network: From the list of available networks, identify the WiFi network you want to connect to (or switch to). Click on it to expand the network details.
- Open Network Properties: Once the network details are expanded, click on the “Properties” button. This will open the network properties window.
- Navigate to Wireless Mode or Frequency Band: In the network properties window, look for the “Wireless Mode,” “Frequency Band,” or a similar option that allows you to switch between WiFi frequencies. Click on it to access the available options.
- Select 2.4 GHz: In the list of available options, select the 2.4 GHz frequency band. This option might be labeled as “2.4 GHz,” “802.11b/g/n,” or something similar. Once selected, click on the “Apply” or “Save” button to save the changes.
After saving the changes, your Windows computer will be connected to the 2.4 GHz WiFi network. It’s important to note that the steps to switch frequencies may vary slightly depending on the version of Windows you are using and the network adapter software installed on your computer.
If you are unable to find the option to switch frequencies, your computer’s network adapter may not support the 5 GHz frequency. In such cases, your computer will automatically connect to the 2.4 GHz network if it is available within range.
Remember to reconnect any other devices you have connected to the WiFi network to ensure they are also using the 2.4 GHz frequency. By doing so, you can take advantage of the extended coverage and compatibility found on the 2.4 GHz WiFi network.
Switching to 2.4 GHz WiFi on Mac
If you are using a Mac, follow these steps to switch to a 2.4 GHz WiFi network:
- Open System Preferences: Click on the Apple menu icon in the top-left corner of the screen and select “System Preferences” from the dropdown menu.
- Go to Network Preferences: In the System Preferences window, locate and click on the “Network” icon. This will open the Network preferences panel.
- Select WiFi: From the list of available network connections on the left-hand side of the Network preferences panel, select the “WiFi” option.
- Click Advanced: In the Network preferences panel, click on the “Advanced” button in the bottom right corner. This will open the Advanced WiFi settings.
- Switch to WiFi Tab: In the Advanced WiFi settings, make sure you are on the “WiFi” tab. This tab displays the available WiFi networks and related settings.
- Navigate to Preferred Networks: Within the WiFi tab, you will see a list of preferred WiFi networks. Locate the network you want to switch to or connect to (if it’s not already selected).
- Choose 2.4 GHz Network: Once you have selected the preferred network, click on the small gear icon at the bottom of the list and choose “Make Service Inactive” from the dropdown menu.
- Reconnect to the 2.4 GHz Network: After making the service inactive, select the same network again from the list, and this time click on the gear icon and choose “Make Service Active.” Your Mac will now reconnect to the network using the 2.4 GHz frequency.
By following these steps, you can easily switch your Mac to a 2.4 GHz WiFi network. Remember to reconnect any other devices you have connected to the WiFi network to ensure they are also using the 2.4 GHz frequency. This will allow you to enjoy the extended coverage and compatibility provided by the 2.4 GHz WiFi network.
Switching to 2.4 GHz WiFi on Android
If you’re using an Android device, you can follow these steps to switch to a 2.4 GHz WiFi network:
- Open the Settings App: Locate the Settings app on your Android device. It is usually represented by a gear-shaped icon and can be found in the app drawer or on the home screen.
- Select the Connections or WiFi Option: In the Settings app, look for the “Connections” option or the “WiFi” option, depending on how your device’s settings are organized. Tap on it to proceed.
- View Available WiFi Networks: On the WiFi page, you will see a list of available WiFi networks. Tap on the network to which you are currently connected or the one you want to switch to.
- Access Advanced WiFi Settings: On the network details page, look for the “Advanced” or “Advanced Settings” option. This option might be represented by three vertical dots or by a gear icon. Tap on it to access the advanced WiFi settings.
- Switch WiFi Frequency: In the advanced WiFi settings, look for a setting related to the WiFi frequency or band selection. Tap on it to change the frequency.
- Select 2.4 GHz: From the available frequency options, choose the 2.4 GHz frequency or band. It may be labeled as “2.4 GHz,” “802.11b/g/n,” or something similar.
- Save the Changes: Once you have selected the 2.4 GHz frequency, tap on the “Save” or “Apply” button to save the changes.
After saving the changes, your Android device will be connected to the 2.4 GHz WiFi network. Keep in mind that the steps to switch frequencies may vary slightly depending on the make and model of your Android device and the version of the Android operating system installed.
Remember to reconnect any other devices you have connected to the WiFi network to ensure they are also using the 2.4 GHz frequency. By doing so, you can take full advantage of the extended coverage and compatibility provided by the 2.4 GHz WiFi network.
Switching to 2.4 GHz WiFi on iOS
If you are using an iPhone or iPad, you can switch to a 2.4 GHz WiFi network by following these steps:
- Open the Settings App: Locate the Settings app on your iOS device. It is represented by a gear-shaped icon and can usually be found on the home screen.
- Select the WiFi Option: In the Settings app, scroll down and tap on the “WiFi” option. This will take you to the WiFi settings page.
- View Available WiFi Networks: On the WiFi settings page, you will see a list of available WiFi networks. Tap on the network to which you are currently connected or the one you want to switch to.
- Access Network Details: On the network details page, you will find information about the selected WiFi network. Look for the “i” icon next to the network name and tap on it to access detailed network settings.
- Switch WiFi Frequency: In the network details settings, look for an option that allows you to switch the WiFi frequency or channel. Tap on it to access the available frequency options.
- Select 2.4 GHz: From the list of available frequency options, choose the 2.4 GHz frequency or band. It may be labeled as “2.4 GHz” or something similar.
- Join the Network: After selecting the 2.4 GHz frequency, tap on the “Join” or “Connect” button to connect to the 2.4 GHz WiFi network.
Once you have successfully connected to the 2.4 GHz WiFi network, your iOS device will utilize this frequency for the wireless connection. Keep in mind that the steps may slightly vary depending on the version of iOS you are using.
Remember to reconnect any other devices you have connected to the WiFi network to ensure they are also using the 2.4 GHz frequency. By doing so, you can enjoy the extended coverage and compatibility offered by the 2.4 GHz WiFi network on your iOS device.
Conclusion
Switching to a 2.4 GHz WiFi network can provide several advantages, including extended coverage, compatibility with older devices, and reduced interference. By following the steps outlined in this guide, you can easily check if your device supports the 2.4 GHz frequency and switch to it on various operating systems.
Before making the switch, it’s important to consider your specific needs and network environment. If you have a large home or office space, connecting to a 2.4 GHz network can ensure a stable connection throughout. Additionally, if you have older devices or smart home devices that only support the 2.4 GHz frequency, it becomes essential to connect to this network for optimal functionality.
To switch to a 2.4 GHz WiFi network, you need to access your router’s settings through a web browser and make the necessary changes. Once done, you can reconfigure your devices to connect to the newly switched network. The steps for switching frequencies may vary slightly depending on the device and operating system you are using, but the basic principles remain the same.
Remember, the 2.4 GHz WiFi frequency provides extended coverage and better compatibility, while the 5 GHz frequency offers faster speeds. By understanding the advantages and limitations of each frequency, you can make an informed decision on which one to connect to based on your specific needs.
By switching to a 2.4 GHz WiFi network, you can ensure a stable and reliable connection, particularly in larger spaces or with devices that only support this frequency. Enjoy the extended coverage, reduced interference, and compatibility benefits that the 2.4 GHz WiFi network brings.