Introduction
When it comes to building and maintaining a computer, dealing with technical issues is an inevitable part of the process. One of the most dreaded problems that computer enthusiasts and professionals may encounter is bent CPU pins. CPU pins are delicate and easily bent, often leading to serious performance issues or even rendering the CPU useless.
But fear not! In this article, we will explore the common causes of bent CPU pins and provide you with a comprehensive guide on how to fix them. Whether you accidentally dropped your CPU or inserted it incorrectly, we’ll walk you through the step-by-step process of straightening those bent pins and getting your CPU back in working order.
Before we dive into the methods of fixing bent CPU pins, let’s first discuss the common causes. Understanding the root causes will help you prevent future mishaps and ensure the longevity of your CPU.
So, if you’re ready to regain the performance of your CPU and learn some essential skills along the way, let’s get started!
Common Causes of Bent CPU Pins
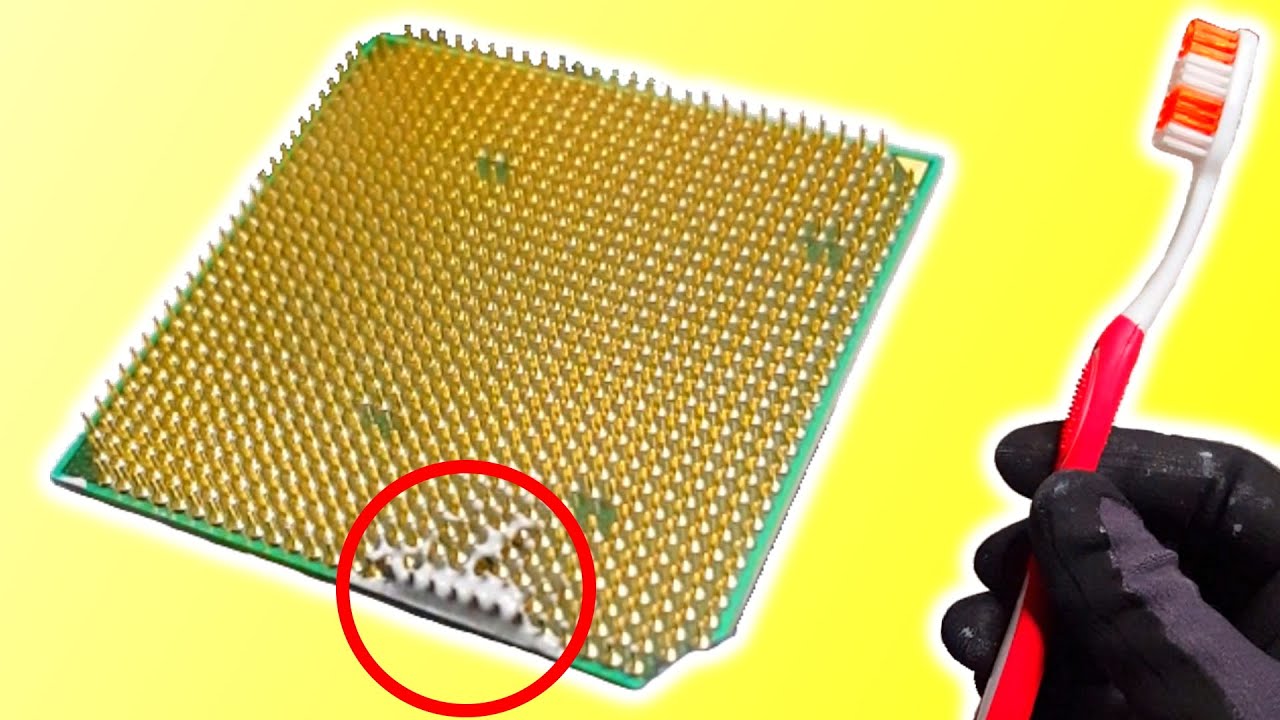
Bent CPU pins can occur due to a variety of reasons. Understanding these common causes will enable you to take preventive measures and reduce the likelihood of encountering this frustrating issue.
1. Installation Errors: One of the primary causes of bent CPU pins is improper installation. When inserting the CPU into the motherboard socket, applying excessive force or misaligning the pins can lead to bending. It’s crucial to handle the CPU with care and ensure it is correctly aligned before applying any pressure.
2. Accidental Damage: Dropping your CPU or mishandling it can result in bent pins. Carelessness during transportation or cleaning can lead to pins getting bent or even broken. It’s essential to handle your CPU with caution and avoid any unnecessary disturbances to prevent accidental damage.
3. Removal Mistakes: Removing the CPU from the socket without unlocking the socket lever or twisting the CPU while it is still secured inside the socket can cause the delicate pins to bend. Always follow the proper removal procedures outlined in the motherboard manual to avoid any mishaps.
4. Transporting without Protection: Moving your computer without providing adequate protection to the CPU can increase the risk of bent pins. Vibrations and jolts during transportation can easily bend the fragile pins. Always use a CPU socket cover or securely package the CPU to safeguard it during transit.
5. Manufacturing Defects: While rare, sometimes CPUs may have manufacturing defects that result in bent pins right out of the box. This highlights the importance of inspecting your CPU upon purchase and contacting the manufacturer for a replacement if any issues are found.
By being mindful of these common causes, you can take necessary precautions to avoid bent CPU pins and ensure the smooth operation of your computer.
Tools and Materials Needed
To fix bent CPU pins, you’ll need the following tools and materials:
- Good lighting: Ensure that you have adequate lighting to clearly see the bent pins.
- Mechanical pencil or tweezers: These fine-pointed tools can be utilized to gently straighten the bent pins.
- Credit card: A credit card with a thin, sturdy edge can be helpful for straightening the pins.
- Knife or needle: You can use a thin, pointed knife or needle to carefully align the bent pins back into place.
- CPU pin straightening tool: Designed specifically for this purpose, a CPU pin straightening tool can provide precise and safe handling of the bent pins.
- Ruler or business card: These flat, straight objects can be used to align the pins.
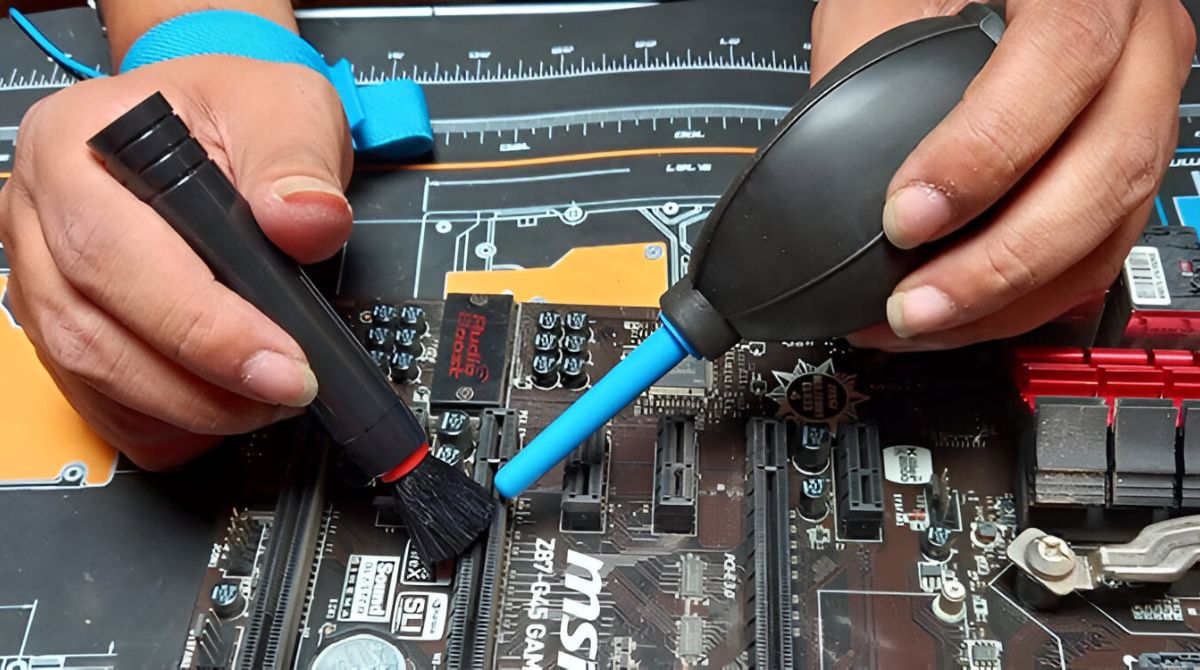
- Isopropyl alcohol and lint-free cloth: It’s important to clean the CPU pins before reinserting it into the socket, and isopropyl alcohol and lint-free cloth are ideal for this task.
- Magnifying glass: For a closer inspection of the bent pins, a magnifying glass can be useful, especially for smaller pins or intricate patterns.
- Anti-static wrist strap: Although not necessary, an anti-static wrist strap can help prevent potential damage to the CPU due to static electricity.
Having these tools and materials ready before you begin the pin straightening process will ensure that you can complete the task effectively and safely.
Step-by-Step Guide to Fix Bent CPU Pins
Follow these step-by-step instructions to fix bent CPU pins:
- Prepare your workspace: Find a clean and well-lit area to work on. Make sure you are grounded by using an anti-static wrist strap or by touching a grounded object like a metal doorknob.
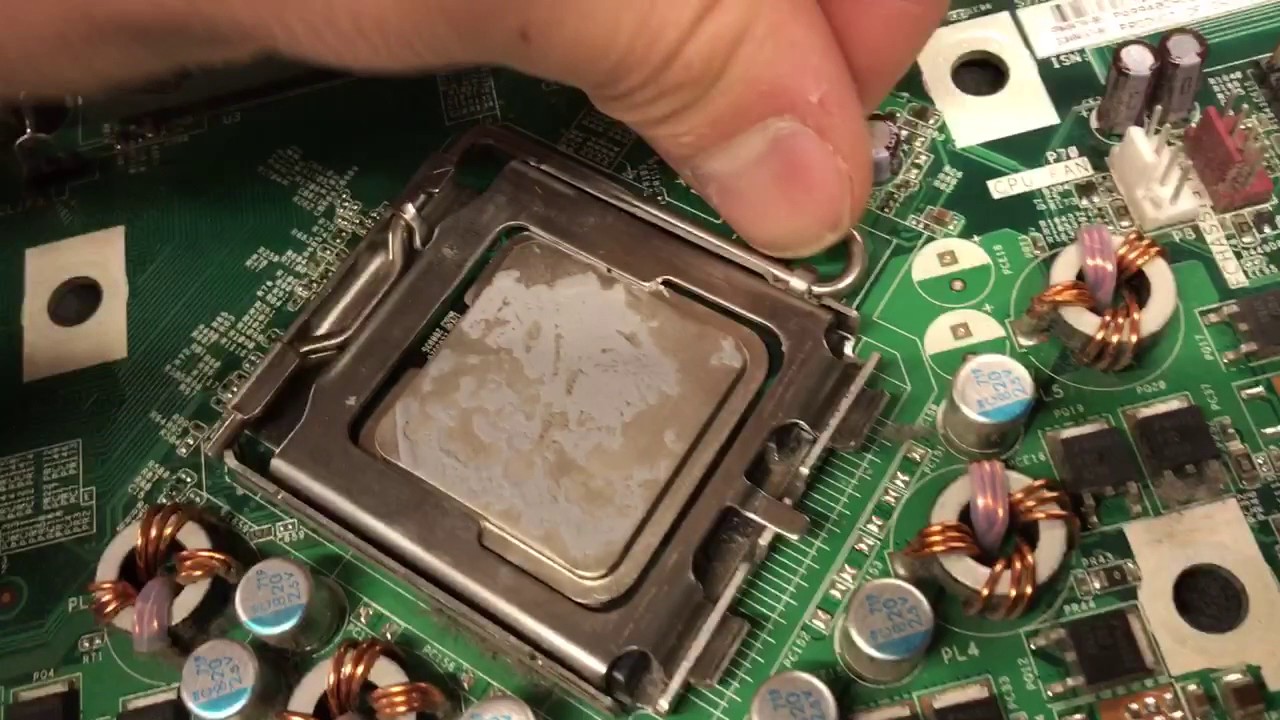
- Inspect the CPU: Carefully remove the CPU from the socket and inspect it for any bent pins. Use a magnifying glass if needed to get a closer look and identify any bent or misaligned pins.
- Select a method: Depending on the severity of the bends and the tools you have available, choose one of the methods mentioned in the upcoming sections for fixing bent CPU pins.
- Firmly but gently straighten the pins: Start by aligning the pins using the method you’ve chosen. Keep in mind to be patient and avoid applying excessive force, as this may result in further damage.
- Reinspect and clean the CPU: After straightening the pins, carefully inspect the CPU again to ensure all pins are correctly aligned. Use isopropyl alcohol and a lint-free cloth to clean the surface of the CPU pins.
- Reinstall the CPU: Insert the CPU back into the socket, aligning the notches or arrows as indicated by the motherboard. Be careful not to put any pressure on the pins during the installation process.
- Secure the CPU: Close and lock the CPU socket lever firmly to secure the CPU in place. Ensure that the lever is in its fully locked position.
- Test the system: Once the CPU is securely installed, attach the necessary components and power on the system. Check if the computer boots up properly and monitor the system’s performance to ensure everything is functioning correctly.
Remember, take your time and handle the CPU with care throughout the entire process. If you feel unsure or uncomfortable, it’s always a good idea to seek professional assistance to avoid any potential damage.
Method 1: Using a Mechanical Pencil or Tweezers
This method involves using a mechanical pencil or tweezers to carefully straighten bent CPU pins. Follow these steps:
- Prepare your workspace: Find a clean, well-lit area to work in. Ensure that you are grounded to prevent any static electricity discharge that could damage the CPU.
- Inspect the CPU: Remove the CPU from the socket and inspect it for any bent pins. Use a magnifying glass if needed for a closer examination.
- Select a tool: Choose either a mechanical pencil or a pair of tweezers with fine, pointed tips. Fingers may be too large and imprecise for this task.
- Straighten the pins: Gently insert the tip of the mechanical pencil or tweezers under the bent pin and carefully apply pressure in the opposite direction to straighten it. Be cautious not to bend the pin further or apply excessive force.
- Check and repeat if necessary: After straightening a pin, inspect it to ensure it is properly aligned. If any pins are still bent, repeat the process until all of the pins are straight.
- Reinspect and clean the CPU: Once all the pins are straightened, closely inspect the CPU again to ensure they are all aligned. Use isopropyl alcohol and a lint-free cloth to clean the surface of the CPU pins.
- Reinstall the CPU: Place the CPU back into the socket, aligning the notches or arrows as indicated by the motherboard. Ensure none of the pins are touching any other metal contacts.
- Secure the CPU: Close the CPU socket lever firmly to secure the CPU in place. Make sure the lever is in its fully locked position.
- Test the system: Attach the necessary components and power on the system. Monitor the computer’s performance to ensure everything is functioning correctly.
This method requires precision and a gentle touch. If you are uncomfortable or unsure of properly straightening the pins with a mechanical pencil or tweezers, consider using an alternative method or seeking professional assistance.
Method 2: Using a Credit Card
If you don’t have access to a mechanical pencil or tweezers, using a credit card can be an effective method for straightening bent CPU pins. Follow these steps:
- Prepare your workspace: Find a well-lit and clean area to work in. Ensure that you are grounded to prevent any static electricity discharge that could damage the CPU.
- Inspect the CPU: Remove the CPU from the socket and carefully examine it for any bent pins. Use a magnifying glass if needed for a closer inspection.
- Choose a credit card: Select a credit card with a thin, sturdy edge. Avoid using one with embossed numbers or logos, as they can interfere with the process.
- Straighten the pins: Hold the credit card edge flat against the row of bent pins, perpendicular to the direction of the pins. Apply gentle pressure and slide the credit card along the row of pins to straighten them. Be careful not to bend the pins further or use excessive force.
- Check and repeat if necessary: After straightening a row of pins, inspect them to ensure they are properly aligned. If any pins are still bent, repeat the process until all of the pins are straight.
- Reinspect and clean the CPU: Once all the pins are straightened, closely inspect the CPU again to ensure they are all aligned. Use isopropyl alcohol and a lint-free cloth to clean the surface of the CPU pins.
- Reinstall the CPU: Place the CPU back into the socket, aligning the notches or arrows as indicated by the motherboard. Ensure none of the pins are touching any other metal contacts.
- Secure the CPU: Close the CPU socket lever firmly to secure the CPU in place. Make sure the lever is in its fully locked position.
- Test the system: Attach the necessary components and power on the system. Monitor the computer’s performance to ensure everything is functioning correctly.
This method requires caution and gentle pressure to avoid further damaging the pins. If you are uncomfortable or unsure of straightening the pins using a credit card, consider using an alternative method or seeking professional assistance.
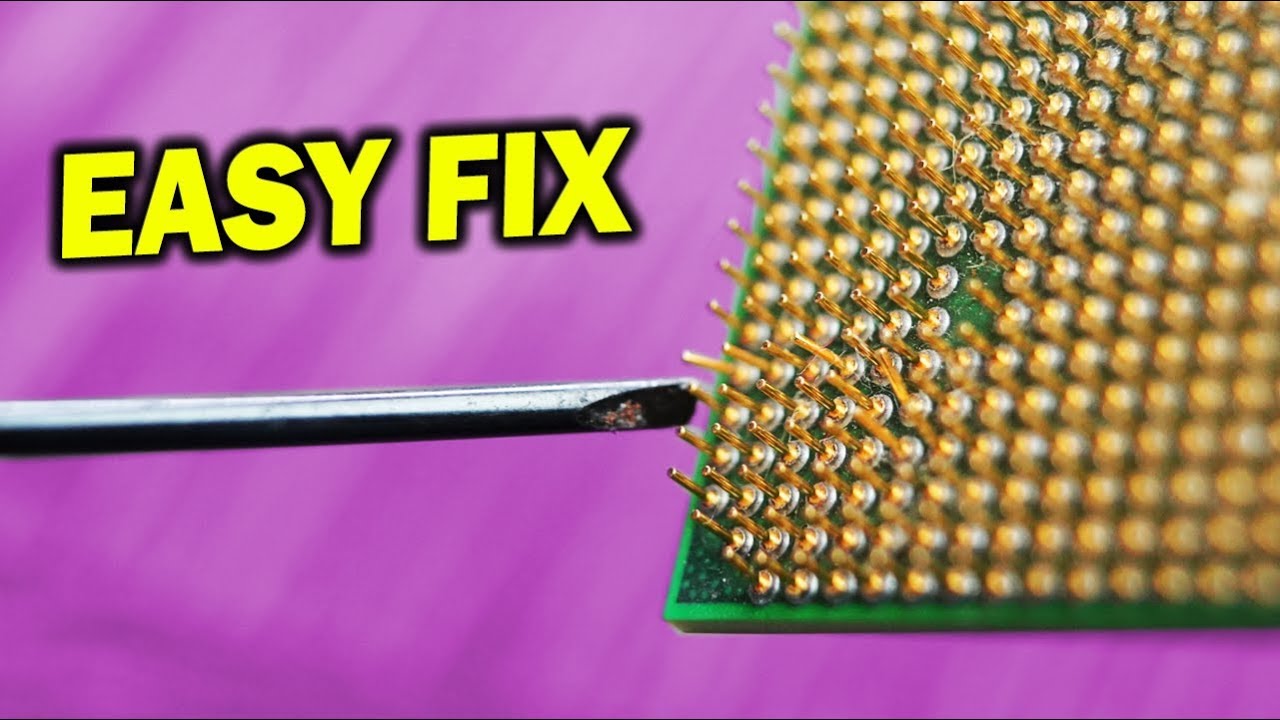
Method 3: Using a Knife or Needle
If you prefer a more precise approach, you can use a thin, pointed knife or needle to straighten bent CPU pins. Please exercise extreme caution when using this method, as it can be risky if not done carefully. Follow these steps:
- Prepare your workspace: Find a clean, well-lit area to work in. Ensure that you are grounded to prevent any static electricity discharge that could damage the CPU.
- Inspect the CPU: Remove the CPU from the socket and carefully examine it for any bent pins. Use a magnifying glass if needed for a closer inspection.
- Select a tool: Choose a thin and pointed knife or needle. Ensure that the tool is clean and free from any residue or dirt that could potentially cause damage.
- Straighten the pins: Gently insert the tip of the knife or needle under the bent pin and carefully apply pressure in the opposite direction to straighten it. Take your time and be cautious not to bend the pin further or use excessive force.
- Check and repeat if necessary: After straightening a pin, inspect it to ensure it is properly aligned. If any pins are still bent, repeat the process until all of the pins are straight.
- Reinspect and clean the CPU: Once all the pins are straightened, closely inspect the CPU again to ensure they are all aligned. Use isopropyl alcohol and a lint-free cloth to clean the surface of the CPU pins.
- Reinstall the CPU: Place the CPU back into the socket, aligning the notches or arrows as indicated by the motherboard. Ensure none of the pins are touching any other metal contacts.
- Secure the CPU: Close the CPU socket lever firmly to secure the CPU in place. Make sure the lever is in its fully locked position.
- Test the system: Attach the necessary components and power on the system. Monitor the computer’s performance to ensure everything is functioning correctly.
This method requires steady hands and precision. Take your time and be mindful of the delicate nature of the pins. If you are uncomfortable or unsure of straightening the pins using a knife or needle, consider using an alternative method or seeking professional assistance.
Method 4: Using a CPU Pin Straightening Tool
If you want a specialized tool for straightening bent CPU pins, using a CPU pin straightening tool can provide precise handling and minimize the risk of damage. Follow these steps:
- Prepare your workspace: Find a clean, well-lit area to work in. Ensure that you are grounded to prevent any static electricity discharge that could damage the CPU.
- Inspect the CPU: Remove the CPU from the socket and carefully examine it for any bent pins. Use a magnifying glass if needed for a closer inspection.
- Obtain a CPU pin straightening tool: Purchase or borrow a CPU pin straightening tool designed specifically for this purpose. These tools often come with multiple sizes for different pin configurations.
- Straighten the pins: Insert the appropriate size of the pin straightening tool over the bent pin and gently rotate it to straighten the pin without applying excessive force. Ensure the pin aligns properly.
- Check and repeat if necessary: After straightening a pin, inspect it to ensure it is properly aligned. If any pins are still bent, repeat the process with the pin straightening tool until all of the pins are straight.
- Reinspect and clean the CPU: Once all the pins are straightened, closely inspect the CPU again to ensure they are all aligned. Use isopropyl alcohol and a lint-free cloth to clean the surface of the CPU pins.
- Reinstall the CPU: Place the CPU back into the socket, aligning the notches or arrows as indicated by the motherboard. Ensure none of the pins are touching any other metal contacts.
- Secure the CPU: Close the CPU socket lever firmly to secure the CPU in place. Make sure the lever is in its fully locked position.
- Test the system: Attach the necessary components and power on the system. Monitor the computer’s performance to ensure everything is functioning correctly.
Using a CPU pin straightening tool can provide added precision and reduce the risk of damage when straightening bent pins. However, if you do not have access to this tool, consider using one of the alternative methods or seeking professional assistance.
Method 5: Using a Ruler or Business Card
If you don’t have access to specialized tools like a CPU pin straightening tool, using a ruler or a business card can be an effective alternative for straightening bent CPU pins. Follow these steps:
- Prepare your workspace: Find a clean, well-lit area to work in. Ensure that you are grounded to prevent any static electricity discharge that could damage the CPU.
- Inspect the CPU: Remove the CPU from the socket and carefully examine it for any bent pins. Use a magnifying glass if needed for a closer inspection.
- Select a straightening tool: Choose a thin and flat object, like a ruler or a business card, that is wide enough to cover the row of pins.
- Straighten the pins: Place the ruler or business card edge gently over the row of bent pins. Apply slight pressure and slide the ruler or business card along the pins to straighten them. Be cautious not to bend the pins further or use excessive force.
- Check and repeat if necessary: After straightening a row of pins, inspect them to ensure they are properly aligned. If any pins are still bent, repeat the process until all of the pins are straight.
- Reinspect and clean the CPU: Once all the pins are straightened, closely inspect the CPU again to ensure they are all aligned. Use isopropyl alcohol and a lint-free cloth to clean the surface of the CPU pins.
- Reinstall the CPU: Place the CPU back into the socket, aligning the notches or arrows as indicated by the motherboard. Ensure none of the pins are touching any other metal contacts.
- Secure the CPU: Close the CPU socket lever firmly to secure the CPU in place. Make sure the lever is in its fully locked position.
- Test the system: Attach the necessary components and power on the system. Monitor the computer’s performance to ensure everything is functioning correctly.
Using a ruler or a business card as a makeshift straightening tool is a viable option if you don’t have specialized equipment. However, take your time and proceed with caution to avoid damaging the pins further. If you feel unsure or uncomfortable, consider seeking professional assistance.
Precautions and Tips
When attempting to fix bent CPU pins, it’s essential to take precautionary measures to ensure the process is carried out smoothly and without causing any additional damage. Here are some important precautions and tips to keep in mind:
- Handle the CPU with care: CPUs and their pins are delicate, so it’s crucial to handle them with utmost care. Avoid dropping or mishandling the CPU to prevent further damage.
- Work in an ESD-safe environment: Electrostatic discharge (ESD) can damage sensitive electronic components. Ensure you are working in an ESD-safe environment by wearing an anti-static wrist strap and working on an anti-static mat.
- Take your time: Straightening bent pins requires patience and precision. Rushing the process may result in further damage. Take your time and ensure each pin is straightened properly.
- Use appropriate tools: Using the right tools, such as a mechanical pencil, tweezers, credit card, or specialized CPU pin straightening tool, can make the process easier and minimize the risk of damage. Avoid using tools that are too large or not designed for this purpose.
- Inspect before reinstallation: After straightening the pins, closely inspect the CPU again to ensure all pins are correctly aligned. Only reinstall the CPU if you are confident that all pins are straight.
- Clean the CPU pins: Before reinserting the CPU into the socket, clean the pins using isopropyl alcohol and a lint-free cloth. This will remove any dirt or residue that could affect the connection or cause issues.
- Seek professional help if uncertain: If you are unsure or uncomfortable with fixing the bent CPU pins yourself, it is always best to seek professional assistance. They have the expertise and experience to handle delicate tasks like this.
- Take preventive measures: Once the CPU pins are straightened and the CPU is reinstalled, take preventive measures to avoid future bending. Exercise caution during installation and removal, transport the computer with care, and use CPU socket covers for protection.
By following these precautions and tips, you can effectively fix bent CPU pins while reducing the risk of causing further damage. Remember, if you are uncertain or uncomfortable with the process, it’s always wise to reach out to a professional for assistance.
Conclusion
Encountering bent CPU pins can be a frustrating situation for anyone involved in computer building or maintenance. However, with the right knowledge and techniques, it is often possible to fix the issue and restore the functionality of the CPU.
In this article, we explored various methods for fixing bent CPU pins, including using tools such as a mechanical pencil or tweezers, a credit card, a knife or needle, a CPU pin straightening tool, and a ruler or business card. Each method requires caution, precision, and patience to ensure that the delicate pins are straightened properly without causing any further damage.
Throughout the process, it is vital to work in a clean environment, follow proper precautions, and handle the CPU with care. Inspecting and cleaning the CPU pins before reinstallation is also crucial for the proper functioning of the CPU.
However, it’s important to note that fixing bent CPU pins can be a delicate task, and if you are uncertain or uncomfortable with the process, it is always recommended to seek professional assistance. They have the expertise and experience to handle these tasks carefully and effectively.
By understanding the common causes of bent CPU pins and following the step-by-step instructions provided in this article, you can increase your chances of successfully fixing bent CPU pins and extending the lifespan of your CPU.
Remember, prevention is key. Take preventive measures to avoid bending CPU pins, such as handling the CPU with care during installation and removal, protecting it during transportation, and using CPU socket covers.
With these precautions and techniques in mind, you can confidently tackle the issue of bent CPU pins and keep your computer running smoothly.